Drablands Challenge: Difference between revisions
MannedTooth (talk | contribs) m (Text replacement - "\|image= \[\[File:(.*).png\|300px]]" to "|image= File:$1.png") |
mNo edit summary |
||
| (18 intermediate revisions by 7 users not shown) | |||
| Line 1: | Line 1: | ||
{{Mode | {{Infobox Mode | ||
|name= Drablands Challenges | |name= Drablands Challenges | ||
|image= File:TFH Drablands Challenges.png | |image= File:TFH Drablands Challenges.png | ||
|caption= | |caption= | ||
|game= | |game= TFH | ||
|other= | |other= | ||
|players= 1 | |players= 1 or 3 | ||
|location= | |location= {{Term|TFH|Hytopia Castle|link}} | ||
|reward= | |reward= | ||
{{List| | |||
{{Plural|TFH|Material|link}}, | |||
{{Plural|TFH|Rupee|link}}, | |||
}} | |||
|features= | |features= | ||
|theme= | |theme= | ||
}} | }} | ||
{{Term/Store|Drablands Challenge|Drablands Challenges|Series, TFH|plural}} are more difficult versions of | {{Term/Store|Drablands Challenge|Drablands Challenges|Series, TFH|plural}} are more difficult versions of {{Plural|TFH|Level|link}} in {{TFH}}. | ||
==Overview== | ==Overview== | ||
Drablands | {{Plural|TFH|Drablands Challenge}} are special challenges added onto regular {{Plural|TFH|Level}}, making them significantly more difficult. They become available in a given {{Term|TFH|Area|link}} once the {{Term|TFH|Boss|link}} of that {{Term|TFH|Area|link}} is defeated. With the exception of the {{Term|TFH|Den of Trials|link}}, each {{Term|TFH|Area}} features 12 {{Plural|TFH|Drablands Challenge}}; three for each {{Term|TFH|Level}}, each with varying goals and difficulty. {{Plural|TFH|Drablands Challenge}} can range anywhere from decreasing the {{Plural|TFH|Links|link}}' {{Plural|TFH|Heart Container|link}}, requiring that they clear a {{Term|TFH|Level}} within a certain time limit, or even neglecting to provide them with {{Plural|TFH|Item}} intended to solve certain puzzles, sometimes in favor of different {{Plural|TFH|Item}}. In addition to simply providing the {{Plural|TFH|Links}} with new goals, {{Plural|TFH|Enemy|link}} that do not normally appear in the {{Plural|TFH|Level}} may become present during these {{Plural|TFH|Drablands Challenge|display=Challenges}}. The {{Term|TFH|Material|link}} rewards that the {{Plural|TFH|Links}} can normally earn at the end of a {{Term|TFH|Level}} differ with each {{Term|TFH|Drablands Challenge}}.<ref>{{Cite Web|quote= And of course to create the really powerful costumes, you need special materials. And you're only going to get those special materials on the really difficult courses. [...] So what I'd like to do today is introduce one of those more difficult courses, which again, once you clear you'll get this special material, that allows you to create one of the more powerful suits in the game.|author= Hiromasa Shikata|published= June 18, 2015|retrieved=August 22, 2015|url= https://www.youtube.com/watch?v=FnQl8A2vx4k|title= Nintendo Treehouse Live @ E3 2015 Day 3 The Legend of Zelda: Tri Force Heroes|site= YouTube|type= Video}}</ref> | ||
===Completion List=== | ===Completion List=== | ||
[[File:TFH Completion List.png|right|thumb|The completed Drablands Challenge Completion List]] | [[File:TFH Completion List.png|right|thumb|The completed Drablands Challenge Completion List]] | ||
The '''Drablands Challenge Completion List''' is a bulletin board that appears in every lobby of | The '''Drablands Challenge Completion List''' is a bulletin board that appears in every lobby of {{Term|TFH|Hytopia Castle|link}}, with the exception of the {{Term|TFH|Coliseum|link}} lobby. It lists {{Term|TFH|Link|link}}'s progress in completing the {{Plural|TFH|Level}} and their {{Plural|TFH|Drablands Challenge}}. For each {{Term|TFH|Level}} or {{Term|TFH|Drablands Challenge|display=Challenge}} that {{Term|TFH|Link}} completes, either over [[Multiplayer]] or with {{Plural|TFH|Doppel|link}}, a {{Term|TFH|Triforce|link}}-shaped marker will be added to the Completion List to signify its completion. If, however, {{Term|TFH|Link}} skips any Stages in a {{Term|TFH|Level}} during single-player, then the {{Term|TFH|Level}} will not be marked on the list after completing it even though it will still be marked in the {{Term|TFH|Level Selection|link}} screen. Including the ordinary {{Plural|TFH|Level}} and all of their {{Plural|TFH|Drablands Challenge}}, there are 128 markers to be filled. | ||
While reading the Completion List, {{Term|TFH|Link}} can also check his completion records cleared only through Multiplayer or only with {{Plural|TFH|Doppel}} by pressing either of two tabs on the bottom screen to show these individual records. Including both boards, there are a total of 256 {{Plural|TFH|Drablands Challenge|display=Challenges}} to clear, however each {{Term|TFH|Drablands Challenge|display=Challenge}} is identical between both modes. | |||
After Link completes all | After {{Term|TFH|Link}} completes all {{Plural|TFH|Drablands Challenge}} of an {{Term|TFH|Area}}, {{Term|TFH|King Tuft|link}} will reward him with a unique, gold-quality {{Term|TFH|Material|link}} that can only otherwise be obtained through the {{Term|TFH|Coliseum}} (eg. clearing all {{Term|TFH|Woodlands|link}} {{Plural|TFH|Level}} will award him the {{Term|TFH|Supple Leaf|link}}). After {{Term|TFH|Link}} clears all 128 {{Plural|TFH|Drablands Challenge|display=Challenges}} on the Completion List, {{Term|TFH|King Tuft|display=the King}} will reward him with a {{Term|TFH|Gold Rupee|link}} worth 300 {{Plural|TFH|Rupee|link}}. | ||
===Types of Challenges=== | ===Types of Challenges=== | ||
{| class=" | {| class="wikitable" cellpadding="4" style="text-align:center; width:100%; max-width:80em;" | ||
|- | |- | ||
!style="width:20%"| Challenge | !style="width:20%"| Challenge | ||
!style="width:60%"| Description | !style="width:60%"| Description | ||
!style="width:20%"| Levels | !style="width:20%"| Levels | ||
|- | |- id="Fewer Heart Containers!" | ||
| [[File:TFH Fewer Heart Containers Icon.png]]<br>''' | | [[File:TFH Fewer Heart Containers Icon.png]]<br/>'''Fewer Heart Containers!''' | ||
| The Links enter the Level with | | The {{Plural|TFH|Links}} enter the {{Term|TFH|Level}} with their amount of {{Plural|TFH|Heart Container|link}} reduced to four.<br/><br/>The {{Plural|TFH|Links}} can wear {{Plural|TFH|Outfit|link}} that increase their maximum health, such as the {{Term|TFH|Jack of Hearts|link}}, {{Term|TFH|Queen of Hearts|link}}, and {{Term|TFH|Lady's Ensemble|link}}, to help regain some of their health. | ||
| | | {{Term|TFH|Deku Forest (Level)|link}}<br/>{{Term|TFH|Forest Temple|link}}<br/>{{Term|TFH|Water Temple|link}}<br/>{{Term|TFH|Den of Flames|link}}<br/>{{Term|TFH|Snowball Ravine|link}}<br/>{{Term|TFH|Ice Temple|link}}<br/>{{Term|TFH|The Lady's Lair|link}}<br/>{{Term|TFH|Infinity Dunes|link}}<br/>{{Term|TFH|Desert Temple|link}}<br/>{{Term|TFH|Illusory Mansion|link}}<br/>{{Term|TFH|Grim Temple|link}}<br/>{{Term|TFH|Sky Temple|link}} | ||
|- | |- id="Clear within the time limit!" | ||
| [[File:TFH Hourglass Icon.png]]<br>''' | | [[File:TFH Hourglass Icon.png]]<br/>'''Clear within the time limit!''' | ||
| The Links are given a limited amount of time to clear the Level. | | The {{Plural|TFH|Links}} are given a limited amount of time to clear the Level. {{Plural|TFH|Hourglass|link}} of varying sizes can be picked up to increase the remaining time: small {{Plural|TFH|Hourglass}} restore five seconds, and big {{Plural|TFH|Hourglass}} restore 20. If time runs out, the {{Plural|TFH|Links}} will receive an immediate {{Term|TFH|Game Over|link}}. The initial time limit given is the same whether playing with other {{Plural|TFH|Links}} or with {{Plural|TFH|Doppel|link}}.<br/><br/>If the {{Plural|TFH|Links}} lose all of their {{Plural|TFH|Heart|link}} and are KOed, they will reappear at the beginning of the {{Term|TFH|Stage}} with the same amount of time they had when they fell. All {{Plural|TFH|Hourglass}} in the {{Term|TFH|Stage}} will reappear as well.<br/><br/>If {{Term|TFH|Linebeck's Uniform|link}} is worn, an additional ten seconds is added to the initial time limit for every {{Term|TFH|Links}} wearing it. | ||
| [[Deku Forest ( | | [[Deku Forest (Level)|Deku Forest]]<br/>[[Buzz Blob Cave]]<br/>{{Term|TFH|Forest Temple|link}}<br/>[[Abyss of Agony]]<br/>[[Cove of Transition]]<br/>[[Hinox Mine]]<br/>[[Den of Flames]]<br/>[[Fire Temple]]<br/>[[Training Ground]]<br/>[[Stone Corridors]]<br/>[[Gibdo Mausoleum]]<br/>[[Desert Temple]]<br/>[[Illusory Mansion]]<br/>[[Grim Temple]]<br/>[[Deception Castle]]<br/>[[Sky Temple]] | ||
|- | |- id="Guard the Orb!" | ||
| [[File:TFH Guard the Orb Icon.png]]<br>''' | | [[File:TFH Guard the Orb Icon.png]]<br/>'''Guard the Orb!''' | ||
| The Links must transport a glowing Orb that lights a circular area around it. This Orb will protect the Links from a red shade covering the Level, which will harm the Links should they step outside the Orb's radius. At the beginning of each Stage, the Orb rests on a pedestal, and at the end, it must be thrown into another. The Triforce Gateway will not activate until the Orb is placed into the latter | | The {{Plural|TFH|Links}} must transport a glowing Orb that lights a circular area around it. This Orb will protect the {{Plural|TFH|Links}} from a red shade covering the Level, which will harm the {{Plural|TFH|Links}} should they step outside the Orb's radius for more than several seconds. At the beginning of each {{Term|TFH|Stage}}, the Orb rests on a pedestal, and at the end, it must be thrown into another. The {{Term|TFH|Triforce Gateway|link}} will not activate until the Orb is placed into the latter pedestal. If the Orb falls down a pit or into water, it will reappear nearby. | ||
| [[Deku Forest ( | | [[Deku Forest (Level)|Deku Forest]]<br/>[[Abyss of Agony]]<br/>[[Frozen Plateau]]<br/>[[Infinity Dunes]]<br/>[[Lone Labyrinth]] | ||
|- | |- id="Pop all balloons!" | ||
| [[File:TFH Pop All Balloons Icon.png]]<br>''' | | [[File:TFH Pop All Balloons Icon.png]]<br/>'''Pop all balloons!''' | ||
| A number of red balloons appear in each of the Level's four | | A number of red balloons appear in each of the {{Term|TFH|Level}}'s four {{Plural|TFH|Stage}}, including any {{Term|TFH|Boss|link}} {{Plural|TFH|Stage}}. These balloons must all be popped in order to advance to the next {{Term|TFH|Stage}}. Some of the balloons float at higher elevations, and require the {{Plural|TFH|Links}} to form a {{Term|TFH|Totem|link}} to reach. | ||
| [[Buzz Blob Cave]]<br>[[Moblin Base]]<br>[[Secret Fortress]]<br>[[Blazing Trail]]<br>[[Hinox Mine]]<br>[[Frozen Plateau]]<br>[[Palace Noir]] | | [[Buzz Blob Cave]]<br/>[[Moblin Base]]<br/>[[Secret Fortress]]<br/>[[Blazing Trail]]<br/>[[Hinox Mine]]<br/>[[Frozen Plateau]]<br/>[[Palace Noir]] | ||
|- | |- id="Clear using only Bombs!" | ||
| [[File:TFH Only Bombs Icon.png]]<br>''' | | [[File:TFH Only Bombs Icon.png]]<br/>'''Clear using only Bombs!''' | ||
| The Level's ordinary | | The {{Term|TFH|Level}}'s ordinary {{Plural|TFH|Item}} are replaced with {{Plural|TFH|Bomb|link}}, requiring the {{Plural|TFH|Links}} to use them more creatively in solving puzzles and defeating {{Plural|TFH|Enemy|link}}. | ||
| [[Buzz Blob Cave]] | | [[Buzz Blob Cave]] | ||
|- | |- id="Defeat all foes sans sword!" | ||
| [[File:TFH Sans Sword Icon.png]]<br>''' | | [[File:TFH Sans Sword Icon.png]]<br/>'''Defeat all foes sans sword!''' | ||
| The Links must defeat all | | The {{Plural|TFH|Links}} must defeat all {{Plural|TFH|Enemy}} without the ability to use their {{Plural|TFH|Sword|link}}, and instead must rely on other {{Plural|TFH|Item}} provided in the {{Term|TFH|Level}}. All {{Plural|TFH|Enemy}} in a {{Term|TFH|Stage}} must be defeated in order to activate the {{Term|TFH|Triforce Gateway}} to the next {{Term|TFH|Stage}}. | ||
| [[Moblin Base]] | | [[Moblin Base]] | ||
|- | |- id="Transport the orb quickly!" | ||
| [[File:TFH Transport the Orb Icon.png]]<br>''' | | [[File:TFH Transport the Orb Icon.png]]<br/>'''Transport the orb quickly!''' | ||
| Similar to the "Guard the Orb!" challenge, except there is no damaging red | | Similar to the "Guard the Orb!" challenge, except there is no damaging red shade. The {{Plural|TFH|Links}} must transport an Orb through the {{Term|TFH|Level}} within a certain amount of time. Varying {{Plural|TFH|Hourglass|link}} can be picked up to increase the remaining time; small {{Plural|TFH|Hourglass}} restore five seconds, and big {{Plural|TFH|Hourglass}} restore 20. If time runs out, the {{Plural|TFH|Links}} will receive an immediate {{Term|TFH|Game Over}}. At the beginning of each {{Term|TFH|Stage}}, the Orb rests on a pedestal, and at the end, it must be thrown into another. The {{Term|TFH|Triforce Gateway}} will not activate until the Orb is placed into the latter pedestal. If the Orb falls down a pit or into water, it will reappear nearby.<br/><br/>If the {{Plural|TFH|Links}} lose all of their {{Plural|TFH|Heart}} and are KOed, they will reappear at the beginning of the {{Term|TFH|Stage}} with the same amount of time they had when they fell. All {{Plural|TFH|Hourglass}} in the {{Term|TFH|Stage}} will reappear as well.<br/><br/>If {{Term|TFH|Linebeck's Uniform|link}} is worn, an additional ten seconds is added to the initial time limit for every {{Term|TFH|Links}} wearing it. | ||
| [[Moblin Base]]<br>[[ | | [[Moblin Base]]<br/>[[Water Temple]]<br/>[[Blazing Trail]]<br/>[[Snowball Ravine]]<br/>[[Ice Temple]]<br/>[[Bomb Storage]]<br/>[[Palace Noir]] | ||
|- | |- id="Adventure in the dark!" | ||
| [[File:TFH Adventure in the Dark Icon.png]]<br>''' | | [[File:TFH Adventure in the Dark Icon.png]]<br/>'''Adventure in the dark!''' | ||
| The entire | | The entire {{Term|TFH|Level}} falls pitch dark, with only the {{Plural|TFH|Links}} and available {{Plural|TFH|Torchlight|link}} providing little light.<br/><br/>The {{Term|TFH|Light Armor|link}} makes the challenge easier, as it illuminates a much larger area. | ||
| {{Term|TFH|Forest Temple|link}}<br>[[Snowball Ravine]]<br>[[Infinity Dunes]]<br>[[Lone Labyrinth]] | | {{Term|TFH|Forest Temple|link}}<br/>[[Snowball Ravine]]<br/>[[Infinity Dunes]]<br/>[[Lone Labyrinth]] | ||
|- | |- id="Clear with halved energy!" | ||
| [[File:TFH Halved Energy Icon.png]]<br>''' | | [[File:TFH Halved Energy Icon.png]]<br/>'''Clear with halved energy!''' | ||
| | | {{Plural|TFH|Item}} that use the {{Term|TFH|Energy Gauge|link}} will use up twice as much energy. | ||
| [[Secret Fortress]]<br>[[ | | [[Secret Fortress]]<br/>[[Water Temple]] | ||
|- | |- id="Evade the Wallmaster!" | ||
| [[File:TFH Evade the Wallmaster Icon.png]]<br>''' | | [[File:TFH Evade the Wallmaster Icon.png]]<br/>'''Evade the Wallmaster!''' | ||
| A | | A {{Term|TFH|Wallmaster|link}} will continuously follow the {{Plural|TFH|Links}} throughout the entire {{Term|TFH|Level}} and must be avoided. If it slams onto one of the {{Plural|TFH|Links}}, it will instantly KO them. It can be defeated, but will soon respawn. | ||
| [[Secret Fortress]]<br>[[Cove of Transition]]<br>[[Blazing Trail]]<br>[[ | | [[Secret Fortress]]<br/>[[Cove of Transition]]<br/>[[Blazing Trail]]<br/>[[Fire Temple]]<br/>[[Silver Shrine]]<br/>[[Sealed Gateway]]<br/>[[The Lady's Lair]]<br/>[[Stone Corridors]]<br/>[[Floating Garden]] | ||
|- | |- id="Halved attack and defense!" | ||
| [[File:TFH Halved Attack Defense Icon.png]]<br>''' | | [[File:TFH Halved Attack Defense Icon.png]]<br/>'''Halved attack and defense!''' | ||
| The Links have their attack power and defense halved, making their attacks do half damage and causing them to take double damage from | | The {{Plural|TFH|Links}} have their attack power and defense halved, making their attacks do half damage and causing them to take double damage from {{Plural|TFH|Enemy}}. The amount of damage from falling into pits or {{Term|TFH|Quicksand|link}} in unchanged.<br/><br/>Wearing the {{Term|TFH|Sword Suit|link}}, the {{Term|TFH|Sword Master Suit|link}}, or the {{Term|TFH|Fierce Deity Armor|link}} will restore the regular {{Term|TFH|Sword}} strength for whichever {{Term|TFH|Link}} is wearing it. | ||
| [[ | | [[Abyss of Agony]]<br/>[[Cove of Transition]]<br/>[[Silver Shrine]]<br/>[[Sealed Gateway]]<br/>[[Training Ground]]<br/>[[Palace Noir]]<br/>[[Dragon Citadel]] | ||
|- | |- id="Don't pop any balloons!" | ||
| [[File:TFH No Balloons Popped Icon.png]]<br>''' | | [[File:TFH No Balloons Popped Icon.png]]<br/>'''Don't pop any balloons!''' | ||
| A number of red balloons appear in each of the Level's four | | A number of red balloons appear in each of the {{Term|TFH|Level}}'s four {{Plural|TFH|Stage}}, including any {{Term|TFH|Boss}} {{Plural|TFH|Stage}}. If any of these balloons are popped, it results in instant KO. The balloons can also be popped by certain {{Term|TFH|Enemy}} attacks. | ||
| | | [[Hinox Mine]]<br/>[[Desert Temple]]<br/>[[Deception Castle]] | ||
|- | |- id="Avoid the volcanic rocks!" | ||
| [[File:TFH Volcanic Rocks Icon.png]]<br>''' | | [[File:TFH Volcanic Rocks Icon.png]]<br/>'''Avoid the volcanic rocks!''' | ||
| | | {{Plural|TFH|Magma Bomb|link}} fall throughout the entire {{Term|TFH|Level}}. If any of the {{Plural|TFH|Links}} are hit by one, they will be damaged and burned. | ||
| [[Den of Flames]]<br>[[Dragon Citadel]] | | [[Den of Flames]]<br/>[[Dragon Citadel]] | ||
|- | |- id="Only Bombs—no swords!" | ||
| [[File:TFH Only Bombs No Swords Icon.png]]<br>''' | | [[File:TFH Only Bombs No Swords Icon.png]]<br/>'''Only Bombs—no swords!''' | ||
| The Links' | | The {{Plural|TFH|Links}}' {{Plural|TFH|Item}} are replaced by {{Plural|TFH|Bomb}}, and their {{Plural|TFH|Sword}} are disabled. The {{Plural|TFH|Links}} must rely entirely on their {{Plural|TFH|Bomb}} to attack and solve puzzles. | ||
| [[ | | [[Fire Temple]]<br/>[[The Lady's Lair]]<br/>[[Gibdo Mausoleum]] | ||
|- | |- id="Don't get hit by snowballs!" | ||
| [[File:TFH Snowball Icon.png]]<br/>'''Don't get hit by snowballs!''' | |||
| | | {{Plural|TFH|Snowball|link}} fall throughout the entire {{Term|TFH|Level}}. If any of the {{Plural|TFH|Links}} are hit by one, they will take damage. | ||
| [[Frozen Plateau]]<br>[[Ice Temple]] | | [[Frozen Plateau]]<br/>[[Ice Temple]] | ||
|- | |- id="Win without using a sword!" | ||
| [[File:TFH No Sword Icon.png]]<br>''' | | [[File:TFH No Sword Icon.png]]<br/>'''Win without using a sword!''' | ||
| The | | The {{Plural|TFH|Links}} are unable to use their {{Plural|TFH|Sword}}, and instead must rely on the {{Term|TFH|Level}}'s {{Plural|TFH|Item}} to attack and solve puzzles. The challenge is similar to the "Defeat all foes sans sword" challenge, except not all {{Plural|TFH|Enemy}} have to be defeated to proceed. | ||
| [[Silver Shrine]]<br>[[Bomb Storage]]<br>[[Floating Garden]] | | [[Silver Shrine]]<br/>[[Bomb Storage]]<br/>[[Floating Garden]] | ||
|- | |- id="Don't drop the pot!" | ||
| [[File:TFH Drop the Pot Icon.png]]<br>''' | | [[File:TFH Drop the Pot Icon.png]]<br/>'''Don't drop the pot!''' | ||
| The Links are provided with a | | The {{Plural|TFH|Links}} are provided with a large Pot which must be safely transported through the entire {{Term|TFH|Level}}. The Pot rests on a pedestal as the {{Term|TFH|Level}} begins, and once it's picked up, it cannot be set back down. In order to solve puzzles and fight certain {{Plural|TFH|Enemy}}, the Pot will have to be passed between the {{Plural|TFH|Links}}. At the very end of the {{Term|TFH|Level}} is a pedestal that the Pot must be dropped into to activate the {{Term|TFH|Triforce Gateway}}. | ||
| [[Sealed Gateway]]<br>[[Training Ground]]<br>[[Lone Labyrinth]] | | [[Sealed Gateway]]<br/>[[Training Ground]]<br/>[[Lone Labyrinth]] | ||
|- | |- id="Don't fall at all!" | ||
| [[File:TFH No Falls Icon.png]]<br>''' | | [[File:TFH No Falls Icon.png]]<br/>'''Don't fall at all!''' | ||
| If any of the Links fall down a pit, they will be instantly KOed and the Stage will restart. | | If any of the {{Plural|TFH|Links}} fall down a pit, they will be instantly KOed and the {{Term|TFH|Stage}} will restart. | ||
| [[Bomb Storage]]<br>[[Stone Corridors]]<br>[[Illusory Mansion]]<br>[[Grim Temple]]<br>[[Floating Garden]]<br>[[Deception Castle]]<br>[[Dragon Citadel]] | | [[Bomb Storage]]<br/>[[Stone Corridors]]<br/>[[Illusory Mansion]]<br/>[[Grim Temple]]<br/>[[Floating Garden]]<br/>[[Deception Castle]]<br/>[[Dragon Citadel]] | ||
|- | |- id="Avoid falling and quicksand!" | ||
| [[File:TFH Quicksand Icon.png]]<br>''' | | [[File:TFH Quicksand Icon.png]]<br/>'''Avoid falling and quicksand!''' | ||
| If any of the {{Plural|TFH|Links}} fall down a pit or into {{Term|TFH|Quicksand|link}}, they will be instantly KOed and the {{Term|TFH|Stage}} will restart. | |||
| [[Gibdo Mausoleum]] | | [[Gibdo Mausoleum]] | ||
|- | |- id="Clear without any items!" | ||
| [[File:TFH No Items Icon.png]]<br>''' | | [[File:TFH No Items Icon.png]]<br/>'''Clear without any items!''' | ||
| No | | No {{Plural|TFH|Item}} are provided for use in the {{Term|TFH|Level}}. Instead the {{Plural|TFH|Links}} must rely entirely on their {{Plural|TFH|Sword}} or other objects, such as {{Plural|TFH|Bomb Flower|link}}, to attack. | ||
| [[Sky Temple]] | | [[Sky Temple]] | ||
|} | |} | ||
==Trivia== | ==Trivia== | ||
*During the Nintendo Treehouse Live event at E3 2015, the Drablands | *During the Nintendo Treehouse Live event at E3 2015, the {{Plural|TFH|Drablands Challenge}} were known as Challenge Courses.<ref>{{Cite Web|quote= |author= Nintendo|published= June 18, 2015|retrieved= August 13, 2018|url= https://www.youtube.com/watch?v=FnQl8A2vx4k&t=2m32s|title= Nintendo Treehouse Live @ E3 2015 Day 3 The Legend of Zelda: Tri Force Heroes|site= YouTube|type= Video}}</ref> | ||
*Although the | *Several unused types of {{Term|TFH|Drablands Challenge}} exist in the game's data: | ||
*The rim of the pedestal on which Link must place the Orb or Pot resembles | **"Transport the orb!", which likely would have been similar to "Guard the orb!" and "Transport the orb quickly!" but without the damaging red shade or a time limit.{{Fact|TFH}} | ||
**"Only hammers—no swords!", which would have likely been used for {{Term|TFH|Silver Shrine|link}}, and possibly other {{Plural|TFH|Level}}.{{Fact|TFH}} | |||
**"Defeat all enemies!", which lacks the no-{{Term|TFH|Sword|link}} restriction of "Defeat all foes sans sword!".{{Fact|TFH}} | |||
**Although the selection used to forego playing a {{Term|TFH|Drablands Challenge}} simply reads "No challenge", its internal text description is "Do that hero thing you do!".{{Fact|TFH}} | |||
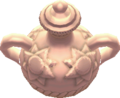
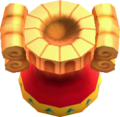
*The rim of the pedestal on which {{Plural|TFH|Link}} must place the Orb or Pot resembles {{Term|TFH|King Tuft|link}}'s collar and hair curls. | |||
==Nomenclature== | ==Nomenclature== | ||
{{ | {{Nomenclature}} | ||
==Gallery== | ==Gallery== | ||
<gallery> | <gallery> | ||
File:TFH Drablands Challenge Selection.png|Selecting a Drablands Challenge | File:TFH Drablands Challenge Selection.png|Selecting a {{Term|TFH|Drablands Challenge}} | ||
File:TFH Balloon Model.png|A Balloon | File:TFH Balloon Model.png|A Balloon | ||
File:TFH Balloons Model.png|Numbered Balloons | File:TFH Balloons Model.png|Numbered Balloons | ||
| Line 167: | Line 136: | ||
File:TFH Challenge Pot Model.png|The fragile Pot | File:TFH Challenge Pot Model.png|The fragile Pot | ||
File:TFH Challenge Pedestal Model.png|The pedestal on which to rest the Orb or Pot | File:TFH Challenge Pedestal Model.png|The pedestal on which to rest the Orb or Pot | ||
File:TFH Hourglass Model.png|A time-restoring Hourglass | File:TFH Hourglass Model.png|A time-restoring {{Term|TFH|Hourglass}} | ||
File:TFH Margoma Darkness.png|Battling Margoma in the "Adventure in the dark!" Challenge | File:TFH Margoma Darkness.png|Battling Margoma in the "Adventure in the dark!" Challenge | ||
</gallery> | </gallery> | ||
{{Ref}} | {{Ref}} | ||
{{Categories | |||
|modes= TFH | |||
}} | |||
Latest revision as of 23:22, 26 April 2024
Drablands Challenges are more difficult versions of Levels in Tri Force Heroes.
Overview
Drablands Challenges are special challenges added onto regular Levels, making them significantly more difficult. They become available in a given Area once the Boss of that Area is defeated. With the exception of the Den of Trials, each Area features 12 Drablands Challenges; three for each Level, each with varying goals and difficulty. Drablands Challenges can range anywhere from decreasing the Links' Heart Containers, requiring that they clear a Level within a certain time limit, or even neglecting to provide them with Items intended to solve certain puzzles, sometimes in favor of different Items. In addition to simply providing the Links with new goals, Enemies that do not normally appear in the Levels may become present during these Challenges. The Material rewards that the Links can normally earn at the end of a Level differ with each Drablands Challenge.[1]
Completion List

The Drablands Challenge Completion List is a bulletin board that appears in every lobby of Hytopia Castle, with the exception of the Coliseum lobby. It lists Link's progress in completing the Levels and their Drablands Challenges. For each Level or Challenge that Link completes, either over Multiplayer or with Doppels, a Triforce-shaped marker will be added to the Completion List to signify its completion. If, however, Link skips any Stages in a Level during single-player, then the Level will not be marked on the list after completing it even though it will still be marked in the Level Selection screen. Including the ordinary Levels and all of their Drablands Challenges, there are 128 markers to be filled.
While reading the Completion List, Link can also check his completion records cleared only through Multiplayer or only with Doppels by pressing either of two tabs on the bottom screen to show these individual records. Including both boards, there are a total of 256 Challenges to clear, however each Challenge is identical between both modes.
After Link completes all Drablands Challenges of an Area, King Tuft will reward him with a unique, gold-quality Material that can only otherwise be obtained through the Coliseum (eg. clearing all Woodlands Levels will award him the Supple Leaf). After Link clears all 128 Challenges on the Completion List, the King will reward him with a Gold Rupee worth 300 Rupees.
Types of Challenges
| Challenge | Description | Levels |
|---|---|---|
Fewer Heart Containers! |
The Links enter the Level with their amount of Heart Containers reduced to four. The Links can wear Outfits that increase their maximum health, such as the Jack of Hearts, Queen of Hearts, and Lady's Ensemble, to help regain some of their health. |
Deku Forest Forest Temple Water Temple Den of Flames Snowball Ravine Ice Temple The Lady's Lair Infinity Dunes Desert Temple Illusory Mansion Grim Temple Sky Temple |
Clear within the time limit! |
The Links are given a limited amount of time to clear the Level. Hourglasses of varying sizes can be picked up to increase the remaining time: small Hourglasses restore five seconds, and big Hourglasses restore 20. If time runs out, the Links will receive an immediate Game Over. The initial time limit given is the same whether playing with other Links or with Doppels. If the Links lose all of their Hearts and are KOed, they will reappear at the beginning of the Stage with the same amount of time they had when they fell. All Hourglasses in the Stage will reappear as well. If Linebeck's Uniform is worn, an additional ten seconds is added to the initial time limit for every Link wearing it. |
Deku Forest Buzz Blob Cave Forest Temple Abyss of Agony Cove of Transition Hinox Mine Den of Flames Fire Temple Training Ground Stone Corridors Gibdo Mausoleum Desert Temple Illusory Mansion Grim Temple Deception Castle Sky Temple |
Guard the Orb! |
The Links must transport a glowing Orb that lights a circular area around it. This Orb will protect the Links from a red shade covering the Level, which will harm the Links should they step outside the Orb's radius for more than several seconds. At the beginning of each Stage, the Orb rests on a pedestal, and at the end, it must be thrown into another. The Triforce Gateway will not activate until the Orb is placed into the latter pedestal. If the Orb falls down a pit or into water, it will reappear nearby. | Deku Forest Abyss of Agony Frozen Plateau Infinity Dunes Lone Labyrinth |
Pop all balloons! |
A number of red balloons appear in each of the Level's four Stages, including any Boss Stages. These balloons must all be popped in order to advance to the next Stage. Some of the balloons float at higher elevations, and require the Links to form a Totem to reach. | Buzz Blob Cave Moblin Base Secret Fortress Blazing Trail Hinox Mine Frozen Plateau Palace Noir |
Clear using only Bombs! |
The Level's ordinary Items are replaced with Bombs, requiring the Links to use them more creatively in solving puzzles and defeating Enemies. | Buzz Blob Cave |
Defeat all foes sans sword! |
The Links must defeat all Enemies without the ability to use their Swords, and instead must rely on other Items provided in the Level. All Enemies in a Stage must be defeated in order to activate the Triforce Gateway to the next Stage. | Moblin Base |
Transport the orb quickly! |
Similar to the "Guard the Orb!" challenge, except there is no damaging red shade. The Links must transport an Orb through the Level within a certain amount of time. Varying Hourglasses can be picked up to increase the remaining time; small Hourglasses restore five seconds, and big Hourglasses restore 20. If time runs out, the Links will receive an immediate Game Over. At the beginning of each Stage, the Orb rests on a pedestal, and at the end, it must be thrown into another. The Triforce Gateway will not activate until the Orb is placed into the latter pedestal. If the Orb falls down a pit or into water, it will reappear nearby. If the Links lose all of their Hearts and are KOed, they will reappear at the beginning of the Stage with the same amount of time they had when they fell. All Hourglasses in the Stage will reappear as well. If Linebeck's Uniform is worn, an additional ten seconds is added to the initial time limit for every Link wearing it. |
Moblin Base Water Temple Blazing Trail Snowball Ravine Ice Temple Bomb Storage Palace Noir |
Adventure in the dark! |
The entire Level falls pitch dark, with only the Links and available Torches providing little light. The Light Armor makes the challenge easier, as it illuminates a much larger area. |
Forest Temple Snowball Ravine Infinity Dunes Lone Labyrinth |
Clear with halved energy! |
Items that use the Energy Gauge will use up twice as much energy. | Secret Fortress Water Temple |
Evade the Wallmaster! |
A Wallmaster will continuously follow the Links throughout the entire Level and must be avoided. If it slams onto one of the Links, it will instantly KO them. It can be defeated, but will soon respawn. | Secret Fortress Cove of Transition Blazing Trail Fire Temple Silver Shrine Sealed Gateway The Lady's Lair Stone Corridors Floating Garden |
Halved attack and defense! |
The Links have their attack power and defense halved, making their attacks do half damage and causing them to take double damage from Enemies. The amount of damage from falling into pits or Quicksand in unchanged. Wearing the Sword Suit, the Sword Master Suit, or the Fierce Deity Armor will restore the regular Sword strength for whichever Link is wearing it. |
Abyss of Agony Cove of Transition Silver Shrine Sealed Gateway Training Ground Palace Noir Dragon Citadel |
Don't pop any balloons! |
A number of red balloons appear in each of the Level's four Stages, including any Boss Stages. If any of these balloons are popped, it results in instant KO. The balloons can also be popped by certain Enemy attacks. | Hinox Mine Desert Temple Deception Castle |
Avoid the volcanic rocks! |
Volcanic Rocks fall throughout the entire Level. If any of the Links are hit by one, they will be damaged and burned. | Den of Flames Dragon Citadel |
Only Bombs—no swords! |
The Links' Items are replaced by Bombs, and their Swords are disabled. The Links must rely entirely on their Bombs to attack and solve puzzles. | Fire Temple The Lady's Lair Gibdo Mausoleum |
Don't get hit by snowballs! |
Snowballs fall throughout the entire Level. If any of the Links are hit by one, they will take damage. | Frozen Plateau Ice Temple |
Win without using a sword! |
The Links are unable to use their Swords, and instead must rely on the Level's Items to attack and solve puzzles. The challenge is similar to the "Defeat all foes sans sword" challenge, except not all Enemies have to be defeated to proceed. | Silver Shrine Bomb Storage Floating Garden |
Don't drop the pot! |
The Links are provided with a large Pot which must be safely transported through the entire Level. The Pot rests on a pedestal as the Level begins, and once it's picked up, it cannot be set back down. In order to solve puzzles and fight certain Enemies, the Pot will have to be passed between the Links. At the very end of the Level is a pedestal that the Pot must be dropped into to activate the Triforce Gateway. | Sealed Gateway Training Ground Lone Labyrinth |
Don't fall at all! |
If any of the Links fall down a pit, they will be instantly KOed and the Stage will restart. | Bomb Storage Stone Corridors Illusory Mansion Grim Temple Floating Garden Deception Castle Dragon Citadel |
Avoid falling and quicksand! |
If any of the Links fall down a pit or into Quicksand, they will be instantly KOed and the Stage will restart. | Gibdo Mausoleum |
Clear without any items! |
No Items are provided for use in the Level. Instead the Links must rely entirely on their Swords or other objects, such as Bomb Flowers, to attack. | Sky Temple |
Trivia
- During the Nintendo Treehouse Live event at E3 2015, the Drablands Challenges were known as Challenge Courses.[2]
- Several unused types of Drablands Challenge exist in the game's data:
- "Transport the orb!", which likely would have been similar to "Guard the orb!" and "Transport the orb quickly!" but without the damaging red shade or a time limit.[citation needed]
- "Only hammers—no swords!", which would have likely been used for Silver Shrine, and possibly other Levels.[citation needed]
- "Defeat all enemies!", which lacks the no-Sword restriction of "Defeat all foes sans sword!".[citation needed]
- Although the selection used to forego playing a Drablands Challenge simply reads "No challenge", its internal text description is "Do that hero thing you do!".[citation needed]
- The rim of the pedestal on which Links must place the Orb or Pot resembles King Tuft's collar and hair curls.
Nomenclature
| Language | Names | Meanings |
|---|---|---|
EnglishBR | Bonus Challenge[9] | |
Japanese | とくべつ任務 (Tokubetsu Ninmu)[4] | Special Mission |
FrenchCA | Mission Spéciale[10] | Special Mission |
FrenchEU | Défi Spécial[5] | Special Challenge |
German | Spezialmission[7] | Special Mission |
Italian | Missione Speciale[3] | Special Mission |
Korean | 특별 임무 (Teugbyeol Immu)[8] | Special Mission |
SpanishLA | Misión especial[6] | Special Mission |
SpanishEU | Misión especial[11] | Special Mission |
| This table was generated using translation pages. To request an addition, please contact a staff member with a reference. | ||
Gallery
-
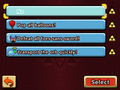
Selecting a Drablands Challenge
-

A Balloon
-
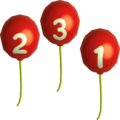
Numbered Balloons
-
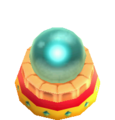
The glowing Orb
-
The fragile Pot
-
The pedestal on which to rest the Orb or Pot
-

A time-restoring Hourglass
-

Battling Margoma in the "Adventure in the dark!" Challenge


References
- ↑ "And of course to create the really powerful costumes, you need special materials. And you're only going to get those special materials on the really difficult courses. [...] So what I'd like to do today is introduce one of those more difficult courses, which again, once you clear you'll get this special material, that allows you to create one of the more powerful suits in the game." — Hiromasa Shikata, Nintendo Treehouse Live @ E3 2015 Day 3 The Legend of Zelda: Tri Force Heroes , YouTube (Video), published June 18, 2015, retrieved August 22, 2015.
- ↑ Nintendo, Nintendo Treehouse Live @ E3 2015 Day 3 The Legend of Zelda: Tri Force Heroes , YouTube (Video), published June 18, 2015, retrieved August 13, 2018.
- ↑ "Scegliere una missione speciale" (Tri Force Heroes manual, pg. 9)
- ↑ "とくべつ任務を選ぶ" (Tri Force Heroes manual, pg. 9)
- ↑ "Choisir les défis spéciaux" (Tri Force Heroes manual, pg. 9)
- ↑ "Misiones especiales" (Tri Force Heroes manual, pg. 9)
- ↑ "Spezialmissionen wählen" (Tri Force Heroes manual, pg. 9)
- ↑ "특별 임무를 선택" (Tri Force Heroes manual, pg. 9)
- ↑ "Play with a bonus challenge?" — Level Selection (Tri Force Heroes)
- ↑ "Choisir les missions spéciales" (Tri Force Heroes manual, pg. 9)
- ↑ "Las misiones especiales" (Tri Force Heroes manual, pg. 9)