Gallery:Ocarina of Time: Difference between revisions
MannedTooth (talk | contribs) m (Text replacement - "Stone of Agony.png" to "OoT Stone of Agony Render.png") |
m (→Characters) |
||
| (33 intermediate revisions by 9 users not shown) | |||
| Line 16: | Line 16: | ||
File:OoT Link Spin Attack Artwork.jpg|Link performing a [[Spin Attack]] | File:OoT Link Spin Attack Artwork.jpg|Link performing a [[Spin Attack]] | ||
File:OoT Zelda Link Artwork.jpg|Link and [[Princess Zelda]] | File:OoT Zelda Link Artwork.jpg|Link and [[Princess Zelda]] | ||
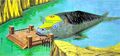
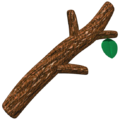
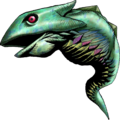
File:Jabujabu1.jpg|[[Lord Jabu-Jabu]] in [[Zora's Domain]] | |||
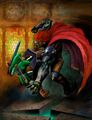
File:OoT Link and Ganondorf Artwork.jpg|Link encountering [[Ganondorf]] | File:OoT Link and Ganondorf Artwork.jpg|Link encountering [[Ganondorf]] | ||
File:OoT Pedestal of Time Artwork.png|Link pulling out the [[Master Sword]] from the [[Pedestal of Time]] | File:OoT Pedestal of Time Artwork.png|Link pulling out the [[Master Sword]] from the [[Pedestal of Time]] | ||
| Line 49: | Line 50: | ||
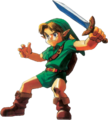
File:OoT Link Stabbing Artwork.png|Link stabbing | File:OoT Link Stabbing Artwork.png|Link stabbing | ||
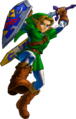
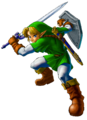
File:Link Spin Attack OoT.png|Link performing a Spin Attack | File:Link Spin Attack OoT.png|Link performing a Spin Attack | ||
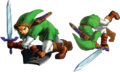
File:Link Jump Attack.png|Link performing a Jump Attack | File:OoT Link Performing Jump Attack Artwork.png|Link performing a Jump Attack | ||
File:Link | File:OoT Link Blocking.png|Link blocking with the [[Hylian Shield]] | ||
File:Link Roll OoT.png|Link performing a [[Roll Attack]] | File:Link Roll OoT.png|Link performing a [[Roll Attack]] | ||
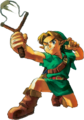
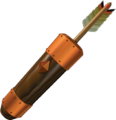
File:OoT Link Using Fairy Bow Artwork.png|Link using the [[Fairy Bow]] | File:OoT Link Using Fairy Bow Artwork.png|Link using the [[Fairy Bow]] | ||
| Line 57: | Line 58: | ||
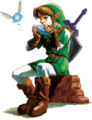
File:Linkposeoot.png|Link charging a Spin Attack | File:Linkposeoot.png|Link charging a Spin Attack | ||
File:OoT Link and Epona Artwork.png|Link petting [[Epona]] | File:OoT Link and Epona Artwork.png|Link petting [[Epona]] | ||
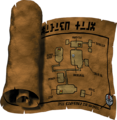
File:Link Ocarina 2.png|Link playing the {{ | File:Link Ocarina 2.png|Link playing the {{Term|OoT3D|Ocarina of Time (Item)|link}} | ||
File:OoT Link Riding Epona Artwork.png|Link riding Epona | File:OoT Link Riding Epona Artwork.png|Link riding Epona | ||
File:OoT Link Portrait.png|Adult Link | File:OoT Link Portrait.png|Adult Link | ||
| Line 72: | Line 73: | ||
File:OoT Ingo Artwork.png|[[Ingo]] | File:OoT Ingo Artwork.png|[[Ingo]] | ||
File:OoT Saria Artwork.png|[[Saria]] | File:OoT Saria Artwork.png|[[Saria]] | ||
File:Kokiri | File:OoT Kokiri Artwork.png|The [[Kokiri]] tribe | ||
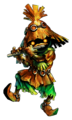
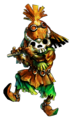
File:OoT Skull Kid Artwork.png|[[Skull Kid]] | File:OoT Skull Kid Artwork.png|[[Skull Kid]] | ||
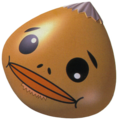
File:OoT Skull Kid Artwork 2.png|Skull Kid wearing the [[Skull Mask]] | File:OoT Skull Kid Artwork 2.png|Skull Kid wearing the [[Skull Mask]] | ||
| Line 81: | Line 82: | ||
File:Kingzora.png|[[King Zora]] | File:Kingzora.png|[[King Zora]] | ||
File:OoT Zora Artwork.png|A [[Zora]] | File:OoT Zora Artwork.png|A [[Zora]] | ||
File: | File:OoT Nabooru Artwork.png|[[Nabooru]] | ||
</gallery> | </gallery> | ||
| Line 101: | Line 102: | ||
File:OoT Light Arrow Render.png|[[Light Arrow]] | File:OoT Light Arrow Render.png|[[Light Arrow]] | ||
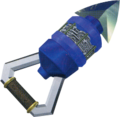
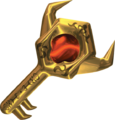
File:OoT Hookshot Render.png|[[Hookshot]] | File:OoT Hookshot Render.png|[[Hookshot]] | ||
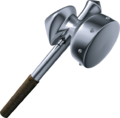
File:OoT Megaton Hammer | File:OoT Megaton Hammer Render.png|[[Megaton Hammer]] | ||
File:OoT Din's Fire | File:OoT Din's Fire Render.png|[[Din's Fire]] | ||
File:OoT Farore's Wind Render.png|[[Farore's Wind]] | File:OoT Farore's Wind Render.png|[[Farore's Wind]] | ||
File:OoT Nayru's Love Render.png|[[Nayru's Love]] | File:OoT Nayru's Love Render.png|[[Nayru's Love]] | ||
| Line 111: | Line 112: | ||
File:OoT Blue Potion Render.png|[[Blue Potion]] | File:OoT Blue Potion Render.png|[[Blue Potion]] | ||
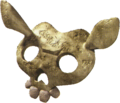
File:OoT Keaton Mask Render.png|[[Keaton Mask]] | File:OoT Keaton Mask Render.png|[[Keaton Mask]] | ||
File:OoT Skull Mask | File:OoT Skull Mask Render.png|Skull Mask | ||
File:OoT Spooky Mask | File:OoT Spooky Mask Render.png|[[Spooky Mask]] | ||
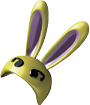
File:OoT Bunny Hood Render.png|[[Bunny Hood]] | File:OoT Bunny Hood Render.png|[[Bunny Hood]] | ||
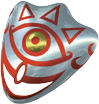
File:OoT Mask of Truth Render 2.png|[[Mask of Truth]] | File:OoT Mask of Truth Render 2.png|[[Mask of Truth]] | ||
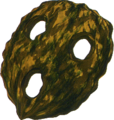
File:OoT Goron Mask Render.png|[[Goron Mask]] | File:OoT Goron Mask Render.png|[[Goron Mask]] | ||
File:OoT Zora Mask Render.png|[[Zora Mask]] | File:OoT Zora Mask Render.png|[[Zora Mask]] | ||
File:OoT Gerudo Mask | File:OoT Gerudo Mask Render.png|[[Gerudo Mask]] | ||
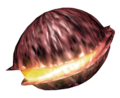
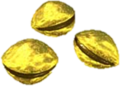
File:OoT Deku Seeds | File:OoT Deku Seeds Render.png|[[Deku Seeds]] | ||
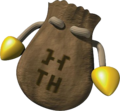
File:OoT Bullet Bag Render.png|[[Bullet Bag]] | File:OoT Bullet Bag Render.png|[[Bullet Bag]] | ||
File:OoT Quiver | File:OoT Quiver Render.png|[[Quiver]] | ||
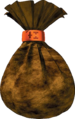
File:OoT Bomb Bag.png|[[Bomb Bag]] | File:OoT Bomb Bag.png|[[Bomb Bag]] | ||
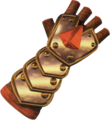
File:OoT Goron's Bracelet Render.png|[[Goron's Bracelet]] | File:OoT Goron's Bracelet Render.png|[[Goron's Bracelet]] | ||
| Line 129: | Line 130: | ||
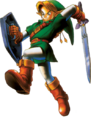
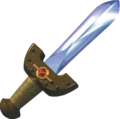
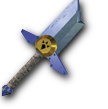
File:OoT Kokiri Sword Render.png|[[Kokiri Sword]] | File:OoT Kokiri Sword Render.png|[[Kokiri Sword]] | ||
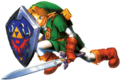
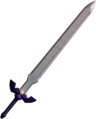
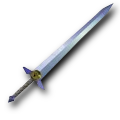
File:OoT Master Sword Render.png|[[Master Sword]] | File:OoT Master Sword Render.png|[[Master Sword]] | ||
File:OoT Giant's Knife | File:OoT Giant's Knife Render.png|[[Giant's Knife]] | ||
File:OoT Broken Giant's Knife | File:OoT Broken Giant's Knife Render.png|Broken Giant's Knife | ||
File:OoT Deku Shield Render.png|[[Deku Shield]] | File:OoT Deku Shield Render.png|[[Deku Shield]] | ||
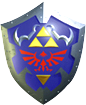
File:OoT Hylian Shield Render.png|[[Hylian Shield]] | File:OoT Hylian Shield Render.png|[[Hylian Shield]] | ||
| Line 137: | Line 138: | ||
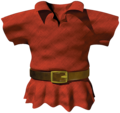
File:OoT Goron Tunic Render.png|[[Goron Tunic]] | File:OoT Goron Tunic Render.png|[[Goron Tunic]] | ||
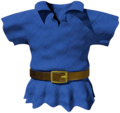
File:OoT Zora Tunic Render.png|[[Zora Tunic]] | File:OoT Zora Tunic Render.png|[[Zora Tunic]] | ||
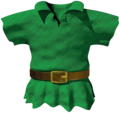
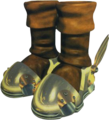
File:OoT Kokiri Boots | File:OoT Kokiri Boots Render.png|[[Kokiri Boots]] | ||
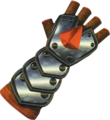
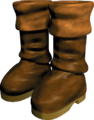
File:OoT Iron Boots Render.png|[[Iron Boots]] | File:OoT Iron Boots Render.png|[[Iron Boots]] | ||
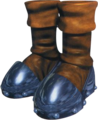
File:OoT Hover Boots | File:OoT Hover Boots Render.png|[[Hover Boots]] | ||
File:OoT Piece of Heart Render.png|[[Piece of Heart]] | File:OoT Piece of Heart Render.png|[[Piece of Heart]] | ||
File:OoT Heart Container Render.png|[[Heart Container]] | File:OoT Heart Container Render.png|[[Heart Container]] | ||
| Line 181: | Line 182: | ||
File:OoT Leever Artwork.png|[[Leever]] | File:OoT Leever Artwork.png|[[Leever]] | ||
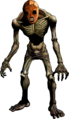
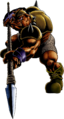
File:OoT Iron Knuckle Artwork.png|[[Iron Knuckle (Boss)|Iron Knuckle]] | File:OoT Iron Knuckle Artwork.png|[[Iron Knuckle (Boss)|Iron Knuckle]] | ||
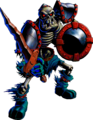
File: | File:OoT Iron Knuckle Nabooru Artwork.png|Nabooru as an Iron Knuckle | ||
</gallery> | </gallery> | ||
| Line 191: | Line 192: | ||
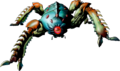
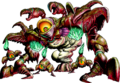
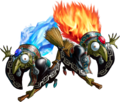
File:OoT Barinade Artwork.png|[[Barinade]] | File:OoT Barinade Artwork.png|[[Barinade]] | ||
File:OoT Phantom Ganon Artwork.png|[[Phantom Ganon]] | File:OoT Phantom Ganon Artwork.png|[[Phantom Ganon]] | ||
File:Volvagia.png|Volvagia | File:OoT Volvagia Artwork.png|Volvagia | ||
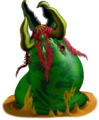
File:Morpha.png|[[Morpha]] | File:OoT Morpha Artwork.png|[[Morpha]] | ||
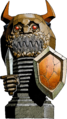
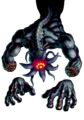
File:OoT Bongo Bongo Artwork.png|[[Bongo Bongo]] | File:OoT Bongo Bongo Artwork.png|[[Bongo Bongo]] | ||
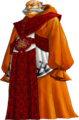
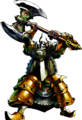
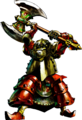
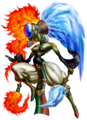
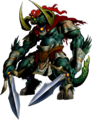
File:OoT | File:OoT Twinrova Artwork.png|[[Koume]] and [[Kotake]] | ||
File:OoT Twinrova Artwork.png|[[Twinrova]] | File:OoT Twinrova Artwork 2.png|[[Twinrova]] | ||
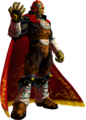
File:OoT3D Ganondorf Artwork.png|[[Ganondorf]] | |||
File:OoT Ganon Artwork.png|[[Ganon]] | File:OoT Ganon Artwork.png|[[Ganon]] | ||
</gallery> | </gallery> | ||
| Line 201: | Line 203: | ||
==Logos== | ==Logos== | ||
<gallery> | <gallery> | ||
File:OoT | File:OoT English Logo.png|English black logo | ||
File:OoT | File:OoT English Logo 2.png|English white logo | ||
File:OoT | File:OoT English Logo 3.png|Revised English logo | ||
File: | File:OoT Japanese Logo.gif|Japanese logo | ||
File: | File:OoT English Concept Logo.png|English concept logo | ||
File:OoT Japanese Concept Logo.png|Japanese conept logo | |||
File:OoT Japanese Concept Logo 2.png|Japanese concept logo | |||
File:OoT Master Quest English Logo.png|English ''Master Quest'' logo | |||
File:OoT Master Quest Japanese Logo.png|Japanese ''Master Quest'' (GameCube) logo | |||
</gallery> | </gallery> | ||
| Line 236: | Line 242: | ||
File:Ganon transformed concept.jpg|Ganon | File:Ganon transformed concept.jpg|Ganon | ||
File:Ganon transformed attacking concept.jpg|Ganon | File:Ganon transformed attacking concept.jpg|Ganon | ||
File:Solid Black Gerudo Stallion concept 2.jpg|[[Ganondorf's | File:Solid Black Gerudo Stallion concept 2.jpg|[[Ganondorf's Horse]] | ||
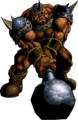
File:OoT Enemy Concept Artwork.jpg|(From left to right) [[Twinrova]], [[Poe]], Ganon, [[Stalfos]], and [[Gohma]] | File:OoT Enemy Concept Artwork.jpg|(From left to right) [[Twinrova]], [[Poe]], Ganon, [[Stalfos]], and [[Gohma]] | ||
</gallery> | </gallery> | ||
| Line 243: | Line 249: | ||
<gallery> | <gallery> | ||
File:OoT Title Screen.png|Title screen | File:OoT Title Screen.png|Title screen | ||
</gallery> | </gallery> | ||
| Line 252: | Line 257: | ||
{{Youtube|oXtl4wcUlDw|200|French ad}} | {{Youtube|oXtl4wcUlDw|200|French ad}} | ||
{{ | {{Categories | ||
|Galleries | |||
}} | |||
Latest revision as of 06:18, 22 August 2023
This is a gallery page featuring promotional and pre-release media from and relating to Ocarina of Time.
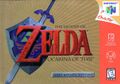
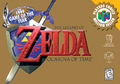
Box Art
-

North American box art
-
North American Collector's Edition box art
-
North American Player's Choice box art
-
European box art
-
European Special Value Pak box art
-
Australian box art
-
Japanese box art
-
Chinese iQue Player box art


Master Quest
-
North American box art
-
North American Master Quest bundle box art
-

Japanese box art
-
Korean box art


Artwork
Illustrations
-
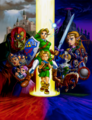
The main cast
-
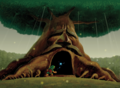
Link about to go inside the Deku Tree
-
Link performing a Spin Attack
-
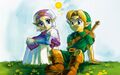
Link and Princess Zelda
-
-
Link encountering Ganondorf
-
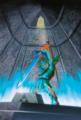
Link pulling out the Master Sword from the Pedestal of Time
-
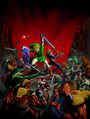
Link and Sheik fighting a group of enemies
-
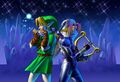
Link and Sheik playing their respective instruments
-
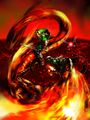
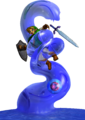
Link fighting against Volvagia
-
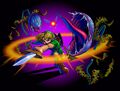
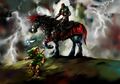
Link fighting against Ganondorf
-

Link riding Epona
-
Link riding Epona with several bosses in the background


Characters
-
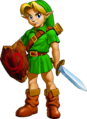
Link with the Kokiri Sword and Deku Shield
-
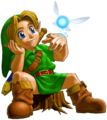
Link and Navi
-
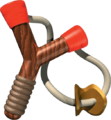
Link using the Fairy Slingshot
-
Link bracing himself
-
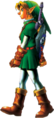
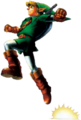
Link performing a Jump Attack
-
Link in an attack pose
-
Link walking
-
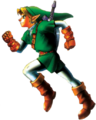
Link running
-
Link jumping
-
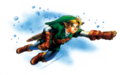
Link swimming
-

Link climbing a ladder
-

Link hanging from a ledge
-
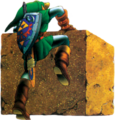
Link climbing a Block
-
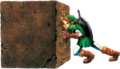
Link pushing a Block
-
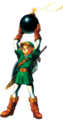
Link holding a Bomb
-
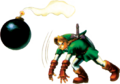
Link throwing a Bomb
-
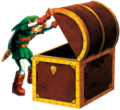
Link opening a Treasure Chest
-
Link performing a vertical slash
-
Link performing a horizontal slash
-
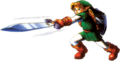
Link stabbing
-
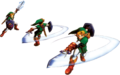
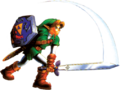
Link performing a Spin Attack
-
Link performing a Jump Attack
-
Link blocking with the Hylian Shield
-
Link performing a Roll Attack
-
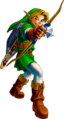
Link using the Fairy Bow
-
Link playing the Ocarina of Time with Navi
-
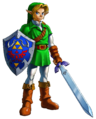
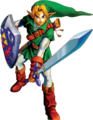
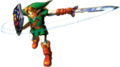
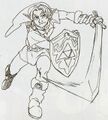
Link with the Master Sword and Hylian Shield
-
Link charging a Spin Attack
-
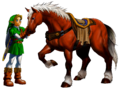
Link petting Epona
-
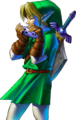
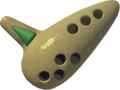
Link playing the Ocarina of Time
-
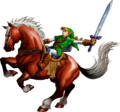
Link riding Epona
-
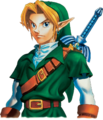
Adult Link
-

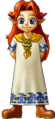
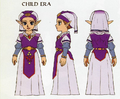
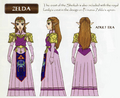
Child Princess Zelda
-
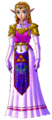
Adult Princess Zelda
-
Sheik
-
-

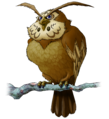
Kaepora Gaebora
-
-
-
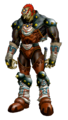
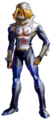
Ganondorf
-

-
-

-

-
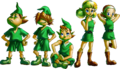
The Kokiri tribe
-
-
Skull Kid wearing the Skull Mask
-
-

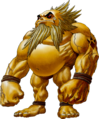
A Goron
-

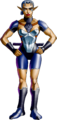
Child Princess Ruto
-

Adult Princess Ruto
-

-
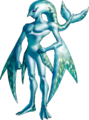
A Zora
-


Items
-
-
Fairy Slingshot
-

-
-
-

Ocarina of Time
-
-

-

-

-

Fairy Bow
-

-

-

-
-
-

-

-

-
Large Magic Jar
-

Empty Bottle
-

-

-

-

-
Skull Mask
-
-
-
-
-
-
-
-
-
-
-
-
-
-

-

-
-
-
-
Broken Giant's Knife
-

-
-

-
-
-
-
-
-
-

-

-
-

-
-

-
-
-
-

-
-
-
-

-
-


Enemies
-

-

-

-

-

-
-
-

-
-
-
-

-

-

-

-
-
-
-

-
-
-
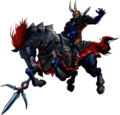
Nabooru as an Iron Knuckle


Bosses
-
-
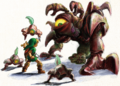
Link fighting against Gohma
-
-

-
-
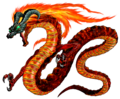
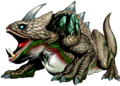
Volvagia
-
-
-
-
-
-


Logos
-
English black logo
-
English white logo
-
Revised English logo
-
Japanese logo
-

English concept logo
-
Japanese conept logo
-
Japanese concept logo
-
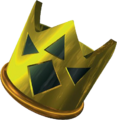
English Master Quest logo
-
Japanese Master Quest (GameCube) logo
Concept Art
-
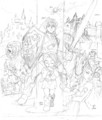
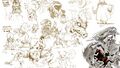
Sketch depicting primary characters
-
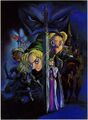
Illustration depicting primary characters
-
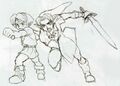
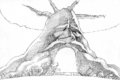
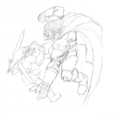
Sketch of Link and Sheik fighting a horde of monsters
-
-
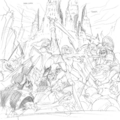
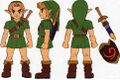
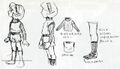
Child Link and Adult Link
-

-
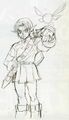
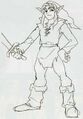
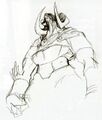
Link
-
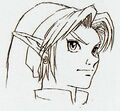
Link
-
Link and Navi
-

Link
-
Link
-
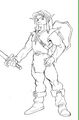
Link
-
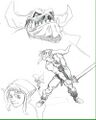
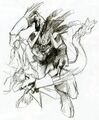
Link, Ganon, and a Fairy
-
-
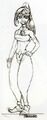
Princess Zelda
-

-
-
-
-
-
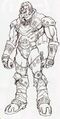
Ganondorf
-
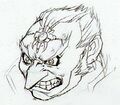
Ganondorf
-

Ganondorf and his monsters
-
Link fighting against Ganondorf
-
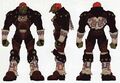
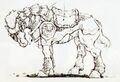
Ganon
-
Ganon
-
-


Screenshots
-
Title screen
