Force Gem: Difference between revisions
No edit summary |
Htwretched (talk | contribs) m (→List of {{Plural|ST|Force Gem}}: Correction to 17) |
||
| (43 intermediate revisions by 15 users not shown) | |||
| Line 1: | Line 1: | ||
{{Infobox Object | {{Infobox Object | ||
|image= File:FSA | |image= {{Media | ||
| | |Artwork FSA= File:FSA Force Gems.png | ||
| | |Artwork PH= File:PHredLinkwForceGem.png | ||
|Artwork ST= File:ST Link with Force Gems Artwork.png | |||
|Model PH= File:PH Force Gem Model.png | |||
|Model ST= File:ST Force Gem Model.png | |||
|Sprite FSA= File:FSA Big Force Gem Green Sprite.png | |||
}} | |||
|caption= | |||
|game= FSA, PH, ST | |||
|other= | |other= | ||
|uses= Restoring power to the Four Sword | |uses= | ||
|comp= | {{Infobox Game Blocks | ||
|FSA= {{List|Restoring power to the {{Term|FSA|Four Sword|link}}, Currency}} | |||
|ST= Restoring the {{Plural|ST|Spirit Tracks (Object)|link}} | |||
}} | |||
|comp= {{List|{{Plural|Series|Rupee|link}}, {{Plural|Series|Tear of Light|link}}}} | |||
}} | }} | ||
{{Term/Store|Force Gem|Force Gems|Series, FSA, PH, ST|plural}} are recurring | {{Term/Store|Force Gem|Force Gems|Series, FSA, PH, ST|plural}} are recurring {{Plural|Series|Item|link}} and {{Plural|Series|Object|link}} in {{TLoZ|Series}}.<ref>{{Cite Book|quote= |book= E |publisher= |page= 124 {{Exp Game|FSA, PH, ST}}}}</ref> | ||
==Location and Uses== | ==Location and Uses== | ||
{{Plural|Series|Force Gem}} appear as {{Wp|Triangular bipyramid|triangular bipyramid}}-shaped jewels that are found in a variety of sizes and colors. Their roles greatly vary between games. They are said to be physical manifestations of the Force, the sacred power that dwells in every living being.<ref name="force">{{Cite Book|quote= The sacred power the gods gave to the world. It's the breath of life itself.|book= HH |publisher= |page= 75}}</ref><ref name="Anjean">{{Cite|As I am sure you know, happiness and gratitude create energy. Well, I am deeply grateful to both of you for all of your help. I cannot help you directly, but I can at least give you this Force Gem.|Anjean|ST}}</ref> | |||
==={{FSA|-}}=== | ==={{FSA|-}}=== | ||
In {{FSA}}, the {{Plural|FSA|Links|link}} need to collect 2,000 {{Plural|FSA|Force Gem}} in a given {{Term|FSA|Level|link}} to empower the {{Term|FSA|Four Sword|link}}, which has lost its power because of {{Term|FSA|Vaati|link}}'s magic.<ref>{{Cite|However, Vaati's magic has robbed the Four Sword of its power to vanquish darkness. To return the sword to its full strength, find the source of that power: Force Gems.|Kaepora Gaebora|FSA}}</ref> Once empowered, it can break {{Term|FSA|Vaati}}'s {{Term|FSA|Dark Barrier|link}} at the end of each {{Term|FSA|Level}}.<ref>{{Cite Manual|quote=Your goal is to destroy the dark magic barrier at the end of each stage. The only way to destroy the barrier is with the magic Force Gem power of the legendary Four Sword.|game= FSA|page= 18}}</ref><ref>{{Cite Manual|quote= If the Four Sword doesn't have enough power, it cant destroy the barrier. Refer to the Status screen to see how many Force Gems you need before the Four Sword reclaims its power to repel evil.|game= FSA|page= 19}}</ref> Often, {{Plural|FSA|Level}} will have an area that gives the {{Plural|FSA|Links}} an opportunity to get many {{Plural|FSA|Force Gem}} at once; usually, this involves defeating many {{Plural|FSA|Enemy|link}}. Doing this without taking damage awards combo points, which will cause more {{Plural|FSA|Force Gem}} to fall from the defeated the {{Plural|FSA|Enemy}}.<ref>{{Cite|Defeat multiple enemies with a single blow to get more Force Gems.|N/A|FSA}}</ref> In some cases, the {{Plural|FSA|Force Gem}} are used as currency.<ref>{{Cite|Today, my aid can be yours for a paltry sum! How about a mere... [#] Force Gems!|Man|FSA}}</ref> Sometimes, if big {{Plural|FSA|Force Gem}} are lying around, {{Term|FSA|Tingle|link}} will appear and attempt to take them before {{Term|FSA|Link}} can reach them; {{Term|FSA|Link}} can throw things at him to deter him.{{Fact}} | |||
Force | {{Plural|FSA|Force Gem}} appear throughout each {{Term|FSA|Level}}, found on {{Plural|FSA|Enemy}}, under {{Plural|FSA|Rock|link}}, frozen in {{Term|FSA|Ice|link}}, and more.<ref>{{Cite Manual|quote= Force Gems can be found all over Hyrule. These gems are the source of the Four Sword's power. They appear after you defeat enemies or cut down grass and bushes.|game= FSA|page=18}}</ref> Like {{Plural|FSA|Rupee|link}} in most games in the series, their size and color determine their value. | ||
== | {| class="wikitable" style="text-align:center;" | ||
|+ Types of Force Gem | |||
! Force Gem | |||
! Value | |||
! Force Gem | |||
! Value | |||
! Force Gem | |||
! Value | |||
|- | |||
| [[File:FSA Force Gem Green Sprite.png]]<br/>'''Small Green''' | |||
| 1 | |||
| [[File:FSA Big Force Gem Green Sprite.png]]<br/>'''Big Green''' | |||
| 100 | |||
| [[File:FSA Giant Green Force Gem Sprite.png]]<br/>'''Giant Green''' | |||
| 1,000 | |||
|- | |||
| [[File:FSA Force Gem Blue Sprite.png]]<br/>'''Small Blue''' | |||
| 5 | |||
| [[File:FSA Big Force Gem Blue Sprite.png]]<br/>'''Big Blue''' | |||
| 150 | |||
| [[File:FSA Giant Blue Force Gem Sprite.png]]<br/>'''Giant Blue''' | |||
| 1,500 | |||
|- | |||
| [[File:FSA Force Gem Red Sprite.png]]<br/>'''Small Red''' | |||
| 20 | |||
| [[File:FSA Big Force Gem Red Sprite.png]]<br/>'''Big Red''' | |||
| 200 | |||
| [[File:FSA Giant Red Force Gem Sprite.png]]<br/>'''Giant Red''' | |||
| 2,000 | |||
|- | |||
| [[File:FSA Force Gem Purple Sprite.png]]<br/>'''Small Purple''' | |||
| 50 | |||
| [[File:FSA Big Force Gem Purple Sprite.png]]<br/>'''Big Purple''' | |||
| 300 | |||
| [[File:FSA Giant Purple Force Gem Sprite.png]]<br/>'''Giant Purple''' | |||
| 3,000 | |||
|} | |||
====Rare Force Gems==== | ====Rare Force Gems==== | ||
[[File:FSA Force Soldier Sprite.png|right|A Force Soldier]] | [[File:FSA Force Soldier Sprite.png|96x112px|right|A Force Soldier]] | ||
*Color alternating Force Gem: Its value depends on which color it is when obtained. | *Color alternating Force Gem: Its value depends on which color it is when obtained. | ||
*[[Force Soldier]]: A large green Force Gem with a sword and legs. If Link destroys it, it will become a big green Force Gem. However, if Link does not defeat it in time and it self destructs, its value will be reduced to one Force Gem. | *[[Force Soldier]]: A large green Force Gem with a sword and legs. If Link destroys it, it will become a big green Force Gem. However, if Link does not defeat it in time and it self destructs, its value will be reduced to one Force Gem. | ||
| Line 51: | Line 78: | ||
==={{PH|-}}=== | ==={{PH|-}}=== | ||
Force Gems | [[File:PH Force Gem Pedestals.png|256px|right|thumb|Link placing Force Gems on pedestals]] | ||
In {{PH}}, {{Plural|PH|Force Gem}} are gold-colored objects found in the {{Term|PH|Temple of the Ocean King|link}}. Three of them must be placed on pedestals inside a {{Term|PH|Safe Zone|link}} in order to create a {{Term|PH|Triforce|link}} symbol that unlocks a door to the next floor. Just like with a {{Term|PH|Boss Key|link}}, carrying a {{Term|PH|Force Gem}} slows {{Term|PH|Link}} down and prevents him from attacking or defending himself.<ref>{{Cite Guide|quote= |game= PH|publisher= Prima|page=15}}</ref> | |||
{{Plural|PH|Force Gem}} are used on floor B3, where each one is found inside a {{Term|PH|Treasure Chest|link}}, and on floor B12, where one {{Term|PH|Force Gem}} is carried by a {{Term|PH|Phantom|link}} that patrols the room, while the other two are found in {{Plural|PH|Treasure Chest}} that cause new {{Plural|PH|Phantom}} to appear when opened. Additionally on the latter floor, placing a {{Term|PH|Force Gem}} on its pedestal causes a {{Term|PH|Wizzrobe|link}} to spawn. | |||
On floors B7 and B8, the Square, Round, and Triangle {{Plural|PH|Crystal|link}} play the same role as the {{Plural|PH|Force Gem}}, though they must all be carried to a {{Term|PH|Safe Zone}} on Floor B9. At one point in the game, {{Term|PH|Oshus|link}} explains that the {{Plural|PH|Sand of Hours|link}} are made of {{Plural|PH|Force Gem}}.<ref>{{Cite|It is said to be made of Force Gems of the great spirit, the Ocean King.|Oshus|PH}}</ref> | |||
===={{Term|PH|Battle Mode}}==== | |||
The goal of {{Term|PH|Battle Mode|link}} is for each of the {{Plural|PH|Links|link}} to collect as many of the {{Plural|PH|Force Gem}} spread around the field as possible. Small {{Plural|PH|Force Gem}} are worth one point, regular-sized {{Plural|PH|Force Gem}} are worth five points, and large {{Plural|PH|Force Gem}} are worth 15 points; the larger a {{Term|PH|Force Gem}}, the heavier it is to carry. The colors of the {{Plural|PH|Force Gem}} are also changed during gameplay; carrying one into a red or blue {{Term|PH|Safe Zone}} will change its color respectively and add its value to that {{Term|PH|Links}}'s score. Neutral {{Plural|PH|Safe Zone}} will turn red or blue {{Plural|PH|Force Gem}} back to gold and subtract their values from the scores. | |||
==={{ST|-}}=== | ==={{ST|-}}=== | ||
[[File:Forcest1.png|right|thumb| | [[File:Forcest1.png|right|thumb|200px|The Force Gem of the {{Term|ST|Forest Temple|link}}]] | ||
{{Plural|ST|Force Gem}} are integral to the plot of {{ST}}. They appear above a [[Goddess Crest]]-like arch as the symbol of the {{Plural|ST|Spirit of Good|link}}, which is seen in numerous places throughout [[New Hyrule]]; notably, on the [[Spirit Engine|Engine]] of the {{Term|ST|Spirit Train|link}}, on the {{Plural|ST|Lokomo|link}}' vehicles, on the completed {{Term|ST|Rail Map|link}}, and atop the {{Term|ST|Tower of Spirits|link}}. The {{Term|ST|Shield|link}} is studded with an ornamental {{Term|ST|Force Gem}}, and the {{Term|ST|Lokomo Sword|link}} has one in its pommel. One of each pair of {{Plural|ST|Spacetime Gate|link}} is adorned with a {{Term|ST|Force Gem}} that changes from green to gold when shot with the {{Term|ST|Cannon|link}}, thereby activating that pair. | |||
[[File:ST Force Gem from Anjean.png|left|thumb|256x192px|Anjean producing a Force Gem]] | |||
When each of the {{Plural|ST|Boss|link}} of the [[Forest Temple|Forest]], [[Snow Temple|Snow]], [[Ocean Temple|Ocean]], and [[Fire Temple]]s are defeated, in their wake appears a large {{Term|ST|Force Gem}}, colored green, white, blue, and red respectively. A mechanical pedestal rises then out of the ground and the {{Term|ST|Force Gem}} lowers onto it, creating a seal that re-energizes the {{Plural|ST|Spirit Tracks (Object)|link}} leading back to the {{Term|ST|Tower of Spirits}} and restores a portion of the broken tower, strengthening the bond that imprisons the Demon King, {{Term|ST|Malladus|link}}.<ref>{{Cite|At the top of this tower is your body. The Demon King's spirit is also there. To prevent him from possessing your body, you must fortify his prison. To do this, restore the energy between the temples and this tower. In other words... Restore the tracks between here and the temples.|Anjean|ST}}</ref> | |||
The | [[File:ST Rail Map - Force Gem from Anjean.png|right|thumb|256x192px|The Spirit Tracks created by Anjean's Force Gem]] | ||
As {{Plural|ST|Item|link}}, gold-colored {{Plural|ST|Force Gem}} appear when {{Term|ST|Link|link}} helps certain characters.<ref>{{Cite|You plan to continue your journey by train, do you not? Then you must always go forth with people's hearts in your mind. When you make people happy, their spirits emit {{Color|ST Light Blue|energy}}. When this {{Color|ST Light Blue|energy}} builds, new tracks appear. This should be very useful for your journey.|Carben|ST}}</ref> The energy in a person's heart is said to be similar to that which powers the {{Plural|ST|Spirit Tracks (Object)}}, and when that person is very happy or grateful, their energy rises and produces a {{Term|ST|Force Gem}}, which restores yet more of the {{Plural|ST|Spirit Tracks (Object)}}.<ref>{{Cite|Here, this is for you. ...You look confused. I'll explain, {{Player Name}}. Every living being possesses an {{Color|ST Light Blue|energy}}... And this energy is similar to the energy that powers the Spirit Tracks. When a person's heart is especially happy or grateful... His energy levels become particularly strong.|Carben|ST}}</ref> These new sections of tracks create shortcuts that ease travel aboard the {{Term|ST|Spirit Train}}, and grant access to new {{Plural|ST|Station|link}}, {{Plural|ST|Rabbit|link}}, and {{Plural|ST|Spacetime Gate}}. | |||
There are 21 {{Plural|ST|Force Gem}} for {{Term|ST|Link}} to collect by transporting {{Plural|ST|Passenger|link}} or {{Term|ST|Cargo|link}} from one location to another; all but three are optional. The [[Force Gem 1|first Force Gem]] is given by {{Term|ST|Carben|link}} after {{Term|ST|Link}} drives him from {{Term|ST|Papuchia Village|link}} to the {{Term|ST|Ocean Sanctuary|link}}, defending him from an onslaught of {{Plural|ST|Pirate|link}} along the way.<ref>{{Cite|{{Color|ST Light Blue|Energy}} lives in the hearts of everyone, even feeble old fellows like me... I don't express it well, but the bottom line is that I appreciate your help... Here, please take this. It belongs to you.|Carben|ST}}</ref> {{Term|ST|Force Gem 5|link}} must also be collected by driving {{Term|ST|Noko|link}} of the {{Plural|ST|Anouki|link}} to the {{Term|ST|Wellspring Station|link}}, as this allows him to make the {{Term|ST|Mega Ice|link}} that {{Term|ST|Link}} requires during his adventure. After the {{Term|ST|Fire Temple}} is completed, {{Term|ST|Anjean|link}} gives {{Term|ST|Link}} and {{Term|ST|Princess Zelda|link}} a special unnumbered {{Term|ST|Force Gem}},<ref>{{Cite Guide|quote= Though this is indeed a Force Gem, it's not counted as one of the 20 you can collect to open up optional tracks. Nope, this one's special!|game= ST|publisher= Prima|page= 246}}</ref> which reveals the {{Plural|ST|Spirit Tracks (Object)}} of the {{Term|ST|Sand Realm|link}},<ref>{{Cite|This Force Gem will serve that very purpose. It will open tracks into the desert.|Anjean|ST}}</ref> as thanks for all they have done for the kingdom.<ref name="Anjean"/> | |||
{{Clear}} | |||
====List of {{Plural|ST|Force Gem}}==== | |||
{| class="wikitable sortable" | {| class="wikitable sortable" | ||
! Number{{Note|According to {{Guide|ST|Prima}}.<ref>{{Cite Guide|quote= |game= ST|publisher= |page= 311}}</ref> They are not numbered in-game, nor are they even stored on the {{Term|ST|Collection|link}} screen.}} | ! Number{{Note|According to {{Guide|ST|Prima}}.<ref>{{Cite Guide|quote= |game= ST|publisher= Prima|page= 311}}</ref> They are not numbered in-game, nor are they even stored on the {{Term|ST|Collection|link}} screen.}} | ||
! Giver | ! Giver | ||
! Event | ! Event | ||
| Line 73: | Line 110: | ||
! Realm Affected | ! Realm Affected | ||
! class="unsortable" | New Access | ! class="unsortable" | New Access | ||
! Prerequisites | |||
|- | |- | ||
| data-sort-value="1"| {{Term|ST|Force Gem 1|link}} | | data-sort-value="1"| {{Term|ST|Force Gem 1|link}} | ||
| Line 80: | Line 118: | ||
| {{Term|ST|Ocean Sanctuary|link}} | | {{Term|ST|Ocean Sanctuary|link}} | ||
| {{Key|1}}{{Term|ST|Forest Realm|link}} | | {{Key|1}}{{Term|ST|Forest Realm|link}} | ||
| {{Term|ST|Warp Gate B|link}}<br>{{Term|ST|Grass Rabbit 4|link}} | | {{Term|ST|Warp Gate B|link}}<br/>{{Term|ST|Grass Rabbit 4|link}} | ||
| data-sort-value="0"| — | |||
|- | |- | ||
| data-sort-value="2"| {{Term|ST|Force Gem 2|link}} | | data-sort-value="2"| {{Term|ST|Force Gem 2|link}} | ||
| {{Term|ST| | | {{Term|ST|Orca (Spirit Tracks)|link}} | ||
| {{Term|ST|Passenger|link}} | | {{Term|ST|Passenger|link}}: {{Term|ST|Dovok|link}} | ||
| {{Term|ST|Whittleton|link}} | | {{Term|ST|Whittleton|link}} | ||
| {{Term|ST|Papuchia Village|link}} | | {{Term|ST|Papuchia Village|link}} | ||
| {{Key|1}}{{Term|ST|Forest Realm|link}} | | {{Key|1}}{{Term|ST|Forest Realm|link}} | ||
| {{Plural|ST|Grass Rabbit|link}} 5 and 6 | | {{Plural|ST|Grass Rabbit|link}} 5 and 6 | ||
| data-sort-value="2"| Complete the {{Term|ST|Ocean Temple|link}} | |||
|- | |- | ||
| data-sort-value="3"| {{Term|ST|Force Gem 3|link}} | | data-sort-value="3"| {{Term|ST|Force Gem 3|link}} | ||
| Line 97: | Line 137: | ||
| {{Key|1}}{{Term|ST|Forest Realm|link}} | | {{Key|1}}{{Term|ST|Forest Realm|link}} | ||
| {{Plural|ST|Grass Rabbit|link}} 8 and 9 | | {{Plural|ST|Grass Rabbit|link}} 8 and 9 | ||
| data-sort-value="2"| Complete the {{Term|ST|Ocean Temple|link}} | |||
|- | |- | ||
| data-sort-value="4"| {{Term|ST|Force Gem 4|link}} | | data-sort-value="4"| {{Term|ST|Force Gem 4|link}} | ||
| Line 105: | Line 146: | ||
| {{Key|1}}{{Term|ST|Forest Realm|link}} | | {{Key|1}}{{Term|ST|Forest Realm|link}} | ||
| Shortcut between {{Term|ST|Castle Town|link}} and {{Term|ST|Forest Temple|link}} | | Shortcut between {{Term|ST|Castle Town|link}} and {{Term|ST|Forest Temple|link}} | ||
| data-sort-value="2"| Complete the {{Term|ST|Ocean Temple|link}} | |||
|- | |- | ||
| data-sort-value="5"| {{Term|ST|Force Gem 5|link}} | | data-sort-value="5"| {{Term|ST|Force Gem 5|link}} | ||
| Line 112: | Line 154: | ||
| {{Term|ST|Wellspring Station|link}} | | {{Term|ST|Wellspring Station|link}} | ||
| {{Key|2}}{{Term|ST|Snow Realm|link}} | | {{Key|2}}{{Term|ST|Snow Realm|link}} | ||
| {{Term|ST|Warp Gate C|link}}<br>Eastern link to {{Term|ST|Forest Realm|link}} | | {{Term|ST|Warp Gate C|link}}<br/>Eastern link to {{Term|ST|Forest Realm|link}} | ||
| data-sort-value="1"| Perform {{Term|ST|Lokomo Song|link}} with {{Term|ST|Carben|link}} | |||
|- | |- | ||
| data-sort-value="6"| {{Term|ST|Force Gem 6|link}} | | data-sort-value="6"| {{Term|ST|Force Gem 6|link}} | ||
| {{Term|ST|Goron|link}} | | {{Term|ST|Goron|link}} (near rail platform) | ||
| {{Term|ST|Passenger|link}} | | {{Term|ST|Passenger|link}} | ||
| {{Term|ST|Goron Village|link}} | | {{Term|ST|Goron Village|link}} | ||
| {{Term|ST|Anouki Village|link}} | | {{Term|ST|Anouki Village|link}} | ||
| {{Key|2}}{{Term|ST|Snow Realm|link}} | | {{Key|2}}{{Term|ST|Snow Realm|link}} | ||
| {{Term|ST|Warp Gate D|link}}<br>{{Plural|ST|Snow Rabbit|link}} 8 and 9 | | {{Term|ST|Warp Gate D|link}}<br/>{{Plural|ST|Snow Rabbit|link}} 8 and 9 | ||
| data-sort-value="5"| Complete the {{Term|ST|Fire Temple|link}} | |||
|- | |- | ||
| data-sort-value="7"| {{Term|ST|Force Gem 7|link}} | | data-sort-value="7"| {{Term|ST|Force Gem 7|link}} | ||
| Line 129: | Line 173: | ||
| {{Key|2}}{{Term|ST|Snow Realm|link}} | | {{Key|2}}{{Term|ST|Snow Realm|link}} | ||
| Northern link to {{Term|ST|Fire Realm|link}} | | Northern link to {{Term|ST|Fire Realm|link}} | ||
| data-sort-value="6"| Obtain {{Term|ST|Force Gem 6|link}} | |||
|- | |- | ||
| data-sort-value="8"| {{Term|ST|Force Gem 8|link}} | | data-sort-value="8"| {{Term|ST|Force Gem 8|link}} | ||
| {{Term|ST|Goron|link}} | | {{Term|ST|Goron|link}} (from eastern home) | ||
| {{Term|ST|Cargo|link}}: [[File:ST Mega Ice Icon.png|16px|link=Mega Ice]] ({{Exp|Minimum required at destination|10}}) | | {{Term|ST|Cargo|link}}: [[File:ST Mega Ice Icon.png|16px|link=Mega Ice]] ({{Exp|Minimum required at destination|10}}) | ||
| {{Term|ST|Wellspring Station|link}} | | {{Term|ST|Wellspring Station|link}} | ||
| {{Term|ST|Goron Village|link}} | | {{Term|ST|Goron Village|link}} | ||
| {{Key|4}}{{Term|ST|Fire Realm|link}} | | {{Key|4}}{{Term|ST|Fire Realm|link}} | ||
| {{Term|ST|Warp Gate F|link}}<br>{{Term|ST|Desert Rabbit 1|link}}<br>Western link to {{Term|ST|Ocean Realm|link}} through {{Term|ST|Sand Realm|link}} | | {{Term|ST|Warp Gate F|link}}<br/>{{Term|ST|Desert Rabbit 1|link}}<br/>Western link to {{Term|ST|Ocean Realm|link}} through {{Term|ST|Sand Realm|link}} | ||
| data-sort-value="4"| Clear the {{Plural|ST|Lava Geyser|link}} in {{Term|ST|Goron Village|link}} | |||
|- | |- | ||
| data-sort-value="9"| {{Term|ST|Force Gem 9|link}} | | data-sort-value="9"| {{Term|ST|Force Gem 9|link}} | ||
| Line 145: | Line 191: | ||
| {{Key|1}}{{Term|ST|Forest Realm|link}} | | {{Key|1}}{{Term|ST|Forest Realm|link}} | ||
| Shortcut from {{Term|ST|Forest Temple|link}} to {{Term|ST|Warp Gate A}} in {{Term|ST|Snow Realm|link}} | | Shortcut from {{Term|ST|Forest Temple|link}} to {{Term|ST|Warp Gate A}} in {{Term|ST|Snow Realm|link}} | ||
| data-sort-value="4"| Clear the {{Plural|ST|Lava Geyser|link}} in {{Term|ST|Goron Village|link}} | |||
|- | |- | ||
| data-sort-value="10"| {{Term|ST|Force Gem 10|link}} | | data-sort-value="10"| {{Term|ST|Force Gem 10|link}} | ||
| {{Term|ST|Yeko|link}} | | {{Term|ST|Yeko|link}} | ||
| style="white-space: nowrap;" | {{Term|ST|Cargo|link}}: [[File:ST Lumber Icon.png|16px|link=Lumber]] ({{Exp|Minimum required at destination| | | style="white-space: nowrap;" | {{Term|ST|Cargo|link}}: [[File:ST Lumber Icon.png|16px|link=Lumber]] ({{Exp|Minimum required at destination|15}})<br/>{{Term|ST|Passenger|link}}: {{Term|ST|Kenzo|link}} | ||
| {{Term|ST|Whittleton|link}} (for Lumber)<br>{{Term|ST|Trading Post|link}} (for Kenzo) | | {{Term|ST|Whittleton|link}} (for Lumber)<br/>{{Term|ST|Trading Post|link}} (for Kenzo) | ||
| {{Term|ST|Anouki Village|link}} | | {{Term|ST|Anouki Village|link}} | ||
| {{Key|2}}{{Term|ST|Snow Realm|link}} | | {{Key|2}}{{Term|ST|Snow Realm|link}} | ||
| {{Term|ST|Snowdrift Station|link}}<br>{{Term|ST|Snow Rabbit 10|link}} | | {{Term|ST|Snowdrift Station|link}}<br/>{{Term|ST|Snow Rabbit 10|link}} | ||
| data-sort-value="3"| Obtain a {{Term|ST|Freight Car|link}} {{Note|{{Term|ST|Kenzo}} can be transported after performing the {{Term|ST|Lokomo Song}} with {{Term|ST|Carben}}.}} | |||
|- | |- | ||
| data-sort-value="11"| {{Term|ST|Force Gem 11|link}} | | data-sort-value="11"| {{Term|ST|Force Gem 11|link}} | ||
| Line 161: | Line 209: | ||
| {{Key|1}}{{Term|ST|Forest Realm|link}} | | {{Key|1}}{{Term|ST|Forest Realm|link}} | ||
| Shortcut from {{Term|ST|Hyrule Castle Town|link}} to [[Bridge Worker's Home]] in {{Term|ST|Snow Realm}} | | Shortcut from {{Term|ST|Hyrule Castle Town|link}} to [[Bridge Worker's Home]] in {{Term|ST|Snow Realm}} | ||
| data-sort-value="4"| Clear the {{Plural|ST|Lava Geyser|link}} in {{Term|ST|Goron Village|link}} | |||
|- | |- | ||
| data-sort-value="12"| {{Term|ST|Force Gem 12|link}} | | data-sort-value="12"| {{Term|ST|Force Gem 12|link}} | ||
| {{Term|ST|Lucia|link}} | | {{Term|ST|Lucia|link}} | ||
| {{Term|ST|Cargo|link}}: [[File:ST | | {{Term|ST|Cargo|link}}: [[File:ST Toboni Icon.png|16px|link=Fish]] ({{Exp|Minimum required at destination|10}}) | ||
| {{Term|ST|Papuchia Village|link}} | | {{Term|ST|Papuchia Village|link}} | ||
| [[Hyrule Castle Town]] | | [[Hyrule Castle Town]] | ||
| {{Key|1}}{{Term|ST|Forest Realm|link}} | | {{Key|1}}{{Term|ST|Forest Realm|link}} | ||
| {{Term|ST|Grass Rabbit 10|link}}<br>{{Term|ST|Ocean Rabbit 8|link}}<br>Link to {{Term|ST|Ocean Realm|link}}{{Note|The tracks added by {{Term|ST|Force Gem 12}} lead to a dead-end in the {{Term|ST|Ocean Realm}} that links up to the tracks from {{Term|ST|Force Gem 16}}.}} | | {{Term|ST|Grass Rabbit 10|link}}<br/>{{Term|ST|Ocean Rabbit 8|link}}<br/>Link to {{Term|ST|Ocean Realm|link}}{{Note|The tracks added by {{Term|ST|Force Gem 12}} lead to a dead-end in the {{Term|ST|Ocean Realm}} that links up to the tracks from {{Term|ST|Force Gem 16}}.}} | ||
| data-sort-value="3"| Obtain a {{Term|ST|Freight Car|link}} | |||
|- | |- | ||
| data-sort-value="13"| {{Term|ST|Force Gem 13|link}} | | data-sort-value="13"| {{Term|ST|Force Gem 13|link}} | ||
| Line 177: | Line 227: | ||
| {{Key|1}}{{Term|ST|Forest Realm|link}} | | {{Key|1}}{{Term|ST|Forest Realm|link}} | ||
| {{Term|ST|Warp Gate E|link}} | | {{Term|ST|Warp Gate E|link}} | ||
| data-sort-value="3"| Obtain a {{Term|ST|Freight Car|link}} | |||
|- | |- | ||
| data-sort-value="14"| {{Term|ST|Force Gem 14|link}} | | data-sort-value="14"| {{Term|ST|Force Gem 14|link}} | ||
| {{Term|ST|Steem|link}} | | {{Term|ST|Steem|link}} | ||
| {{Term|ST|Cargo|link}} | | {{Term|ST|Cargo|link}}: [[File:ST Vessel Icon.png|16px|link=Vessel]] | ||
| {{Term|ST|Papuchia Village|link}} | | {{Term|ST|Papuchia Village|link}} | ||
| [[Snow Sanctuary]] | | [[Snow Sanctuary]] | ||
| {{Key|2}}{{Term|ST|Snow Realm|link}} | | {{Key|2}}{{Term|ST|Snow Realm|link}} | ||
| [[Slippery Station]] | | [[Slippery Station]] | ||
| data-sort-value="3"| Obtain a {{Term|ST|Freight Car|link}} | |||
|- | |- | ||
| data-sort-value="15"| {{Term|ST|Force Gem 15|link}} | | data-sort-value="15"| {{Term|ST|Force Gem 15|link}} | ||
| Line 192: | Line 244: | ||
| [[Hyrule Castle Town]] | | [[Hyrule Castle Town]] | ||
| {{Key|4}}{{Term|ST|Fire Realm|link}} | | {{Key|4}}{{Term|ST|Fire Realm|link}} | ||
| [[Disorientation Station]]<br>{{Term|ST|Mountain Rabbit 9|link}} | | [[Disorientation Station]]<br/>{{Term|ST|Mountain Rabbit 9|link}} | ||
| data-sort-value="5"| Complete the {{Term|ST|Fire Temple|link}} | |||
|- | |- | ||
| data-sort-value="16"| {{Term|ST|Force Gem 16|link}} | | data-sort-value="16"| {{Term|ST|Force Gem 16|link}} | ||
| Line 200: | Line 253: | ||
| [[Papuchia Village]] | | [[Papuchia Village]] | ||
| {{Key|3}}{{Term|ST|Ocean Realm|link}} | | {{Key|3}}{{Term|ST|Ocean Realm|link}} | ||
| [[Pirate Hideout]]<br>Shortcut from [[Pirate Hideout]] to {{Term|ST|Forest Realm|link}} via tracks from {{Term|ST|Force Gem 12}} | | [[Pirate Hideout]]<br/>Shortcut from [[Pirate Hideout]] to {{Term|ST|Forest Realm|link}} via tracks from {{Term|ST|Force Gem 12}} | ||
| data-sort-value="5"| Complete the {{Term|ST|Fire Temple|link}} | |||
|- | |- | ||
| data-sort-value="17"| {{Term|ST|Force Gem 17|link}} | | data-sort-value="17"| {{Term|ST|Force Gem 17|link}} | ||
| Line 208: | Line 262: | ||
| [[Papuchia Village]] | | [[Papuchia Village]] | ||
| {{Key|3}}{{Term|ST|Ocean Realm|link}} | | {{Key|3}}{{Term|ST|Ocean Realm|link}} | ||
| {{Term|ST|Warp Gate G|link}}<br>{{Term|ST|Ocean Rabbit 9|link}}<br>Shortcut between {{Term|ST|Ocean Sanctuary|link}} and {{Term|ST|Ocean Floor|link}} | | {{Term|ST|Warp Gate G|link}}<br/>{{Term|ST|Ocean Rabbit 9|link}}<br/>Shortcut between {{Term|ST|Ocean Sanctuary|link}} and {{Term|ST|Ocean Floor|link}}<br/>Shortcut between {{Term|ST|Pirate Hideout|link}} and {{Term|ST|Ocean Floor}} | ||
| data-sort-value="6"| Obtain {{Term|ST|Force Gem 16|link}} | |||
|- | |- | ||
| data-sort-value="18"| {{Term|ST|Force Gem 18|link}} | | data-sort-value="18"| {{Term|ST|Force Gem 18|link}} | ||
| {{Term|ST|Ferrus|link}} | | {{Term|ST|Ferrus|link}} | ||
| {{Term|ST|Passenger|link}} | | {{Term|ST|Passenger|link}} | ||
| [[Fire Realm]] tracks next to [[ | | [[Fire Realm]] tracks next to [[Fire Temple]] | ||
| [[Ocean Temple]] | | [[Ocean Temple]] | ||
| {{Key|4}}{{Term|ST|Fire Realm|link}} | | {{Key|4}}{{Term|ST|Fire Realm|link}} | ||
| [[Dark Ore Mine]]<br>Eastern link to {{Term|ST|Sand Realm|link}} | | [[Dark Ore Mine]]<br/>Eastern link to {{Term|ST|Sand Realm|link}} | ||
| data-sort-value="8"| Obtain {{Term|ST|Force Gem 11|link}}<br/>Complete the {{Term|ST|Sand Temple|link}}, then enter the {{Term|ST|Tower of Spirits|link}} | |||
|- | |- | ||
| data-sort-value="19"| {{Term|ST|Force Gem 19|link}} | | data-sort-value="19"| {{Term|ST|Force Gem 19|link}} | ||
| Line 224: | Line 280: | ||
| {{Term|ST|Trading Post|link}} | | {{Term|ST|Trading Post|link}} | ||
| {{Key|3}}{{Term|ST|Ocean Realm|link}} | | {{Key|3}}{{Term|ST|Ocean Realm|link}} | ||
| [[Lost at Sea Station]]<br>{{Term|ST|Ocean Rabbit 10|link}} | | [[Lost at Sea Station]]<br/>{{Term|ST|Ocean Rabbit 10|link}} | ||
| data-sort-value="9"| Obtain {{Term|ST|Force Gem 18|link}} | |||
|- | |- | ||
| data-sort-value="20"| {{Term|ST|Force Gem 20|link}} | | data-sort-value="20"| {{Term|ST|Force Gem 20|link}} | ||
| Line 232: | Line 289: | ||
| [[Sand Sanctuary]] | | [[Sand Sanctuary]] | ||
| {{Key|5}}{{Term|ST|Sand Realm|link}} | | {{Key|5}}{{Term|ST|Sand Realm|link}} | ||
| [[Ends of the Earth Station]]<br>{{Term|ST|Mountain Rabbit 10|link}} | | [[Ends of the Earth Station]]<br/>{{Term|ST|Mountain Rabbit 10|link}} | ||
| data-sort-value="7"| Obtain the {{Term|ST|Sand Wand|link}} | |||
|} | |} | ||
{{Term|ST|Battle Mode| | ===={{Term|ST|Battle Mode}}==== | ||
{{Main|Battle Mode}} | |||
{{Stub|ST}} | |||
{{Term|ST|Battle Mode}} has players (as the {{Plural|ST|Links|link}}) collecting as many {{Plural|ST|Force Gem}} as they can within a time limit. | |||
==Trivia== | ==Trivia== | ||
| Line 241: | Line 302: | ||
==Nomenclature== | ==Nomenclature== | ||
{{ | {{Nomenclature}} | ||
==Gallery== | ==Gallery== | ||
<gallery> | <gallery> | ||
File:Force Gem Green.png| | File:Force Gem Green.png|Artwork of a green Force Gem from {{FSA|-}} | ||
File:Force Gem Blue.png| | File:Force Gem Blue.png|Artwork of a blue Force Gem from {{FSA|-}} | ||
File:Force Gem Red.png| | File:Force Gem Red.png|Artwork of a red Force Gem from {{FSA|-}} | ||
File:FSA Purple Force Gem Artwork.png| | File:FSA Purple Force Gem Artwork.png|Artwork of a purple Force Gem from {{FSA|-}} | ||
File:Force Gem.png| | File:FSA Tingle Artwork.png|Artwork of {{Term|FSA|Tingle}} holding a Force Gem from {{FSA|-}} | ||
File:Gem.png| | File:ST Battle Mode Artwork.png|Artwork of the [[Links]] with Force Gems from the [[Battle Mode]] in {{ST|-}} | ||
File:ST Force Gem Model 2.png|The Force Gem from the Forest Temple in {{ST|-}} | |||
File:Snow Temple Force Gem.png|The Force Gem from the Snow Temple in {{ST|-}} | |||
File:Fire Temple Force Gem.png|The Force Gem from the Fire Temple in {{ST|-}} | |||
File:Ocean Temple Force Gem.png|The Force Gem from the Ocean Temple in {{ST|-}} | |||
</gallery> | </gallery> | ||
{{Notes}} | {{Notes}} | ||
{{Ref}} | {{Ref}} | ||
{{ | |||
{{ST Force Gems}} | |||
{{Categories | |||
|Currencies, Force Gems, Jewels, Powers, Quest Items, Pickups | |||
|items= FSA, PH, ST | |||
|side-quests= ST | |||
}} | |||
Latest revision as of 00:15, 4 March 2024
Force Gems are recurring Items and Objects in The Legend of Zelda series.[1]
Location and Uses
Force Gems appear as triangular bipyramid-shaped jewels that are found in a variety of sizes and colors. Their roles greatly vary between games. They are said to be physical manifestations of the Force, the sacred power that dwells in every living being.[2][3]
Four Swords Adventures
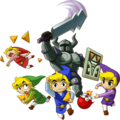
In Four Swords Adventures, the Links need to collect 2,000 Force Gems in a given Level to empower the Four Sword, which has lost its power because of Vaati's magic.[4] Once empowered, it can break Vaati's Dark Barrier at the end of each Level.[5][6] Often, Levels will have an area that gives the Links an opportunity to get many Force Gems at once; usually, this involves defeating many Enemies. Doing this without taking damage awards combo points, which will cause more Force Gems to fall from the defeated the Enemies.[7] In some cases, the Force Gems are used as currency.[8] Sometimes, if big Force Gems are lying around, Tingle will appear and attempt to take them before Link can reach them; Link can throw things at him to deter him.[citation needed]
Force Gems appear throughout each Level, found on Enemies, under Rocks, frozen in Ice, and more.[9] Like Rupees in most games in the series, their size and color determine their value.
| Force Gem | Value | Force Gem | Value | Force Gem | Value |
|---|---|---|---|---|---|
Small Green |
1 | Big Green |
100 | Giant Green |
1,000 |
Small Blue |
5 | Big Blue |
150 | Giant Blue |
1,500 |
Small Red |
20 | Big Red |
200 | Giant Red |
2,000 |
Small Purple |
50 | Big Purple |
300 | Giant Purple |
3,000 |
Rare Force Gems
- Color alternating Force Gem: Its value depends on which color it is when obtained.
- Force Soldier: A large green Force Gem with a sword and legs. If Link destroys it, it will become a big green Force Gem. However, if Link does not defeat it in time and it self destructs, its value will be reduced to one Force Gem.
Force Gem Thieves
- Hinoxes will shake great amounts of Force Gems from Link while he is in their grasp.
- Wizzrobes can continuously suck Force Gems from Link while dodging him at great ease and speed.
- Force Likes will suck Force Gems from Link.
- When Link takes significant damage, Force Gems will fall from him.
Phantom Hourglass

In Phantom Hourglass, Force Gems are gold-colored objects found in the Temple of the Ocean King. Three of them must be placed on pedestals inside a Safe Zone in order to create a Triforce symbol that unlocks a door to the next floor. Just like with a Boss Key, carrying a Force Gem slows Link down and prevents him from attacking or defending himself.[10]
Force Gems are used on floor B3, where each one is found inside a Treasure Chest, and on floor B12, where one Force Gem is carried by a Phantom that patrols the room, while the other two are found in Treasure Chests that cause new Phantoms to appear when opened. Additionally on the latter floor, placing a Force Gem on its pedestal causes a Wizzrobe to spawn.
On floors B7 and B8, the Square, Round, and Triangle Crystals play the same role as the Force Gems, though they must all be carried to a Safe Zone on Floor B9. At one point in the game, Oshus explains that the Sands of Hours are made of Force Gems.[11]
Battle Mode
The goal of Battle Mode is for each of the Links to collect as many of the Force Gems spread around the field as possible. Small Force Gems are worth one point, regular-sized Force Gems are worth five points, and large Force Gems are worth 15 points; the larger a Force Gem, the heavier it is to carry. The colors of the Force Gems are also changed during gameplay; carrying one into a red or blue Safe Zone will change its color respectively and add its value to that Link's score. Neutral Safe Zones will turn red or blue Force Gems back to gold and subtract their values from the scores.
Spirit Tracks

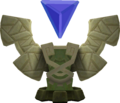
Force Gems are integral to the plot of Spirit Tracks. They appear above a Goddess Crest-like arch as the symbol of the Spirits of Good, which is seen in numerous places throughout New Hyrule; notably, on the Engine of the Spirit Train, on the Lokomo' vehicles, on the completed Rail Map, and atop the Tower of Spirits. The Shield is studded with an ornamental Force Gem, and the Lokomo Sword has one in its pommel. One of each pair of Spacetime Gates is adorned with a Force Gem that changes from green to gold when shot with the Cannon, thereby activating that pair.

When each of the Bosses of the Forest, Snow, Ocean, and Fire Temples are defeated, in their wake appears a large Force Gem, colored green, white, blue, and red respectively. A mechanical pedestal rises then out of the ground and the Force Gem lowers onto it, creating a seal that re-energizes the Spirit Tracks leading back to the Tower of Spirits and restores a portion of the broken tower, strengthening the bond that imprisons the Demon King, Malladus.[12]

As Items, gold-colored Force Gems appear when Link helps certain characters.[13] The energy in a person's heart is said to be similar to that which powers the Spirit Tracks, and when that person is very happy or grateful, their energy rises and produces a Force Gem, which restores yet more of the Spirit Tracks.[14] These new sections of tracks create shortcuts that ease travel aboard the Spirit Train, and grant access to new Stations, Rabbits, and Spacetime Gates.
There are 21 Force Gems for Link to collect by transporting Passengers or Cargo from one location to another; all but three are optional. The first Force Gem is given by Carben after Link drives him from Papuchia Village to the Ocean Sanctuary, defending him from an onslaught of Pirates along the way.[15] Force Gem 5 must also be collected by driving Noko of the Anouki to the Wellspring Station, as this allows him to make the Mega Ice that Link requires during his adventure. After the Fire Temple is completed, Anjean gives Link and Princess Zelda a special unnumbered Force Gem,[16] which reveals the Spirit Tracks of the Sand Realm,[17] as thanks for all they have done for the kingdom.[3]
List of Force Gems
Battle Mode
Battle Mode has players (as the Links) collecting as many Force Gems as they can within a time limit.
Trivia
- Force Gems were inspired by the Piece of Power items from Link's Awakening.[19]
Nomenclature
| Language | Names | Meanings |
|---|---|---|
Japanese | フォース (Fōsu) (PH)[22] | Force |
FrenchCA | Joyau de force (ST)[26] | |
FrenchEU | Gemme de force (ST)[24] | |
German | Force-Kristall (ST)[23] | |
Italian |
| |
SpanishLA | Gema de la fuerza (ST)[25] | |
SpanishEU | Fortianita (ST)[27] | |
| This table was generated using translation pages. To request an addition, please contact a staff member with a reference. | ||
Gallery
-

Artwork of a green Force Gem from Four Swords Adventures
-

Artwork of a blue Force Gem from Four Swords Adventures
-

Artwork of a red Force Gem from Four Swords Adventures
-

Artwork of a purple Force Gem from Four Swords Adventures
-

Artwork of Tingle holding a Force Gem from Four Swords Adventures
-
Artwork of the Links with Force Gems from the Battle Mode in Spirit Tracks
-

The Force Gem from the Forest Temple in Spirit Tracks
-
The Force Gem from the Snow Temple in Spirit Tracks
-
The Force Gem from the Fire Temple in Spirit Tracks
-
The Force Gem from the Ocean Temple in Spirit Tracks


Notes
- ↑ According to The Legend of Zelda: Spirit Tracks—PRIMA Official Game Guide by Prima Games.[18] They are not numbered in-game, nor are they even stored on the Collection Screen screen.
- ↑ Kenzo can be transported after performing the Song of Restoration with Carben.
- ↑ The tracks added by Force Gem 12 lead to a dead-end in the Ocean Realm that links up to the tracks from Force Gem 16.
References
- ↑ Encyclopedia, Dark Horse Books, pg. 124 (FSA | PH | ST)
- ↑ "The sacred power the gods gave to the world. It's the breath of life itself." (Hyrule Historia, Dark Horse Books, pg. 75)
- ↑ 3.0 3.1 "As I am sure you know, happiness and gratitude create energy. Well, I am deeply grateful to both of you for all of your help. I cannot help you directly, but I can at least give you this Force Gem." — Anjean (Spirit Tracks)
- ↑ "However, Vaati's magic has robbed the Four Sword of its power to vanquish darkness. To return the sword to its full strength, find the source of that power: Force Gems." — Kaepora Gaebora (Four Swords Adventures)
- ↑ "Your goal is to destroy the dark magic barrier at the end of each stage. The only way to destroy the barrier is with the magic Force Gem power of the legendary Four Sword." (Four Swords Adventures manual, pg. 18)
- ↑ "If the Four Sword doesn't have enough power, it cant destroy the barrier. Refer to the Status screen to see how many Force Gems you need before the Four Sword reclaims its power to repel evil." (Four Swords Adventures manual, pg. 19)
- ↑ "Defeat multiple enemies with a single blow to get more Force Gems." — N/A (Four Swords Adventures)
- ↑ "Today, my aid can be yours for a paltry sum! How about a mere... [#] Force Gems!" — Man (Four Swords Adventures)
- ↑ "Force Gems can be found all over Hyrule. These gems are the source of the Four Sword's power. They appear after you defeat enemies or cut down grass and bushes." (Four Swords Adventures manual, pg. 18)
- ↑ The Legend of Zelda: Phantom Hourglass—Prima Official Game Guide, Prima Games, pg. 15
- ↑ "It is said to be made of Force Gems of the great spirit, the Ocean King." — Oshus (Phantom Hourglass)
- ↑ "At the top of this tower is your body. The Demon King's spirit is also there. To prevent him from possessing your body, you must fortify his prison. To do this, restore the energy between the temples and this tower. In other words... Restore the tracks between here and the temples." — Anjean (Spirit Tracks)
- ↑ "You plan to continue your journey by train, do you not? Then you must always go forth with people's hearts in your mind. When you make people happy, their spirits emit energy. When this energy builds, new tracks appear. This should be very useful for your journey." — Carben (Spirit Tracks)
- ↑ "Here, this is for you. ...You look confused. I'll explain, Link. Every living being possesses an energy... And this energy is similar to the energy that powers the Spirit Tracks. When a person's heart is especially happy or grateful... His energy levels become particularly strong." — Carben (Spirit Tracks)
- ↑ "Energy lives in the hearts of everyone, even feeble old fellows like me... I don't express it well, but the bottom line is that I appreciate your help... Here, please take this. It belongs to you." — Carben (Spirit Tracks)
- ↑ "Though this is indeed a Force Gem, it's not counted as one of the 20 you can collect to open up optional tracks. Nope, this one's special!" (The Legend of Zelda: Spirit Tracks—PRIMA Official Game Guide, Prima Games, pg. 246)
- ↑ "This Force Gem will serve that very purpose. It will open tracks into the desert." — Anjean (Spirit Tracks)
- ↑ The Legend of Zelda: Spirit Tracks—PRIMA Official Game Guide, Prima Games, pg. 311
- ↑ Encyclopedia, Dark Horse Books, pg. 267
- ↑ "Per far sì che torni com'era, devi cercare la fonte del suo potere: le Gemme Forza." — Kaepora Gaebora (Four Swords Adventures, Italian localization)
- ↑ "Hai ricevuto una Gemma della Forza! La Stele sprigiona forte luce!" — N/A (Spirit Tracks)
- ↑ フォースを見つけた!
こっそり持ち運ぼう! (N/A) - ↑ "Du hast einen Force-Kristall erhalten! Die Waldtafel leuchtet auf!" — N/A (Spirit Tracks)
- ↑ "Vous obtenez une gemme de force, signe de gratitude! La stèle sylvestre se met à briller!" — N/A (Spirit Tracks)
- ↑ "¡Has encontrado una gema de la fuerza! ¡La Litografía de los Bosques está brillando!" — N/A (Spirit Tracks)
- ↑ "Vous avez obtenez un joyau de force, signe de gratitude! Le glyphe de la forêt s'est mis à briller!" — N/A (Spirit Tracks)
- ↑ "¡Has recibido una fortianita! ¡La Litografía de los Bosques está brillando!" — N/A (Spirit Tracks)