Scenario: Difference between revisions
m (Text replacement - "HW Lanayru Gorge 3.png" to "HW Valley of Seers 3.png") |
mNo edit summary |
||
| (66 intermediate revisions by 22 users not shown) | |||
| Line 1: | Line 1: | ||
{{Noncanon}} | {{Noncanon}} | ||
{{Term/Store|Scenario|Scenarios|Series, HW, HWL, HWDE|plural}} are story arc | {{Infobox Mechanic | ||
|image= File:HWAoC Scenario.png | |||
|caption= | |||
|game= HW, HWL, HWDE | |||
|other= | |||
|purpose= Playing through the main story | |||
|related= {{Term|Series|Adventure Mode|link}} | |||
}} | |||
{{Term/Store|Scenario|Scenarios|Series, HW, HWL, HWDE|plural}} are recurring story arc battles in {{TLoZ|Series}}.<ref>{{Cite Guide|quote= |game= HWL |publisher= Prima |page= 4}}</ref> | |||
==Overview== | ==Overview== | ||
{{Plural| | ==={{HW|-}}=== | ||
In {{HW}}, {{Plural|HWDE|Scenario}} follow the plot of the {{Term|HWDE|War Across the Ages|link}}. There are a total of 23 {{Plural|HWDE|Scenario}} across eight arcs in {{HW}} and 32 {{Plural|HWDE|Scenario}} across 10 arcs in {{HW|L}} and {{HW|DE}}. Completing one {{Term|HWDE|Scenario}} will unlock the following {{Term|HWDE|Scenario}} in the story.<ref name="Prima">{{Cite Guide|quote= |game= HWL |publisher= Prima |page= 4}}</ref> The {{Plural|HWDE|Scenario}} can be accessed from the {{Term|HWDE|Select Scenario|link}} menu in {{Term|HWDE|Legend Mode|link}} or {{Term|HWDE|Free Mode|link}}. Each {{Term|HWDE|Scenario}} can only be played by certain {{Plural|HWDE|Warrior|link}} assigned to the {{Term|HWDE|Scenario}}.<ref name="Prima"/> However, in {{Term|HWDE|Free Mode}}, any {{Plural|HWDE|Warrior}} can be used to play a {{Term|HWDE|Scenario}}.<ref>{{Cite|Replay any scenario with any unlocked warrior.|Select Mode|HWDE}}</ref> A {{Term|HWDE|Scenario}} can only be played in {{Term|HWDE|Free Mode}} if it has been previously beaten in {{Term|HWDE|Legend Mode}}. {{Plural|HWDE|Scenario}} can be played in any four {{Term|HWDE|Difficulty|link}} levels: Easy, Normal, Hard, and {{Term|HWDE|Hero Mode|link|display= Hero}}.<ref>{{Cite|{{Icon|HWDE X}} Change Difficulty|Select Scenario|HWDE}}</ref> {{Term|HWDE|Hero Mode}} is only unlocked after completing every {{Term|HWDE|Scenario}} in {{Term|HWDE|Legend Mode}}. Every {{Term|HWDE|Sub-Weapon|link}} can be unlocked in different {{Plural|HWDE|Scenario}}. | |||
===List of Scenarios=== | Every {{Term|HWDE|Scenario}} will have a {{Term|HWDE|Heart Container|link}} and a {{Term|HWDE|Piece of Heart|link}} for a specific {{Term|HWDE|Warrior}} hidden around the {{Term|HWDE|Stage|link}}.<ref>{{Cite|You can check information on heart containers and pieces of heart hidden on a given battlefield from the Select Scenario screen. However, each will only appear when using a specific warrior.|Tutorial|HWDE}}</ref> Every {{Term|HWDE|Scenario}} will also have two {{Plural|HWDE|Gold Skulltula|link}} that can be found after completing certain objectives.<ref>{{Cite|Gold Skulltulas will only appear {{Color|HWDE Green|within the spider's web}} on the map once you fulfill certain battle conditions. They flee after a set period of time has passed, so move quickly!|Tutorial|HWDE}}</ref> The first {{Term|HWDE|Gold Skulltula}} will always be revealed after killing 1,000 {{Plural|HWDE|Enemy|link}} with any {{Term|HWDE|Warrior}}, while the second {{Term|HWDE|Gold Skulltula}} will vary in objectives depending on the {{Term|HWDE|Scenario}}. The second {{Term|HWDE|Gold Skulltula}} will only be able to be defeated in a {{Term|HWDE|Scenario}} after {{Term|HWDE|Hero Mode}} has been unlocked.{{Fact|HWDE}} The objectives needed to make a {{Term|HWDE|Gold Skulltula}} appear in a {{Term|HWDE|Scenario}} will be displayed on the {{Term|HWDE|Select Scenario}} menu or the {{Term|HWDE|Check Skulltulas|link}} screen in the {{Term|HWDE|Warrior Info|link}} menu before starting a {{Term|HWDE|Scenario}}.<ref>{{Cite|You can check information on Gold Skulltulas hidden on a given battlefield from the Select Scenario screen. However, some only appear when using specific warriors or weapons.|Tutorial|HWDE}}</ref> | ||
{{Clear}} | |||
====List of Scenarios==== | |||
{| class="wikitable sortable" style="text-align:center; width:100%;" | {| class="wikitable sortable" style="text-align:center; width:100%;" | ||
|- | |- | ||
| Line 14: | Line 26: | ||
!style="width:15%"| Game | !style="width:15%"| Game | ||
|- | |- | ||
| [[File: | | [[File:HWDE The Dragon of the Caves.png|200px|link= The Dragon of the Caves]]<br/>"'''{{Term|HWDE|The Dragon of the Caves|link}}'''" | ||
| {{Term|HWDE|Cia's Tale|link}} | | {{Term|HWDE|Cia's Tale|link}} | ||
| {{Term|HWDE|Eldin Caves|link}} | | {{Term|HWDE|Eldin Caves|link}} | ||
| "{{Term|HWDE|Solidus Cave|link}}" | | "{{Term|HWDE|Solidus Cave|link}}" | ||
| {{ | | All{{Exp|Requires Master Quest Pack DLC in Wii U version, included in HWL and HWDE}} | ||
|- | |- | ||
| [[File: | | [[File:HWDE The Invasion Begins.png|200px|link= The Invasion Begins]]<br/>"'''{{Term|HWDE|The Invasion Begins|link}}'''" | ||
| {{Term|HWDE|Cia's Tale|link}} | | {{Term|HWDE|Cia's Tale|link}} | ||
| {{Term|HWDE|Hyrule Field ( | | {{Term|HWDE|Hyrule Field (Stage)|link}} | ||
| "{{Term|HWDE|Under Siege|link}}" | | {{List|"{{Term|HWDE|Under Siege|link}}"|"{{Term|HWDE|Hyrule Field:1 st|link}}"}} | ||
| {{ | | All{{Exp|Requires Master Quest Pack DLC in Wii U version, included in HWL and HWDE}} | ||
|- | |- | ||
| [[File: | | [[File:HWDE The Armies of Ruin.png|200px|link= The Armies of Ruin]]<br/>"'''{{Term|HWDE|The Armies of Ruin|link}}'''" | ||
| {{Term|HWDE|Prologue|link}} | | {{Term|HWDE|Prologue|link}} | ||
| {{Term|HWDE|Hyrule Field ( | | {{Term|HWDE|Hyrule Field (Stage)|link}} | ||
| "{{Term|HWDE|Under Siege|link}}" | | {{List|"{{Term|HWDE|Under Siege|link}}"|"{{Term|HWDE|Hyrule Field:1 st|link}}"}} | ||
| | | All | ||
|- | |- | ||
| [[File: | | [[File:HWDE The Sheikah Tribesman.png|200px|link= The Sheikah Tribesman]]<br/>"'''{{Term|HWDE|The Sheikah Tribesman|link}}'''" | ||
| {{Term|HWDE|Prologue|link}} | | {{Term|HWDE|Prologue|link}} | ||
| {{Term|HWDE|Eldin Caves|link}} | | {{Term|HWDE|Eldin Caves|link}} | ||
| "{{Term|HWDE|Solidus Cave|link}}" | | "{{Term|HWDE|Solidus Cave|link}}" | ||
| | | All | ||
|- | |- | ||
| [[File: | | [[File:HWDE The Sorceress of the Woods.png|200px|link= The Sorceress of the Woods]]<br/>"'''{{Term|HWDE|The Sorceress of the Woods|link}}'''" | ||
| {{Term|HWDE|Prologue|link}} | | {{Term|HWDE|Prologue|link}} | ||
| {{Term|HWDE|Faron Woods (Hyrule Warriors)|link}} | | {{Term|HWDE|Faron Woods (Hyrule Warriors)|link}} | ||
| "{{Term|HWDE|In the Greenwood|link}}" | | "{{Term|HWDE|In the Greenwood|link}}" | ||
| | | All | ||
|- | |- | ||
| [[File: | | [[File:HWDE The Girl in the Green Tunic.png|200px|link= The Girl in the Green Tunic]]<br/>"'''{{Term|HWDE|The Girl in the Green Tunic|link}}'''" | ||
| {{Term|HWDE|Linkle's Tale|link}} | | {{Term|HWDE|Linkle's Tale|link}} | ||
| {{Term|HWDE|Faron Woods (Hyrule Warriors)|link}} | | {{Term|HWDE|Faron Woods (Hyrule Warriors)|link}} | ||
| "{{Term|HWDE|In the Greenwood|link}}" | | "{{Term|HWDE|In the Greenwood|link}}" | ||
| {{HW|L}} | | {{HW|L}} / {{HW|DE}} | ||
|- | |- | ||
| [[File: | | [[File:HWDE The Sorceress of the Valley.png|200px|link= The Sorceress of the Valley]]<br/>"'''{{Term|HWDE|The Sorceress of the Valley|link}}'''" | ||
| {{Term|HWDE|Prologue|link}} | | {{Term|HWDE|Prologue|link}} | ||
| {{Term|HWDE|Valley of Seers|link}} | | {{Term|HWDE|Valley of Seers|link}} | ||
| "{{Term|HWDE|Eclipse of the Sun|link}}" | | "{{Term|HWDE|Eclipse of the Sun|link}}" | ||
| | | All | ||
|- | |- | ||
| [[File: | | [[File:HWDE The Demon Lord's Plan.png|200px|link= The Demon Lord's Plan]]<br/>"'''{{Term|HWDE|The Demon Lord's Plan|link}}'''" | ||
| {{Term|HWDE|Linkle's Tale|link}} | | {{Term|HWDE|Linkle's Tale|link}} | ||
| {{Term|HWDE|Sealed Grounds (Hyrule Warriors)|link}} | | {{Term|HWDE|Sealed Grounds (Hyrule Warriors)|link}} | ||
| "{{Term|HWDE|Heart of the End|link}}" | | "{{Term|HWDE|Heart of the End|link}}" | ||
| {{HW|L}} | | {{HW|L}} / {{HW|DE}} | ||
|- | |- | ||
| [[File: | | [[File:HWDE The Demon Lord.png|200px|link= The Demon Lord]]<br/>"'''{{Term|HWDE|The Demon Lord|link}}'''" | ||
| {{Term|HWDE|Cia's Tale|link}} | | {{Term|HWDE|Cia's Tale|link}} | ||
| {{Term|HWDE|Skyloft (Stage)|link}} | | {{Term|HWDE|Skyloft (Stage)|link}} | ||
| "{{Term|HWDE|Skyloft:SS|link}}" | | "{{Term|HWDE|Skyloft:SS|link}}" | ||
| {{ | | All{{Exp|Requires Master Quest Pack DLC in Wii U version, included in HWL and HWDE}} | ||
|- | |- | ||
| [[File: | | [[File:HWDE Land in the Sky.png|200px|link= Land in the Sky]]<br/>"'''{{Term|HWDE|Land in the Sky|link}}'''" | ||
| {{Term|HWDE|Skyward Sword ( | | {{Term|HWDE|Skyward Sword (Arc)|link}} | ||
| {{Term|HWDE|Skyloft (Stage)|link}} | | {{Term|HWDE|Skyloft (Stage)|link}} | ||
| "{{Term|HWDE|Skyloft:SS|link}}" | | "{{Term|HWDE|Skyloft:SS|link}}" | ||
| | | All | ||
|- | |- | ||
| [[File: | | [[File:HWDE Sealed Ambition.png|200px]]<br/>"'''{{Term|HWDE|Sealed Ambition|link}}'''" | ||
| {{Term|HWDE|Skyward Sword ( | | {{Term|HWDE|Skyward Sword (Arc)|link}} | ||
| {{Term|HWDE|Sealed Grounds (Hyrule Warriors)|link}} | | {{Term|HWDE|Sealed Grounds (Hyrule Warriors)|link}} | ||
| "{{Term|HWDE|Heart of the End|link}}" | | "{{Term|HWDE|Heart of the End|link}}" | ||
| | | All | ||
|- | |- | ||
| [[File: | | [[File:HWDE Land of Myth.png|200px|link= Land of Myth]]<br/>"'''{{Term|HWDE|Land of Myth|link}}'''" | ||
| {{Term|HWDE|Ocarina of Time ( | | {{Term|HWDE|Ocarina of Time (Arc)|link}} | ||
| {{Term|HWDE|Death Mountain ( | | {{Term|HWDE|Death Mountain (Stage)|link}} | ||
| "{{Term|HWDE|Hammer of Stones|link}}" | | "{{Term|HWDE|Hammer of Stones|link}}" | ||
| | | All | ||
|- | |- | ||
| [[File: | | [[File:HWDE The Water Temple.png|200px|link= The Water Temple]]<br/>"'''{{Term|HWDE|The Water Temple|link}}'''" | ||
| {{Term|HWDE|Ocarina of Time ( | | {{Term|HWDE|Ocarina of Time (Arc)|link}} | ||
| {{Term|HWDE|Lake Hylia ( | | {{Term|HWDE|Lake Hylia (Stage)|link}} | ||
| "{{Term|HWDE|Sequence of Drops|link}}" | | "{{Term|HWDE|Sequence of Drops|link}}" | ||
| | | All | ||
|- | |- | ||
| [[File: | | [[File:HWDE Powers Collide.png|200px|link= Powers Collide]]<br/>"'''{{Term|HWDE|Powers Collide|link}}'''" | ||
| {{Term|HWDE|Linkle's Tale|link}} | | {{Term|HWDE|Linkle's Tale|link}} | ||
| {{Term|HWDE|Lake Hylia ( | | {{Term|HWDE|Lake Hylia (Stage)|link}} | ||
| "{{Term|HWDE|Sequence of Drops|link}}" | | "{{Term|HWDE|Sequence of Drops|link}}" | ||
| {{HW|L}} | | {{HW|L}} / {{HW|DE}} | ||
|- | |- | ||
| [[File: | | [[File:HWDE The Usurper King.png|200px|link= The Usurper King]]<br/>"'''{{Term|HWDE|The Usurper King|link}}'''" | ||
| {{Term|HWDE|Cia's Tale|link}} | | {{Term|HWDE|Cia's Tale|link}} | ||
| {{Term|HWDE|Palace of Twilight (Hyrule Warriors)|link}} | | {{Term|HWDE|Palace of Twilight (Hyrule Warriors)|link}} | ||
| "{{Term|HWDE|Remnant of the Twilight|link}}" | | "{{Term|HWDE|Remnant of the Twilight|link}}" | ||
| {{ | | All{{Exp|Requires Master Quest Pack DLC in Wii U version, included in HWL and HWDE}} | ||
|- | |- | ||
| [[File: | | [[File:HWDE Land of Twilight.png|200px|link= Land of Twilight]]<br/>"'''{{Term|HWDE|Land of Twilight|link}}'''" | ||
| {{Term|HWDE|Twilight Princess ( | | {{Term|HWDE|Twilight Princess (Arc)|link}} | ||
| {{Term|HWDE|Twilight Field|link}} | | {{Term|HWDE|Twilight Field|link}} | ||
| "{{Term|HWDE|Hyrule Field:TP|link}}" | | "{{Term|HWDE|Hyrule Field:TP|link}}" | ||
| | | All | ||
|- | |- | ||
| [[File: | | [[File:HWDE The Shadow King.png|200px|link= The Shadow King]]<br/>"'''{{Term|HWDE|The Shadow King|link}}'''" | ||
| {{Term|HWDE|Twilight Princess ( | | {{Term|HWDE|Twilight Princess (Arc)|link}} | ||
| {{Term|HWDE|Palace of Twilight (Hyrule Warriors)|link}} | | {{Term|HWDE|Palace of Twilight (Hyrule Warriors)|link}} | ||
| "{{Term|HWDE|Remnant of the Twilight|link}}" | | "{{Term|HWDE|Remnant of the Twilight|link}}" | ||
| | | All | ||
|- | |- | ||
| [[File: | | [[File:HWDE The Sacred Sword.png|200px|link= The Sacred Sword]]<br/>"'''{{Term|HWDE|The Sacred Sword|link}}'''" | ||
| {{Term|HWDE|Epilogue|link}} | | {{Term|HWDE|Epilogue|link}} | ||
| {{Term|HWDE|Temple of the Sacred Sword|link}} | | {{Term|HWDE|Temple of the Sacred Sword|link}} | ||
| "{{Term|HWDE|Silent Guardians|link}}" | | "{{Term|HWDE|Silent Guardians|link}}" | ||
| | | All | ||
|- | |- | ||
| [[File: | | [[File:HWDE Her True Self.png|200px|link= Her True Self]]<br/>"'''{{Term|HWDE|Her True Self|link}}'''" | ||
| {{Term|HWDE|Linkle's Tale|link}} | | {{Term|HWDE|Linkle's Tale|link}} | ||
| {{Term|HWDE|Palace of Twilight (Hyrule Warriors)|link}} | | {{Term|HWDE|Palace of Twilight (Hyrule Warriors)|link}} | ||
| "{{Term|HWDE|Remnant of the Twilight|link}}" | | "{{Term|HWDE|Remnant of the Twilight|link}}" | ||
| {{HW|L}} | | {{HW|L}} / {{HW|DE}} | ||
|- | |- | ||
| [[File: | | [[File:HWDE A War of Spirit.png|200px|link= A War of Spirit]]<br/>"'''{{Term|HWDE|A War of Spirit|link}}'''" | ||
| {{Term|HWDE|Epilogue|link}} | | {{Term|HWDE|Epilogue|link}} | ||
| {{Term|HWDE|Temple of Souls|link}} | | {{Term|HWDE|Temple of Souls|link}} | ||
| "{{Term|HWDE|Psychostorm|link}}" | | "{{Term|HWDE|Psychostorm|link}}" | ||
| | | All | ||
|- | |- | ||
| [[File: | | [[File:HWDE Darkness Falls.png|200px|link= Darkness Falls]]<br/>"'''{{Term|HWDE|Darkness Falls|link}}'''" | ||
| {{Term|HWDE|Cia's Tale|link}} | | {{Term|HWDE|Cia's Tale|link}} | ||
| {{Term|HWDE|Valley of Seers|link}} | | {{Term|HWDE|Valley of Seers|link}} | ||
| "{{Term|HWDE|Eclipse of the Sun|link}}" | | "{{Term|HWDE|Eclipse of the Sun|link}}" | ||
| {{ | | All{{Exp|Requires Master Quest Pack DLC in Wii U version, included in HWL and HWDE}} | ||
|- | |- | ||
| [[File: | | [[File:HWDE Shining Beacon.png|200px|link= Shining Beacon]]<br/>"'''{{Term|HWDE|Shining Beacon|link}}'''" | ||
| {{Term|HWDE|Epilogue|link}} | | {{Term|HWDE|Epilogue|link}} | ||
| {{Term|HWDE|Valley of Seers|link}} | | {{Term|HWDE|Valley of Seers|link}} | ||
| "{{Term|HWDE|Eclipse of the Moon|link}}" | | "{{Term|HWDE|Eclipse of the Moon|link}}" | ||
| | | All | ||
|- | |- | ||
| [[File: | | [[File:HWDE Ganondorf's Return.png|200px|link= Ganondorf's Return]]<br/>"'''{{Term|HWDE|Ganondorf's Return|link}}'''" | ||
| {{Term|HWDE|Ganondorf ( | | {{Term|HWDE|Ganondorf (Arc)|link}} | ||
| {{Term|HWDE|Gerudo Desert (Hyrule Warriors)|link}} | | {{Term|HWDE|Gerudo Desert (Hyrule Warriors)|link}} | ||
| "{{Term|HWDE|Sandstream|link}}" | | "{{Term|HWDE|Sandstream|link}}" | ||
| | | All | ||
|- | |- | ||
| [[File: | | [[File:HWDE March of the Demon King.png|200px|link= March of the Demon King]]<br/>"'''{{Term|HWDE|March of the Demon King|link}}'''" | ||
| {{Term|HWDE|Ganondorf ( | | {{Term|HWDE|Ganondorf (Arc)|link}} | ||
| {{Term|HWDE|Valley of Seers|link}} | | {{Term|HWDE|Valley of Seers|link}} | ||
| "{{Term|HWDE|Eclipse of the Sun|link}}" | | "{{Term|HWDE|Eclipse of the Sun|link}}" | ||
| | | All | ||
|- | |- | ||
| [[File: | | [[File:HWDE Battle of the Triforce.png|200px|link= Battle of the Triforce]]<br/>"'''{{Term|HWDE|Battle of the Triforce|link}}'''" | ||
| {{Term|HWDE|Ganondorf ( | | {{Term|HWDE|Ganondorf (Arc)|link}} | ||
| {{Term|HWDE|Hyrule Field ( | | {{Term|HWDE|Hyrule Field (Stage)|link}} | ||
| "{{Term|HWDE|Under Siege|link}}" | | {{List|"{{Term|HWDE|Under Siege|link}}"|"{{Term|HWDE|Hyrule Field:1 st|link}}"}} | ||
| | | All | ||
|- | |- | ||
| [[File: | | [[File:HWDE Enduring Resolve.png|200px|link= Enduring Resolve]]<br/>"'''{{Term|HWDE|Enduring Resolve|link}}'''" | ||
| {{Term|HWDE|Grand Finale|link}} | | {{Term|HWDE|Grand Finale|link}} | ||
| {{Term|HWDE|Gerudo Desert (Hyrule Warriors)|link}} | | {{Term|HWDE|Gerudo Desert (Hyrule Warriors)|link}} | ||
| "{{Term|HWDE|Sandstream|link}}" | | "{{Term|HWDE|Sandstream|link}}" | ||
| | | All | ||
|- | |- | ||
| [[File: | | [[File:HWDE Liberation of the Triforce.png|200px|link= Liberation of the Triforce]]<br/>"'''{{Term|HWDE|Liberation of the Triforce|link}}'''" | ||
| {{Term|HWDE|Grand Finale|link}} | | {{Term|HWDE|Grand Finale|link}} | ||
| {{Term|HWDE|Ganon's Tower | | {{Term|HWDE|Ganon's Tower|link}} | ||
| "{{Term|HWDE|Eclipse of the World|link}}" | | "{{Term|HWDE|Eclipse of the World|link}}" | ||
| | | All | ||
|- | |- | ||
| [[File: | | [[File:HWDE The Other Hero.png|200px|link= The Other Hero]]<br/>"'''{{Term|HWDE|The Other Hero|link}}'''" | ||
| {{Term|HWDE|Linkle's Tale|link}} | | {{Term|HWDE|Linkle's Tale|link}} | ||
| {{Term|HWDE|Ganon's Tower | | {{Term|HWDE|Ganon's Tower|link}} | ||
| | | | ||
| {{HW|L}} | | {{HW|L}} / {{HW|DE}} | ||
|- | |- | ||
| [[File: | | [[File:HWDE A New Disturbance.png|200px|link= A New Disturbance]]<br/>"'''{{Term|HWDE|A New Disturbance|link}}'''" | ||
| {{Term|HWDE|Wind Waker ( | | {{Term|HWDE|Wind Waker (Arc)|link}} | ||
| {{Term|HWDE|Forsaken Fortress (Hyrule Warriors Legends)|link}} | | {{Term|HWDE|Forsaken Fortress (Hyrule Warriors Legends)|link}} | ||
| | | | ||
| {{HW|L}} | | {{HW|L}} / {{HW|DE}} | ||
|- | |- | ||
| [[File: | | [[File:HWDE The Search for Cia.png|200px|link= The Search for Cia]]<br/>"'''{{Term|HWDE|The Search for Cia|link}}'''" | ||
| {{Term|HWDE|Wind Waker ( | | {{Term|HWDE|Wind Waker (Arc)|link}} | ||
| {{Term|HWDE|Gerudo Desert (Hyrule Warriors)|link}} | | {{Term|HWDE|Gerudo Desert (Hyrule Warriors)|link}} | ||
| "{{Term|HWDE|Sandstream|link}}" | | "{{Term|HWDE|Sandstream|link}}" | ||
| {{HW|L}} | | {{HW|L}} / {{HW|DE}} | ||
|- | |- | ||
| [[File: | | [[File:HWDE Reclaiming the Darkness.png|200px|link= Reclaiming the Darkness]]<br/>"'''{{Term|HWDE|Reclaiming the Darkness|link}}'''" | ||
| {{Term|HWDE|Wind Waker ( | | {{Term|HWDE|Wind Waker (Arc)|link}} | ||
| {{Term|HWDE|Temple of Souls|link}} | | {{Term|HWDE|Temple of Souls|link}} | ||
| | | | ||
| {{HW|L}} | | {{HW|L}} / {{HW|DE}} | ||
|- | |- | ||
| [[File: | | [[File:HWDE Watchers of the Triforce.png|200px|link= Watchers of the Triforce]]<br/>"'''{{Term|HWDE|Watchers of the Triforce|link}}'''" | ||
| {{Term|HWDE|Wind Waker ( | | {{Term|HWDE|Wind Waker (Arc)|link}} | ||
| {{Term|HWDE|Wind and Earth Temples|link}} | | {{Term|HWDE|Wind and Earth Temples|link}} | ||
| | | | ||
| {{HW|L}} | | {{HW|L}} / {{HW|DE}} | ||
|} | |} | ||
{{ | ==Nomenclature== | ||
{{Nomenclature}} | |||
==See Also== | |||
* {{Term|Series|Adventure Mode|link}} | |||
* {{Term|HWAoC|Chapters|link}} similar mechanic in {{HWAoC}} | |||
{{Ref}} | |||
{{Categories | |||
|Location Listings, Stages | |||
|mechanics= HW, HWL, HWDE | |||
}} | |||
Latest revision as of 02:25, 1 May 2024
Scenarios are recurring story arc battles in The Legend of Zelda series.[1]
Overview
Hyrule Warriors
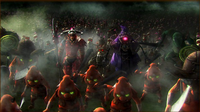
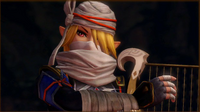
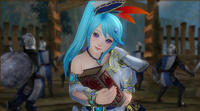
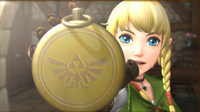
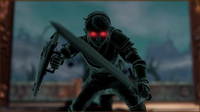
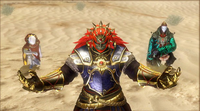
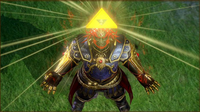
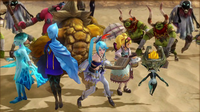
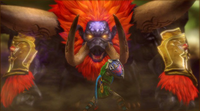
In Hyrule Warriors, Scenarios follow the plot of the War Across the Ages. There are a total of 23 Scenarios across eight arcs in Hyrule Warriors and 32 Scenarios across 10 arcs in Hyrule Warriors Legends and Hyrule Warriors: Definitive Edition. Completing one Scenario will unlock the following Scenario in the story.[2] The Scenarios can be accessed from the Select Scenario menu in Legend Mode or Free Mode. Each Scenario can only be played by certain Warriors assigned to the Scenario.[2] However, in Free Mode, any Warriors can be used to play a Scenario.[3] A Scenario can only be played in Free Mode if it has been previously beaten in Legend Mode. Scenarios can be played in any four Difficulty levels: Easy, Normal, Hard, and Hero.[4] Hero Mode is only unlocked after completing every Scenario in Legend Mode. Every Sub-Weapon can be unlocked in different Scenarios.
Every Scenario will have a Heart Container and a Piece of Heart for a specific Warrior hidden around the Stage.[5] Every Scenario will also have two Gold Skulltulas that can be found after completing certain objectives.[6] The first Gold Skulltula will always be revealed after killing 1,000 Enemies with any Warrior, while the second Gold Skulltula will vary in objectives depending on the Scenario. The second Gold Skulltula will only be able to be defeated in a Scenario after Hero Mode has been unlocked.[citation needed] The objectives needed to make a Gold Skulltula appear in a Scenario will be displayed on the Select Scenario menu or the Check Skulltulas screen in the Warrior Info menu before starting a Scenario.[7]
List of Scenarios
Nomenclature
| Language | Names | |
|---|---|---|
| This table was generated using translation pages. To request an addition, please contact a staff member with a reference. | ||
See Also
- Adventure Mode
- Chapters similar mechanic in Hyrule Warriors: Age of Calamity
References
- ↑ Hyrule Warriors Legends—Collector's Edition Guide, Prima Games, pg. 4
- ↑ 2.0 2.1 Hyrule Warriors Legends—Collector's Edition Guide, Prima Games, pg. 4
- ↑ "Replay any scenario with any unlocked warrior." — Select Mode (Hyrule Warriors: Definitive Edition)
- ↑ "
 Change Difficulty" — Select Scenario (Hyrule Warriors: Definitive Edition)
- ↑ "You can check information on heart containers and pieces of heart hidden on a given battlefield from the Select Scenario screen. However, each will only appear when using a specific warrior." — Tutorial (Hyrule Warriors: Definitive Edition)
- ↑ "Gold Skulltulas will only appear within the spider's web on the map once you fulfill certain battle conditions. They flee after a set period of time has passed, so move quickly!" — Tutorial (Hyrule Warriors: Definitive Edition)
- ↑ "You can check information on Gold Skulltulas hidden on a given battlefield from the Select Scenario screen. However, some only appear when using specific warriors or weapons." — Tutorial (Hyrule Warriors: Definitive Edition)
