Gibdo: Difference between revisions
PhantomCaleb (talk | contribs) m (→{{OoT|-}}: Updating Template:Navi) |
m (→Gallery) |
||
| (46 intermediate revisions by 15 users not shown) | |||
| Line 1: | Line 1: | ||
{{Infobox Enemy | {{Infobox Enemy | ||
|image= | |image= | ||
| Line 14: | Line 12: | ||
|Model TPHD= File:TPHD Gibdo Model.png | |Model TPHD= File:TPHD Gibdo Model.png | ||
|Model ALBW= File:ALBW Gibdo Model.png | |Model ALBW= File:ALBW Gibdo Model.png | ||
|Model TFH= File:TFH Gibdo.png | |Model TFH= File:TFH Gibdo Model.png | ||
|Model TotK= File:TotK Gibdo Model.png | |||
|Sprite TLoZ= File:TLoZ Gibdo Sprite.png | |Sprite TLoZ= File:TLoZ Gibdo Sprite.png | ||
|Sprite ALttP= File:ALttP Gibdo Sprite.png | |Sprite ALttP= File:ALttP Gibdo Sprite.png | ||
| Line 29: | Line 28: | ||
|plural= Gibdos<ref>{{Cite Book|quote= |book= E |publisher= |page= 160}}</ref> | |plural= Gibdos<ref>{{Cite Book|quote= |book= E |publisher= |page= 160}}</ref> | ||
|race= | |race= | ||
|game= | |game= TLoZ, ALttP, LA, OoT, MM, OoS, OoA, FS, FSA, TMC, TP, ALBW, TFH, TotK | ||
|other= | |other= TLoZ (TV Series), TCT, TWoG, ZA, LCT, HW, CoH | ||
|habitat= {{ | |habitat= {{Spawn Locations}} | ||
|member= | |member= | ||
|health={{Infobox Game Blocks | |health= | ||
{{Infobox Game Blocks | |||
|TLoZ= {{HP|TLoZ|6}} | |TLoZ= {{HP|TLoZ|6}} | ||
|LA= {{HP|LA|6}} | |LA= {{HP|LA|6}} | ||
| Line 39: | Line 39: | ||
|OoA= {{HP|OoA|4}} | |OoA= {{HP|OoA|4}} | ||
|OoT= {{HP|OoT|8}} | |OoT= {{HP|OoT|8}} | ||
|TotK= {{HP|TotK|60}} | |||
}} | }} | ||
|attack={{Infobox Game Blocks | |attack= | ||
|TLoZ= Contact [[File:TMC Life | {{Infobox Game Blocks | ||
|ALttP= Contact [[File:TMC Life | |TLoZ= Contact [[File:TMC Life Energy Sprite.png|1 heart]][[File:TMC Life Energy Sprite.png|1 heart]] | ||
|LA= Contact [[File:TMC Life | |ALttP= Contact [[File:TMC Life Energy Sprite.png|1 heart]][[File:TMC Life Energy Sprite.png|1 heart]][[File:TMC Life Energy Sprite.png|1 heart]] | ||
|OoS= Contact [[File:TMC Life | |LA= Contact [[File:TMC Life Energy Sprite.png|1 heart]] | ||
|OoA= Contact [[File:TMC Life | |OoS= Contact [[File:TMC Life Energy Sprite 4.png|1/2 heart]] | ||
|OoT= Gaze [[File:TMC Life | |OoA= Contact [[File:TMC Life Energy Sprite 4.png|1/2 heart]] | ||
|OoT= Gaze [[File:TMC Life Energy Sprite 2.png|0 hearts]] {{small|(stuns Link)}}, Grab [[File:TMC Life Energy Sprite 4.png|1/2 heart]] {{Small|(Per second)}} | |||
|TotK= 20 | |||
}} | }} | ||
|weapon= {{Term|Series|Sword|link}} | |weapon= | ||
|spoils= Four {{Plural|TLoZ|Bomb|link}} | {{Infobox Game Blocks | ||
|exp= | |Series= {{Term|Series|Sword|link}}, {{Term|Series|Fire Arrow|link}}, {{Term|Series|Flame Lantern|link}} | ||
|TCT= {{Term|TCT|Magic Arrow|link}} | |||
|TWoG= {{Term|TWoG|Shroud|link}} {{Exp Game|TWoG}} | |||
}} | |||
|spoils= | |||
{{Infobox Game Blocks | |||
|TLoZ= Four {{Plural|TLoZ|Bomb|link}}, One {{Term|TLoZ|Rupee|link}}, {{Term|TLoZ|Clock|link}}, {{Term|TLoZ|Heart|link}} | |||
|TotK= {{Term|TotK|Gibdo Bone|link}}, {{Term|TotK|Gibdo Guts|link}} | |||
}} | |||
|exp= 0 | |||
|theme= | |theme= | ||
}} | }} | ||
{{Term/Store|Gibdo|Gibdos|Series, TLoZ, ALttP, LA, LADX, LANS, OoT, OoT3D, MM, MM3D, OoS, OoA, FS, TMC, TP, TPHD, ALBW, TFH|plural}} are recurring {{Plural|Series|Enemy|link}} in {{TLoZ|Series}}.<ref name="E 181">{{Cite Book|quote= |book= E |publisher= |page= 181 {{Exp Game|TLoZ, ALttP, LA, OoT, MM, OoS, OoA, FS, TMC, TP, ALBW, TFH}}}}</ref>{{ | {{Term/Store|Gibdo|Gibdos|Series, TLoZ, ALttP, LA, LADX, LANS, OoT, OoT3D, MM, MM3D, OoS, OoA, FS, TMC, TP, TPHD, ALBW, TFH, ZA|plural}} are recurring {{Plural|Series|Enemy|link}} in {{TLoZ|Series}}.<ref name="E 181">{{Cite Book|quote= |book= E |publisher= |page= 181 {{Exp Game|TLoZ, ALttP, LA, OoT, MM, OoS, OoA, FS, TMC, TP, ALBW, TFH}}}}</ref><ref>{{Cite|'''Gibdo'''|Hyrule Compendium|TotK}}</ref><ref>{{Cite Magazine|quote= S4-11: Twee Gibdos.|translation= S4-11: Two Gibdos.|magazine= CD Interactief|volume= |issue= |date= April/May 1999|publisher= HUB Uitgevers|page= 6}}</ref><ref>{{Cite|Gibdo|Battlefield Info|HWDE}}</ref> | ||
==Characteristics== | ==Characteristics== | ||
{{Plural|Series|Gibdo}} are undead, mummified corpses commonly appearing within {{Plural|Series|Graveyard|link}} and {{Plural|Series|Dungeon|link}}. They are one of the more resilient enemies in {{TLoZ|-}} series, as they are weak to few weapons and are not knocked back when hit with a {{Term|Series|Sword|link}} in most games.<ref>{{Cite | {{Lacking Sources|ALttP, OoT3D, OoS, OoA, FS, FSA, TMC, TPHD, HWDE}} | ||
{{Plural|Series|Gibdo}} are undead, mummified corpses commonly appearing within {{Plural|Series|Graveyard|link}} and {{Plural|Series|Dungeon|link}}. They are one of the more resilient enemies in {{TLoZ|-}} series, as they are weak to few weapons and are not knocked back when hit with a {{Term|Series|Sword|link}} in most games.<ref>{{Cite Manual|quote= The mummy man. He's got some strange powers, and some pretty powerful attacking force.|game= TLoZ|page= 37}}</ref> In some games, they are able to use a petrifying gaze to stun {{Term|Series|Link|link}}, identically to that of the similar {{Plural|Series|ReDead|link}}. They are very susceptible to fire-based attacks, and take great damage from items such as the {{Term|Series|Fire Rod|link}} and {{Term|Series|Din's Fire|link}}.<ref>{{Cite Manual|quote= This bandage swathed menace is indeed powerful. It can withstand repeated blows from the sword without even slowing down. However, it is rumored that it cannot stand fire...|game= ALttP|page= 44}}</ref> Burning away a {{Term|Series|Gibdo}}'s bandages in {{MM}} will even reveal it to be a {{Term|Series|ReDead}}, while in other games, burning a {{Term|Series|Gibdo}}'s bandages instead reveals a {{Term|Series|Stalfos|link}}. | |||
==={{TLoZ|-}}=== | ==={{TLoZ|-}}=== | ||
| Line 63: | Line 76: | ||
==={{ALttP|-}}=== | ==={{ALttP|-}}=== | ||
{{Manual|ALttP|Gibdos|This bandage swathed menace is indeed powerful. It can withstand repeated blows from the sword without even slowing down. However, it is rumored that it cannot stand fire...}}In | {{Manual|ALttP|Gibdos|This bandage swathed menace is indeed powerful. It can withstand repeated blows from the sword without even slowing down. However, it is rumored that it cannot stand fire...}} | ||
In {{ALttP}}, {{Plural|ALttP|Gibdo}} first appear in {{Term|ALttP|Skull Woods|link}}, and deal 3 hearts of damage with each attack. They are also found later in {{Term|ALttP|Ganon's Tower|link}}. {{Plural|ALttP|Gibdo}} are weak to the {{Term|ALttP|Lantern|link}} and {{Term|ALttP|Fire Rod|link}}, the latter also found in {{Term|ALttP|Skull Woods}}. | |||
==={{OoT|-}}=== | ==={{OoT|-}}=== | ||
{{Navi | {{Navi | ||
|quote1= {{Color|OoT White|Gibdo}}<br>Its gaze will paralyze you. If it bites you, tap any button to escape! | |quote1= {{Color|OoT White|Gibdo}}<br/>Its gaze will paralyze you. If it bites you, tap any button to escape! | ||
}} | }} | ||
{{Plural|OoT3D|Gibdo}} appear in the {{Term|OoT3D|Shadow Temple|link}} and the {{Term|OoT3D|Spirit Temple|link}} in {{OoT}}. They are susceptible to the "{{Term|OoT3D|Sun's Song|link}}", which will stun them for a period of time after being played. Unlike | {{Plural|OoT3D|Gibdo}} appear in the {{Term|OoT3D|Bottom of the Well|link}}, {{Term|OoT3D|Shadow Temple|link}} and the {{Term|OoT3D|Spirit Temple|link}} in {{OoT}}. They also appear in the Master Quest variant of {{Term|OoT3D|Inside Ganon's Castle|link}}. They are susceptible to the "{{Term|OoT3D|Sun's Song|link}}", which will stun them for a period of time after being played. Unlike {{Plural|OoT3D|ReDead|link}}, which walk around in circles, thereby making them briefly harmless when one is killed in the same room, Gibdos are not affected by this therefore making them more dangerous. | ||
==={{MM|-}}=== | ==={{MM|-}}=== | ||
{{Tatl| | {{Tatl | ||
|quote1= It's a {{Color|MM3D White|Gibdo}}.<br/>You won't be able to move if it glares at you, so be careful! Got it? | |||
}} | |||
Sentient {{Plural|MM3D|Gibdo}} can be found {{Term|MM3D|Beneath the Well|link}} in {{MM}}, requesting that {{Term|MM3D|Link|link}} bring them certain items when he wears the {{Term|MM3D|Gibdo Mask|link}}.<ref>{{Cite|Leeeave me something delicious to chomp on. Something that sprouts when it's watered. Preferably five of them...|Gibdo|MM}}</ref><ref>{{Cite|Leeeaave me something deliciously fresh!|Gibdo|MM}}</ref>. They also appear in {{Term|MM3D|Ikana Canyon|link}}. They have an intense dislike for the song "{{Term|MM3D|Farewell to Gibdos|link}}", composed by {{Term|MM3D|Pamela's Father|link}}, and will retreat into the ground when they hear it. | Sentient {{Plural|MM3D|Gibdo}} can be found {{Term|MM3D|Beneath the Well|link}} in {{MM}}, requesting that {{Term|MM3D|Link|link}} bring them certain items when he wears the {{Term|MM3D|Gibdo Mask|link}}.<ref>{{Cite|Leeeave me something delicious to chomp on. Something that sprouts when it's watered. Preferably five of them...|Gibdo|MM}}</ref><ref>{{Cite|Leeeaave me something deliciously fresh!|Gibdo|MM}}</ref>. They also appear in {{Term|MM3D|Ikana Canyon|link}}. They have an intense dislike for the song "{{Term|MM3D|Farewell to Gibdos|link}}", composed by {{Term|MM3D|Pamela's Father|link}}, and will retreat into the ground when they hear it. | ||
Wearing the {{Term|MM3D|Gibdo Mask|link}} will keep {{Plural|MM3D|Gibdo}} from attacking {{Term|MM3D|Link}}. Interestingly, neither {{Plural|MM3D|Gibdo}} nor {{Plural|MM3D|ReDead|link}} are able to harm {{Term|MM3D|Deku Link|link}} or {{Term|MM3D|Goron Link|link}}, as the former and latter are too small and large respectively for them to attack. Both forms are still vulnerable to {{Plural|MM3D|Gibdo}}' paralyzing gaze. Using {{Plural|MM3D|Fire | Wearing the {{Term|MM3D|Gibdo Mask|link}} will keep {{Plural|MM3D|Gibdo}} from attacking {{Term|MM3D|Link}}. Interestingly, neither {{Plural|MM3D|Gibdo}} nor {{Plural|MM3D|ReDead|link}} are able to harm {{Term|MM3D|Deku Link|link}} or {{Term|MM3D|Goron Link|link}}, as the former and latter are too small and large respectively for them to attack. Both forms are still vulnerable to {{Plural|MM3D|Gibdo}}' paralyzing gaze. Using {{Plural|MM3D|Fire Arrow|link}} against them will result in their bandages being burnt off, revealing a {{Term|MM3D|ReDead}}. However, they will not begin to dance if {{Term|MM3D|Link}} is wearing {{Term|MM3D|Garo's Mask}} or the {{Term|MM3D|Captain's Hat}}, unlike other {{Plural|MM3D|ReDead|link}}. | ||
==={{OoS|-}}=== | |||
{{Stub|OoS}} | |||
==={{OoA|-}}=== | |||
{{Stub|OoA}} | |||
==={{FS|-}}=== | |||
{{Stub|FS}} | |||
==={{FSA|-}}=== | |||
{{Plural|FSA|Gibdo}} in {{FSA}} appear in the {{Term|FSA|Desert of Doubt (Stage)|link}} and the {{Term|FSA|Pyramid|link}}, acting the same as in {{FS|-}}. | |||
==={{TMC|-}}=== | ==={{TMC|-}} === | ||
{{ | {{Figurines|TMC}} | ||
{{Plural|TMC|Gibdo}} appear in the {{Term|TMC|Royal Crypt|link}}, the {{Term|TMC|Palace of Winds|link}}, and {{Term|TMC|Dark Hyrule Castle|link}}. If their bandages are burned away using the {{Term|TMC|Flame Lantern|link}}, they will reveal a {{Term|TMC|Stalfos|link}} underneath. Some {{Plural|TMC|Gibdo}} hold items such as {{Plural|TMC|Small Key|link}}. | {{Plural|TMC|Gibdo}} appear in the {{Term|TMC|Royal Crypt|link}}, the {{Term|TMC|Palace of Winds|link}}, and {{Term|TMC|Dark Hyrule Castle|link}}. If their bandages are burned away using the {{Term|TMC|Flame Lantern|link}}, they will reveal a {{Term|TMC|Stalfos|link}} underneath. Some {{Plural|TMC|Gibdo}} hold items such as {{Plural|TMC|Small Key|link}}. | ||
| Line 86: | Line 115: | ||
12 {{Plural|TPHD|Arrow|link}}, two {{Plural|TPHD|Bomb Arrow|link}}, the {{Term|TPHD|Ball and Chain|link}}, a {{Term|TPHD|Jump Strike|link}}, and a {{Term|TPHD|Mortal Draw|link}} can all be used to defeat {{Plural|TPHD|Gibdo}}. As {{Term|TPHD|Wolf Link|link}}, they can be defeated by targeting and continuously biting them twice. A {{Term|TPHD|Back Slice|link}} can be used if {{Term|TPHD|Link}} is caught in a {{Term|TPHD|Gibdo}}'s scream by pressing the A button and tilting the control stick left or right. When it brings down its sword, {{Term|TPHD|Link}} will roll around it and slice at it, leaving the {{Term|TPHD|Gibdo}} vulnerable. | 12 {{Plural|TPHD|Arrow|link}}, two {{Plural|TPHD|Bomb Arrow|link}}, the {{Term|TPHD|Ball and Chain|link}}, a {{Term|TPHD|Jump Strike|link}}, and a {{Term|TPHD|Mortal Draw|link}} can all be used to defeat {{Plural|TPHD|Gibdo}}. As {{Term|TPHD|Wolf Link|link}}, they can be defeated by targeting and continuously biting them twice. A {{Term|TPHD|Back Slice|link}} can be used if {{Term|TPHD|Link}} is caught in a {{Term|TPHD|Gibdo}}'s scream by pressing the A button and tilting the control stick left or right. When it brings down its sword, {{Term|TPHD|Link}} will roll around it and slice at it, leaving the {{Term|TPHD|Gibdo}} vulnerable. | ||
==={{TotK|-}}=== | |||
{{Plural|TotK|Gibdo|link}} appear in the {{Term|TotK|Gerudo Desert|link}} and the {{Term|TotK|Gerudo Desert Depths|link}} alongside the {{Term|TotK|Sand Shroud|link}},<ref>{{Cite|A monster that appeared along with the sand shroud. Though slow to move, they can fight without faltering to physical attacks thanks to their tough outer skin. On the other hand, they are vulnerable to fire and lightning, which can turn them white and brittle.|Hyrule Compendium|TotK}}</ref> emerging from hives in the sand to attack {{Term|TotK|Gerudo Town|link}} and {{Term|TotK|Kara Kara Bazaar|link}}. {{Plural|TotK|Gibdo}} have a skeletal appearance with distinctly inhuman body proportions, and insectoid mandibles. While highly resistant to physical attacks, they are vulnerable to {{Term|TotK|Electricity|link}}, {{Term|TotK|Fire|link}}, {{Term|TotK|Ice|link}}, and {{Term|TotK|Water|link}}-based attacks, which will cause them to turn white and temporarily disable their resistance to physical attacks.<ref>{{Cite|{{Big|Monster Tips: Gibdos}}<br/>Though they are normally resistant to damage, they can be weakened with elemental attacks, such as fire or water. While in this vulnerable state, their bodies turn white.|Tips and Tricks|TotK}}</ref> Additionally, concentrated light will kill them outright. Some Gibdos may lie motionless on the ground to ambush Link. | |||
A new variation called {{Plural|TotK|Moth Gibdo|link}} also appear, which are able to fly and move more quickly than the standard {{Term|TotK|Gibdo}}; they can also attack from long range by spitting acid. They are seemingly led by the {{Term|TotK|Queen Gibdo|link}}. | |||
==Other Appearances== | ==Other Appearances== | ||
==={{TLoZ|-}} TV Series=== | |||
{{Noncanon|Start}} | {{Noncanon|Start}} | ||
[[File:Gibdo (Underworld Connections).png|thumb|right|150px|A Gibdo from ''The Legend of Zelda'' TV series]] | [[File:Gibdo (Underworld Connections).png|thumb|right|150px|A Gibdo from ''The Legend of Zelda'' TV series]] | ||
Gibdos appear in three episodes of the {{TLoZ|TV Series}}. In "[[Kiss'n Tell]]", a Gibdo disguises itself as a beautiful maiden who is pretending to be under attack by a [[Gleeok]] in order to draw Link onto the scene. Although [[Princess Zelda]] arrives first, Link eventually appears and defeats the Gleeok. The maiden then rewards Link with a kiss, and as their lips meet, Link turns into a [[Frog Link|frog]] while the maiden turns to her true form.<ref>{{Cite Episode|quote=What's the matter, Link? You don't like my charms anymore? You fell for it! Ganon's plan worked perfectly!|name=Gibdo|show=The Legend of Zelda|episode=4}}</ref> When Link reaches for his sword, he realizes that his hands have turned frog-like and is too distracted to see that the Gibdo is about to attack him.<ref>{{Cite Episode|quote=My hands! They're all weird!|name=Link|show=The Legend of Zelda|episode=4}}</ref> However, Zelda pushes him out of the way and easily defeats the Gibdo by spinning it until it disappears back to [[Ganon]]'s [[Evil Jar]].<ref>{{Cite Episode|quote=Wait 'till you see the rest of you! Let's go for a spin, Gibdo!|episode=4}}</ref> Ganon congratulates the Gleeok and Gibdo for their success and leaves the [[Underworld]] to proceed with his plan to obtain the [[Triforce of Wisdom]].<ref>{{Cite Episode|quote=Excellent. You've done well, my servants. Link has been transformed into a frog! And with Link rendered practically useless, Zelda will be at my mercy! Now I shall put the rest of my plan into action. When I return, Zelda will be with me and Link will be gone...forever!|name=Ganon|show=The Legend of Zelda|episode=4}}</ref> | Gibdos appear in three episodes of the {{TLoZ|TV Series}}. In "[[Kiss'n Tell]]", a Gibdo disguises itself as a beautiful maiden who is pretending to be under attack by a [[Gleeok]] in order to draw Link onto the scene. Although [[Princess Zelda]] arrives first, Link eventually appears and defeats the Gleeok. The maiden then rewards Link with a kiss, and as their lips meet, Link turns into a [[Frog Link|frog]] while the maiden turns to her true form.<ref>{{Cite Episode|quote=What's the matter, Link? You don't like my charms anymore? You fell for it! Ganon's plan worked perfectly!|name=Gibdo|show=The Legend of Zelda|episode=4}}</ref> When Link reaches for his sword, he realizes that his hands have turned frog-like and is too distracted to see that the Gibdo is about to attack him.<ref>{{Cite Episode|quote=My hands! They're all weird!|name=Link|show=The Legend of Zelda|episode=4}}</ref> However, Zelda pushes him out of the way and easily defeats the Gibdo by spinning it until it disappears back to [[Ganon]]'s [[Evil Jar]].<ref>{{Cite Episode|quote=Wait 'till you see the rest of you! Let's go for a spin, Gibdo!|episode=4}}</ref> Ganon congratulates the Gleeok and Gibdo for their success and leaves the [[Underworld]] to proceed with his plan to obtain the [[Triforce of Wisdom]].<ref>{{Cite Episode|quote=Excellent. You've done well, my servants. Link has been transformed into a frog! And with Link rendered practically useless, Zelda will be at my mercy! Now I shall put the rest of my plan into action. When I return, Zelda will be with me and Link will be gone...forever!|name=Ganon|show=The Legend of Zelda|episode=4}}</ref> | ||
In "[[Underworld Connections]]", a Gibdo briefly appears out of the darkness while Link and Zelda are trying to recover the missing shards of the Triforce of Wisdom. The Gibdo attempts to grab the Triforce from Zelda's hands, but the young hero easily [[Sword Beam#Zap|zap]]s it away. Lastly, in "[[The Moblins are Revolting]]", the Gibdos join the struggle formed by the [[Brotherhood of Underworld Monsters]], where they try to attack [[North Castle]]; however, they accomplish nothing meaningful and eventually return to Ganon. | In "[[Underworld Connections]]", a Gibdo briefly appears out of the darkness while Link and Zelda are trying to recover the missing shards of the Triforce of Wisdom. The Gibdo attempts to grab the Triforce from Zelda's hands, but the young hero easily [[Sword Beam#Zap|zap]]s it away. Lastly, in "[[The Moblins are Revolting]]", the Gibdos join the struggle formed by the [[Brotherhood of Underworld Monsters]], where they try to attack [[North Castle]]; however, they accomplish nothing meaningful and eventually return to Ganon. | ||
{{Noncanon|End}} | |||
==={{TCT|-}}=== | ==={{TCT|-}}=== | ||
{{Noncanon|Start}} | |||
In {{TCT}}, {{Term|TCT|Princess Zelda|link}} encounters various {{Plural|TCT|Gibdo}} while inside a {{Term|TCT|Cavern (The Crystal Trap)|link}}. As {{Term|TCT|Princess Zelda}} is traveling through the {{Term|TCT|Cavern (The Crystal Trap)}}, she hears the sound of {{Plural|TCT|Gibdo}} approaching her from behind, and although she claims she can outrun them, more appear on the other side. {{Term|TCT|Princess Zelda}} realizes that neither a {{Term|TCT|Zelda's Dagger|link|display=Dagger}} nor normal {{Plural|TCT|Arrow|link}} can pierce through the {{Plural|TCT|Gibdo}}, commenting to herself that she would need {{Plural|TCT|Magic Arrow|link}} to defeat them. | In {{TCT}}, {{Term|TCT|Princess Zelda|link}} encounters various {{Plural|TCT|Gibdo}} while inside a {{Term|TCT|Cavern (The Crystal Trap)|link}}. As {{Term|TCT|Princess Zelda}} is traveling through the {{Term|TCT|Cavern (The Crystal Trap)}}, she hears the sound of {{Plural|TCT|Gibdo}} approaching her from behind, and although she claims she can outrun them, more appear on the other side. {{Term|TCT|Princess Zelda}} realizes that neither a {{Term|TCT|Zelda's Dagger|link|display=Dagger}} nor normal {{Plural|TCT|Arrow|link}} can pierce through the {{Plural|TCT|Gibdo}}, commenting to herself that she would need {{Plural|TCT|Magic Arrow|link}} to defeat them. | ||
If {{Term|TCT|Princess Zelda}} picks up the {{Plural|TCT|Magic Arrow}} in {{Term|TCT|Midoro Palace|link}}, she will shoot one of them at a {{Term|TCT|Gibdo}}, causing it to burst into flames and scare the other {{Plural|TCT|Gibdo}} away.<ref>{{Cite Book|quote=The arrow finds its mark and the gibdo bursts into flame! In the red glare, Zelda sees the twisted shapes of the other mummy men as they run in fear from the terrible fire.|book= | If {{Term|TCT|Princess Zelda}} picks up the {{Plural|TCT|Magic Arrow}} in {{Term|TCT|Midoro Palace|link}}, she will shoot one of them at a {{Term|TCT|Gibdo}}, causing it to burst into flames and scare the other {{Plural|TCT|Gibdo}} away.<ref>{{Cite Book|quote=The arrow finds its mark and the gibdo bursts into flame! In the red glare, Zelda sees the twisted shapes of the other mummy men as they run in fear from the terrible fire.|book= TCT|publisher= |page=18}}</ref> This frees a {{Term|TCT|Blue Fairy|link}}, who will thank {{Term|TCT|Princess Zelda}} by healing her and providing her with the {{Term|TCT|Fairy's Scroll|link}}. More {{Plural|TCT|Gibdo}} will then begin to approach her, but she enters a nearby door to escape them. | ||
{{Noncanon|End}} | |||
==={{TWoG|-}}=== | ==={{TWoG|-}}=== | ||
{{Noncanon|Start}} | |||
[[File:TWoG Gibdo Cutscene Sprite.png|right|180px]] | [[File:TWoG Gibdo Cutscene Sprite.png|right|180px]] | ||
In {{TWoG}}, a {{Term|TWoG|Gibdo}} appears as the first {{Term|TWoG|Boss|link}}. It is located in the abandoned church of {{Term|TWoG|Sakado|link}}, using it as its base of operations. It terrorizes the town by commanding the monsters in that area and raising the dead to enslave the living.<ref>{{Cite|For the dead shall raise, and the living shall be their slaves. She must be stopped!|Gibdo|TWoG}}</ref> It also plays the church's organ. | In {{TWoG}}, a {{Term|TWoG|Gibdo}} appears as the first {{Term|TWoG|Boss|link}}. It is located in the abandoned church of {{Term|TWoG|Sakado|link}}, using it as its base of operations. It terrorizes the town by commanding the monsters in that area and raising the dead to enslave the living.<ref>{{Cite|For the dead shall raise, and the living shall be their slaves. She must be stopped!|Gibdo|TWoG}}</ref> It also plays the church's organ. | ||
{{Term|TWoG|Princess Zelda|link}} defeats it with the {{Term|TWoG|Shroud|link}} given to her by {{Term|TWoG|Lubonga|link}} in {{Term|TWoG|Aru Ainu|link}}, of which it is afraid.<ref>{{Cite|Here's a shroud that scares the wraps off Gibdo.|Lubonga|TWoG}}</ref> The {{Term|TWoG|Shroud}} is the only item that will defeat it, as normal attacks are ineffective. It fades away as the {{Term|TWoG|Shroud}} is thrown onto it. | {{Term|TWoG|Princess Zelda|link}} defeats it with the {{Term|TWoG|Shroud|link}} given to her by {{Term|TWoG|Lubonga|link}} in {{Term|TWoG|Aru Ainu|link}}, of which it is afraid.<ref>{{Cite|Here's a shroud that scares the wraps off Gibdo.|Lubonga|TWoG}}</ref> The {{Term|TWoG|Shroud}} is the only item that will defeat it, as normal attacks are ineffective. It fades away as the {{Term|TWoG|Shroud}} is thrown onto it. | ||
{{Noncanon|End}} | |||
==={{ZA|-}}=== | |||
{{Noncanon|Start}} | |||
{{Stub|ZA}} | |||
{{Noncanon|End}} | |||
==={{LCT|-}}=== | |||
{{Noncanon|Start}} | |||
{{Plural|LCT|Gibdo}} appear in {{LCT}} in [[Link's Crossbow Training#Stage 7|Level 7-1]]. They behave similarly as their {{TP|-}} incarnations, and as they are shot down, more appear to attack. They rise up from inside coffins, often near the camera. A single shot to the head with a normal {{Term|LCT|Arrow|link}} will destroy them, though using {{Plural|LCT|Bomb Arrow|link}} is the most effective way to destroy larger groups that appear. | |||
{{Noncanon|End}} | |||
==={{HW|-}}=== | ==={{HW|-}}=== | ||
{{Noncanon|Start}} | |||
In {{HW}}, {{Plural|HW|Gibdo}} appear as {{Plural|HW|Captain (Hyrule Warriors)|link}}. They drag large swords behind them, which they will infrequently swing in a slow but brutal attack on nearby enemies. When surrounded with enemies, {{Plural|HW|Gibdo}} will release a ranged shriek, stunning all nearby foes. If an opposing {{Term|HW|Warrior}} stands in line of their view but outside of their regular shriek's radius, the {{Term|HW|Gibdo}} will release a controlled shriek in the direction of the {{Term|HW|Warrior}}. Their shrieks leave them vulnerable, however, causing their {{Term|HW|Weak Point Gauge|link}} to be exposed. {{Plural|HW|Gibdo}} also have an additional attack, in which they glow before releasing a poisonous miasma around them, similar to {{Plural|HW|Deku Baba|link}}. While charging this attack, they expose their weakness to {{Plural|HW|Arrow|link}}. Shooting them while glowing will expose their {{Term|HW|Weak Point Gauge}} and cause them to spin around, damaging their allies in the process. | In {{HW}}, {{Plural|HW|Gibdo}} appear as {{Plural|HW|Captain (Hyrule Warriors)|link}}. They drag large swords behind them, which they will infrequently swing in a slow but brutal attack on nearby enemies. When surrounded with enemies, {{Plural|HW|Gibdo}} will release a ranged shriek, stunning all nearby foes. If an opposing {{Term|HW|Warrior}} stands in line of their view but outside of their regular shriek's radius, the {{Term|HW|Gibdo}} will release a controlled shriek in the direction of the {{Term|HW|Warrior}}. Their shrieks leave them vulnerable, however, causing their {{Term|HW|Weak Point Gauge|link}} to be exposed. {{Plural|HW|Gibdo}} also have an additional attack, in which they glow before releasing a poisonous miasma around them, similar to {{Plural|HW|Deku Baba|link}}. While charging this attack, they expose their weakness to {{Plural|HW|Arrow|link}}. Shooting them while glowing will expose their {{Term|HW|Weak Point Gauge}} and cause them to spin around, damaging their allies in the process. | ||
| Line 112: | Line 162: | ||
{{Noncanon|End}} | {{Noncanon|End}} | ||
==={{CoH|-}} === | |||
==={{CoH|-}}=== | |||
{{Ambig|Start}} | {{Ambig|Start}} | ||
{{Plural|CoH|Gibdo}} appear as enemies in {{CoH}} where they move to the beat of the music. Their behavior is modeled after the Golem enemies from ''{{wp|Crypt of the NecroDancer}}''. As they make their way towards {{Term|CoH|Cadence|link}}, {{Term|CoH|Link|link}}, {{Term|CoH|Yves|link}}, or {{Term|CoH|Princess Zelda|link}}, they will stand still for two beats, crouching on the third before jumping to attack on the fourth beat. They can be turned into {{Term|CoH|ReDead|link}} by burning off their bandages by hitting them with fire either from the {{Term|CoH|Fire Rod|link}}, {{Plural|CoH|Fire Arrow|link}}, or fireballs casted by the {{Term|CoH|Fire Wizzrobe|link}}. The game itself introduces [[Black | {{Plural|CoH|Gibdo}} appear as enemies in {{CoH}} where they move to the beat of the music. Their behavior is modeled after the Golem enemies from ''{{wp|Crypt of the NecroDancer}}''. As they make their way towards {{Term|CoH|Cadence|link}}, {{Term|CoH|Link|link}}, {{Term|CoH|Yves|link}}, or {{Term|CoH|Princess Zelda|link}}, they will stand still for two beats, crouching on the third before jumping to attack on the fourth beat. They can be turned into {{Term|CoH|ReDead|link}} by burning off their bandages by hitting them with fire either from the {{Term|CoH|Fire Rod|link}}, {{Plural|CoH|Fire Arrow|link}}, or fireballs casted by the {{Term|CoH|Fire Wizzrobe|link}}. The game itself introduces [[Black Gibdo]]s, which are stronger, while Green Gibdos make their first appearance since ''Four Swords Adventures''. | ||
{{Ambig|End}} | {{Ambig|End}} | ||
==Nomenclature== | ==Nomenclature== | ||
{{Nomenclature}} | {{Nomenclature}} | ||
===Other Names=== | |||
{{Other Names | |||
|- | |||
| ReDead<ref>{{Cite Guide|quote= |game= TP |guide= Prima |page= 19}}</ref> | |||
| {{TP}} | |||
| {{Guide|TP|Prima}} | |||
| {{E}} | |||
|- | |||
| ReDead Knight<ref>{{Cite Guide|quote= |game= TP |guide= Nintendo |page= 86}}</ref> | |||
| {{TP}} | |||
| {{Guide|TP|Nintendo}} | |||
| {{E}} | |||
}} | |||
==Gallery== | ==Gallery== | ||
| Line 133: | Line 192: | ||
File:GibdoReDead MM.png|{{Term|MM|Link}} speaking to a {{Term|MM|Gibdo}} turned into a {{Term|MM|ReDead}} from {{MM|-}} | File:GibdoReDead MM.png|{{Term|MM|Link}} speaking to a {{Term|MM|Gibdo}} turned into a {{Term|MM|ReDead}} from {{MM|-}} | ||
File:TP Gibdo Sword Model.png|The sword used by {{Plural|TP|Gibdo}} from {{TP|-}} | File:TP Gibdo Sword Model.png|The sword used by {{Plural|TP|Gibdo}} from {{TP|-}} | ||
File:Gibdo | File:TWoG Gibdo Sprite.png|{{Term|TFoE|Gibdo}} sprite in {{TWoG|-}} | ||
File:HW Gibdo Artwork.png|Artwork of a {{Term|HW|Gibdo}} from {{HW|-}} | File:HW Gibdo Artwork.png|Artwork of a {{Term|HW|Gibdo}} from {{HW|-}} | ||
File:HW Gibdo Model.png|Model of a Gibdo from {{HW|-}} | |||
File:HW Gibdo Sword Model.png|The sword used by {{Plural|HW|Gibdo}} from {{HW|-}} | File:HW Gibdo Sword Model.png|The sword used by {{Plural|HW|Gibdo}} from {{HW|-}} | ||
File:HWDE Gibdo Icon.png|Portrait of a {{Term|HW|Gibdo}} from {{HW|-}} | File:HWDE Gibdo Icon.png|Portrait of a {{Term|HW|Gibdo}} from {{HW|-}} | ||
| Line 142: | Line 202: | ||
File:HW Gibdo Adventure Mode Icon.png|A {{Term|HW|Gibdo}} sprite in {{Term|HW|Adventure Mode}} from {{HW|-}} | File:HW Gibdo Adventure Mode Icon.png|A {{Term|HW|Gibdo}} sprite in {{Term|HW|Adventure Mode}} from {{HW|-}} | ||
File:HW Gibdo Adventure Mode Credits Sprite.png|A {{Term|HW|Gibdo}} sprite in the {{Term|HW|Adventure Mode}} credits from {{HW|-}} | File:HW Gibdo Adventure Mode Credits Sprite.png|A {{Term|HW|Gibdo}} sprite in the {{Term|HW|Adventure Mode}} credits from {{HW|-}} | ||
File:ALttP Cagiva Gibdo.png|A {{Term|Series|Gibdo}} from the {{ALttP|-}} manga by Ataru Cagiva | |||
File:TLoZ Link Fighting a Gibdo Figure.png|Figure of {{Term|TLoZ|Link}} fighting a {{Term|TLoZ|Gibdo}} from {{TLoZ|-}} | File:TLoZ Link Fighting a Gibdo Figure.png|Figure of {{Term|TLoZ|Link}} fighting a {{Term|TLoZ|Gibdo}} from {{TLoZ|-}} | ||
File:CoH Gibdo Sprite.png|A {{Term|CoH|Gibdo}} from {{CoH|-}} | File:CoH Gibdo Sprite.png|A {{Term|CoH|Gibdo}} from {{CoH|-}} | ||
</gallery> | </gallery> | ||
==See Also== | ==See Also == | ||
* {{Term|Series|Black Gibdo|link}} | * {{Term|Series|Black Gibdo|link}} | ||
* {{Term|Series|Blue Gibdo|link}} | * {{Term|Series|Blue Gibdo|link}} | ||
* {{Term|Series|Dark Gibdo|link}} | * {{Term|Series|Dark Gibdo|link}} | ||
* {{Term|Series|Green Gibdo|link}} | * {{Term|Series|Green Gibdo|link}} | ||
* {{Term|Series|Moth Gibdo|link}} | |||
* {{Term|Series|Queen Gibdo|link}} | |||
* {{Term|Series|ReDead|link}} | * {{Term|Series|ReDead|link}} | ||
* {{Term|Series|ReDead Knight|link}} | * {{Term|Series|ReDead Knight|link}} | ||
| Line 158: | Line 221: | ||
{{Notes}} | {{Notes}} | ||
{{Ref}} | {{Ref}} | ||
{{Categories | {{Categories | ||
|Gibdos, Undead | |Gibdos, Humanoid Enemies, Undead Enemies | ||
|bosses= ALBW, TWoG | |bosses= ALBW, TWoG | ||
|characters= TWoG | |characters= TWoG | ||
|enemies= TLoZ, ALttP, LA, LADX, LANS, OoT, OoT3D, MM, MM3D, OoS, OoA, FS, FSA, TMC, TP, TPHD, ALBW, TFH, ZA, HW, HWL, HWDE, CoH | |enemies= TLoZ, ALttP, LA, LADX, LANS, OoT, OoT3D, MM, MM3D, OoS, OoA, FS, FSA, TMC, TP, TPHD, ALBW, TFH, TotK, TLoZ (TV Series), ZA, HW, HWL, HWDE, CoH | ||
}} | }} | ||
Latest revision as of 23:33, 6 April 2024
Gibdos are recurring Enemies in The Legend of Zelda series.[2][3][4][5]
Characteristics

Gibdos are undead, mummified corpses commonly appearing within Graveyards and Dungeons. They are one of the more resilient enemies in The Legend of Zelda series, as they are weak to few weapons and are not knocked back when hit with a Sword in most games.[6] In some games, they are able to use a petrifying gaze to stun Link, identically to that of the similar ReDeads. They are very susceptible to fire-based attacks, and take great damage from items such as the Fire Rod and Din's Fire.[7] Burning away a Gibdo's bandages in Majora's Mask will even reveal it to be a ReDead, while in other games, burning a Gibdo's bandages instead reveals a Stalfos.
The Legend of Zelda
Gibdos first appear in The Legend of Zelda. When defeated, Gibdos may drop either a Heart, one Rupee, four Bombs or a Clock.[note 1]
A Link to the Past
GibdosThis bandage swathed menace is indeed powerful. It can withstand repeated blows from the sword without even slowing down. However, it is rumored that it cannot stand fire...
In A Link to the Past, Gibdos first appear in Skull Woods, and deal 3 hearts of damage with each attack. They are also found later in Ganon's Tower. Gibdos are weak to the Lamp and Fire Rod, the latter also found in Skull Woods.
Ocarina of Time

Gibdo
Its gaze will paralyze you. If it bites you, tap any button to escape!
Gibdos appear in the Bottom of the Well, Shadow Temple and the Spirit Temple in Ocarina of Time. They also appear in the Master Quest variant of Inside Ganon's Castle. They are susceptible to the "Sun's Song", which will stun them for a period of time after being played. Unlike ReDeads, which walk around in circles, thereby making them briefly harmless when one is killed in the same room, Gibdos are not affected by this therefore making them more dangerous.
Majora's Mask

It's a Gibdo.
You won't be able to move if it glares at you, so be careful! Got it?
Sentient Gibdos can be found Beneath the Well in Majora's Mask, requesting that Link bring them certain items when he wears the Gibdo Mask.[9][10]. They also appear in Ikana Canyon. They have an intense dislike for the song "Farewell to Gibdos", composed by Pamela's Father, and will retreat into the ground when they hear it.
Wearing the Gibdo Mask will keep Gibdos from attacking Link. Interestingly, neither Gibdos nor ReDeads are able to harm Deku Link or Goron Link, as the former and latter are too small and large respectively for them to attack. Both forms are still vulnerable to Gibdos' paralyzing gaze. Using Fire Arrows against them will result in their bandages being burnt off, revealing a ReDead. However, they will not begin to dance if Link is wearing Garo's Mask or the Captain's Hat, unlike other ReDeads.
Oracle of Seasons
Oracle of Ages
Four Swords
Four Swords Adventures
Gibdos in Four Swords Adventures appear in the Desert of Doubt and the Pyramid, acting the same as in Four Swords.
The Minish Cap
| Figurine | |
|---|---|
| Number | 078 |
| Description | Appears in the Palace of Winds. |
| Figurine | Number | Description |
|---|---|---|
078 | Appears in the Palace of Winds. |
Gibdos appear in the Royal Crypt, the Palace of Winds, and Dark Hyrule Castle. If their bandages are burned away using the Flame Lantern, they will reveal a Stalfos underneath. Some Gibdos hold items such as Small Keys.
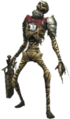
Twilight Princess
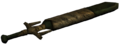
Gibdos appear in Arbiter's Grounds and the Cave of Ordeals in Twilight Princess. They lay motionless on the ground until Link approaches, then they rise and drag their sword towards him. When Link is within their attack range, Gibdos will release a paralyzing scream before attacking with their sword.
12 Arrows, two Bomb Arrows, the Ball and Chain, a Jump Strike, and a Mortal Draw can all be used to defeat Gibdos. As Wolf Link, they can be defeated by targeting and continuously biting them twice. A Back Slice can be used if Link is caught in a Gibdo's scream by pressing the A button and tilting the control stick left or right. When it brings down its sword, Link will roll around it and slice at it, leaving the Gibdo vulnerable.
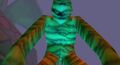
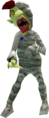
Tears of the Kingdom
Gibdos appear in the Gerudo Desert and the Gerudo Desert Depths alongside the Sand Shroud,[11] emerging from hives in the sand to attack Gerudo Town and Kara Kara Bazaar. Gibdos have a skeletal appearance with distinctly inhuman body proportions, and insectoid mandibles. While highly resistant to physical attacks, they are vulnerable to Electricity, Fire, Ice, and Water-based attacks, which will cause them to turn white and temporarily disable their resistance to physical attacks.[12] Additionally, concentrated light will kill them outright. Some Gibdos may lie motionless on the ground to ambush Link.
A new variation called Moth Gibdos also appear, which are able to fly and move more quickly than the standard Gibdo; they can also attack from long range by spitting acid. They are seemingly led by the Queen Gibdo.
Other Appearances
The Legend of Zelda TV Series
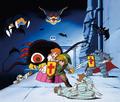
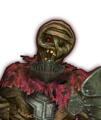
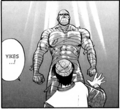
.png)
Gibdos appear in three episodes of the The Legend of Zelda TV series. In "Kiss'n Tell", a Gibdo disguises itself as a beautiful maiden who is pretending to be under attack by a Gleeok in order to draw Link onto the scene. Although Princess Zelda arrives first, Link eventually appears and defeats the Gleeok. The maiden then rewards Link with a kiss, and as their lips meet, Link turns into a frog while the maiden turns to her true form.[13] When Link reaches for his sword, he realizes that his hands have turned frog-like and is too distracted to see that the Gibdo is about to attack him.[14] However, Zelda pushes him out of the way and easily defeats the Gibdo by spinning it until it disappears back to Ganon's Evil Jar.[15] Ganon congratulates the Gleeok and Gibdo for their success and leaves the Underworld to proceed with his plan to obtain the Triforce of Wisdom.[16]
In "Underworld Connections", a Gibdo briefly appears out of the darkness while Link and Zelda are trying to recover the missing shards of the Triforce of Wisdom. The Gibdo attempts to grab the Triforce from Zelda's hands, but the young hero easily zaps it away. Lastly, in "The Moblins are Revolting", the Gibdos join the struggle formed by the Brotherhood of Underworld Monsters, where they try to attack North Castle; however, they accomplish nothing meaningful and eventually return to Ganon.
The Crystal Trap
In The Crystal Trap, Zelda encounters various Gibdos while inside a Cavern (The Crystal Trap). As Zelda is traveling through the Cavern (The Crystal Trap), she hears the sound of Gibdos approaching her from behind, and although she claims she can outrun them, more appear on the other side. Zelda realizes that neither a Dagger nor normal Arrows can pierce through the Gibdos, commenting to herself that she would need Magic Arrows to defeat them.
If Zelda picks up the Magic Arrows in Midoro Palace, she will shoot one of them at a Gibdo, causing it to burst into flames and scare the other Gibdos away.[17] This frees a Blue Fairy, who will thank Zelda by healing her and providing her with the Fairy's Scroll. More Gibdos will then begin to approach her, but she enters a nearby door to escape them.
The Wand of Gamelon
In The Wand of Gamelon, a Gibdo appears as the first Boss. It is located in the abandoned church of Sakado, using it as its base of operations. It terrorizes the town by commanding the monsters in that area and raising the dead to enslave the living.[18] It also plays the church's organ.
Princess Zelda defeats it with the Shroud given to her by Lubonga in Aru Ainu, of which it is afraid.[19] The Shroud is the only item that will defeat it, as normal attacks are ineffective. It fades away as the Shroud is thrown onto it.
Zelda's Adventure
Link's Crossbow Training
Gibdos appear in Link's Crossbow Training in Level 7-1. They behave similarly as their Twilight Princess incarnations, and as they are shot down, more appear to attack. They rise up from inside coffins, often near the camera. A single shot to the head with a normal Arrow will destroy them, though using Exploding Arrows is the most effective way to destroy larger groups that appear.
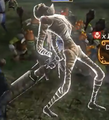
Hyrule Warriors
In Hyrule Warriors, Gibdos appear as Captains. They drag large swords behind them, which they will infrequently swing in a slow but brutal attack on nearby enemies. When surrounded with enemies, Gibdos will release a ranged shriek, stunning all nearby foes. If an opposing Warrior stands in line of their view but outside of their regular shriek's radius, the Gibdo will release a controlled shriek in the direction of the Warrior. Their shrieks leave them vulnerable, however, causing their Weak Point Gauge to be exposed. Gibdos also have an additional attack, in which they glow before releasing a poisonous miasma around them, similar to Deku Babas. While charging this attack, they expose their weakness to Arrows. Shooting them while glowing will expose their Weak Point Gauge and cause them to spin around, damaging their allies in the process.
When defeated, Gibdos may either drop the Gibdo Bandage or Heavy Gibdo Sword Materials.
Cadence of Hyrule
Gibdos appear as enemies in Cadence of Hyrule where they move to the beat of the music. Their behavior is modeled after the Golem enemies from Crypt of the NecroDancer. As they make their way towards Cadence, Link, Yves, or Zelda, they will stand still for two beats, crouching on the third before jumping to attack on the fourth beat. They can be turned into ReDead by burning off their bandages by hitting them with fire either from the Fire Rod, Fire Arrows, or fireballs casted by the Fire Wizzrobe. The game itself introduces Black Gibdos, which are stronger, while Green Gibdos make their first appearance since Four Swords Adventures.
Nomenclature
| Language | Names | Meanings |
|---|---|---|
Japanese | ギブド (Gibudo) (TLoZ | ALttP | OoT | TotK | CoH)[24][25][26][27] | Same as English. |
ChineseTR | 吉波得 (Jíbōdé) (TotK) | |
ChineseSI | 吉波得 (Jíbōdé) (TLoZ | TotK)[35] | |
Dutch | ||
FrenchCA | Gibdo (TotK | CoH) | |
FrenchEU | Gibdo (TLoZ | TotK | HWDE | CoH)[28][29][30] | |
German | Gibdo (TotK | HWDE | CoH)[34] | |
Italian | Ghibdo (TLoZ | ALttP | LA | LADX | OoT | OoT3D | MM | MM3D | OoS | OoA | FS | ALBW | TotK | CoH)[20][21][22][23] | Simple transliteration |
Korean | 기브도 (Gibeudo) (TotK) | |
SpanishLA | Gibdo (TotK | CoH)[32][33] | |
SpanishEU | Gibdo (TotK | CoH)[36][37] | |
| This table was generated using translation pages. To request an addition, please contact a staff member with a reference. | ||
Other Names
Gallery
-
Artwork of two Gibdos aiding a Lanmola, a Blue Darknut, and several Keese in surrounding Link and Princess Zelda from The Legend of Zelda
-
A Gibdo swallowed up by the earth from Majora's Mask
-

Artwork of Pamela's Father transformed into a Gibdo from Majora's Mask
-
Pamela's Father transformed into a Gibdo from Majora's Mask
-
Link speaking to a Gibdo turned into a ReDead from Majora's Mask
-

The sword used by Gibdos from Twilight Princess
-

Gibdo sprite in The Wand of Gamelon
-
Artwork of a Gibdo from Hyrule Warriors
-
Model of a Gibdo from Hyrule Warriors
-
The sword used by Gibdos from Hyrule Warriors
-
Portrait of a Gibdo from Hyrule Warriors
-

Portrait of a Dark Gibdo from Hyrule Warriors
-

VS Gibdo icon from Hyrule Warriors
-

VS Dark Gibdo icon from Hyrule Warriors
-

A Gibdo sprite in Adventure Mode from Hyrule Warriors
-

A Gibdo sprite in the Adventure Mode credits from Hyrule Warriors
-
A Gibdo from the A Link to the Past manga by Ataru Cagiva
-
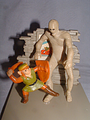
Figure of Link fighting a Gibdo from The Legend of Zelda
-

A Gibdo from Cadence of Hyrule


See Also
- Black Gibdo
- Blue Gibdo
- Dark Gibdo
- Green Gibdo
- Moth Gibdo
- Queen Gibdo
- ReDead
- ReDead Knight
- Stalfos
- Yellow Gibdo
Notes
- ↑ If Link defeats 10 enemies without getting hit or teleporting with the Flute, then the 10th enemy defeated will drop five Rupees. However, if the 10th enemy is defeated with a Bomb, then it will drop four Bombs. If Link defeats 16 enemies without getting hit or teleporting, then the 16th enemy will drop a Fairy. After the 16th enemy, Link must get hit and reset the counter to zero in order to achieve this effect again. Defeating Armos, Like Likes, Keese, or Gels will not be counted.[8]
References
- ↑ Encyclopedia, Dark Horse Books, pg. 160
- ↑ Encyclopedia, Dark Horse Books, pg. 181 (TLoZ | ALttP | LA | OoT | MM | OoS | OoA | FS | TMC | TP | ALBW | TFH)
- ↑ "Gibdo" — Hyrule Compendium (Tears of the Kingdom)
- ↑ "S4-11: Twee Gibdos." (S4-11: Two Gibdos.) (CD Interactief, HUB Uitgevers, April/May 1999, pg. 6)
- ↑ "Gibdo" — Battlefield Info (Hyrule Warriors: Definitive Edition)
- ↑ "The mummy man. He's got some strange powers, and some pretty powerful attacking force." (The Legend of Zelda manual, pg. 37)
- ↑ "This bandage swathed menace is indeed powerful. It can withstand repeated blows from the sword without even slowing down. However, it is rumored that it cannot stand fire..." (A Link to the Past manual, pg. 44)
- ↑ n.a., Forced Drops , redcandle.us, published n.d., retrieved August 17, 2017.
- ↑ "Leeeave me something delicious to chomp on. Something that sprouts when it's watered. Preferably five of them..." — Gibdo (Majora's Mask)
- ↑ "Leeeaave me something deliciously fresh!" — Gibdo (Majora's Mask)
- ↑ "A monster that appeared along with the sand shroud. Though slow to move, they can fight without faltering to physical attacks thanks to their tough outer skin. On the other hand, they are vulnerable to fire and lightning, which can turn them white and brittle." — Hyrule Compendium (Tears of the Kingdom)
- ↑ "Monster Tips: Gibdos
Though they are normally resistant to damage, they can be weakened with elemental attacks, such as fire or water. While in this vulnerable state, their bodies turn white." — Tips and Tricks (Tears of the Kingdom) - ↑ "What's the matter, Link? You don't like my charms anymore? You fell for it! Ganon's plan worked perfectly!" — Gibdo (The Legend of Zelda TV Series, Episode 4)
- ↑ "My hands! They're all weird!" — Link (The Legend of Zelda TV Series, Episode 4)
- ↑ "Wait 'till you see the rest of you! Let's go for a spin, Gibdo!" — (', Episode 4)
- ↑ "Excellent. You've done well, my servants. Link has been transformed into a frog! And with Link rendered practically useless, Zelda will be at my mercy! Now I shall put the rest of my plan into action. When I return, Zelda will be with me and Link will be gone...forever!" — Ganon (The Legend of Zelda TV Series, Episode 4)
- ↑ "The arrow finds its mark and the gibdo bursts into flame! In the red glare, Zelda sees the twisted shapes of the other mummy men as they run in fear from the terrible fire." (The Crystal Trap, Simon & Schuster, pg. 18)
- ↑ "For the dead shall raise, and the living shall be their slaves. She must be stopped!" — Gibdo (The Wand of Gamelon)
- ↑ "Here's a shroud that scares the wraps off Gibdo." — Lubonga (The Wand of Gamelon)
- ↑ Enciclopedia di Hyrule, Magazzini Salani, pg. 181
- ↑ "Ghibdo" — Navi (Ocarina of Time 3D, Italian localization)
- ↑ "Ecco un ghibdo." — Tatl (Majora's Mask 3D, Italian localization)
- ↑ "Causa della sconfitta: Ghibdo" — Game Over (Cadence of Hyrule, Italian localization)
- ↑ Hyrule Encyclopedia, Tokuma Shoten Publishing Co., Ltd., pg. 170
- ↑ A Link to the Past manual, pg. 50Nintendo Official Guidebook: The Legend of Zelda: A Link to the Past Vol. 2, Shogakukan, pg. 140Nintendo Official Guidebook—The Legend of Zelda: A Link to the Past & Four Swords, Shogakukan, pg. 26
- ↑ Nintendo Official Guidebook—The Legend of Zelda: Ocarina of Time, Shogakukan, pg. 143
- ↑ "敗因:ギブド" — Game Over (Cadence of Hyrule, Japanese localization)
- ↑ 28.0 28.1 The Legend of Zelda manual, pg. 37
- ↑ "Gibdo" — Battlefield Info (Hyrule Warriors: Definitive Edition, European French localization)
- ↑ "Défaite causée par: Gibdo" — Game Over (Cadence of Hyrule, Canadian French localization)
- ↑ "Gibdo" — Hyrule Compendium (Tears of the Kingdom)
- ↑ "Gibdo" — Hyrule Compendium (Tears of the Kingdom, Latin American Spanish localization)
- ↑ "¡Fin de la partida! Causa: Gibdo" — Game Over (Cadence of Hyrule, Latin American Spanish localization)
- ↑ "Besiegt von: Gibdo" — Game Over (Cadence of Hyrule, German localization)
- ↑ 塞尔达传说:百科全书, New Star Press, pg. 185
- ↑ "Gibdo" — Hyrule Compendium (Tears of the Kingdom, European Spanish localization)
- ↑ "¡Fin de la partida! Causa: Gibdo" — Game Over (Cadence of Hyrule, European Spanish localization)
- ↑ The Legend of Zelda: Twilight Princess—PRIMA Official Game Guide, Prima Games, pg. 19
- ↑ The Legend of Zelda: Twilight Princess—The Official Nintendo Player's Guide, Nintendo of America, pg. 86
- Enemies
- Gibdos
- Humanoid Enemies
- Undead Enemies
- Bosses
- Characters
- Enemies in The Legend of Zelda
- Enemies in A Link to the Past
- Enemies in Link's Awakening
- Enemies in Link's Awakening DX
- Enemies in Link's Awakening (Nintendo Switch)
- Enemies in Ocarina of Time
- Enemies in Ocarina of Time 3D
- Enemies in Majora's Mask
- Enemies in Majora's Mask 3D
- Enemies in Oracle of Seasons
- Enemies in Oracle of Ages
- Enemies in Four Swords
- Enemies in Four Swords Adventures
- Enemies in The Minish Cap
- Enemies in Twilight Princess
- Enemies in Twilight Princess HD
- Bosses in A Link Between Worlds
- Enemies in A Link Between Worlds
- Enemies in Tri Force Heroes
- Enemies in Tears of the Kingdom
- Enemies in The Legend of Zelda (TV Series)
- Bosses in The Wand of Gamelon
- Characters in The Wand of Gamelon
- Enemies in Zelda's Adventure
- Enemies in Hyrule Warriors
- Enemies in Hyrule Warriors Legends
- Enemies in Hyrule Warriors: Definitive Edition
- Enemies in Cadence of Hyrule