Cameos of The Legend of Zelda in Third-Party Media: Difference between revisions
TriforceTony (talk | contribs) No edit summary |
Htwretched (talk | contribs) (→{{SCII|-}}: Updated Command List tables) |
||
| (40 intermediate revisions by 14 users not shown) | |||
| Line 7: | Line 7: | ||
==Third-Party Games== | ==Third-Party Games== | ||
===''Ace Combat: Assault Horizon Legacy +''=== | ===''Ace Combat: Assault Horizon Legacy +''=== | ||
{{Main|amiibo# | {{Main|amiibo#Ace Combat: Assault Horizon Legacy +}} | ||
: [[Link]] and [[Princess Zelda|Zelda]]-themed planes can be unlocked by scanning the Link or [[Toon Link]] [[amiibo]], and the Zelda or [[Sheik]] amiibo, respectively. | : [[Link]] and [[Princess Zelda|Zelda]]-themed planes can be unlocked by scanning the Link or [[Toon Link]] [[amiibo]], and the Zelda or [[Sheik]] amiibo, respectively. | ||
| Line 15: | Line 15: | ||
<gallery class="center"> | <gallery class="center"> | ||
File:Bayonetta Link Outfit.png|Bayonetta wearing her Link costume | File:Bayonetta Link Outfit Render.png|Bayonetta wearing her Link costume | ||
File:Bayonetta Link Key.png|Bayonetta using a Key in ''Bayonetta'' | File:Bayonetta Link Key.png|Bayonetta using a Key in ''Bayonetta'' | ||
File:Bayonetta Link Screenshot.png|Bayonetta dressed as Link in ''Bayonetta 2'' | File:Bayonetta Link Screenshot.png|Bayonetta dressed as Link in ''Bayonetta 2'' | ||
| Line 32: | Line 32: | ||
File:D3EC Ganondorf Transmogrification 2 Artwork.jpg|Ganondorf's Transmogrification alongside the Triforce portrait frame | File:D3EC Ganondorf Transmogrification 2 Artwork.jpg|Ganondorf's Transmogrification alongside the Triforce portrait frame | ||
</gallery> | </gallery> | ||
===''{{Wp|The Elder Scrolls V: Skyrim}}''=== | |||
:In the Nintendo Switch version of ''Skyrim'', amiibo functionality has been added to summon {{Plural|Series|Treasure Chest|link}}. {{TLoZ|-}} amiibo have a chance of including the exclusive items: the {{Term|Series|Master Sword|link}}, {{Term|Series|Hylian Shield|link}}, or {{Term|Series|Champion's Tunic|link}}. These items can also be found in a {{Term|Series|Treasure Chest}} on top of the Throat of the World. Additionally, male Bosmer have been given a unique blue eye color. | |||
===''{{Wp|Fatal Frame: Maiden of Black Water}}''=== | |||
: In the [[Wii U]] version only, Miu Hinasaki, one of the playable protagonists in ''Maiden of Black Water'', is capable of wearing an alternate costume that grants her the dress of Princess Zelda from {{HW}}. | |||
===''{{Wp|Metal Gear Solid: The Twin Snakes}}''=== | ===''{{Wp|Metal Gear Solid: The Twin Snakes}}''=== | ||
: If there is saved data for {{TWW}} on a memory card in the [[Nintendo GameCube]], Psycho Mantis will prove his telekinetic powers to Solid Snake during their encounter by reading the data and asking if he likes ''The Legend of Zelda''.<ref>{{Cite|You seem to like The Legend of Zelda, don't you?|Psycho Mantis|Metal Gear Solid: The Twin Snakes}}</ref> | : If there is saved data for {{TWW}} on a memory card in the [[Nintendo GameCube]], Psycho Mantis will prove his telekinetic powers to Solid Snake during their encounter by reading the data and asking if he likes ''The Legend of Zelda''.<ref>{{Cite|You seem to like The Legend of Zelda, don't you?|Psycho Mantis|{{Wp|Metal Gear Solid: The Twin Snakes}}}}</ref> | ||
===''{{Wp|Monster Hunter}} series''=== | |||
====''{{Wp|Monster Hunter 4}}''==== | |||
: A costume of Link in his {{SS|-}} incarnation with the Master Sword, Hylian Shield, and the Sacred Bow is available in ''Monster Hunter 4'' after completing a quest where players have to defeat monsters known as Jinouga, Kirin, and Rajang. These monsters are chosen to represent Power, Wisdom and Courage, the three aspects of the [[Triforce]]. Defeating them grants the player a Triforce ticket that can be used to obtain the item set. | |||
====''{{Wp|Monster Hunter Generations}}''==== | |||
: The Palico companions in ''Monster Hunter Generations'' are able to wear a [[Toon Link]] costume as a form of DLC. This costume grants them his appearance, with the only major changes being cat ears, a cat's tail, and whiskers. They are able to use the [[Wind Waker (Item)|Wind Waker]] as a melee weapon to strike enemies. The costume also has the complete [[Master Sword#The Wind Waker|Master Sword]] and the [[Mirror Shield]] attached to its back. | |||
: The costume of Link from {{SS|-}} in ''Monster Hunter 4'' is also available in ''Monster Hunter Generations''. | |||
====''{{wp|Monster Hunter Stories}}''==== | |||
: The main character dresses as Link while wielding the Master Sword. | |||
: [[Epona]] can be unlocked as a Monster Mount for riding into combat. | |||
: The Palico ally, Nabiru, can wear the Skull Kid's hat and Majora's Mask. | |||
====''{{wp|Monster Hunter Generations}} Ultimate''==== | |||
: The main character can wear the [[Champion's Tunic]], and the [[Hylian Trousers]] and [[Hylian Hood|Hood]]. A costume based on a [[Korok]] also appears. | |||
<gallery class="center"> | |||
File:MH4 Link Costume.png|The Link costume in ''Monster Hunter 4'' | |||
File:Toon Link - MHX Palico Costume.png|The Toon Link costume in ''Monster Hunter Generations'' | |||
File:Epona - MHST Monster Mount.png|Epona Beast Mount in ''Monster Hunter Stories'' | |||
File:MHXX BotW Promo.jpg|The {{BotW|-}} costumes in ''Monster Hunter Generations Ultimate'' | |||
</gallery> | |||
===''{{wp|Nobody Saves the World}}''=== | |||
The {{Term|Series|Master Sword}} appears on a wall together with several other iconic video game swords, including the {{xsw|Monado}} from ''{{xsw|Xenoblade Chronicles}}'', the Buster Sword from ''Final Fantasy VII'', and a Keyblade from ''Kingdom Hearts'', among others. | |||
===''One Piece: Super Grand Battle! X''=== | ===''One Piece: Super Grand Battle! X''=== | ||
[[File:One Piece Link Costume.jpg|thumb|right|230px|Zoro's Link costume from ''One Piece: Super Grand Battle! X'']] | [[File:One Piece Link Costume.jpg|thumb|right|230px|Zoro's Link costume from ''One Piece: Super Grand Battle! X'']] | ||
{{Main|amiibo# | {{Main|amiibo#One Piece: Super Grand Battle! X}} | ||
: By using amiibo figures through the [[New Nintendo 3DS]] or NFC Reader/Writer, various costumes based on Nintendo characters can be unlocked. Scanning the Link amiibo creates a Link costume for Zoro, which includes the Master Sword, Hylian Shield, and {{MM|Item}}. | : By using amiibo figures through the [[New Nintendo 3DS]] or NFC Reader/Writer, various costumes based on Nintendo characters can be unlocked. Scanning the Link amiibo creates a Link costume for Zoro, which includes the Master Sword, Hylian Shield, and {{MM|Item}}. | ||
| Line 44: | Line 76: | ||
File:One Piece Majora's Mask.jpg|Zoro wearing Majora's Mask in ''One Piece: Super Grand Battle! X'' | File:One Piece Majora's Mask.jpg|Zoro wearing Majora's Mask in ''One Piece: Super Grand Battle! X'' | ||
</gallery> | </gallery> | ||
===''{{Wp|Phantasy Star 0}}''=== | ===''{{Wp|Phantasy Star 0}}''=== | ||
| Line 60: | Line 87: | ||
</gallery> | </gallery> | ||
===''{{Wp| | ===''{{Wp|Sonic Lost World}}''=== | ||
: | {{Main|The Legend of Zelda Zone}} | ||
[[File:Zelda Zone Logo.png|thumb|right|230px|''The Legend of Zelda'' Zone artwork]] | |||
:''The Legend of Zelda'' Zone is a free {{wp|Downloadable Content|DLC}}-level for ''Sonic Lost World''. In the level, {{Wp|Sonic the Hedgehog}} is dressed like Link in a green tunic and boots. The Zone features many elements from ''The Legend of Zelda'' series, including enemies, objects, and sounds. Link himself appears in his {{SS}} incarnation. | |||
<br clear=right/> | |||
==={{SCII|-}}=== | |||
{{Main|SoulCalibur II}} | |||
:[[Link]] is a playable character in the [[Nintendo GameCube|GameCube]] version of {{SCII|-}}. In the game, [[Hyrule]]'s tranquility was shattered by the arrival of several disasters, which brought opaque, ominous clouds with them. Eventually, it was discovered that an unknown magician was to blame for all that had happened. Just as the people were about to lose all hope, the sun miraculously returned as Link, having been summoned by [[Princess Zelda]] to find the disasters' source, successfully defeated the magician. The people of Hyrule rejoiced in the belief that eternal peace would rule; but it eventually became clear that the magician responsible for the disasters was in fact controlled by an evil sword from another world, Soul Edge, and that the fragments of Soul Edge had been gathering in the other world.<ref>{{Cite|Just as the people were about to lose all hope, the sun miraculously returned. Link, who was summoned by Zelda to find the cause of the disasters, successfully defeated the magician. The people of Hyrule rejoiced in the belief that eternal peace would rule. Unfortunately, this was not to be. It became clear that the magician responsible for the disasters was in fact controlled by an evil sword called Soul Edge, which existed in an another world.|N/A|SCII}}</ref> | |||
:Knowing that the resurrection of the evil blade must be prevented at all costs, Link chose to travel to the other world and destroy Soul Edge himself, taking his trusted [[Master Sword]] and {{Term|OoT3D|Ocarina of Time (Item)|link}}, and transporting himself off on a secret journey.<ref>{{Cite|Knowing that the resurrection of the evil blade must be prevented at all costs, Link chose to travel to the other world and destroy Soul Edge. Link gathered his trusted Master Sword, Hylian Shield, and Ocarina, and set off on a secret journey.|N/A|SCII}}</ref> Through the completion of Arcade mode, Link succeeds in sealing away the evil within the Soul Edge, saving his homeland and quietly leaving the world he had come upon, leaving only a faint echo of his Ocarina.<ref>{{Cite|Link came to this world in order to defeat the evil which threatened Hyrule. After a long journey, Link finally succeeded in sealing away the terrible evil. In doing so, he not only saved his homeland from peril, but also maintained the tranquility of this world. Link then quietly left this world--a faint echo of his Ocarina was all that remained.|N/A|SCII}}</ref> | |||
:Knowing that the resurrection of the evil blade must be prevented at all costs, Link chose to travel to the other world and destroy Soul Edge himself, taking his trusted [[Master Sword]] and {{ | |||
:Link is the only character with a ranged attack. His fighting style retains many of his signature moves from past games in the ''Zelda'' and [[:Category:Super Smash Bros.|{{SSB|-}} series]]. Some of these moves include the [[Spin Attack]], the [[Jump Attack]], the [[Down Thrust]], the [[Jump Thrust]], and the [[Dash Attack]]. | |||
Link is the only character with a ranged attack. His fighting style retains many of his signature moves from past games in the ''Zelda'' and [[:Category:Super Smash Bros.|{{SSB|-}} series]]. Some of these moves include the [[Spin Attack]], the [[Jump Attack]], the [[Down Thrust]], the [[Jump Thrust]], and the [[Dash Attack]]. | |||
; Controls | ====Command List==== | ||
{|class=" | <div style="display:none"> | ||
{{#vardefine:Left|{{!}}style="text-align:left;"}} | |||
{{#vardefine:Sp| }} | |||
</div> | |||
;Controls | |||
{|class="wikitable mw-collapsible mw-collapsed" style="text-align:center" | |||
!colspan="2"| Button Explanation | !colspan="2"| Button Explanation | ||
|- | |- | ||
! | !Image | ||
!Explanation | !Explanation | ||
|- | |- | ||
|{{ | |{{Icon|SCII Horizontal Attack}} | ||
|Horizontal Attack Button | {{#var:Left}}|Horizontal Attack Button | ||
|- | |- | ||
|{{ | |{{Icon|SCII Hold Horizontal Attack}} | ||
|Hold Horizontal Attack Button | {{#var:Left}}|Hold Horizontal Attack Button | ||
|- | |- | ||
|{{ | |{{Icon|SCII Vertical Attack}} | ||
|Vertical Attack Button | {{#var:Left}}|Vertical Attack Button | ||
|- | |- | ||
|{{ | |{{Icon|SCII Hold Vertical Attack}} | ||
|Hold Vertical Attack Button | {{#var:Left}}|Hold Vertical Attack Button | ||
|- | |- | ||
|{{ | |{{Icon|SCII Kick}} | ||
|Kick Button | {{#var:Left}}|Kick Button | ||
|- | |- | ||
|{{ | |{{Icon|SCII Hold Kick}} | ||
|Hold Kick Button | {{#var:Left}}|Hold Kick Button | ||
|- | |- | ||
|{{ | |{{Icon|SCII Guard}} | ||
|Guard Button | {{#var:Left}}|Guard Button | ||
|- | |- | ||
|{{ | |{{Icon|SCII Hold Guard}} | ||
|Hold Guard Button | {{#var:Left}}|Hold Guard Button | ||
|- | |- | ||
|{{ | |{{Icon|SCII Arrow Right}} | ||
|Control Pad | {{#var:Left}}|Control Pad | ||
|- | |- | ||
|{{ | |{{Icon|SCII Hold Arrow Right}} | ||
|Hold Control Pad | {{#var:Left}}|Hold Control Pad | ||
|- | |- | ||
|{{ | |{{Icon|SCII Kick Slide}}{{Icon|SCII Vertical Attack}} | ||
|Slide Input | {{#var:Left}}|Slide Input | ||
|- | |- | ||
|{{ | |{{Icon|SCII Neutral}} | ||
|Neutral | {{#var:Left}}|Neutral | ||
|} | |} | ||
{|class=" | {|class="wikitable mw-collapsible mw-collapsed" style="text-align:center" | ||
!colspan="2"| Legend | !colspan="2"| Legend | ||
|- | |- | ||
! | !Image | ||
!Explanation | !Explanation | ||
|- | |- | ||
|{{ | |{{Icon|SCII High Attack}} | ||
|High Attack | {{#var:Left}}|High Attack | ||
|- | |- | ||
|{{ | |{{Icon|SCII Mid Attack}} | ||
|Mid Attack | {{#var:Left}}|Mid Attack | ||
|- | |- | ||
|{{ | |{{Icon|SCII Special Mid Attack}} | ||
|Special Mid Attack | {{#var:Left}}|Special Mid Attack | ||
|- | |- | ||
|{{ | |{{Icon|SCII Low Attack}} | ||
|Low Attack | {{#var:Left}}|Low Attack | ||
|- | |- | ||
|{{ | |{{Icon|SCII Throw}} | ||
|Throw | {{#var:Left}}|Throw | ||
|- | |- | ||
|{{ | |{{Icon|SCII Unblockable Attack}} | ||
|Unblockable Attack | {{#var:Left}}|Unblockable Attack | ||
|- | |- | ||
|{{ | |{{Icon|SCII Attack Throw}} | ||
|Attack Throw | {{#var:Left}}|Attack Throw | ||
|- | |- | ||
|{{ | |{{Icon|SCII Special Movement}} | ||
|Special Movement | {{#var:Left}}|Special Movement | ||
|- | |- | ||
|{{ | |{{Icon|SCII Guard Break}} | ||
|Guard Break properties | {{#var:Left}}|Guard Break properties | ||
|- | |- | ||
|{{ | |{{Icon|SCII Guard Impact}} | ||
|Guard Impact properties | {{#var:Left}}|Guard Impact properties | ||
|- | |- | ||
|{{ | |{{Icon|SCII Switch to Stance}} | ||
|Switch to stance | {{#var:Left}}|Switch to stance | ||
|} | |} | ||
{|class="wikitable | ;Attacks | ||
!colspan=" | {|class="wikitable mw-collapsible mw-collapsed" style="text-align:center" | ||
!colspan="4"| Horizontal Attacks | |||
|- | |- | ||
!Name | !Name | ||
!Button(s) | !Button(s) | ||
!Attack | !Attack | ||
!Properties | |||
|- | |- | ||
|Horizontal Slash | {{#var:Left}}|Horizontal Slash | ||
|{{ | |{{Icon|SCII Horizontal Attack}} | ||
|{{ | |{{Icon|SCII High Attack}} | ||
|- | |- | ||
|Horizontal Slash~[[Spin Attack]] | {{#var:Left}}|Horizontal Slash~[[Spin Attack]] | ||
|{{ | |{{Icon|SCII Hold Horizontal Attack}} | ||
|{{ | |{{Icon|SCII High Attack}}{{Icon|SCII High Attack}}{{Icon|SCII High Attack}}{{Icon|SCII High Attack}}{{Icon|SCII High Attack}} | ||
|{{Icon|SCII Unblockable Attack}} | |||
|- | |- | ||
|Double Sword Slash (Horizontal) | {{#var:Left}}|Double Sword Slash (Horizontal) | ||
|{{ | |{{Icon|SCII Horizontal Attack}}{{#var:Sp}}{{Icon|SCII Horizontal Attack}} | ||
|{{ | |{{Icon|SCII High Attack}}{{Icon|SCII High Attack}} | ||
|- | |- | ||
|Double Sword Slash (Horizontal)~Boomerang Stance | {{#var:Left}}|Double Sword Slash (Horizontal)~Boomerang Stance | ||
|{{ | |{{Icon|SCII Horizontal Attack}}{{#var:Sp}}{{Icon|SCII Hold Horizontal Attack}} | ||
|{{ | |{{Icon|SCII High Attack}}{{Icon|SCII High Attack}} | ||
|{{Icon|SCII Switch to Stance}} | |||
|- | |- | ||
|Cross Slash | {{#var:Left}}|Cross Slash | ||
|{{ | |{{Icon|SCII Horizontal Attack}}{{#var:Sp}}{{Icon|SCII Vertical Attack}} | ||
|{{ | |{{Icon|SCII High Attack}}{{Icon|SCII Mid Attack}} | ||
|- | |- | ||
|Cross Slash~Bomb Stance | {{#var:Left}}|Cross Slash~Bomb Stance | ||
|{{ | |{{Icon|SCII Horizontal Attack}}{{#var:Sp}}{{Icon|SCII Vertical Attack}}{{#var:Sp}}{{Icon|SCII Vertical Attack}}{{Icon|SCII +}}{{Icon|SCII Kick}} | ||
|{{ | |{{Icon|SCII High Attack}}{{Icon|SCII Mid Attack}} | ||
|{{Icon|SCII Switch to Stance}} | |||
|- | |- | ||
|Cross Slash Combo | {{#var:Left}}|Cross Slash Combo | ||
|{{ | |{{Icon|SCII Horizontal Attack}}{{#var:Sp}}{{Icon|SCII Vertical Attack}}{{#var:Sp}}{{Icon|SCII Kick}} | ||
|{{ | |{{Icon|SCII High Attack}}{{Icon|SCII Mid Attack}}{{Icon|SCII High Attack}} | ||
|- | |- | ||
|Cross Slash Combo (Delay) | {{#var:Left}}|Cross Slash Combo (Delay) | ||
|{{ | |{{Icon|SCII Horizontal Attack}}{{#var:Sp}}{{Icon|SCII Vertical Attack}}{{#var:Sp}}{{Icon|SCII Kick}} | ||
|{{ | |{{Icon|SCII High Attack}}{{Icon|SCII Mid Attack}}{{Icon|SCII High Attack}} | ||
|- | |- | ||
|Cross Slash Combo~Bomb Stance | {{#var:Left}}|Cross Slash Combo~Bomb Stance | ||
|{{ | |{{Icon|SCII Horizontal Attack}}{{#var:Sp}}{{Icon|SCII Vertical Attack}}{{#var:Sp}}{{Icon|SCII Hold Kick}} | ||
|{{ | |{{Icon|SCII High Attack}}{{Icon|SCII Mid Attack}}{{Icon|SCII High Attack}} | ||
|{{Icon|SCII Switch to Stance}} | |||
|- | |- | ||
|Step-in Attack Combo | {{#var:Left}}|Step-in Attack Combo | ||
|{{ | |{{Icon|SCII Arrow Right}}{{Icon|SCII Horizontal Attack}}{{#var:Sp}}{{Icon|SCII Horizontal Attack}} | ||
|{{ | |{{Icon|SCII High Attack}}{{Icon|SCII Low Attack}} | ||
|- | |- | ||
|Step-in Attack Combo (Delay) | {{#var:Left}}|Step-in Attack Combo (Delay) | ||
|{{ | |{{Icon|SCII Arrow Right}}{{Icon|SCII Horizontal Attack}}{{#var:Sp}}{{Icon|SCII Horizontal Attack}} | ||
|{{ | |{{Icon|SCII High Attack}}{{Icon|SCII Low Attack}} | ||
|- | |- | ||
|Step-in Attack Upper Combo | {{#var:Left}}|Step-in Attack Upper Combo | ||
|{{ | |{{Icon|SCII Arrow Right}}{{Icon|SCII Horizontal Attack}}{{#var:Sp}}{{Icon|SCII Horizontal Attack}}{{#var:Sp}}{{Icon|SCII Vertical Attack}} | ||
|{{ | |{{Icon|SCII High Attack}}{{Icon|SCII Mid Attack}} | ||
|- | |- | ||
|Bat Swing | {{#var:Left}}|Bat Swing | ||
|{{ | |{{Icon|SCII Arrow Right}}{{Icon|SCII Arrow Right}}{{Icon|SCII Horizontal Attack}} | ||
|{{ | |{{Icon|SCII Mid Attack}} | ||
|- | |- | ||
|Shoelace Slash | {{#var:Left}}|Shoelace Slash | ||
|{{ | |{{Icon|SCII Arrow Down Right}}{{Icon|SCII Horizontal Attack}} | ||
|{{ | |{{Icon|SCII Low Attack}} | ||
|- | |- | ||
|Crouching Slash | {{#var:Left}}|Crouching Slash | ||
|{{ | |{{Icon|SCII Arrow Down}}{{Icon|SCII Horizontal Attack}} | ||
|{{ | |{{Icon|SCII Special Mid Attack}} | ||
|- | |- | ||
|Sword Trip | {{#var:Left}}|Sword Trip | ||
|{{ | |{{Icon|SCII Arrow Down Left}}{{Icon|SCII Horizontal Attack}} | ||
|{{ | |{{Icon|SCII Low Attack}} | ||
|- | |- | ||
|Counter Slash | {{#var:Left}}|Counter Slash | ||
|{{ | |{{Icon|SCII Arrow Left}}{{Icon|SCII Horizontal Attack}} | ||
|{{ | |{{Icon|SCII High Attack}} | ||
|- | |- | ||
|Counter Slash~Boomerang Stance | {{#var:Left}}|Counter Slash~Boomerang Stance | ||
|{{ | |{{Icon|SCII Arrow Left}}{{Icon|SCII Hold Horizontal Attack}} | ||
|{{ | |{{Icon|SCII High Attack}} | ||
|{{Icon|SCII Switch to Stance}} | |||
|- | |- | ||
|[[Cyclone Attack]] | {{#var:Left}}|[[Cyclone Attack]] | ||
|{{ | |{{Icon|SCII Arrow Up}}{{Icon|SCII (}}{{Icon|SCII Arrow Up Left}}{{Icon|SCII ,}}{{Icon|SCII Arrow Up Right}}{{Icon|SCII )}}{{Icon|SCII Horizontal Attack}} | ||
|{{ | |{{Icon|SCII Mid Attack}} | ||
|- | |- | ||
|Cyclone Attack (Hold) | {{#var:Left}}|Cyclone Attack (Hold) | ||
|{{ | |{{Icon|SCII Arrow Up}}{{Icon|SCII (}}{{Icon|SCII Arrow Up Left}}{{Icon|SCII ,}}{{Icon|SCII Arrow Up Right}}{{Icon|SCII )}}{{Icon|SCII Hold Horizontal Attack}} | ||
|{{ | |{{Icon|SCII Mid Attack}}{{Icon|SCII High Attack}}{{Icon|SCII High Attack}} | ||
|- | |- | ||
|[[Spin Attack]] | {{#var:Left}}|[[Spin Attack]] | ||
|{{ | |{{Icon|SCII Arrow Down}}{{Icon|SCII Arrow Down Left}}{{Icon|SCII Arrow Left}}{{Icon|SCII Horizontal Attack}} | ||
|{{ | |{{Icon|SCII High Attack}}{{Icon|SCII High Attack}} | ||
|- | |- | ||
|Spin Attack (Hold) | {{#var:Left}}|Spin Attack (Hold) | ||
|{{ | |{{Icon|SCII Arrow Down}}{{Icon|SCII Arrow Down Left}}{{Icon|SCII Arrow Left}}{{Icon|SCII Hold Horizontal Attack}} | ||
|{{ | |{{Icon|SCII High Attack}}{{Icon|SCII High Attack}}{{Icon|SCII High Attack}}{{Icon|SCII High Attack}} | ||
|{{Icon|SCII Unblockable Attack}} | |||
|- | |- | ||
|Bat Swing | {{#var:Left}}|Bat Swing | ||
|{{ | |{{Icon|SCII Hold Arrow Right}}{{Icon|SCII Horizontal Attack}} | ||
|{{ | |{{Icon|SCII Mid Attack}} | ||
|- | |- | ||
|Force Counter Slash | {{#var:Left}}|Force Counter Slash | ||
|{{ | |{{Icon|SCII Hold Arrow Down Right}}{{Icon|SCII (}}{{Icon|SCII Hold Arrow Up Right}}{{Icon|SCII )}}{{Icon|SCII Horizontal Attack}} | ||
|{{ | |{{Icon|SCII Mid Attack}} | ||
|- | |- | ||
|Spinning Leap Strike | {{#var:Left}}|Spinning Leap Strike | ||
|{{ | |{{Icon|SCII Hold Arrow Down}}{{Icon|SCII (}}{{Icon|SCII Hold Arrow Up}}{{Icon|SCII )}}{{Icon|SCII Horizontal Attack}} | ||
|{{ | |{{Icon|SCII High Attack}} | ||
|- | |- | ||
|Grass Cutter | {{#var:Left}}|Grass Cutter | ||
|{{ | |{{Icon|SCII Hold Arrow Down Left}}{{Icon|SCII (}}{{Icon|SCII Hold Arrow Up Left}}{{Icon|SCII )}}{{Icon|SCII Horizontal Attack}} | ||
|{{ | |{{Icon|SCII Low Attack}} | ||
|- | |- | ||
|Grass Cutter (Hold) | {{#var:Left}}|Grass Cutter (Hold) | ||
|{{ | |{{Icon|SCII Hold Arrow Down Left}}{{Icon|SCII (}}{{Icon|SCII Hold Arrow Up Left}}{{Icon|SCII )}}{{Icon|SCII Hold Horizontal Attack}} | ||
|{{ | |{{Icon|SCII Low Attack}} | ||
|- | |- | ||
|Grass Cutter High Feint | {{#var:Left}}|Grass Cutter High Feint | ||
|{{ | |{{Icon|SCII Hold Arrow Down Left}}{{Icon|SCII (}}{{Icon|SCII Hold Arrow Up Left}}{{Icon|SCII )}}{{Icon|SCII Horizontal Attack}}{{#var:Sp}}{{Icon|SCII Vertical Attack}} | ||
|{{ | |{{Icon|SCII Mid Attack}} | ||
|- | |- | ||
|Counter Slash | {{#var:Left}}|Counter Slash | ||
|{{ | |{{Icon|SCII Hold Arrow Left}}{{Icon|SCII Horizontal Attack}} | ||
|{{ | |{{Icon|SCII High Attack}} | ||
|- | |- | ||
|Counter Slash~Boomerang Stance | {{#var:Left}}|Counter Slash~Boomerang Stance | ||
|{{ | |{{Icon|SCII Hold Arrow Left}}{{Icon|SCII Hold Horizontal Attack}} | ||
|{{ | |{{Icon|SCII High Attack}} | ||
|{{Icon|SCII Switch to Stance}} | |||
|- | |- | ||
|[[Bow]] Stance | {{#var:Left}}|[[Bow]] Stance | ||
|{{ | |{{Icon|SCII Hold Arrow Right}}{{Icon|SCII (}}{{Icon|SCII Hold Arrow Down Right}}{{Icon|SCII ,}}{{Icon|SCII Hold Arrow Up Right}}{{Icon|SCII ,}}{{Icon|SCII Hold Arrow Down}}{{Icon|SCII ,}}{{Icon|SCII Hold Arrow Up}}{{Icon|SCII ,}}{{Icon|SCII Hold Arrow Down Left}}{{Icon|SCII ,}}{{Icon|SCII Hold Arrow Up Left}}{{Icon|SCII ,}}{{Icon|SCII Hold Arrow Left}}{{Icon|SCII )}}{{Icon|SCII Horizontal Attack}}{{Icon|SCII +}}{{Icon|SCII Vertical Attack}} | ||
|{{ | | | ||
|{{Icon|SCII Switch to Stance}} | |||
|- | |- | ||
|[[Boomerang]] Stance | {{#var:Left}}|[[Boomerang]] Stance | ||
|{{ | |{{Icon|SCII Hold Arrow Right}}{{Icon|SCII (}}{{Icon|SCII Hold Arrow Down Right}}{{Icon|SCII ,}}{{Icon|SCII Hold Arrow Up Right}}{{Icon|SCII ,}}{{Icon|SCII Hold Arrow Down}}{{Icon|SCII ,}}{{Icon|SCII Hold Arrow Up}}{{Icon|SCII ,}}{{Icon|SCII Hold Arrow Down Left}}{{Icon|SCII ,}}{{Icon|SCII Hold Arrow Up Left}}{{Icon|SCII ,}}{{Icon|SCII Hold Arrow Left}}{{Icon|SCII )}}{{Icon|SCII Horizontal Attack}}{{Icon|SCII +}}{{Icon|SCII Kick}} | ||
|{{ | | | ||
|{{Icon|SCII Switch to Stance}} | |||
|- | |- | ||
|Rising Horizontal Slash | {{#var:Left}}|Rising Horizontal Slash | ||
|While rising {{ | |(While rising) {{Icon|SCII Horizontal Attack}} | ||
|{{ | |{{Icon|SCII Mid Attack}} | ||
|- | |- | ||
|Rising Horizontal Slash~Boomerang Stance | {{#var:Left}}|Rising Horizontal Slash~Boomerang Stance | ||
|While rising {{ | |(While rising) {{Icon|SCII Hold Horizontal Attack}} | ||
|{{ | |{{Icon|SCII Mid Attack}} | ||
|{{Icon|SCII Switch to Stance}} | |||
|} | |} | ||
{|class="wikitable | {|class="wikitable mw-collapsible mw-collapsed" style="text-align:center" | ||
!colspan=" | !colspan="4"| Vertical Attacks | ||
|- | |- | ||
!Name | !Name | ||
!Button(s) | !Button(s) | ||
!Attack | !Attack | ||
!Properties | |||
|- | |- | ||
|Vertical Slash~Bow Stance | {{#var:Left}}|Vertical Slash~Bow Stance | ||
|{{ | |{{Icon|SCII Hold Vertical Attack}} | ||
|{{ | |{{Icon|SCII Mid Attack}} | ||
|{{Icon|SCII Switch to Stance}} | |||
|- | |- | ||
|Double Sword Slash (Vertical) | {{#var:Left}}|Double Sword Slash (Vertical) | ||
|{{ | |{{Icon|SCII Vertical Attack}}{{#var:Sp}}{{Icon|SCII Vertical Attack}} | ||
|{{ | |{{Icon|SCII Mid Attack}}{{Icon|SCII Mid Attack}} | ||
|- | |- | ||
|Slash Kick Combo | {{#var:Left}}|Slash Kick Combo | ||
|{{ | |{{Icon|SCII Vertical Attack}}{{#var:Sp}}{{Icon|SCII Kick}} | ||
|{{ | |{{Icon|SCII Mid Attack}}{{Icon|SCII Mid Attack}} | ||
|- | |- | ||
|Stab | {{#var:Left}}|Stab | ||
|{{ | |{{Icon|SCII Arrow Right}}{{Icon|SCII Vertical Attack}} | ||
|{{ | |{{Icon|SCII Mid Attack}} | ||
|- | |- | ||
|Illusion Stab Combo | {{#var:Left}}|Illusion Stab Combo | ||
|{{ | |{{Icon|SCII Arrow Right}}{{Icon|SCII Vertical Attack}} (repeat rapidly) | ||
|{{ | |{{Icon|SCII Mid Attack}}{{Icon|SCII High Attack}}{{Icon|SCII Mid Attack}}{{Icon|SCII Special Mid Attack}}{{Icon|SCII High Attack}}{{Icon|SCII Special Mid Attack}}{{Icon|SCII Mid Attack}} | ||
|- | |- | ||
|[[Running Hack]] | {{#var:Left}}|[[Running Hack]] | ||
|{{ | |{{Icon|SCII Arrow Right}}{{Icon|SCII Arrow Right}}{{Icon|SCII Vertical Attack}} | ||
|{{ | |{{Icon|SCII Mid Attack}} | ||
|- | |- | ||
|Half-Moon Swipe | {{#var:Left}}|Half-Moon Swipe | ||
|{{ | |{{Icon|SCII Arrow Down Right}}{{Icon|SCII Vertical Attack}} | ||
|{{ | |{{Icon|SCII Mid Attack}} | ||
|- | |- | ||
|Half-Moon Swipe~Bow Stance | {{#var:Left}}|Half-Moon Swipe~Bow Stance | ||
|{{ | |{{Icon|SCII Arrow Down Right}}{{Icon|SCII Hold Vertical Attack}} | ||
|{{ | |{{Icon|SCII Mid Attack}} | ||
|{{Icon|SCII Switch to Stance}} | |||
|- | |- | ||
|[[Sword Plant]] | {{#var:Left}}|[[Sword Plant]] | ||
|{{ | |{{Icon|SCII Arrow Down}}{{Icon|SCII Vertical Attack}} | ||
|{{ | |{{Icon|SCII Mid Attack}} | ||
|- | |- | ||
|Down Slash | {{#var:Left}}|Down Slash | ||
|{{ | |{{Icon|SCII Arrow Down Left}}{{Icon|SCII Vertical Attack}} | ||
|{{ | |{{Icon|SCII Mid Attack}} | ||
|- | |- | ||
|Double Spin Slash | {{#var:Left}}|Double Spin Slash | ||
|{{ | |{{Icon|SCII Arrow Left}}{{Icon|SCII Vertical Attack}}{{#var:Sp}}{{Icon|SCII Horizontal Attack}} | ||
|{{ | |{{Icon|SCII Mid Attack}}{{Icon|SCII High Attack}} | ||
|- | |- | ||
|Double Spin Slash (Hold) | {{#var:Left}}|Double Spin Slash (Hold) | ||
|{{ | |{{Icon|SCII Arrow Left}}{{Icon|SCII Vertical Attack}}{{#var:Sp}}{{Icon|SCII Hold Horizontal Attack}} | ||
|{{ | |{{Icon|SCII Mid Attack}}{{Icon|SCII High Attack}} | ||
|- | |- | ||
|Power Thrust | {{#var:Left}}|Power Thrust | ||
|{{ | |{{Icon|SCII Arrow Left}}{{Icon|SCII Arrow Left}}{{Icon|SCII Vertical Attack}} | ||
|{{ | |{{Icon|SCII Mid Attack}} | ||
|- | |- | ||
|Power Thrust (Hold) | {{#var:Left}}|Power Thrust (Hold) | ||
|{{ | |{{Icon|SCII Arrow Left}}{{Icon|SCII Arrow Left}}{{Icon|SCII Hold Vertical Attack}} | ||
|{{ | |{{Icon|SCII Mid Attack}} | ||
|{{Icon|SCII Guard Break}} | |||
|- | |- | ||
|Power Thrust~Bow Stance | {{#var:Left}}|Power Thrust~Bow Stance | ||
|{{ | |{{Icon|SCII Arrow Left}}{{Icon|SCII Arrow Left}}{{Icon|SCII Hold Vertical Attack}} | ||
|{{ | |{{Icon|SCII Mid Attack}} | ||
|{{Icon|SCII Guard Break}}{{Icon|SCII Switch to Stance}} | |||
|- | |- | ||
|[[Rocket Stab]] | {{#var:Left}}|[[Rocket Stab]] | ||
|{{ | |{{Icon|SCII Arrow Up}}{{Icon|SCII (}}{{Icon|SCII Arrow Up Left}}{{Icon|SCII ,}}{{Icon|SCII Arrow Up Right}}{{Icon|SCII )}}{{Icon|SCII Vertical Attack}} | ||
|{{ | |{{Icon|SCII Mid Attack}} | ||
|- | |- | ||
|[[Hyper Dash Attack]] | {{#var:Left}}|[[Hyper Dash Attack]] | ||
|{{ | |{{Icon|SCII Arrow Left}}{{Icon|SCII Arrow Left}}{{Icon|SCII Vertical Attack}}{{Icon|SCII +}}{{Icon|SCII Kick}} | ||
|{{ | |{{Icon|SCII Mid Attack}}{{Icon|SCII Mid Attack}} | ||
|{{Icon|SCII Guard Break}} | |||
|- | |- | ||
|Hyper Dash Attack (Hold) | {{#var:Left}}|Hyper Dash Attack (Hold) | ||
|{{ | |{{Icon|SCII Arrow Left}}{{Icon|SCII Arrow Left}}{{Icon|SCII Hold Vertical Attack}}{{Icon|SCII +}}{{Icon|SCII Hold Kick}} | ||
|{{ | |{{Icon|SCII Mid Attack}}{{Icon|SCII Mid Attack}}{{Icon|SCII Mid Attack}} | ||
|{{Icon|SCII Unblockable Attack}} | |||
|- | |- | ||
|Hyper Dash Attack (Cancel) | {{#var:Left}}|Hyper Dash Attack (Cancel) | ||
|{{ | |{{Icon|SCII Arrow Left}}{{Icon|SCII Arrow Left}}{{Icon|SCII Hold Vertical Attack}}{{Icon|SCII +}}{{Icon|SCII Hold Kick}}{{#var:Sp}}{{Icon|SCII Guard}} | ||
|{{ | | | ||
|{{Icon|SCII Special Movement}} | |||
|- | |- | ||
|Sword Sweep | {{#var:Left}}|Sword Sweep | ||
| | |{{Icon|SCII Vertical Attack Slide}}{{Icon|SCII Horizontal Attack}} | ||
|{{ | |{{Icon|SCII Mid Attack}} | ||
|{{Icon|SCII Guard Impact}} | |||
|- | |- | ||
|Sword Sweep~Spin Attack | {{#var:Left}}|Sword Sweep~Spin Attack | ||
| | |{{Icon|SCII Vertical Attack Slide}}{{Icon|SCII Hold Horizontal Attack}} | ||
|{{ | |{{Icon|SCII Mid Attack}}{{Icon|SCII High Attack}}{{Icon|SCII High Attack}}{{Icon|SCII High Attack}}{{Icon|SCII High Attack}} | ||
|{{Icon|SCII Unblockable Attack}} | |||
|- | |- | ||
|Running Spin Slash | {{#var:Left}}|Running Spin Slash | ||
|{{ | |{{Icon|SCII Arrow Right}}{{Icon|SCII Arrow Right}}{{Icon|SCII Vertical Attack Slide}}{{Icon|SCII Horizontal Attack}} | ||
|{{ | |{{Icon|SCII High Attack}} | ||
|- | |- | ||
|Running Spin Slash (Hold) | {{#var:Left}}|Running Spin Slash (Hold) | ||
|{{ | |{{Icon|SCII Arrow Left}}{{Icon|SCII Arrow Left}}{{Icon|SCII Vertical Attack Slide}}{{Icon|SCII Hold Horizontal Attack}} | ||
|{{ | |{{Icon|SCII High Attack}} | ||
|- | |- | ||
|Running Hack | {{#var:Left}}|Running Hack | ||
|{{ | |{{Icon|SCII Hold Arrow Right}}{{Icon|SCII (}}{{Icon|SCII Hold Arrow Down Right}}{{Icon|SCII ,}}{{Icon|SCII Hold Arrow Up Right}}{{Icon|SCII )}}{{Icon|SCII Vertical Attack}} | ||
|{{ | |{{Icon|SCII Mid Attack}} | ||
|- | |- | ||
|High Launcher | {{#var:Left}}|High Launcher | ||
|{{ | |{{Icon|SCII Hold Arrow Down}}{{Icon|SCII (}}{{Icon|SCII Hold Arrow Up}}{{Icon|SCII )}}{{Icon|SCII Vertical Attack}} | ||
|{{ | |{{Icon|SCII Mid Attack}} | ||
|- | |- | ||
|High Launcher~Bow Stance | {{#var:Left}}|High Launcher~Bow Stance | ||
|{{ | |{{Icon|SCII Hold Arrow Down}}{{Icon|SCII (}}{{Icon|SCII Hold Arrow Up}}{{Icon|SCII )}}{{Icon|SCII Hold Vertical Attack}} | ||
|{{ | |{{Icon|SCII Mid Attack}} | ||
|{{Icon|SCII Switch to Stance}} | |||
|- | |- | ||
|Sword Chop | {{#var:Left}}|Sword Chop | ||
|{{ | |{{Icon|SCII Hold Arrow Down Left}}{{Icon|SCII (}}{{Icon|SCII Hold Arrow Up Left}}{{Icon|SCII )}}{{Icon|SCII Vertical Attack}} | ||
|{{ | |{{Icon|SCII Mid Attack}} | ||
|- | |- | ||
|Power Thrust | {{#var:Left}}|Power Thrust | ||
|{{ | |{{Icon|SCII Hold Arrow Left}}{{Icon|SCII Vertical Attack}} | ||
|{{ | |{{Icon|SCII Mid Attack}} | ||
|- | |- | ||
|Power Thrust (Hold) | {{#var:Left}}|Power Thrust (Hold) | ||
|{{ | |{{Icon|SCII Hold Arrow Left}}{{Icon|SCII Hold Vertical Attack}} | ||
|{{ | |{{Icon|SCII Mid Attack}} | ||
|{{Icon|SCII Guard Break}} | |||
|- | |- | ||
|Power Thrust~Bow Stance | {{#var:Left}}|Power Thrust~Bow Stance | ||
|{{ | |{{Icon|SCII Hold Arrow Left}}{{Icon|SCII Hold Vertical Attack}} | ||
|{{ | |{{Icon|SCII Mid Attack}} | ||
|{{Icon|SCII Guard Break}}{{Icon|SCII Switch to Stance}} | |||
|- | |- | ||
|Running Spin Slash | {{#var:Left}}|Running Spin Slash | ||
|{{ | |{{Icon|SCII Hold Arrow Right}}{{Icon|SCII (}}{{Icon|SCII Hold Arrow Down Right}}{{Icon|SCII ,}}{{Icon|SCII Hold Arrow Up Right}}{{Icon|SCII )}}{{Icon|SCII Vertical Attack Slide}}{{Icon|SCII Horizontal Attack}} | ||
|{{ | |{{Icon|SCII High Attack}} | ||
|- | |- | ||
|Running Spin Slash (Hold) | {{#var:Left}}|Running Spin Slash (Hold) | ||
|{{ | |{{Icon|SCII Hold Arrow Right}}{{Icon|SCII (}}{{Icon|SCII Hold Arrow Down Right}}{{Icon|SCII ,}}{{Icon|SCII Hold Arrow Up Right}}{{Icon|SCII )}}{{Icon|SCII Vertical Attack Slide}}{{Icon|SCII Hold Horizontal Attack}} | ||
|{{ | |{{Icon|SCII High Attack}} | ||
|- | |- | ||
|[[Bomb]] Stance | {{#var:Left}}|[[Bomb]] Stance | ||
|{{ | |{{Icon|SCII Hold Arrow Right}}{{Icon|SCII (}}{{Icon|SCII Hold Arrow Down Right}}{{Icon|SCII ,}}{{Icon|SCII Hold Arrow Up Right}}{{Icon|SCII ,}}{{Icon|SCII Hold Arrow Down}}{{Icon|SCII ,}}{{Icon|SCII Hold Arrow Up}}{{Icon|SCII ,}}{{Icon|SCII Hold Arrow Down Left}}{{Icon|SCII ,}}{{Icon|SCII Hold Arrow Up Left}}{{Icon|SCII ,}}{{Icon|SCII Hold Arrow Left}}{{Icon|SCII )}}{{Icon|SCII Vertical Attack}}{{Icon|SCII +}}{{Icon|SCII Kick}} | ||
|{{ | | | ||
|{{Icon|SCII Switch to Stance}} | |||
|- | |- | ||
|Rising High Slash | {{#var:Left}}|Rising High Slash | ||
|While rising {{ | |(While rising) {{Icon|SCII Vertical Attack}} | ||
|{{ | |{{Icon|SCII Mid Attack}} | ||
|} | |} | ||
{|class="wikitable | {|class="wikitable mw-collapsible mw-collapsed" style="text-align:center" | ||
!colspan=" | !colspan="4"| Kick Attacks | ||
|- | |- | ||
!Name | !Name | ||
!Button(s) | !Button(s) | ||
!Attack | !Attack | ||
!Properties | |||
|- | |- | ||
|Kick | {{#var:Left}}|Kick | ||
|{{ | |{{Icon|SCII Kick}} | ||
|{{ | |{{Icon|SCII High Attack}} | ||
|- | |- | ||
|Kick~Bomb Stance | {{#var:Left}}|Kick~Bomb Stance | ||
|{{ | |{{Icon|SCII Hold Kick}} | ||
|{{ | |{{Icon|SCII High Attack}} | ||
|{{Icon|SCII Switch to Stance}} | |||
|- | |- | ||
|Front Kick | {{#var:Left}}|Front Kick | ||
|{{ | |{{Icon|SCII Arrow Right}}{{Icon|SCII Kick}} | ||
|{{ | |{{Icon|SCII High Attack}} | ||
|- | |- | ||
|Front Kick~Bomb Stance | {{#var:Left}}|Front Kick~Bomb Stance | ||
|{{ | |{{Icon|SCII Arrow Right}}{{Icon|SCII Hold Kick}} | ||
|{{ | |{{Icon|SCII High Attack}} | ||
|{{Icon|SCII Switch to Stance}} | |||
|- | |- | ||
|Forward Roll | {{#var:Left}}|Forward Roll | ||
|{{ | |{{Icon|SCII Arrow Right}}{{Icon|SCII Arrow Right}}{{Icon|SCII Kick}} | ||
|{{ | | | ||
|{{Icon|SCII Special Movement}} | |||
|- | |- | ||
|Mid Kick | {{#var:Left}}|Mid Kick | ||
|{{ | |{{Icon|SCII Arrow Down Right}}{{Icon|SCII Kick}} | ||
|{{ | |{{Icon|SCII Mid Attack}} | ||
|- | |- | ||
|Low Kick | {{#var:Left}}|Low Kick | ||
|{{ | |{{Icon|SCII Arrow Down}}{{Icon|SCII Kick}} | ||
|{{ | |{{Icon|SCII Low Attack}} | ||
|- | |- | ||
|Double Kick | {{#var:Left}}|Double Kick | ||
|{{ | |{{Icon|SCII Arrow Down Left}}{{Icon|SCII Kick}}{{#var:Sp}}{{Icon|SCII Kick}} | ||
|{{ | |{{Icon|SCII Low Attack}}{{Icon|SCII High Attack}} | ||
|- | |- | ||
|Kick Out | {{#var:Left}}|Kick Out | ||
|{{ | |{{Icon|SCII Arrow Left}}{{Icon|SCII Kick}} | ||
|{{ | |{{Icon|SCII Mid Attack}} | ||
|- | |- | ||
|Back Somersault | {{#var:Left}}|Back Somersault | ||
|{{ | |{{Icon|SCII Arrow Left}}{{Icon|SCII Arrow Left}}{{Icon|SCII Kick}} | ||
|{{ | | | ||
|{{Icon|SCII Special Movement}} | |||
|- | |- | ||
|Knee Thrust | {{#var:Left}}|Knee Thrust | ||
|{{ | |{{Icon|SCII Hold Arrow Down Right}}{{Icon|SCII (}}{{Icon|SCII Hold Arrow Up Right}}{{Icon|SCII ,}}{{Icon|SCII Hold Arrow Down Left}}{{Icon|SCII ,}}{{Icon|SCII Hold Arrow Up Left}}{{Icon|SCII )}}{{Icon|SCII Kick}} | ||
|{{ | |{{Icon|SCII Mid Attack}} | ||
|- | |- | ||
|Propeller Kick | {{#var:Left}}|Propeller Kick | ||
|{{ | |{{Icon|SCII Hold Arrow Down}}{{Icon|SCII (}}{{Icon|SCII Hold Arrow Up}}{{Icon|SCII )}}{{Icon|SCII Kick}} | ||
|{{ | |{{Icon|SCII High Attack}} | ||
|- | |- | ||
|Propeller Kick~Bomb Stance | {{#var:Left}}|Propeller Kick~Bomb Stance | ||
|{{ | |{{Icon|SCII Hold Arrow Down}}{{Icon|SCII (}}{{Icon|SCII Hold Arrow Up}}{{Icon|SCII )}}{{Icon|SCII Hold Kick}} | ||
|{{ | |{{Icon|SCII High Attack}} | ||
|{{Icon|SCII Switch to Stance}} | |||
|- | |- | ||
|Propeller Kick~Forward Roll | {{#var:Left}}|Propeller Kick~Forward Roll | ||
|{{ | |{{Icon|SCII Hold Arrow Down}}{{Icon|SCII (}}{{Icon|SCII Hold Arrow Up}}{{Icon|SCII )}}{{Icon|SCII Kick}}{{Icon|SCII Arrow Right}} | ||
|{{ | |{{Icon|SCII High Attack}} | ||
|{{Icon|SCII Special Movement}} | |||
|- | |- | ||
|Propeller Kick~Back Somersault | {{#var:Left}}|Propeller Kick~Back Somersault | ||
|{{ | |{{Icon|SCII Hold Arrow Down}}{{Icon|SCII (}}{{Icon|SCII Hold Arrow Up}}{{Icon|SCII )}}{{Icon|SCII Kick}}{{Icon|SCII Arrow Left}} | ||
|{{ | |{{Icon|SCII High Attack}} | ||
|{{Icon|SCII Special Movement}} | |||
|- | |- | ||
|Back Somersault | {{#var:Left}}|Back Somersault | ||
|{{ | |{{Icon|SCII Hold Arrow Left}}{{Icon|SCII Kick}} | ||
|{{ | | | ||
|{{Icon|SCII Special Movement}} | |||
|- | |- | ||
|Leaping Split Combo | {{#var:Left}}|Leaping Split Combo | ||
|While rising{{ | |(While rising) {{Icon|SCII Kick}}{{#var:Sp}}{{Icon|SCII Arrow Down}}{{Icon|SCII Vertical Attack}} | ||
|{{ | |{{Icon|SCII Mid Attack}}{{Icon|SCII Mid Attack}} | ||
|} | |} | ||
{|class="wikitable | {|class="wikitable mw-collapsible mw-collapsed" style="text-align:center" | ||
!colspan="3"| | !colspan="3"| Throws | ||
|- | |- | ||
!Name | !Name | ||
| Line 527: | Line 596: | ||
!Attack | !Attack | ||
|- | |- | ||
|Arm Twist | {{#var:Left}}|Arm Twist | ||
|Approach enemy {{ | |(Approach enemy) {{Icon|SCII Horizontal Attack}}{{Icon|SCII +}}{{Icon|SCII Guard}} | ||
|{{ | |{{Icon|SCII Throw}} | ||
|- | |- | ||
|Running Slash | {{#var:Left}}|Running Slash | ||
|Approach enemy {{ | |(Approach enemy) {{Icon|SCII Vertical Attack}}{{Icon|SCII +}}{{Icon|SCII Guard}} | ||
|{{ | |{{Icon|SCII Throw}} | ||
|- | |- | ||
|Shield Shove | {{#var:Left}}|Shield Shove | ||
|Approach enemy from behind {{ | |(Approach enemy from behind) {{Icon|SCII Horizontal Attack}}{{Icon|SCII +}}{{Icon|SCII Guard}} or {{Icon|SCII Vertical Attack}}{{Icon|SCII +}}{{Icon|SCII Guard}} | ||
|{{ | |{{Icon|SCII Throw}} | ||
|- | |- | ||
|Piggyback Throw | {{#var:Left}}|Piggyback Throw | ||
|Approach enemy from the left {{ | |(Approach enemy from the left) {{Icon|SCII Horizontal Attack}}{{Icon|SCII +}}{{Icon|SCII Guard}} or {{Icon|SCII Vertical Attack}}{{Icon|SCII +}}{{Icon|SCII Guard}} | ||
|{{ | |{{Icon|SCII Throw}} | ||
|- | |- | ||
|Power Roll | {{#var:Left}}|Power Roll | ||
|Approach enemy from the right {{ | |(Approach enemy from the right) {{Icon|SCII Horizontal Attack}}{{Icon|SCII +}}{{Icon|SCII Guard}} or {{Icon|SCII Vertical Attack}}{{Icon|SCII +}}{{Icon|SCII Guard}} | ||
|{{ | |{{Icon|SCII Throw}} | ||
|- | |- | ||
|Swing Under | {{#var:Left}}|Swing Under | ||
|Approach enemy {{ | |(Approach enemy) {{Icon|SCII Arrow Right}}{{Icon|SCII Arrow Right}}{{Icon|SCII Vertical Attack}}{{Icon|SCII +}}{{Icon|SCII Guard}} | ||
|{{ | |{{Icon|SCII Throw}} | ||
|} | |} | ||
{|class="wikitable | {|class="wikitable mw-collapsible mw-collapsed" style="text-align:center" | ||
!colspan=" | !colspan="4"| Miscellaneous Attacks | ||
|- | |- | ||
!Name | !Name | ||
!Button(s) | !Button(s) | ||
!Attack | !Attack | ||
!Properties | |||
|- | |- | ||
|Bow Stance | {{#var:Left}}|Bow Stance | ||
|{{ | |{{Icon|SCII Horizontal Attack}}{{Icon|SCII +}}{{Icon|SCII Vertical Attack}} | ||
|{{ | | | ||
|{{Icon|SCII Switch to Stance}} | |||
|- | |- | ||
|Boomerang Stance | {{#var:Left}}|Boomerang Stance | ||
|During Bow Stance {{ | |(During Bow Stance) {{Icon|SCII Horizontal Attack}} | ||
|{{ | | | ||
|{{Icon|SCII Switch to Stance}} | |||
|- | |- | ||
|Bomb Stance | {{#var:Left}}|Bomb Stance | ||
|During | |(During Bow Stance) {{Icon|SCII Kick}} | ||
|{{ | | | ||
|{{Icon|SCII Switch to Stance}} | |||
|- | |- | ||
|Bow | {{#var:Left}}|Bow | ||
|During Bow Stance {{ | |(During Bow Stance) {{Icon|SCII Vertical Attack}} | ||
|{{ | |{{Icon|SCII High Attack}} | ||
|{{Icon|SCII Guard Break}} | |||
|- | |- | ||
|Bow (Hold) | {{#var:Left}}|Bow (Hold) | ||
|During Bow Stance {{ | |(During Bow Stance) {{Icon|SCII Hold Vertical Attack}} | ||
|{{ | |{{Icon|SCII High Attack}} | ||
|{{Icon|SCII Unblockable Attack}} | |||
|- | |- | ||
|Bow (Low) | {{#var:Left}}|Bow (Low) | ||
|During Bow Stance {{ | |(During Bow Stance) {{Icon|SCII Arrow Down Right}}{{Icon|SCII Vertical Attack}} | ||
|{{ | |{{Icon|SCII Low Attack}} | ||
|- | |- | ||
|Bow (High) | {{#var:Left}}|Bow (High) | ||
|During Bow Stance {{ | |(During Bow Stance) {{Icon|SCII Arrow Up Right}}{{Icon|SCII Vertical Attack}} | ||
|{{ | |{{Icon|SCII High Attack}} | ||
|{{Icon|SCII Guard Break}} | |||
|- | |- | ||
|Bomb Stance | {{#var:Left}}|Bomb Stance | ||
|{{ | |{{Icon|SCII Vertical Attack}}{{Icon|SCII +}}{{Icon|SCII Kick}} | ||
|{{ | | | ||
|{{Icon|SCII Switch to Stance}} | |||
|- | |- | ||
|Boomerang Stance | {{#var:Left}}|Boomerang Stance | ||
|During Bomb Stance {{ | |(During Bomb Stance) {{Icon|SCII Horizontal Attack}} | ||
|{{ | | | ||
|{{Icon|SCII Switch to Stance}} | |||
|- | |- | ||
|Bow Stance | {{#var:Left}}|Bow Stance | ||
|During Bomb Stance {{ | |(During Bomb Stance) {{Icon|SCII Vertical Attack}} | ||
|{{ | | | ||
|{{Icon|SCII Switch to Stance}} | |||
|- | |- | ||
|Bomb | {{#var:Left}}|Bomb | ||
|During Bomb Stance {{ | |(During Bomb Stance) {{Icon|SCII Kick}} | ||
|{{ | |{{Icon|SCII Mid Attack}} | ||
|- | |- | ||
|Bomb | {{#var:Left}}|Bomb | ||
|During Bomb Stance, wait until the last moment {{ | |(During Bomb Stance, wait until the last moment) {{Icon|SCII Kick}} | ||
|{{ | |{{Icon|SCII Mid Attack}} | ||
|{{Icon|SCII Unblockable Attack}} | |||
|- | |- | ||
|Boomerang Stance | {{#var:Left}}|Boomerang Stance | ||
|{{ | |{{Icon|SCII Horizontal Attack}}{{Icon|SCII +}}{{Icon|SCII Kick}} | ||
|{{ | | | ||
|{{Icon|SCII Switch to Stance}} | |||
|- | |- | ||
|Boomerang | {{#var:Left}}|Boomerang | ||
|During Boomerang Stance {{ | |(During Boomerang Stance) {{Icon|SCII Horizontal Attack}} | ||
|{{ | |{{Icon|SCII High Attack}}{{Icon|SCII High Attack}} | ||
|- | |- | ||
|Boomerang (Side) | {{#var:Left}}|Boomerang (Side) | ||
|During Boomerang Stance {{ | |(During Boomerang Stance) {{Icon|SCII Arrow Down}}{{Icon|SCII (}}{{Icon|SCII Arrow Up}}{{Icon|SCII )}}{{Icon|SCII Horizontal Attack}} | ||
|{{ | |{{Icon|SCII High Attack}}{{Icon|SCII High Attack}} | ||
|- | |- | ||
|Bow Stance | {{#var:Left}}|Bow Stance | ||
|During Boomerang Stance {{ | |(During Boomerang Stance) {{Icon|SCII Vertical Attack}} | ||
|{{ | | | ||
|{{Icon|SCII Switch to Stance}} | |||
|- | |- | ||
|Bomb Stance | {{#var:Left}}|Bomb Stance | ||
|During Boomerang Stance {{ | |(During Boomerang Stance) {{Icon|SCII Kick}} | ||
|{{ | | | ||
|{{Icon|SCII Switch to Stance}} | |||
|- | |- | ||
|Forward Roll | {{#var:Left}}|Forward Roll | ||
|{{ | |{{Icon|SCII Arrow Right}}{{Icon|SCII Arrow Right}}{{Icon|SCII Kick}} | ||
|{{ | | | ||
|{{Icon|SCII Special Movement}} | |||
|- | |- | ||
|Force Counter Slash | {{#var:Left}}|Force Counter Slash | ||
|During Forward Roll {{ | |(During Forward Roll) {{Icon|SCII Horizontal Attack}} | ||
|{{ | |{{Icon|SCII Mid Attack}} | ||
|- | |- | ||
|Rocket Stab | {{#var:Left}}|Rocket Stab | ||
|During Forward Roll {{ | |(During Forward Roll) {{Icon|SCII Vertical Attack}} | ||
|{{ | |{{Icon|SCII Mid Attack}} | ||
|- | |- | ||
|Leaping Split Combo | {{#var:Left}}|Leaping Split Combo | ||
|During Forward Roll{{ | |(During Forward Roll) {{Icon|SCII Kick}}{{#var:Sp}}{{Icon|SCII Arrow Down}}{{Icon|SCII Vertical Attack}} | ||
|{{ | |{{Icon|SCII Mid Attack}}{{Icon|SCII Mid Attack}} | ||
|- | |- | ||
|Side Roll | {{#var:Left}}|Side Roll | ||
|During Forward Roll {{ | |(During Forward Roll) {{Icon|SCII Arrow Down}}{{Icon|SCII (}}{{Icon|SCII Arrow Up}}{{Icon|SCII )}} | ||
|{{ | | | ||
|{{Icon|SCII Special Movement}} | |||
|- | |- | ||
|Spinning Leap Strike | {{#var:Left}}|Spinning Leap Strike | ||
|During Side Roll {{ | |(During Side Roll) {{Icon|SCII Horizontal Attack}} | ||
|{{ | |{{Icon|SCII High Attack}} | ||
|- | |- | ||
|Rocket Stab | {{#var:Left}}|Rocket Stab | ||
|During Side Roll {{ | |(During Side Roll) {{Icon|SCII Vertical Attack}} | ||
|{{ | |{{Icon|SCII Mid Attack}} | ||
|- | |- | ||
|Leaping Split Combo | {{#var:Left}}|Leaping Split Combo | ||
|During Side Roll{{ | |(During Side Roll) {{Icon|SCII Kick}}{{#var:Sp}}{{Icon|SCII Arrow Down}}{{Icon|SCII Vertical Attack}} | ||
|{{ | |{{Icon|SCII Mid Attack}}{{Icon|SCII Mid Attack}} | ||
|- | |- | ||
|Back Somersault | {{#var:Left}}|Back Somersault | ||
|{{ | |{{Icon|SCII Arrow Left}}{{Icon|SCII Arrow Left}}{{Icon|SCII Kick}} | ||
|{{ | | | ||
|{{Icon|SCII Special Movement}} | |||
|- | |- | ||
|Force Counter Slash | {{#var:Left}}|Force Counter Slash | ||
|During Back Somersault {{ | |(During Back Somersault) {{Icon|SCII Horizontal Attack}} | ||
|{{ | |{{Icon|SCII Mid Attack}} | ||
|- | |- | ||
|Leap Strike | {{#var:Left}}|Leap Strike | ||
|During Back Somersault {{ | |(During Back Somersault) {{Icon|SCII Vertical Attack}} | ||
|{{ | |{{Icon|SCII Mid Attack}} | ||
|- | |- | ||
|Knee Thrust | {{#var:Left}}|Knee Thrust | ||
|During Back Somersault {{ | |(During Back Somersault) {{Icon|SCII Kick}} | ||
|{{ | |{{Icon|SCII Mid Attack}} | ||
|} | |} | ||
{|class="wikitable | {|class="wikitable mw-collapsible mw-collapsed" style="text-align:center" | ||
!colspan=" | !colspan="4"| Signature Moves | ||
|- | |- | ||
!Name | !Name | ||
!Button(s) | !Button(s) | ||
!Attack | !Attack | ||
!Properties | |||
|- | |- | ||
|Spin Attack | {{#var:Left}}|Spin Attack | ||
|{{ | |{{Icon|SCII Arrow Down}}{{Icon|SCII Arrow Down Left}}{{Icon|SCII Arrow Left}}{{Icon|SCII Horizontal Attack}} | ||
|{{ | |{{Icon|SCII High Attack}}{{Icon|SCII High Attack}} | ||
|- | |- | ||
|[[Bow]] | {{#var:Left}}|[[Bow]] | ||
|During Bow Stance {{ | |(During Bow Stance) {{Icon|SCII Vertical Attack}} | ||
|{{ | |{{Icon|SCII High Attack}} | ||
|{{Icon|SCII Guard Break}} | |||
|- | |- | ||
|[[Bomb]] | {{#var:Left}}|[[Bomb]] | ||
|During Bomb Stance {{ | |(During Bomb Stance) {{Icon|SCII Kick}} | ||
|{{ | |{{Icon|SCII Mid Attack}} | ||
|- | |- | ||
|[[Boomerang]] | {{#var:Left}}|[[Boomerang]] | ||
|During Boomerang Stance {{ | |(During Boomerang Stance) {{Icon|SCII Horizontal Attack}} | ||
|{{ | |{{Icon|SCII High Attack}}{{Icon|SCII High Attack}} | ||
|} | |} | ||
{|class="wikitable | {|class="wikitable mw-collapsible mw-collapsed" style="text-align:center" | ||
!colspan="3"| Quick Attacks | !colspan="3"| Quick Attacks | ||
|- | |- | ||
| Line 708: | Line 795: | ||
!Attack | !Attack | ||
|- | |- | ||
|Double Sword Slash (Horizontal) | {{#var:Left}}|Double Sword Slash (Horizontal) | ||
|{{ | |{{Icon|SCII Horizontal Attack}}{{#var:Sp}}{{Icon|SCII Horizontal Attack}} | ||
|{{ | |{{Icon|SCII High Attack}}{{Icon|SCII High Attack}} | ||
|- | |- | ||
|Double Sword Slash (Vertical) | {{#var:Left}}|Double Sword Slash (Vertical) | ||
|{{ | |{{Icon|SCII Vertical Attack}}{{#var:Sp}}{{Icon|SCII Vertical Attack}} | ||
|{{ | |{{Icon|SCII Mid Attack}}{{Icon|SCII Mid Attack}} | ||
|- | |- | ||
|Mid Kick | {{#var:Left}}|Mid Kick | ||
|{{ | |{{Icon|SCII Arrow Down Right}}{{Icon|SCII Kick}} | ||
|{{ | |{{Icon|SCII Mid Attack}} | ||
|- | |- | ||
|Step-in Attack Combo | {{#var:Left}}|Step-in Attack Combo | ||
|{{ | |{{Icon|SCII Arrow Right}}{{Icon|SCII Horizontal Attack}}{{#var:Sp}}{{Icon|SCII Horizontal Attack}} | ||
|{{ | |{{Icon|SCII High Attack}}{{Icon|SCII Low Attack}} | ||
|} | |} | ||
{|class="wikitable | {|class="wikitable mw-collapsible mw-collapsed" style="text-align:center" | ||
!colspan=" | !colspan="4"| Powerful Attacks | ||
|- | |- | ||
!Name | !Name | ||
!Button(s) | !Button(s) | ||
!Attack | !Attack | ||
!Properties | |||
|- | |- | ||
|[[Spin Attack]] (Hold) | {{#var:Left}}|[[Spin Attack]] (Hold) | ||
|{{ | |{{Icon|SCII Arrow Down}}{{Icon|SCII Arrow Down Left}}{{Icon|SCII Arrow Left}}{{Icon|SCII Hold Horizontal Attack}} | ||
|{{ | |{{Icon|SCII High Attack}}{{Icon|SCII High Attack}}{{Icon|SCII High Attack}}{{Icon|SCII High Attack}} | ||
|{{Icon|SCII Unblockable Attack}} | |||
|- | |- | ||
|[[Cyclone Attack]] (Hold) | {{#var:Left}}|[[Cyclone Attack]] (Hold) | ||
|{{ | |{{Icon|SCII Arrow Up}}{{Icon|SCII (}}{{Icon|SCII Arrow Up Left}}{{Icon|SCII ,}}{{Icon|SCII Arrow Up Right}}{{Icon|SCII )}}{{Icon|SCII Hold Horizontal Attack}} | ||
|{{ | |{{Icon|SCII Mid Attack}}{{Icon|SCII High Attack}}{{Icon|SCII High Attack}} | ||
|- | |- | ||
|[[Hyper Dash Attack]] (Hold) | {{#var:Left}}|[[Hyper Dash Attack]] (Hold) | ||
|{{ | |{{Icon|SCII Arrow Left}}{{Icon|SCII Arrow Left}}{{Icon|SCII Hold Vertical Attack}}{{Icon|SCII +}}{{Icon|SCII Hold Kick}} | ||
|{{ | |{{Icon|SCII Mid Attack}}{{Icon|SCII Mid Attack}}{{Icon|SCII Mid Attack}} | ||
|{{Icon|SCII Unblockable Attack}} | |||
|- | |- | ||
|Power Thrust~Bow Stance | {{#var:Left}}|Power Thrust~Bow Stance | ||
|{{ | |{{Icon|SCII Arrow Left}}{{Icon|SCII Arrow Left}}{{Icon|SCII Hold Vertical Attack}} | ||
|{{ | |{{Icon|SCII Mid Attack}} | ||
|{{Icon|SCII Guard Break}}{{Icon|SCII Switch to Stance}} | |||
|} | |} | ||
| Line 752: | Line 843: | ||
====Weaponry==== | ====Weaponry==== | ||
Like all {{SCII|-}} characters, Link has a total of 11 weapons to choose from. His starting and most-balanced weapon is the [[Master Sword]] and [[Hylian Shield]], and the rest of the weapons must be bought in shops in various cities in the Weapon Master Mode. | :Like all {{SCII|-}} characters, Link has a total of 11 weapons to choose from. His starting and most-balanced weapon is the [[Master Sword]] and [[Hylian Shield]], and the rest of the weapons must be bought in shops in various cities in the Weapon Master Mode. | ||
{|class=" | {|class="wikitable mw-collapsible mw-collapsed" style="text-align:center; width:100%;" | ||
|- | |- | ||
!colspan="4"| Link's Weapons | !colspan="4"| Link's Weapons | ||
| Line 763: | Line 854: | ||
!width="50%"|Description | !width="50%"|Description | ||
|- | |- | ||
| [[File:Master Sword | | [[File:SCII Master Sword Model.png|80px]]<br/>'''[[Master Sword]]''' & '''[[Hylian Shield]]''' | ||
| Free | | Free | ||
| Well-balanced | | Well-balanced | ||
| A magic sword and shield that have accompanied Link on many adventures and helped him repeatedly save the land of Hyrule. This journey is no less dire, and Link once again goes into battle equipped with these items, this time in another world. These are well-balanced arms for Link. | | A magic sword and shield that have accompanied Link on many adventures and helped him repeatedly save the land of Hyrule. This journey is no less dire, and Link once again goes into battle equipped with these items, this time in another world. These are well-balanced arms for Link. | ||
|- | |- | ||
| [[File:Razor Sword | | [[File:SCII Razor Sword Model.png|80px]]<br/>'''[[Razor Sword]]''' | ||
| 600 Gold | | 600 Gold | ||
| Attack goes up 25%<br>Short reach<br>Takes 15% block damage | | Attack goes up 25%<br/>Short reach<br/>Takes 15% block damage | ||
| A sword forged by the [[ | | A sword forged by the [[Gabora|blacksmith]] from the [[Mountain Village]] on [[Snowhead]]. The blacksmith is famous for his perfectionism—this sword is yet another excellent example of his craftsmanship and boasts an amazingly sharp cutting edge. Unfortunately, the metal used to forge this blade is prone to chipping, so there remains some concern about its defensive capabilities. | ||
|- | |- | ||
| [[File:Armos Series.png|80px]]<br>'''[[Armos Series]]''' | | [[File:SCII Armos Series Model.png|80px]]<br/>'''[[Armos Series]]''' | ||
| 900 Gold | | 900 Gold | ||
| Defense decreases 30%<br>Offense increases with Soul Charge 40% (deteriorates) | | Defense decreases 30%<br/>Offense increases with Soul Charge 40% (deteriorates) | ||
| A sword and shield from one of the living Armos statues that dot the land of Hyrule. The origins of these items are shrouded in mystery, much like the Armos themselves. Concentrating one's will increases the weapons' power, but they are a bit too heavy for Link and he cannot use them effectively for guarding. | | A sword and shield from one of the living Armos statues that dot the land of Hyrule. The origins of these items are shrouded in mystery, much like the Armos themselves. Concentrating one's will increases the weapons' power, but they are a bit too heavy for Link and he cannot use them effectively for guarding. | ||
|- | |- | ||
| [[File:SCII Megaton Hammer Model.png|80px]]<br>'''[[Megaton Hammer]]''' | | [[File:SCII Megaton Hammer Model.png|80px]]<br/>'''[[Megaton Hammer]]''' | ||
| 1,200 Gold | | 1,200 Gold | ||
| Offense goes up 35%<br>Short reach | | Offense goes up 35%<br/>Short reach | ||
| An extremely heavy hammer. Learning to use it effectively could take some time, as its reach is somewhat short for a weapon. Its power and toughness, however, far exceed that of any normal sword. It's guaranteed to inspire awe. | | An extremely heavy hammer. Learning to use it effectively could take some time, as its reach is somewhat short for a weapon. Its power and toughness, however, far exceed that of any normal sword. It's guaranteed to inspire awe. | ||
|- | |- | ||
| [[File:Cane of Byrna | | [[File:SCII Cane of Byrna Model.png|80px]]<br/>'''[[Cane of Byrna]]''' | ||
| 1,600 Gold | | 1,600 Gold | ||
| Soul Charge boosts offense up to 50%{{Exp|continuous effect}}<br>Soul Charge lowers damage received by 25%{{Exp|diminishing effect}}<br>Soul Charge recovers up to 32 HP each time | | Soul Charge boosts offense up to 50%{{Exp|continuous effect}}<br/>Soul Charge lowers damage received by 25%{{Exp|diminishing effect}}<br/>Soul Charge recovers up to 32 HP each time | ||
| An ancient magic staff that grants protection to heroes. It can be used even by those who are not sorcerers as long as their hearts are pure. It is said that praying to the staff with all one's heart will shroud the user in light and fill him with vitality. Because it is not a true weapon, it usually does not fare well when it clashes against an opponent's weapon. | | An ancient magic staff that grants protection to heroes. It can be used even by those who are not sorcerers as long as their hearts are pure. It is said that praying to the staff with all one's heart will shroud the user in light and fill him with vitality. Because it is not a true weapon, it usually does not fare well when it clashes against an opponent's weapon. | ||
|- | |- | ||
| [[File:Mirror Shield | | [[File:SCII Master Sword and Mirror Shield Model.png|80px]]<br/>'''[[Mirror Shield#SoulCalibur II|Mirror Shield]]''' | ||
| 2,200 Gold | | 2,200 Gold | ||
| Hits taken are counters<br>33% of damage received is inflicted back onto opponent | | Hits taken are counters<br/>33% of damage received is inflicted back onto opponent | ||
| A mirror-like shield found in the [[Spirit Temple]]. It is an amazing work of art, and there are few who would argue that it is not one of the finest shields in Hyrule. It is said that its surface reflects not only light but hostile intent as well. | | A mirror-like shield found in the [[Spirit Temple]]. It is an amazing work of art, and there are few who would argue that it is not one of the finest shields in Hyrule. It is said that its surface reflects not only light but hostile intent as well. | ||
|- | |- | ||
| [[File:Magic Sword and | | [[File:SCII Magic Sword and Magical Shield Model.png|80px]]<br/>'''[[Magic Sword]]''' & '''[[Magical Shield#SoulCalibur II|Magic Shield]]''' | ||
| 3,000 Gold | | 3,000 Gold | ||
| Causes 40% block damage<br>Weak against physical impact | | Causes 40% block damage<br/>Weak against physical impact | ||
| Ancient arms hidden deep in an underground tomb. This powerful sword holds an enchantment that counters the forces of darkness, and its holy aura allows it to deliver damage to the enemy even without making physical contact. The shield is enchanted with a spell that protects its user from enemy magic, but the actual shield itself is quite old and is weak against physical impact. | | Ancient arms hidden deep in an underground tomb. This powerful sword holds an enchantment that counters the forces of darkness, and its holy aura allows it to deliver damage to the enemy even without making physical contact. The shield is enchanted with a spell that protects its user from enemy magic, but the actual shield itself is quite old and is weak against physical impact. | ||
|- | |- | ||
| [[File:Biggoron Sword | | [[File:SCII Biggoron Sword Model.png|60px]]<br/>'''[[Biggoron's Sword#SoulCalibur II|Biggoron's Sword]]''' | ||
| 4,000 Gold | | 4,000 Gold | ||
| Long reach<br>Drains 3 HP per attack | | Long reach<br/>Drains 3 HP per attack | ||
| A masterfully crafted long sword forged by the best blacksmith in [[Hyrule]], [[Biggoron]], who lives on [[Death Mountain]]. Designed specifically for Link, it is made to be wielded with one hand. Even so, swinging it with full force gets tiring after a while. | | A masterfully crafted long sword forged by the best blacksmith in [[Hyrule]], [[Biggoron]], who lives on [[Death Mountain]]. Designed specifically for Link, it is made to be wielded with one hand. Even so, swinging it with full force gets tiring after a while. | ||
|- | |- | ||
| [[File:Soul Edge | | [[File:SCII Soul Edge Model.png|80px]]<br/>'''Soul Edge (Complete)''' | ||
| 7,700 Gold | | 7,700 Gold | ||
| Offense goes up 40%<br>Defense goes up 35%<br>Drains 2 HP per second | | Offense goes up 40%<br/>Defense goes up 35%<br/>Drains 2 HP per second | ||
| An evil blade with a reputation for devouring souls. This weapon is also known to be a shape-shifter—which form it takes depends on its current owner. The forms it has taken are legendary, as are the souls of the renowned warriors it has consumed. Only those with great mental discipline can retain their will while wielding this weapon. It consumes the souls of those who fall before the blade, and also the soul of its wielder. | | An evil blade with a reputation for devouring souls. This weapon is also known to be a shape-shifter—which form it takes depends on its current owner. The forms it has taken are legendary, as are the souls of the renowned warriors it has consumed. Only those with great mental discipline can retain their will while wielding this weapon. It consumes the souls of those who fall before the blade, and also the soul of its wielder. | ||
|- | |- | ||
| [[File:Great Fairy's Sword | | [[File:SCII Great Fairy's Sword Model.png|80px]]<br/>'''[[Great Fairy Sword]]''' | ||
| 9,800 Gold | | 9,800 Gold | ||
| Attack goes up 20%<br>Gains 5 HP per second<br>Takes 20% block damage | | Attack goes up 20%<br/>Gains 5 HP per second<br/>Takes 20% block damage | ||
| A sword blessed by the [[Great Fairy]], rumored to be able to reflect any and all dark magic. Merely holding it fills the wielder with strength, but unfortunately, its protective power did not survive intact in this world, and it is no longer able to resist enemy attacks. | | A sword blessed by the [[Great Fairy]], rumored to be able to reflect any and all dark magic. Merely holding it fills the wielder with strength, but unfortunately, its protective power did not survive intact in this world, and it is no longer able to resist enemy attacks. | ||
|- | |- | ||
| [[File:Bug-Catching Net | | [[File:SCII Bug-Catching Net Model.png|65px]]<br/>'''[[Bug Net#SoulCalibur II|Bug-Catching Net]]''' | ||
| 12,500 Gold | | 12,500 Gold | ||
| Offense decreases 80%<br>Defenses decreases 80% | | Offense decreases 80%<br/>Defenses decreases 80% | ||
| A long-handled net used for catching bugs. This item is an old companion of Link's and has appeared on many of his adventures—it accompanies him on this adventure as well. Obviously, it is not a weapon, but perhaps it will cause opponents to let down their guard. | | A long-handled net used for catching bugs. This item is an old companion of Link's and has appeared on many of his adventures—it accompanies him on this adventure as well. Obviously, it is not a weapon, but perhaps it will cause opponents to let down their guard. | ||
|} | |} | ||
| Line 823: | Line 914: | ||
*The overworld theme from ''The Legend of Zelda'' is used in Link's profile viewer and destined battle theme. It is also played if Link was used in Eurydice Shrine gallery. | *The overworld theme from ''The Legend of Zelda'' is used in Link's profile viewer and destined battle theme. It is also played if Link was used in Eurydice Shrine gallery. | ||
*Link's stage is the Ostrheinsburg Chapel and his alternate stage is Eurydice Shrine Gallery. | *Link's stage is the Ostrheinsburg Chapel and his alternate stage is Eurydice Shrine Gallery. | ||
*Link can buy the Soul Edge for 7,800 Gold in the Castor Shop while playing the Weapon Master mode. Link's Soul Edge causes for his defense and offense to increase to 135% and 140%, respectively; however, it drains his health by 2 HP every second.<ref>{{Cite|Fearsome demonic weapon said to excel in offense and defense....| | *Link can buy the Soul Edge for 7,800 Gold in the Castor Shop while playing the Weapon Master mode. Link's Soul Edge causes for his defense and offense to increase to 135% and 140%, respectively; however, it drains his health by 2 HP every second.<ref>{{Cite|Fearsome demonic weapon said to excel in offense and defense....|N/A|SCII}}</ref> | ||
*Instead of having the standard two or three costumes like every other character, Link has 4 different costumes: green, red, blue, and violet. His two starter costumes are the green and red tunic. To obtain the Blue Tunic, the player must buy it in the Castor Shop for 21,000 Gold, found in the Extra Chapter 1 of the Weapon Master mode. Only after buying the Blue Tunic can the player buy the [[Blue Ring]] Tunic from the original {{TLoZ}}, which is sold for the same price as the Blue Tunic. | *Instead of having the standard two or three costumes like every other character, Link has 4 different costumes: green, red, blue, and violet. His two starter costumes are the green and red tunic. To obtain the Blue Tunic, the player must buy it in the Castor Shop for 21,000 Gold, found in the Extra Chapter 1 of the Weapon Master mode. Only after buying the Blue Tunic can the player buy the [[Blue Ring]] Tunic from the original {{TLoZ}}, which is sold for the same price as the Blue Tunic. | ||
<gallery class="center"> | <gallery class="center"> | ||
File: | File:SCII Box Art.jpg|The box art for {{SCII|-}} featuring Link on the cover | ||
File:SCII Artwork.png|Artwork of Link with other characters from {{SCII|-}} | File:SCII Artwork.png|Artwork of Link with other characters from {{SCII|-}} | ||
File:Link | File:SCII Link Artwork.png|Artwork of Link | ||
File:Link 2 | File:SCII Link Artwork 2.png|Artwork of Link | ||
File: | File:SCII Link Artwork 3.png|Artwork of Link | ||
File: | File:SCII Link Render.png|Render of Link | ||
File: | File:SCII Link Model.png|Link, as seen in-game | ||
File:SCII.jpg|Link fighting Ivy | File:SCII Link Model 2.png|Link, as seen in-game | ||
File:Link | File:SCII Link with Green Tunic Model.png|Link, as seen in-game | ||
File:SCII Link Fighting Ivy.jpg|Link fighting Ivy | |||
File:SCII Link Ending.png|Link in the Arcade mode ending | |||
</gallery> | </gallery> | ||
===''{{Wp|Taiko no Tatsujin}}'' Series=== | |||
====''Taiko no Tatsujin: Yellow Version''==== | |||
:The arcade game ''Yellow Version'' and its later incarnations ''Blue Version'' and ''Green Version'' feature a remixed {{BotW|-}} medley, added to ''Yellow Version'' in the version 2.07 update. | |||
====''Taiko no Tatsujin: Rhythm Festival''==== | |||
:One of the featured songs is an orchestral version of {{Term|Series|The Legend of Zelda (Theme)|link}}.<ref>{{Cite Web|quote= |author= Nintendo|published= February 9, 2022|retrieved= February 10, 2022|url= https://youtu.be/EhDFA_O7zNg?t=1839|title= Nintendo Direct - 2.9.2022 - Youtube|site= Youtube|type= }}</ref> | |||
===''{{Wp|Tekken Tag Tournament 2|Tekken Tag Tournament 2: Wii U Edition}}''=== | ===''{{Wp|Tekken Tag Tournament 2|Tekken Tag Tournament 2: Wii U Edition}}''=== | ||
| Line 849: | Line 948: | ||
</gallery> | </gallery> | ||
===''{{Wp| | ===''{{Wp|Travis Strikes Again: No More Heroes}}''=== | ||
:A Special Legendary T-shirt based on {{TAoL}} was released for free alongside a patch on February 28, 2019.<ref>{{Cite Twitter|quote= The update patch on 2/28 will include the Special Legendary T-shirt: Zelda II: The Adventure of Link!|url= https://twitter.com/suda_51/status/1100750028153344001|archive= https://web.archive.org/web/20210110132145/https://twitter.com/suda_51/status/1100750028153344001}}</ref> | |||
: A | |||
: The | |||
: | |||
</ | |||
===''Warriors'' series=== | ===''Warriors'' series=== | ||
====''Shin Sangoku Musou VS''==== | |||
: The game features a costume of Link based on his {{SS}} incarnation. The costume is equipped with the True Master Sword and the Hylian Shield; however, the equipment are only cosmetic display and cannot actually be used. | : The game features a costume of Link based on his {{SS}} incarnation. The costume is equipped with the True Master Sword and the Hylian Shield; however, the equipment are only cosmetic display and cannot actually be used. | ||
====''{{Wp|Samurai Warriors Chronicles 3}}''==== | |||
: A special set of costumes based | : A special set of costumes based on the {{HW}} incarnations of [[Link]] and [[Princess Zelda|Zelda]] are available for the game's customizable main protagonist. The costumes are unlocked in the 3DS version of the game if players have save data from the game's demo. The costumes are exclusive to the Japanese version of the game as the demo was not released internationally. | ||
<gallery class="center"> | <gallery class="center"> | ||
| Line 887: | Line 966: | ||
==Gallery== | ==Gallery== | ||
<gallery> | <gallery> | ||
File: | File:Phantasy Star 0 Hylian Shield Model.png|The Hylian Shield in ''Phantasy Star 0'' | ||
File:FFMoBW - Miu (Zelda Costume).png|Miu dressed as Zelda from {{HW|-}} in ''Fatal Frame: Maiden of Black Water'' | File:FFMoBW - Miu (Zelda Costume).png|Miu dressed as Zelda from {{HW|-}} in ''Fatal Frame: Maiden of Black Water'' | ||
File:TSANMH TAoL Shirt.jpg|{{TAoL|-}} t-shirt from ''Travis Strikes Again: No More Heroes'' | |||
</gallery> | </gallery> | ||
| Line 904: | Line 984: | ||
{{Ref}} | {{Ref}} | ||
{{ | {{TLoZ Series Nav}} | ||
[[Category:Zelda]] | [[Category:Zelda]] | ||
[[Category:Listings]] | [[Category:Listings]] | ||
Revision as of 22:33, 15 January 2024
The Legend of Zelda series has made numerous Cameos in Third-Party Media. Elements and characters from the series have appeared in a number of third-party games and related media. This listing does not include appearances in first and second-party video games. Please visit Cameos of The Legend of Zelda in Nintendo Media for examples of these. For unlicensed parodies and homages in other media, see The Legend of Zelda in popular culture.
Third-Party Games
Ace Combat: Assault Horizon Legacy +
- Link and Zelda-themed planes can be unlocked by scanning the Link or Toon Link amiibo, and the Zelda or Sheik amiibo, respectively.
Bayonetta

- In the Wii U version of Bayonetta and Bayonetta 2, the titular character Bayonetta and the side character Jeanne appear with multiple Nintendo-inspired outfits, including the Hero of Hyrule costume based on Link. With this costume, they use the Master Sword and Hylian Shield, with the Master Sword replacing the Shuraba Sword and the Shield used to parry and counter incoming attacks. Other elements from The Legend of Zelda series also appear, such as collectible Rupees and jingles that play when opening a locked door or a chest.
-
Bayonetta wearing her Link costume
-
Bayonetta using a Key in Bayonetta
-
Bayonetta dressed as Link in Bayonetta 2


Diablo III: Eternal Collection
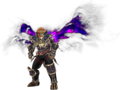
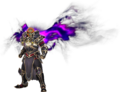
- The Nintendo Switch version of Diablo III features a Ganondorf Transmogrification set, a Cucco pet, and Triforce portrait frame. Armor based on Link's Tunic was planned, but was scrapped during development.[citation needed]
-
A male Barbarian using the Ganondorf transmogrification
-
A male Crusader using the Ganondorf transmogrification
-
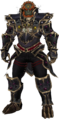
A male Barbarian using the Ganondorf transmogrification
-
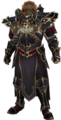
A male Crusader using the Ganondorf transmogrification
-
The Cucco pet
-

Ganondorf's Transmogrification
-
Ganondorf's Transmogrification alongside the Triforce portrait frame


The Elder Scrolls V: Skyrim
- In the Nintendo Switch version of Skyrim, amiibo functionality has been added to summon Treasure Chests. The Legend of Zelda amiibo have a chance of including the exclusive items: the Master Sword, Hylian Shield, or Champion's Tunic. These items can also be found in a Treasure Chest on top of the Throat of the World. Additionally, male Bosmer have been given a unique blue eye color.
Fatal Frame: Maiden of Black Water
- In the Wii U version only, Miu Hinasaki, one of the playable protagonists in Maiden of Black Water, is capable of wearing an alternate costume that grants her the dress of Princess Zelda from Hyrule Warriors.
Metal Gear Solid: The Twin Snakes
- If there is saved data for The Wind Waker on a memory card in the Nintendo GameCube, Psycho Mantis will prove his telekinetic powers to Solid Snake during their encounter by reading the data and asking if he likes The Legend of Zelda.[1]
Monster Hunter series
Monster Hunter 4
- A costume of Link in his Skyward Sword incarnation with the Master Sword, Hylian Shield, and the Sacred Bow is available in Monster Hunter 4 after completing a quest where players have to defeat monsters known as Jinouga, Kirin, and Rajang. These monsters are chosen to represent Power, Wisdom and Courage, the three aspects of the Triforce. Defeating them grants the player a Triforce ticket that can be used to obtain the item set.
Monster Hunter Generations
- The Palico companions in Monster Hunter Generations are able to wear a Toon Link costume as a form of DLC. This costume grants them his appearance, with the only major changes being cat ears, a cat's tail, and whiskers. They are able to use the Wind Waker as a melee weapon to strike enemies. The costume also has the complete Master Sword and the Mirror Shield attached to its back.
- The costume of Link from Skyward Sword in Monster Hunter 4 is also available in Monster Hunter Generations.
Monster Hunter Stories
- The main character dresses as Link while wielding the Master Sword.
- Epona can be unlocked as a Monster Mount for riding into combat.
- The Palico ally, Nabiru, can wear the Skull Kid's hat and Majora's Mask.
Monster Hunter Generations Ultimate
- The main character can wear the Champion's Tunic, and the Hylian Trousers and Hood. A costume based on a Korok also appears.
-
The Link costume in Monster Hunter 4
-
The Toon Link costume in Monster Hunter Generations
-
Epona Beast Mount in Monster Hunter Stories
-

The Breath of the Wild costumes in Monster Hunter Generations Ultimate


Nobody Saves the World
The Master Sword appears on a wall together with several other iconic video game swords, including the Monado from Xenoblade Chronicles, the Buster Sword from Final Fantasy VII, and a Keyblade from Kingdom Hearts, among others.
One Piece: Super Grand Battle! X

- By using amiibo figures through the New Nintendo 3DS or NFC Reader/Writer, various costumes based on Nintendo characters can be unlocked. Scanning the Link amiibo creates a Link costume for Zoro, which includes the Master Sword, Hylian Shield, and Majora's Mask.
-
Zoro wearing Majora's Mask in One Piece: Super Grand Battle! X

Phantasy Star 0
- Along with other Nintendo-themed cameos such as Samus's Power Beam, the Hylian Shield appears as a Shield weapon in the Japanese version of Phantasy Star Zero. It is only available using a special code.
Scribblenauts Unlimited
- In the Wii U version of the game, many people and objects from the Mario and Zelda series can be created.
-
Link in Scribblenauts Unlimited

Sonic Lost World
- The Legend of Zelda Zone is a free DLC-level for Sonic Lost World. In the level, Sonic the Hedgehog is dressed like Link in a green tunic and boots. The Zone features many elements from The Legend of Zelda series, including enemies, objects, and sounds. Link himself appears in his Skyward Sword incarnation.
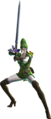
SoulCalibur II
- Link is a playable character in the GameCube version of SoulCalibur II. In the game, Hyrule's tranquility was shattered by the arrival of several disasters, which brought opaque, ominous clouds with them. Eventually, it was discovered that an unknown magician was to blame for all that had happened. Just as the people were about to lose all hope, the sun miraculously returned as Link, having been summoned by Princess Zelda to find the disasters' source, successfully defeated the magician. The people of Hyrule rejoiced in the belief that eternal peace would rule; but it eventually became clear that the magician responsible for the disasters was in fact controlled by an evil sword from another world, Soul Edge, and that the fragments of Soul Edge had been gathering in the other world.[2]
- Knowing that the resurrection of the evil blade must be prevented at all costs, Link chose to travel to the other world and destroy Soul Edge himself, taking his trusted Master Sword and Ocarina of Time, and transporting himself off on a secret journey.[3] Through the completion of Arcade mode, Link succeeds in sealing away the evil within the Soul Edge, saving his homeland and quietly leaving the world he had come upon, leaving only a faint echo of his Ocarina.[4]
- Link is the only character with a ranged attack. His fighting style retains many of his signature moves from past games in the Zelda and Super Smash Bros. series. Some of these moves include the Spin Attack, the Jump Attack, the Down Thrust, the Jump Thrust, and the Dash Attack.
Command List
- Controls
| Button Explanation | |
|---|---|
| Image | Explanation |
| Horizontal Attack Button | |
| Hold Horizontal Attack Button | |
| Vertical Attack Button | |
| Hold Vertical Attack Button | |
| Kick Button | |
| Hold Kick Button | |
| Guard Button | |
| Hold Guard Button | |
| Control Pad | |
| Hold Control Pad | |
| Slide Input | |
| Neutral | |
| Legend | |
|---|---|
| Image | Explanation |
| High Attack | |
| Mid Attack | |
| Special Mid Attack | |
| Low Attack | |
| Throw | |
| Unblockable Attack | |
| Attack Throw | |
| Special Movement | |
| Guard Break properties | |
| Guard Impact properties | |
| Switch to stance | |
- Attacks
| Horizontal Attacks | |||
|---|---|---|---|
| Name | Button(s) | Attack | Properties |
| Horizontal Slash | |||
| Horizontal Slash~Spin Attack | |||
| Double Sword Slash (Horizontal) | |||
| Double Sword Slash (Horizontal)~Boomerang Stance | |||
| Cross Slash | |||
| Cross Slash~Bomb Stance | |||
| Cross Slash Combo | |||
| Cross Slash Combo (Delay) | |||
| Cross Slash Combo~Bomb Stance | |||
| Step-in Attack Combo | |||
| Step-in Attack Combo (Delay) | |||
| Step-in Attack Upper Combo | |||
| Bat Swing | |||
| Shoelace Slash | |||
| Crouching Slash | |||
| Sword Trip | |||
| Counter Slash | |||
| Counter Slash~Boomerang Stance | |||
| Cyclone Attack | |||
| Cyclone Attack (Hold) | |||
| Spin Attack | |||
| Spin Attack (Hold) | |||
| Bat Swing | |||
| Force Counter Slash | |||
| Spinning Leap Strike | |||
| Grass Cutter | |||
| Grass Cutter (Hold) | |||
| Grass Cutter High Feint | |||
| Counter Slash | |||
| Counter Slash~Boomerang Stance | |||
| Bow Stance | |||
| Boomerang Stance | |||
| Rising Horizontal Slash | (While rising) |
||
| Rising Horizontal Slash~Boomerang Stance | (While rising) |
||
| Vertical Attacks | |||
|---|---|---|---|
| Name | Button(s) | Attack | Properties |
| Vertical Slash~Bow Stance | |||
| Double Sword Slash (Vertical) | |||
| Slash Kick Combo | |||
| Stab | |||
| Illusion Stab Combo | |||
| Running Hack | |||
| Half-Moon Swipe | |||
| Half-Moon Swipe~Bow Stance | |||
| Sword Plant | |||
| Down Slash | |||
| Double Spin Slash | |||
| Double Spin Slash (Hold) | |||
| Power Thrust | |||
| Power Thrust (Hold) | |||
| Power Thrust~Bow Stance | |||
| Rocket Stab | |||
| Hyper Dash Attack | |||
| Hyper Dash Attack (Hold) | |||
| Hyper Dash Attack (Cancel) | |||
| Sword Sweep | |||
| Sword Sweep~Spin Attack | |||
| Running Spin Slash | |||
| Running Spin Slash (Hold) | |||
| Running Hack | |||
| High Launcher | |||
| High Launcher~Bow Stance | |||
| Sword Chop | |||
| Power Thrust | |||
| Power Thrust (Hold) | |||
| Power Thrust~Bow Stance | |||
| Running Spin Slash | |||
| Running Spin Slash (Hold) | |||
| Bomb Stance | |||
| Rising High Slash | (While rising) |
||
| Kick Attacks | |||
|---|---|---|---|
| Name | Button(s) | Attack | Properties |
| Kick | |||
| Kick~Bomb Stance | |||
| Front Kick | |||
| Front Kick~Bomb Stance | |||
| Forward Roll | |||
| Mid Kick | |||
| Low Kick | |||
| Double Kick | |||
| Kick Out | |||
| Back Somersault | |||
| Knee Thrust | |||
| Propeller Kick | |||
| Propeller Kick~Bomb Stance | |||
| Propeller Kick~Forward Roll | |||
| Propeller Kick~Back Somersault | |||
| Back Somersault | |||
| Leaping Split Combo | (While rising) |
||
| Throws | ||
|---|---|---|
| Name | Button(s) | Attack |
| Arm Twist | (Approach enemy) |
|
| Running Slash | (Approach enemy) |
|
| Shield Shove | (Approach enemy from behind) |
|
| Piggyback Throw | (Approach enemy from the left) |
|
| Power Roll | (Approach enemy from the right) |
|
| Swing Under | (Approach enemy) |
|
| Miscellaneous Attacks | |||
|---|---|---|---|
| Name | Button(s) | Attack | Properties |
| Bow Stance | |||
| Boomerang Stance | (During Bow Stance) |
||
| Bomb Stance | (During Bow Stance) |
||
| Bow | (During Bow Stance) |
||
| Bow (Hold) | (During Bow Stance) |
||
| Bow (Low) | (During Bow Stance) |
||
| Bow (High) | (During Bow Stance) |
||
| Bomb Stance | |||
| Boomerang Stance | (During Bomb Stance) |
||
| Bow Stance | (During Bomb Stance) |
||
| Bomb | (During Bomb Stance) |
||
| Bomb | (During Bomb Stance, wait until the last moment) |
||
| Boomerang Stance | |||
| Boomerang | (During Boomerang Stance) |
||
| Boomerang (Side) | (During Boomerang Stance) |
||
| Bow Stance | (During Boomerang Stance) |
||
| Bomb Stance | (During Boomerang Stance) |
||
| Forward Roll | |||
| Force Counter Slash | (During Forward Roll) |
||
| Rocket Stab | (During Forward Roll) |
||
| Leaping Split Combo | (During Forward Roll) |
||
| Side Roll | (During Forward Roll) |
||
| Spinning Leap Strike | (During Side Roll) |
||
| Rocket Stab | (During Side Roll) |
||
| Leaping Split Combo | (During Side Roll) |
||
| Back Somersault | |||
| Force Counter Slash | (During Back Somersault) |
||
| Leap Strike | (During Back Somersault) |
||
| Knee Thrust | (During Back Somersault) |
||
| Signature Moves | |||
|---|---|---|---|
| Name | Button(s) | Attack | Properties |
| Spin Attack | |||
| Bow | (During Bow Stance) |
||
| Bomb | (During Bomb Stance) |
||
| Boomerang | (During Boomerang Stance) |
||
| Quick Attacks | ||
|---|---|---|
| Name | Button(s) | Attack |
| Double Sword Slash (Horizontal) | ||
| Double Sword Slash (Vertical) | ||
| Mid Kick | ||
| Step-in Attack Combo | ||
| Powerful Attacks | |||
|---|---|---|---|
| Name | Button(s) | Attack | Properties |
| Spin Attack (Hold) | |||
| Cyclone Attack (Hold) | |||
| Hyper Dash Attack (Hold) | |||
| Power Thrust~Bow Stance | |||
Weaponry
- Like all SoulCalibur II characters, Link has a total of 11 weapons to choose from. His starting and most-balanced weapon is the Master Sword and Hylian Shield, and the rest of the weapons must be bought in shops in various cities in the Weapon Master Mode.
| Link's Weapons | |||
|---|---|---|---|
| Weapon Set | Cost | Attributes | Description |
 Master Sword & Hylian Shield |
Free | Well-balanced | A magic sword and shield that have accompanied Link on many adventures and helped him repeatedly save the land of Hyrule. This journey is no less dire, and Link once again goes into battle equipped with these items, this time in another world. These are well-balanced arms for Link. |
 Razor Sword |
600 Gold | Attack goes up 25% Short reach Takes 15% block damage |
A sword forged by the blacksmith from the Mountain Village on Snowhead. The blacksmith is famous for his perfectionism—this sword is yet another excellent example of his craftsmanship and boasts an amazingly sharp cutting edge. Unfortunately, the metal used to forge this blade is prone to chipping, so there remains some concern about its defensive capabilities. |
 Armos Series |
900 Gold | Defense decreases 30% Offense increases with Soul Charge 40% (deteriorates) |
A sword and shield from one of the living Armos statues that dot the land of Hyrule. The origins of these items are shrouded in mystery, much like the Armos themselves. Concentrating one's will increases the weapons' power, but they are a bit too heavy for Link and he cannot use them effectively for guarding. |
 Megaton Hammer |
1,200 Gold | Offense goes up 35% Short reach |
An extremely heavy hammer. Learning to use it effectively could take some time, as its reach is somewhat short for a weapon. Its power and toughness, however, far exceed that of any normal sword. It's guaranteed to inspire awe. |
 Cane of Byrna |
1,600 Gold | Soul Charge boosts offense up to 50% Soul Charge lowers damage received by 25% Soul Charge recovers up to 32 HP each time |
An ancient magic staff that grants protection to heroes. It can be used even by those who are not sorcerers as long as their hearts are pure. It is said that praying to the staff with all one's heart will shroud the user in light and fill him with vitality. Because it is not a true weapon, it usually does not fare well when it clashes against an opponent's weapon. |
 Mirror Shield |
2,200 Gold | Hits taken are counters 33% of damage received is inflicted back onto opponent |
A mirror-like shield found in the Spirit Temple. It is an amazing work of art, and there are few who would argue that it is not one of the finest shields in Hyrule. It is said that its surface reflects not only light but hostile intent as well. |
 Magic Sword & Magic Shield |
3,000 Gold | Causes 40% block damage Weak against physical impact |
Ancient arms hidden deep in an underground tomb. This powerful sword holds an enchantment that counters the forces of darkness, and its holy aura allows it to deliver damage to the enemy even without making physical contact. The shield is enchanted with a spell that protects its user from enemy magic, but the actual shield itself is quite old and is weak against physical impact. |
 Biggoron's Sword |
4,000 Gold | Long reach Drains 3 HP per attack |
A masterfully crafted long sword forged by the best blacksmith in Hyrule, Biggoron, who lives on Death Mountain. Designed specifically for Link, it is made to be wielded with one hand. Even so, swinging it with full force gets tiring after a while. |
 Soul Edge (Complete) |
7,700 Gold | Offense goes up 40% Defense goes up 35% Drains 2 HP per second |
An evil blade with a reputation for devouring souls. This weapon is also known to be a shape-shifter—which form it takes depends on its current owner. The forms it has taken are legendary, as are the souls of the renowned warriors it has consumed. Only those with great mental discipline can retain their will while wielding this weapon. It consumes the souls of those who fall before the blade, and also the soul of its wielder. |
 Great Fairy Sword |
9,800 Gold | Attack goes up 20% Gains 5 HP per second Takes 20% block damage |
A sword blessed by the Great Fairy, rumored to be able to reflect any and all dark magic. Merely holding it fills the wielder with strength, but unfortunately, its protective power did not survive intact in this world, and it is no longer able to resist enemy attacks. |
 Bug-Catching Net |
12,500 Gold | Offense decreases 80% Defenses decreases 80% |
A long-handled net used for catching bugs. This item is an old companion of Link's and has appeared on many of his adventures—it accompanies him on this adventure as well. Obviously, it is not a weapon, but perhaps it will cause opponents to let down their guard. |
Other Information
- Link's Destined Battle in Arcade mode is against Raphael.
- The overworld theme from The Legend of Zelda is used in Link's profile viewer and destined battle theme. It is also played if Link was used in Eurydice Shrine gallery.
- Link's stage is the Ostrheinsburg Chapel and his alternate stage is Eurydice Shrine Gallery.
- Link can buy the Soul Edge for 7,800 Gold in the Castor Shop while playing the Weapon Master mode. Link's Soul Edge causes for his defense and offense to increase to 135% and 140%, respectively; however, it drains his health by 2 HP every second.[5]
- Instead of having the standard two or three costumes like every other character, Link has 4 different costumes: green, red, blue, and violet. His two starter costumes are the green and red tunic. To obtain the Blue Tunic, the player must buy it in the Castor Shop for 21,000 Gold, found in the Extra Chapter 1 of the Weapon Master mode. Only after buying the Blue Tunic can the player buy the Blue Ring Tunic from the original The Legend of Zelda, which is sold for the same price as the Blue Tunic.
-
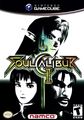
The box art for SoulCalibur II featuring Link on the cover
-
Artwork of Link with other characters from SoulCalibur II
-

Artwork of Link
-

Artwork of Link
-
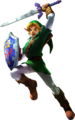
Artwork of Link
-
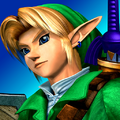
Render of Link
-
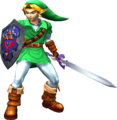
Link, as seen in-game
-
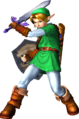
Link, as seen in-game
-
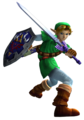
Link, as seen in-game
-
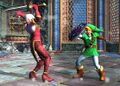
Link fighting Ivy
-
Link in the Arcade mode ending


Taiko no Tatsujin Series
Taiko no Tatsujin: Yellow Version
- The arcade game Yellow Version and its later incarnations Blue Version and Green Version feature a remixed Breath of the Wild medley, added to Yellow Version in the version 2.07 update.
Taiko no Tatsujin: Rhythm Festival
- One of the featured songs is an orchestral version of The Legend of Zelda (Theme).[6]
Tekken Tag Tournament 2: Wii U Edition
- The Wii U version of the game includes many Nintendo-themed costumes for the characters, including Link, Ganon, Princess Zelda and Sheik, based predominantly on their Super Smash Bros. Brawl appearances. The Link costume includes the Master Sword.
-
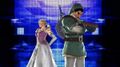
Link and Zelda costumes in Tekken Tag Tournament 2: Wii U Edition
-
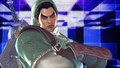
Kazuya Mishima dressed as Link in Tekken Tag Tournament 2: Wii U Edition
-

The Master Sword in Tekken Tag Tournament 2: Wii U Edition
-
Kazuya Mishima dressed as Link fighting King dressed as Ganondorf in Tekken Tag Tournament 2: Wii U Edition
-
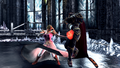
Nina Williams dressed as Zelda fighting King dressed as Ganondorf in Tekken Tag Tournament 2: Wii U Edition


Travis Strikes Again: No More Heroes
- A Special Legendary T-shirt based on The Adventure of Link was released for free alongside a patch on February 28, 2019.[7]
Warriors series
Shin Sangoku Musou VS
- The game features a costume of Link based on his Skyward Sword incarnation. The costume is equipped with the True Master Sword and the Hylian Shield; however, the equipment are only cosmetic display and cannot actually be used.
Samurai Warriors Chronicles 3
- A special set of costumes based on the Hyrule Warriors incarnations of Link and Zelda are available for the game's customizable main protagonist. The costumes are unlocked in the 3DS version of the game if players have save data from the game's demo. The costumes are exclusive to the Japanese version of the game as the demo was not released internationally.
-

The Link costume in Dynasty Warriors Vs.
-
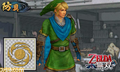
The Link costume in Samurai Warriors Chronicles 3
-
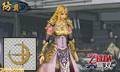
The Zelda costume in Samurai Warriors Chronicles 3


Gallery
-
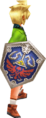
The Hylian Shield in Phantasy Star 0
-
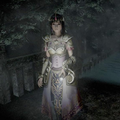
Miu dressed as Zelda from Hyrule Warriors in Fatal Frame: Maiden of Black Water
-
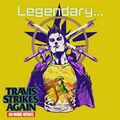
The Adventure of Link t-shirt from Travis Strikes Again: No More Heroes
.png)

Video Gallery
See Also
- amiibo
- Cameos of The Legend of Zelda in Nintendo Media
- Cameos in The Legend of Zelda
- The Legend of Zelda in Popular Culture
References
- ↑ "You seem to like The Legend of Zelda, don't you?" — Psycho Mantis (Metal Gear Solid: The Twin Snakes)
- ↑ "Just as the people were about to lose all hope, the sun miraculously returned. Link, who was summoned by Zelda to find the cause of the disasters, successfully defeated the magician. The people of Hyrule rejoiced in the belief that eternal peace would rule. Unfortunately, this was not to be. It became clear that the magician responsible for the disasters was in fact controlled by an evil sword called Soul Edge, which existed in an another world." — N/A (SoulCalibur II)
- ↑ "Knowing that the resurrection of the evil blade must be prevented at all costs, Link chose to travel to the other world and destroy Soul Edge. Link gathered his trusted Master Sword, Hylian Shield, and Ocarina, and set off on a secret journey." — N/A (SoulCalibur II)
- ↑ "Link came to this world in order to defeat the evil which threatened Hyrule. After a long journey, Link finally succeeded in sealing away the terrible evil. In doing so, he not only saved his homeland from peril, but also maintained the tranquility of this world. Link then quietly left this world--a faint echo of his Ocarina was all that remained." — N/A (SoulCalibur II)
- ↑ "Fearsome demonic weapon said to excel in offense and defense...." — N/A (SoulCalibur II)
- ↑ Nintendo, Nintendo Direct - 2.9.2022 - Youtube , Youtube, published February 9, 2022, retrieved February 10, 2022.
- ↑ "The update patch on 2/28 will include the Special Legendary T-shirt: Zelda II: The Adventure of Link!" — @suda_51 on Twitter, February 27, 2019 (Archive)