Boomerang: Difference between revisions
JumbledLimes (talk | contribs) No edit summary Tag: 2017 source edit |
mNo edit summary |
||
| (55 intermediate revisions by 19 users not shown) | |||
| Line 1: | Line 1: | ||
{{Hatnote|This article is about the regular Boomerang. For other variants, see [[Magical Boomerang]], [[Gale Boomerang]], and [[Nice Boomerang]].}} | |||
{{Infobox Item | {{Infobox Item | ||
|image= | |image= | ||
| Line 7: | Line 7: | ||
|Artwork LA= File:LA Boomerang Artwork.png | |Artwork LA= File:LA Boomerang Artwork.png | ||
|Artwork FS= File:FS Boomerang Artwork.png | |Artwork FS= File:FS Boomerang Artwork.png | ||
|Artwork TWWHD= File:TWWHD Boomerang Artwork.png | |||
|Artwork TMC= File:TMC Boomerang Artwork.png | |Artwork TMC= File:TMC Boomerang Artwork.png | ||
|Artwork ST= File:ST Link Boomerang Artwork.png | |Artwork ST= File:ST Link Boomerang Artwork.png | ||
|Render OoT= File:OoT Boomerang Render.png | |Render OoT= File:OoT Boomerang Render.png | ||
|Render ALBW= File:ALBW Boomerang.png | |Render ALBW= File:ALBW Boomerang.png | ||
|Render TFH= File:TFH Boomerang Render.png | |Render TFH= File:TFH Boomerang Render.png | ||
| Line 21: | Line 21: | ||
|Model ST= File:PH Boomerang Model.png | |Model ST= File:PH Boomerang Model.png | ||
|Model BotW= File:BotW Boomerang Model.png | |Model BotW= File:BotW Boomerang Model.png | ||
|Model TotK= File:TotK Boomerang Model.png | |||
|Sprite TLoZ= File:TLoZ Boomerang Sprite.png | |Sprite TLoZ= File:TLoZ Boomerang Sprite.png | ||
|Sprite ALttP= File: | |Sprite ALttP= File:ALttP Boomerang Sprite.png | ||
|Sprite LA= File:LA Boomerang Sprite.png | |Sprite LA= File:LA Boomerang Sprite.png | ||
|Sprite LADX= File:LADX Boomerang Sprite.png | |Sprite LADX= File:LADX Boomerang Sprite.png | ||
| Line 40: | Line 41: | ||
|Sprite TFH= File:TFH Boomerang Icon.png | |Sprite TFH= File:TFH Boomerang Icon.png | ||
|Sprite BotW= File:BotW Boomerang Icon.png | |Sprite BotW= File:BotW Boomerang Icon.png | ||
|Sprite TotK= File:TotK Boomerang Icon.png | |||
}} | }} | ||
|caption= | |caption= | ||
|type= boomerang | |type= boomerang | ||
|game= | |game= TLoZ, ALttP, LA, OoT, OoS, OoA, FS, TWW, FSA, TMC, PH, ST, ALBW, TFH, BotW, TotK | ||
|other= | |other= TLoZ (TV Series), TLoZGW, TLoZ (Valiant Comics), ZA, AST, SSB, SSBM, SCII, SSBB, PH (Himekawa), HW, SSB4, SSBU, CoH, HWAoC | ||
| | |cost= | ||
{{Infobox Game Blocks | |||
|TMC= 300 [[Rupee]]s | |||
|ALBW= 800 [[Rupee]]s | |||
}} | |||
|value= | |value= | ||
|location= {{Term|TLoZ|Level 1|link}} | |location= | ||
|uses= Stunning | {{Infobox Game Blocks | ||
|strength= | |TLoZ= {{Term|TLoZ|Level 1|link}} | ||
|durability= | |ALttP= [[Hyrule Castle (Dungeon)|Hyrule Castle]], [[Kakariko Village]] | ||
|LA= {{Term|LANS|Cave|link}} at [[Toronbo Shores]] | |||
|OoT= [[Inside Jabu-Jabu's Belly]] | |||
|OoS= [[Dance Hall]] | |||
|OoA= [[Shooting Gallery#Oracle of Ages|Goron Shooting Gallery]] | |||
|TWW= [[Forbidden Woods]] | |||
|TMC= {{Term|TMC|Stockwell's Shop|link}} | |||
|PH= [[Temple of Fire]] | |||
|ST= [[Snow Temple]] | |||
|ALBW= [[Ravio's Shop]] | |||
}} | |||
|uses= | |||
{{List| | |||
Stunning {{Plural|Series|Enemy|link}}, | |||
Retrieving distant {{Plural|Series|Item|link}}, | |||
Hitting {{Plural|Series|Switch|link}} | |||
}} | |||
|strength= | |||
{{Infobox Game Blocks | |||
|ALttP= {{HP|ALttP|0.5}} | |||
|OoT= {{HP|OoT|1}} | |||
|ALBW= {{HP|ALBW|1}} | |||
|TFH= {{HP|TFH|0.5}} | |||
|BotW= 8 | |||
}} | |||
|durability= | |||
{{Infobox Game Blocks | |||
|BotW= 18 | |||
|TotK= | |||
}} | |||
|comp= | |comp= | ||
|sample= | |sample= | ||
|theme= | |theme= | ||
}} | }} | ||
{{Term/Store|Boomerang|Boomerangs|Series, TLoZ, ALttP, LA, LADX, OoT, OoT3D, OoS, OoA, TWW, TWWHD | {{Term/Store|Boomerang|Boomerangs|Series, TLoZ, ALttP, LA, LADX, OoT, OoT3D, OoS, OoA, FS, TWW, TWWHD, FSA, TMC, PH, ST, ALBW, TFH, BotW, TotK|plural}} are recurring {{Plural|Series|Item|link}} in {{TLoZ|Series}}.{{Exp Game|TLoZ, ALttP, LA, OoT, OoS, OoA, FS, TWW, FSA, TMC, PH, ST, ALBW, TFH, BotW, TotK}}<ref>{{Cite Book|quote= |book= E |publisher= |page= 118 {{Exp Game|TLoZ, ALttP, LA, OoT, OoS, OoA, TWW, FS, FSA, TMC, PH, ST, ALBW, TFH}}}}</ref><ref name="BotW Inventory">{{Cite|{{Big|Boomerang}}<br/>This throwing weapon was originally used by the forest-dwelling Koroks. Its unique shape allows it to return after being thrown.|Inventory|BotW}}</ref><ref name="TotK Inventory">{{Cite|{{Big|Boomerang}}<br/>A decayed wooden boomerang. A useful tool that {{Color|TotK Teal|comes back after you throw it}}. Its current state has not lessened its performance.|Inventory|TotK}}</ref>{{Name Ref|HWAoC}} | ||
==Location and Uses== | ==Location and Uses== | ||
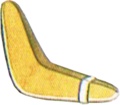
The Boomerang is an item that [[Link]] can throw, at which point it will return to him. It can be used for both combat and [[Puzzle]] solving. It can be used to stun enemies, although a single hit will defeat weak enemies, such as [[Keese]].<ref name="PH Guide 11">{{Cite Guide|quote= |game= PH|publisher= Prima|page= 11}}</ref> It can also be used to retrieve items that are out of [[Link]]'s reach.<ref>{{Cite | The Boomerang is an item that [[Link]] can throw, at which point it will return to him. It can be used for both combat and [[Puzzle]] solving. It can be used to stun enemies, although a single hit will defeat weak enemies, such as [[Keese]].<ref name="PH Guide 11">{{Cite Guide|quote= |game= PH|publisher= Prima|page= 11}}</ref> It can also be used to retrieve items that are out of [[Link]]'s reach.<ref>{{Cite Manual|quote= If you hit an enemy with this, it will be stunned for a short time (some enemies will sustain damage when hit by the boomerang). The boomerang can also retrieve distant Rupees and Hearts.|game= ALttP|page= 37}}</ref> The Boomerang first appeared in {{TLoZ}} and has gone through several design changes since then. In {{PH}} and {{ST}}, Link can draw the path that the Boomerang will take, allowing a more direct control of it.<ref name="PH Guide 11"/> Moreover, the Boomerang can also be used to turn [[Spark]]s and [[Bubbles]] into [[Fairy|Fairies]] in certain games. | ||
==={{TLoZ|-}}=== | ==={{TLoZ|-}}=== | ||
{{ | {{Manual|TLoZ|Wooden boomerang and magical boomerang|Link can use these to inflict damage on weak enemies. He can also stop most of the enemy in their tracks if he throws the boomerang on target. The magical boomerang flies further than the wooden boomerang.}} | ||
In {{TLoZ}}, Link can acquire a Boomerang by defeating all of the red [[Goriya]]s in a certain room within {{Term|TLoZ|Level 1|link}} of both the First Quest and the [[Second Quest]]. Goriyas attack Link with Boomerangs. Link can use the Boomerang to stun certain enemies for a brief period of time.<ref>{{Cite | In {{TLoZ}}, Link can acquire a Boomerang by defeating all of the red [[Goriya]]s in a certain room within {{Term|TLoZ|Level 1|link}} of both the First Quest and the [[Second Quest]]. Goriyas attack Link with Boomerangs. Link can use the Boomerang to stun certain enemies for a brief period of time.<ref>{{Cite Manual|quote= He can also stop most of the enemy in their tracks if he throws the boomerang on target.|game= TLoZ|page= 24}}</ref> He can also use it to instantly defeat [[Keese]] and [[Gel]]s.<ref>{{Cite Manual|quote= Link can use these to inflict damage on weak enemies.|game= TLoZ|page= 24}}</ref> The Boomerang can also be used to collect items from a distance. The Boomerang can be replaced with the [[Magical Boomerang]], which can be thrown further.<ref>{{Cite Manual|quote= The magical boomerang flies further than the wooden boomerang.|game= TLoZ|page= 24}}</ref> | ||
{| class="wikitable mw-collapsible mw-collapsed" style="text-align:center" | {| class="wikitable mw-collapsible mw-collapsed" style="text-align:center" | ||
| Line 70: | Line 105: | ||
! No Effect | ! No Effect | ||
|- | |- | ||
| [[File:TLoZ Gel Sprite.png]]<br>'''[[Gel]]''' | | [[File:TLoZ Gel Sprite.png]]<br/>'''[[Gel]]''' | ||
| [[File:TLoZ Armos Sprite.png]]<br>'''[[Armos]]''' | | [[File:TLoZ Armos Sprite.png]]<br/>'''[[Armos]]''' | ||
| [[File:TLoZ Aquamentus Sprite.png]]<br>'''[[Aquamentus]]''' | | [[File:TLoZ Aquamentus Sprite.png]]<br/>'''[[Aquamentus]]''' | ||
|- | |- | ||
| [[File:TLoZ Keese Sprite.png]]<br>'''[[Keese]]''' | | [[File:TLoZ Keese Sprite.png]]<br/>'''[[Keese]]''' | ||
| [[File:TLoZ Digdogger Sprite 2.png]]<br>'''[[Digdogger]]''' {{Exp|While weakened}} | | [[File:TLoZ Digdogger Sprite 2.png]]<br/>'''[[Digdogger]]''' {{Exp|While weakened}} | ||
| [[File:TLoZ Bubble Sprite.png]]<br>'''[[Bubble]]''' | | [[File:TLoZ Bubble Sprite.png]]<br/>'''[[Bubble]]''' | ||
|- | |- | ||
|rowspan="15"| | |rowspan="15"| | ||
| [[File:TLoZ Ghini Sprite.png]]<br>'''[[Ghini]]''' | | [[File:TLoZ Ghini Sprite.png]]<br/>'''[[Ghini]]''' | ||
| [[File:TLoZ Red Darknut Sprite.png]]<br>'''[[Darknut]]''' | | [[File:TLoZ Red Darknut Sprite.png]]<br/>'''[[Darknut]]''' | ||
|- | |- | ||
| [[File:TLoZ Gibdo Sprite.png]]<br>'''[[Gibdo]]''' | | [[File:TLoZ Gibdo Sprite.png]]<br/>'''[[Gibdo]]''' | ||
| [[File:TLoZ Dodongo Sprite.png]]<br>'''[[Dodongo]]''' | | [[File:TLoZ Dodongo Sprite.png]]<br/>'''[[Dodongo]]''' | ||
|- | |- | ||
| [[File:TLoZ Red Goriya Sprite.png]]<br>'''[[Goriya]]''' | | [[File:TLoZ Red Goriya Sprite.png]]<br/>'''[[Goriya]]''' | ||
| [[File:TLoZ Gleeok | | [[File:TLoZ Gleeok Sprite.png]]<br/>'''[[Gleeok]]''' | ||
|- | |- | ||
| [[File:TLoZ Leever | | [[File:TLoZ Red Leever Sprite.png]]<br/>'''[[Red Leever]]''' | ||
| [[File:TLoZ Gohma | | [[File:TLoZ Blue Gohma Sprite.png]]<br/>'''[[Blue Gohma]]''' | ||
|- | |- | ||
| [[File:TLoZ Like Like Sprite.png]]<br>'''[[Like Like]]''' | | [[File:TLoZ Like Like Sprite.png]]<br/>'''[[Like Like]]''' | ||
| [[File:TLoZ Gleeok Head Sprite.png]]<br>'''[[Gleeok Head]]''' | | [[File:TLoZ Gleeok Head Sprite.png]]<br/>'''[[Gleeok Head]]''' | ||
|- | |- | ||
| [[File:TLoZ Lynel | | [[File:TLoZ Red Lynel Sprite.png]]<br/>'''[[Red Lynel]]''' | ||
| [[File:TLoZ Lanmola | | [[File:TLoZ Red Lanmola Sprite.png]]<br/>'''[[Red Lanmola]]''' | ||
|- | |- | ||
| [[File:TLoZ Red Moblin Sprite.png]]<br>'''{{Term|TLoZ|Red Moblin|link}}''' | | [[File:TLoZ Red Moblin Sprite.png]]<br/>'''{{Term|TLoZ|Red Moblin|link}}''' | ||
| [[File:TLoZ Manhandla Sprite.png]]<br>'''[[Manhandla]]''' | | [[File:TLoZ Manhandla Sprite.png]]<br/>'''[[Manhandla]]''' | ||
|- | |- | ||
| [[File:TLoZ Octorok | | [[File:TLoZ Red Octorok Sprite.png]]<br/>'''[[Red Octorok]]''' | ||
| [[File:TLoZ Moldorm Sprite.png]]<br>'''[[Moldorm]]''' | | [[File:TLoZ Moldorm Sprite.png]]<br/>'''[[Moldorm]]''' | ||
|- | |- | ||
| [[File:TLoZ Peahat Sprite.png]]<br>'''[[Peahat]]''' | | [[File:TLoZ Peahat Sprite.png]]<br/>'''[[Peahat]]''' | ||
| [[File:TLoZ Patra Sprite.png]]<br>'''[[Patra]]''' | | [[File:TLoZ Patra Sprite.png]]<br/>'''[[Patra]]''' | ||
|- | |- | ||
| [[File:TLoZ Rope Sprite.png]]<br>'''[[Rope]]''' | | [[File:TLoZ Rope Sprite.png]]<br/>'''[[Rope]]''' | ||
| [[File:TLoZ Pols Voice Sprite.png]]<br>'''[[Pols Voice]]''' | | [[File:TLoZ Pols Voice Sprite.png]]<br/>'''[[Pols Voice]]''' | ||
|- | |- | ||
| [[File:TLoZ Stalfos Sprite.png]]<br>'''[[Stalfos]]''' | | [[File:TLoZ Stalfos Sprite.png]]<br/>'''[[Stalfos]]''' | ||
| [[File:TLoZ Red Wizzrobe Sprite.png]]<br>'''{{Term|TLoZ|Red Wizzrobe|link}}''' | | [[File:TLoZ Red Wizzrobe Sprite.png]]<br/>'''{{Term|TLoZ|Red Wizzrobe|link}}''' | ||
|- | |- | ||
| [[File:TLoZ Red Tektite Sprite.png]]<br>'''[[Tektite]]''' | | [[File:TLoZ Red Tektite Sprite.png]]<br/>'''[[Tektite]]''' | ||
| [[File:TLoZ Zora Sprite.png]]<br>'''[[Zora]]''' | | [[File:TLoZ Zora Sprite.png]]<br/>'''[[Zora]]''' | ||
|- | |- | ||
|rowspan="3"| | |rowspan="3"| | ||
| [[File:TLoZ Vire Sprite.png]]<br>'''[[Vire]]''' | | [[File:TLoZ Vire Sprite.png]]<br/>'''[[Vire]]''' | ||
|- | |- | ||
| [[File:TLoZ Wallmaster Sprite.png]]<br>'''[[Wallmaster]]''' | | [[File:TLoZ Wallmaster Sprite.png]]<br/>'''[[Wallmaster]]''' | ||
|- | |- | ||
| [[File:TLoZ Zol Sprite.png]]<br>'''[[Zol]]''' | | [[File:TLoZ Zol Sprite.png]]<br/>'''[[Zol]]''' | ||
|} | |} | ||
==={{ALttP|-}}=== | ==={{ALttP|-}}=== | ||
In {{ALttP}}, Link can obtain a Boomerang in [[Hyrule Castle ( | {{Manual|ALttP|Boomerang|If you hit an enemy with this, it will be stunned for a short time (some enemies will sustain damage when hit by the boomerang). The boomerang can also retrieve distant Rupees and Hearts.}} | ||
{{Manual|ALttP&FS|Boomerang|This temmporarily paralyzes enemies when it strikes them. You can also use it to retrieve Rupees and other items in hard-to-reach places.}} | |||
In {{ALttP}}, Link can obtain a Boomerang in [[Hyrule Castle (Dungeon)|Hyrule Castle]]. It is contained in a [[Treasure Chest]] a few rooms before the prison where the [[Ball and Chain Trooper]] holds [[Princess Zelda]] captive. It appears as a Big Chest on the Map, but is in fact a Small Chest. If Link fails to collect the Boomerang in the Hyrule Castle, he can find another one in the house of the [[Sweeping Lady]] in [[Kakariko Village]]. If Link does not open either Chest, he can obtain a Magical Boomerang from a Chest in the [[Village of Outcasts]]. Link can also obtain a Magical Boomerang as an upgrade to the Boomerang at the [[Waterfall of Wishing]]. The Boomerang is blue, while the Magical Boomerang is red, faster and can be thrown farther.<ref>{{Cite|You got the Magical Boomerang! You can throw this faster and farther than your old one!|N/A|ALttP}}</ref> Both varieties can be used to stun enemies, hit [[Switch]]es, and collect items from a distance. | |||
==={{LA|-}}=== | ==={{LA|-}}=== | ||
In {{LA}}, Link can obtain the Boomerang by completing the {{Term|LANS|Trading Quest|link}} and using the [[Magnifying Lens]] inside a hidden {{Term|LANS|Cave|link}} at the eastern side of [[Toronbo Shores]]. Here Link will meet a Goriya who will offer to give Link a Boomerang in exchange for an item. The Boomerang can be used to stun enemies, hit Switches, collect items from a distance, and cut bushes. The Boomerang is one of the two items able to destroy | In {{LA}}, Link can obtain the Boomerang by completing the {{Term|LANS|Trading Quest|link}} and using the [[Magnifying Lens]] inside a hidden {{Term|LANS|Cave|link}} at the eastern side of [[Toronbo Shores]]. Here Link will meet a Goriya who will offer to give Link a Boomerang in exchange for an item. The Boomerang can be used to stun enemies, hit Switches, collect items from a distance, and cut bushes. The Boomerang is one of the two items able to destroy {{Plural|LADX|Bubble|link}}, the other being the [[Magic Powder]]. It is also the only weapon able to defeat a [[Spark]]. It can also defeat certain enemies in one hit, such as [[Ghini]]s. The Boomerang is the most effective weapon against the final form of [[Nightmare]], as it can be defeated in one hit. | ||
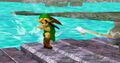
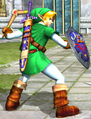
==={{OoT|-}}=== | ==={{OoT|-}}=== | ||
{{ | {{Manual|OoT|Boomerang|If you throw it, it comes back! The Boomerang can stun or defeat enemies. Use Z Targeting to improve your accuracy. Some enemies can only be defeated with the Boomerang.}} | ||
In {{OoT}}, the Boomerang can only be used by Link as a child. It is the main item [[Inside Jabu-Jabu's Belly]]. The Boomerang is needed in order to defeat [[Tailpasaran]]s, [[Parasitic Tentacle]]s, the [[Big Octo#Ocarina of Time|Big Octo]], and the [[Boss]] of the Dungeon, [[Barinade]]. It also allows Link to collect distant items such as [[Gold Skulltula]] Tokens. It can be used to stun and defeat certain enemies. Before being thrown, the camera shifts to a first-person perspective, allowing Link to aim. The camera will remain in a third-person perspective if Link is [[Targeting]] something. When Targeting, the Boomerang will follow its target until impact. | In {{OoT}}, the Boomerang can only be used by Link as a child. It is the main item [[Inside Jabu-Jabu's Belly]]. The Boomerang is needed in order to defeat [[Tailpasaran]]s, [[Parasitic Tentacle]]s, the [[Big Octo#Ocarina of Time|Big Octo]], and the [[Boss]] of the Dungeon, [[Barinade]]. It also allows Link to collect distant items such as [[Gold Skulltula]] Tokens. It can be used to stun and defeat certain enemies. Before being thrown, the camera shifts to a first-person perspective, allowing Link to aim. The camera will remain in a third-person perspective if Link is [[Targeting]] something. When Targeting, the Boomerang will follow its target until impact. | ||
==={{OoS|-}}=== | ==={{OoS|-}}=== | ||
In {{OoS}}, the Boomerang can be found in [[Subrosia]] as a prize from the [[Dance Hall]] | {{Manual|OoS|Boomerang|The Boomerang returns to you after you have thrown it. Use it to get objects like Pieces of Hearts and Rupees when those objects are out of your reach.}} | ||
In {{OoS}}, the Boomerang can be found in [[Subrosia]] as a prize from the [[Dance Hall]]. It is upgraded to the [[Magical Boomerang]] in the {{Term|OoS|Ancient Ruins|link}}. The Magical Boomerang is faster, can fly higher distances and can be controlled at will. The normal Boomerang is an optional item in this game, whereas the Magical Boomerang is a required item. | |||
In certain dungeons, red [[Moblin]]s wield Boomerangs. They are blue in color, but do damage to Link instead of having the stun effect of Link's Boomerang. Also, the miniboss of the [[Gnarled Root Dungeon|first dungeon]] features a pair of [[Brother Goriyas]] who throw a Boomerang to each other, injuring Link when in the way. | |||
==={{OoA|-}}=== | ==={{OoA|-}}=== | ||
In {{OoA}}, the Boomerang can be found in the [[Rolling Ridge]] as a prize from the [[Shooting Gallery#Oracle of Ages|Goron Shooting Gallery]]. It is an optional | In {{OoA}}, the Boomerang can be found in the [[Rolling Ridge]] as a prize from either the [[Shooting Gallery#Oracle of Ages|Goron Shooting Gallery]] or the [[Target Carts]]. It is an optional item in this game. | ||
In certain dungeons, red [[Moblin]]s wield Boomerangs. They are blue in color, but do damage to Link instead of having the stun effect of Link's Boomerang. | |||
==={{FS|-}}=== | ==={{FS|-}}=== | ||
{{Manual|FS|Boomerang|Use this weapon to attack enemies from a distance. You can also use this to retrieve hard-to-reach Rupees and hearts. Some enemies might even get stunned when hit...}} | |||
In {{FS}}, the Boomerang appears in various [[Stage]]s. It can only be used in the Stage where it was obtained. It is useful for collecting [[Rupee]]s. | In {{FS}}, the Boomerang appears in various [[Stage]]s. It can only be used in the Stage where it was obtained. It is useful for collecting [[Rupee]]s. | ||
| Line 146: | Line 189: | ||
==={{FSA|-}}=== | ==={{FSA|-}}=== | ||
{{Manual|FSA|Boomerang|Daze enemies by hitting them with this weapon. You can also use it to pull items like Force Gems, Hearts, and even other characters close to you. Hold the A Button to make it hover in midair.<br/>{{Big|Lev. 2}}<br/>This faster boomerang flies even farther.}} | |||
In {{FSA}}, the Boomerang can be held in place before returning to Link. This is useful for retrieving moving [[Force Gem]]s. The Boomerang can be upgraded to the Level 2 Boomerang, which is faster and has a longer reach. | In {{FSA}}, the Boomerang can be held in place before returning to Link. This is useful for retrieving moving [[Force Gem]]s. The Boomerang can be upgraded to the Level 2 Boomerang, which is faster and has a longer reach. | ||
==={{TMC|-}}=== | ==={{TMC|-}}=== | ||
{{Manual|TMC|Boomerang|Hit an enemy to daze him: he’ll stop moving for a short period time. You can also use the boomerang to nab Rupees and other items beyond your reach.}} | |||
In {{TMC}}, the {{Term|TMC|Boomerang}} can be bought in {{Term|TMC|Stockwell's Shop|link}} for 300 {{Plural|TMC|Rupee}}. It can be upgraded to the {{Term|TMC|Magical Boomerang}} by {{Term|TMC|Kinstone Fusion|link|display=Fusing}} {{Plural|TMC|Kinstone|link}} with the {{Term|TMC|Tingle Siblings?|link}}. | In {{TMC}}, the {{Term|TMC|Boomerang}} can be bought in {{Term|TMC|Stockwell's Shop|link}} for 300 {{Plural|TMC|Rupee}}. It can be upgraded to the {{Term|TMC|Magical Boomerang}} by {{Term|TMC|Kinstone Fusion|link|display=Fusing}} {{Plural|TMC|Kinstone|link}} with the {{Term|TMC|Tingle Siblings?|link}}. | ||
| Line 161: | Line 206: | ||
==={{TFH|-}}=== | ==={{TFH|-}}=== | ||
In {{TFH}}, the {{Term|TFH|Boomerang}} can be used to grab another {{Term|TFH|Link}} and pull him toward the wielder, and has the ability to hover in place for several seconds at its furthest point by holding the Item button. While wearing the {{Term|TFH|Boomeranger|link}} {{Term|TFH|Outfit|link}}, the {{Term|TFH|Boomerang}} becomes larger and gains the ability to carry two {{ | In {{TFH}}, the {{Term|TFH|Boomerang}} can be used to grab another {{Term|TFH|Link}} and pull him toward the wielder, and has the ability to hover in place for several seconds at its furthest point by holding the Item button. While wearing the {{Term|TFH|Boomeranger|link}} {{Term|TFH|Outfit|link}}, the {{Term|TFH|Boomerang}} becomes larger and gains the ability to carry two {{Plural|TFH|Links}}, pass through enemies, and deal damage to them. | ||
{{Plural|TFH|Boomerang}} first appear in the {{Term|TFH|Blazing Trail|link}} where all three {{ | {{Plural|TFH|Boomerang}} first appear in the {{Term|TFH|Blazing Trail|link}} where all three {{Plural|TFH|Links}} acquire one, then reappear in {{Term|TFH|Hinox Mine}} (two {{Plural|TFH|Boomerang}}), {{Term|TFH|Den of Flames|link}}, {{Term|TFH|Fire Temple|link}}, {{Term|TFH|Snowball Ravine|link}}, {{Term|TFH|Sealed Gateway|link}} (two {{Plural|TFH|Boomerang}}), {{Term|TFH|The Lady's Lair|link}}, {{Term|TFH|Stone Corridors|link}}, {{Term|TFH|Desert Temple|link}}, {{Term|TFH|Illusory Mansion|link}} (three {{Plural|TFH|Boomerang}}), {{Term|TFH|Grim Temple|link}}, {{Term|TFH|Dragon Citadel|link}}, and {{Term|TFH|Sky Temple|link}} (one {{Term|TFH|Boomerang}} per Stage). They also appear in the {{Term|TFH|Forest Zone|link}}, {{Term|TFH|Frozen Zone|link}}, {{Term|TFH|Shadow Zone|link}} and {{Term|TFH|Baneful Zone|link}} of the {{Term|TFH|Den of Trials|link}}, as well as the {{Term|TFH|Coliseum|link}}'s Volcano and The Ruins arenas. | ||
==={{BotW|-}}=== | ==={{BotW|-}}=== | ||
| Line 170: | Line 215: | ||
|strength = 8 | |strength = 8 | ||
|durability = 18 | |durability = 18 | ||
|flammable = | |flammable = Yes | ||
|magnetic = | |magnetic = No | ||
|buoyant = | |buoyant = Yes | ||
|conductive = | |conductive = No | ||
|guardian = | |guardian = No | ||
|throw = | |throw = Yes | ||
|throw effect = Returns to Link. | |throw effect = Returns to Link. | ||
}} | }} | ||
{{Compendium/Extract|Boomerang}} | {{Compendium/Extract|Boomerang}} | ||
{{Plural|BotW|Boomerang}} are a throwing {{Term|BotW|Weapon|link}} in {{BotW}} originally used by {{Plural|BotW|Korok|link}}.<ref name="BotW Inventory"/> Several other varieties of {{Plural|BotW|Boomerang}} can also be found, including {{Plural|BotW|Lizal Boomerang|link}}, {{Plural|BotW|Lizal Forked Boomerang}}, {{Plural|BotW|Lizal Tri-Boomerang|link}}, and {{Plural|BotW|Giant Boomerang|link}}. The {{Term|BotW|Sea-Breeze Boomerang|link}}, which is based on the {{Term|BotW|Boomerang}} from {{TWW|-}}, can also be obtained at random from using the {{Term|BotW|Amiibo (Rune)|link}} {{Term|BotW|Rune|link}}. After being thrown, {{Term|BotW|Link}} must manually catch the {{Term|BotW|Boomerang}} when it returns to him. If the {{Term|BotW|Boomerang}} flies into an object or wall, it will fall to the ground and will not return to {{Term|BotW|Link}}. | |||
A regular {{Term|BotW|Boomerang}} has a chance to appear in a {{Term|BotW|Treasure Chest|link}} spawned by scanning the following {{Plural|Series|Amiibo|link}} with the {{Term|BotW|Amiibo (Rune)}} {{Term|BotW|Rune}}: | |||
* {{SSB}} Series {{Term|SSB|Toon Link|link}} {{Term|Series|Amiibo}} | |||
* {{TLoZ|Series}} Series {{Term|Series|Toon Link}} {{Term|Series|Amiibo}} | |||
Being made from wood, {{Plural|BotW|Boomerang}} will catch on {{Term|BotW|Fire|link}} if they make contact with a {{Term|BotW|Campfire|link}} or if they are exposed to a {{Term|BotW|Scorching Climate|link}}. They will not attract {{Term|BotW|Lightning|link}} during a {{Term|BotW|Thunderstorm|link}}, and they do not conduct {{Term|BotW|Electricity|link}} either. They will float if dropped in {{Term|BotW|Water (Terrain)|link}}. Finally, the {{Term|BotW|Magnesis|link}} {{Term|BotW|Rune}} is unable to pick up {{Plural|BotW|Boomerang}}. | |||
{{BotW Weapon Parameters | |||
|ActorName = "Weapon_Sword_051" | |||
|Life = 18 | |||
|Power = 8 | |||
|SpHitActor = "" | |||
|SpHitRatio = 2.0 | |||
|IsHammer = false | |||
|IsWeakBreaker = false | |||
|IsBoomerang = true | |||
|IsLuckyWeapon = false | |||
|IsPikohan = false | |||
|IsThrowingWeapon = true | |||
|IsThrowingBreakWeapon = false | |||
|ThrowRange = 20.0 | |||
|ChemicalEnergyMax = 0 | |||
|ChemicalEnergyAmountUsed = 0 | |||
|ChemicalEnergyRecoverRate = 0.0 | |||
|ChemicalEnergyRecoverInterval = 60 | |||
|ShootBeam = "" | |||
|SharpWeaponAddAtkMin = 5 | |||
|SharpWeaponAddAtkMax = 8 | |||
|SharpWeaponAddLifeMin = 2 | |||
|SharpWeaponAddLifeMax = 4 | |||
|SharpWeaponAddCrit = true | |||
|PoweredSharpAddAtkMin = 9 | |||
|PoweredSharpAddAtkMax = 13 | |||
|PoweredSharpAddLifeMin = 5 | |||
|PoweredSharpAddLifeMax = 9 | |||
|PoweredSharpAddThrowMin = 1.0 | |||
|PoweredSharpAddThrowMax = 1.0 | |||
|ThrowSpeed = 1.0 | |||
|ThrowRotSpeed = 1500.0 | |||
|SellingPrice = 25 | |||
|BuyingPrice = 100 | |||
}} | |||
==={{TotK|-}}=== | |||
{{TotK Item Properties/Store | |||
|type = One-Handed Weapon | |||
|strength = | |||
|durability = | |||
|flammable = | |||
|magnetic = | |||
|buoyant = | |||
|conductive = | |||
|guardian = | |||
|throw = | |||
|throw effect = | |||
}} | |||
{{Stub|TotK}} | |||
{{Plural|BotW|Boomerang}} are a throwing {{Term|BotW|Weapon|link}} in {{TotK}}.<ref name="BotW Inventory"/> | |||
==Other Appearances== | ==Other Appearances== | ||
==={{TLoZ|-}} TV Series=== | |||
==={{ | |||
{{Noncanon|Start}} | {{Noncanon|Start}} | ||
[[File:ZCS That Sinking Feeling Kangaroo Boomerang.png|right|150px]] | [[File:ZCS That Sinking Feeling Kangaroo Boomerang.png|right|150px]] | ||
[[File:ZCS That Sinking Feeling Boomerang.png|left|thumb|Zelda wielding a Boomerang]] | [[File:ZCS That Sinking Feeling Boomerang.png|left|thumb|Zelda wielding a Boomerang]] | ||
The Boomerang is one of the most used items in {{TLoZ|TV Series}}, and one hit from this weapon is capable of defeating most of Ganon's minions. It is mostly used by [[Princess Zelda]], although Link, [[Moblin]]s, and [[Goriya]]s wield it as well. The Boomerang first appears in "[[Cold Spells]]", where Zelda defeats various magically-possessed cleaning supplies with it. Later, in "[[Sing for the Unicorn]]", Zelda once again uses it to defeat an [[Armos Knight]] and [[Ganon]], rescuing Link and [[King Harkinian|her father]] in the process. The Boomerang shown in "[[That Sinking Feeling]]" is given to Zelda by Link so that the two of them can fight off several [[Tektite]]s that have ambushed them. Link is not shown wielding this item until the "[[Stinging a Stinger]]" episode, which he uses it to defeat a [[Gohma]] with the help of Zelda's [[Magic Rope]]. Although the series mostly exemplifies the use of the Boomerang for fighting enemies, the "[[Doppelganger]]" episode demonstrates how Zelda uses the Boomerang to break free from the ropes that Ganon had tied around her hands. | The Boomerang is one of the most used items in {{TLoZ|TV Series}}, and one hit from this weapon is capable of defeating most of Ganon's minions. It is mostly used by [[Princess Zelda]], although Link, [[Moblin]]s, and [[Goriya]]s wield it as well. The Boomerang first appears in "[[Cold Spells]]", where Zelda defeats various magically-possessed cleaning supplies with it. Later, in "[[Sing for the Unicorn]]", Zelda once again uses it to defeat an [[Armos Knight]] and [[Ganon]], rescuing Link and [[King Harkinian|her father]] in the process. The Boomerang shown in "[[That Sinking Feeling]]" is given to Zelda by Link so that the two of them can fight off several [[Tektite]]s that have ambushed them. Link is not shown wielding this item until the "[[Stinging a Stinger]]" episode, which he uses it to defeat a [[Gohma]] with the help of Zelda's [[Magic Rope]]. Although the series mostly exemplifies the use of the Boomerang for fighting enemies, the "[[Doppelganger]]" episode demonstrates how Zelda uses the Boomerang to break free from the ropes that Ganon had tied around her hands. | ||
{{ | {{Noncanon|End}} | ||
=== | ==={{TLoZ|-}} Game Watch=== | ||
{{Noncanon|Start}} | |||
[[File:TLoZGW Boomerang Artwork.png|left]] | [[File:TLoZGW Boomerang Artwork.png|left]] | ||
The Boomerang appears in {{TLoZGW}}. One appears in each room, and Link must collect it and use it to defeat all the [[Iron Ball]]s. | The Boomerang appears in {{TLoZGW}}. One appears in each room, and Link must collect it and use it to defeat all the [[Iron Ball]]s. | ||
{{Noncanon|End}} | |||
==={{TLoZ|-}} (Valiant Comics)=== | ==={{TLoZ|-}} (Valiant Comics)=== | ||
The Magic Boomerang from ''The Legend of Zelda'' makes an appearance in the ''[[Day of the Triforce]]'' story of {{TLoZ|Valiant Comics}} comic. After [[Princess Zelda]] and [[Cassiopia]] arrive to the [[Water Town of Saria]] to fight off the monsters that have attacked the town, Cassiopia uses the Magic Boomerang to free her husband, the [[River Man]], from the chains that bind him.<ref>{{Cite Book|quote=Wait till I have freed you with the magic boomerang!|book= | {{Noncanon|Start}} | ||
The Magic Boomerang from ''The Legend of Zelda'' makes an appearance in the ''[[Day of the Triforce]]'' story of {{TLoZ|Valiant Comics}} comic. After [[Princess Zelda]] and [[Cassiopia]] arrive to the [[Water Town of Saria]] to fight off the monsters that have attacked the town, Cassiopia uses the Magic Boomerang to free her husband, the [[River Man]], from the chains that bind him.<ref>{{Cite Book|quote=Wait till I have freed you with the magic boomerang!|book=TLoZ (Valiant Comics)|publisher= |page=4}}</ref> | |||
{{Noncanon|End}} | |||
==={{ZA|-}}=== | ==={{ZA|-}}=== | ||
{{Noncanon|Start}} | |||
In {{ZA}}, the Boomerang appears as a [[Spells of Zelda's Adventure|Spell]] which lets Zelda cast Boomerang projectiles with her [[Items in Zelda's Adventure#Wand|Wand]]. It can be found in a small area in western [[Plain of Andor]] with a lone [[Goriya]], which drops the Spell after being defeated. The Spell costs 1 Rupee to use. | In {{ZA}}, the Boomerang appears as a [[Spells of Zelda's Adventure|Spell]] which lets Zelda cast Boomerang projectiles with her [[Items in Zelda's Adventure#Wand|Wand]]. It can be found in a small area in western [[Plain of Andor]] with a lone [[Goriya]], which drops the Spell after being defeated. The Spell costs 1 Rupee to use. | ||
{{Noncanon|End}} | |||
==={{AST|-}}=== | |||
{{Noncanon|Start}} | |||
{{Stub|AST}} | |||
{{Noncanon|End}} | |||
==={{SSB|-}}=== | ==={{SSB|-}}=== | ||
{{Noncanon|Start}} | |||
[[File:SSBB Toon Boomerang.jpg|thumb|right|Toon Link using the Boomerang | {{Hatnote|See {{Ssb|Main Page|SmashWiki's}} article on {{Ssb|Boomerang}} for more information.}} | ||
[[File:SSBB Toon Boomerang.jpg|thumb|right|Toon Link using the Boomerang from {{SSBB|-}}]] | |||
The Boomerang functions as [[Link]]'s {{Ssb|Neutral Special Move}} in {{SSB}}. The Boomerang is based on its iteration from {{OoT}}. | The Boomerang functions as [[Link]]'s {{Ssb|Neutral Special Move}} in {{SSB}}. The Boomerang is based on its iteration from {{OoT}}. | ||
{{Noncanon|End}} | |||
==={{SSBM|-}}=== | ==={{SSBM|-}}=== | ||
{{Noncanon|Start}} | |||
The Boomerang is [[Link]]'s {{Ssb|Side Special Move}} in {{SSBM}}. [[Young Link]] also wields the Boomerang as his Side Special Move. Both Boomerangs are based on their {{OoT}} iteration. | The Boomerang is [[Link]]'s {{Ssb|Side Special Move}} in {{SSBM}}. [[Young Link]] also wields the Boomerang as his Side Special Move. Both Boomerangs are based on their {{OoT}} iteration. | ||
{{Noncanon|End}} | |||
==={{SCII|-}}=== | ==={{SCII|-}}=== | ||
:''How to perform:'' {{ | {{Noncanon|Start}} | ||
In {{SCII}}, the Boomerang from {{OoT|-}} is part of [[ | :''How to perform:'' {{Icon|SCII Horizontal Attack}}{{Icon|SCII +}}{{Icon|SCII Kick}} | ||
In {{SCII}}, the Boomerang from {{OoT|-}} is part of [[SoulCalibur II/Command List|Link's fighting style]]. To get into the Boomerang Stance, the player must press the horizontal attack button and the kick button at the same time. Pressing the horizontal attack again will cause Link to release the Boomerang towards his enemy. The Boomerang attack is considered to be a high attack, dealing 25 HP worth of damage to the opponent. | |||
{{Noncanon|End}} | |||
==={{SSBB|-}}=== | ==={{SSBB|-}}=== | ||
{{Noncanon|Start}} | |||
The Boomerang is [[Link]] and [[Toon Link]]'s {{Ssb|Side Special Move}} in {{SSBB}}. Link's Boomerang resembles the [[Gale Boomerang]] from {{TP}} whereas Toon Link's Boomerang resembles the Boomerang from {{TWW}}. | The Boomerang is [[Link]] and [[Toon Link]]'s {{Ssb|Side Special Move}} in {{SSBB}}. Link's Boomerang resembles the [[Gale Boomerang]] from {{TP}} whereas Toon Link's Boomerang resembles the Boomerang from {{TWW}}. | ||
| Line 227: | Line 342: | ||
{{#section:Sticker|Boomerang}} | {{#section:Sticker|Boomerang}} | ||
|} | |} | ||
{{Noncanon|End}} | |||
==={{PH|-}} (Himekawa)=== | ==={{PH|-}} (Himekawa)=== | ||
As Link battles [[Blaaz]] in the Temple of Fire, [[Ciela]] points out the location of a [[Treasure Chest]].<ref>{{Cite Book|quote= Look!|book= | {{Noncanon|Start}} | ||
As Link battles [[Blaaz]] in the Temple of Fire, [[Ciela]] points out the location of a [[Treasure Chest]].<ref>{{Cite Book|quote= Look!|book= PH (Himekawa)|publisher= |page= 56}}</ref><ref>{{Cite Book|quote= A Treasure Chest?!|book= PH (Himekawa)|publisher= |page= 56}}</ref> Link opens the Chest to find the Boomerang.<ref>{{Cite Book|quote= A Boomerang!|book= PH (Himekawa)|publisher= |page= 56}}</ref> With Ciela's guidance, Link uses the Boomerang to defeat Blaaz's split form and eventually destroys the monster. | |||
{{Noncanon|End}} | |||
==={{HW|-}}=== | ==={{HW|-}}=== | ||
{{Noncanon|Start}} | |||
The Boomerang appears as an item in {{HW}}. It can be upgraded temporarily to the Gale Boomerang by collecting the Boomerang power ups. The Boomerang is able to slice through vines that block pathways. [[Manhandla]]s and their [[Manhandla Stalk|Stalks]] are weak to the Boomerang and it is also one of the items used to fight [[Ganon]] with. In the Master Quest DLC pack, the 8-Bit Boomerang from {{TLoZ}} appears as a weapon for [[Impa]]. It is statistically identical to and part of the [[Biggoron's Sword]] weapon type. | The Boomerang appears as an item in {{HW}}. It can be upgraded temporarily to the Gale Boomerang by collecting the Boomerang power ups. The Boomerang is able to slice through vines that block pathways. [[Manhandla]]s and their [[Manhandla Stalk|Stalks]] are weak to the Boomerang and it is also one of the items used to fight [[Ganon]] with. In the Master Quest DLC pack, the 8-Bit Boomerang from {{TLoZ}} appears as a weapon for [[Impa]]. It is statistically identical to and part of the [[Biggoron's Sword]] weapon type. | ||
{{Noncanon|End}} | |||
==={{SSB4|-}}=== | ==={{SSB4|-}}=== | ||
{{Noncanon|Start}} | |||
The Boomerang is [[Link]] and [[Toon Link]]'s {{Ssb|Side Special Move}} in {{SSB4}}. Like in {{SSBB}}, Link's Boomerang resembles the [[Gale Boomerang]] from {{TP}} and Toon Link's Boomerang resembles the Boomerang from {{TWW}}. | The Boomerang is [[Link]] and [[Toon Link]]'s {{Ssb|Side Special Move}} in {{SSB4}}. Like in {{SSBB}}, Link's Boomerang resembles the [[Gale Boomerang]] from {{TP}} and Toon Link's Boomerang resembles the Boomerang from {{TWW}}. | ||
{{Noncanon|End}} | |||
==={{SSBU|-}}=== | ==={{SSBU|-}}=== | ||
{{Noncanon|Start}} | |||
In {{SSBU}}, the {{Term|SSBU|Boomerang}} is used by {{Term|SSBU|Link|link}}, {{Term|SSBU|Toon Link|link}}, and {{Term|SSBU|Young Link|link}} as their {{Ssb|Side Special Move}}. {{Term|SSBU|Link}} uses the {{Term|SSBU|Boomerang}} from {{BotW}} whereas {{Term|SSBU|Toon Link}} uses the {{Term|SSBU|Boomerang}} from {{TWW}}, and {{Term|SSBU|Young Link}} uses the {{Term|SSBU|Boomerang}} from {{OoT}}. A {{Term|SSBU|Boomerang}} also appears as an item that can be used by {{Term|SSBU|Spirit|link}}s in {{Term|SSBU|Spirit Battle|link}}s. | In {{SSBU}}, the {{Term|SSBU|Boomerang}} is used by {{Term|SSBU|Link|link}}, {{Term|SSBU|Toon Link|link}}, and {{Term|SSBU|Young Link|link}} as their {{Ssb|Side Special Move}}. {{Term|SSBU|Link}} uses the {{Term|SSBU|Boomerang}} from {{BotW}} whereas {{Term|SSBU|Toon Link}} uses the {{Term|SSBU|Boomerang}} from {{TWW}}, and {{Term|SSBU|Young Link}} uses the {{Term|SSBU|Boomerang}} from {{OoT}}. A {{Term|SSBU|Boomerang}} also appears as an item that can be used by {{Term|SSBU|Spirit|link}}s in {{Term|SSBU|Spirit Battle|link}}s. | ||
{{Noncanon|End}} | {{Noncanon|End}} | ||
==={{CoH|-}}=== | |||
{{Ambig|Start}} | {{Ambig|Start}} | ||
{{Stub|CoH}} | {{Stub|CoH}} | ||
The Boomerang appears as an item in {{CoH}}, where it can be wielded by {{Term|CoH|Cadence|link}}, {{Term|CoH|Link|link}}, and {{Term|CoH|Princess Zelda|link}}. Its primary use is to stun enemies, though it can be used to break open {{Plural|CoH|Treasure Chest|link}} and retrieve their contents from afar.<ref>{{Cite|{{Color|CoH Yellow|Boomerang}} -- Assign it to {{Icon|CoH A}} {{Icon|CoH B}} {{Icon|CoH X}} {{Icon|CoH Y}}<br>Throw this at enemies to stun them. It always finds its way back to you.|Inventory|CoH}}</ref> | The Boomerang appears as an item in {{CoH}}, where it can be wielded by {{Term|CoH|Cadence|link}}, {{Term|CoH|Link|link}}, and {{Term|CoH|Princess Zelda|link}}. Its primary use is to stun enemies, though it can be used to break open {{Plural|CoH|Treasure Chest|link}} and retrieve their contents from afar.<ref>{{Cite|{{Color|CoH Yellow|Boomerang}} -- Assign it to {{Icon|CoH A}} {{Icon|CoH B}} {{Icon|CoH X}} {{Icon|CoH Y}}<br/>Throw this at enemies to stun them. It always finds its way back to you.|Inventory|CoH}}</ref> | ||
{{Ambig|End}} | {{Ambig|End}} | ||
==={{HWAoC|-}}=== | |||
{{Noncanon|Start}} | {{Noncanon|Start}} | ||
{{HWAoC Item Properties/Store | |||
|type= Link One-Handed Weapon | |||
}} | |||
{{Stub|HWAoC}} | {{Stub|HWAoC}} | ||
{{Noncanon|End}} | {{Noncanon|End}} | ||
| Line 256: | Line 383: | ||
*The Boomerang was also planned to be included in ''[[The Legend of Zelda: Majora's Mask|Majora's Mask]]'', but was scrapped. | *The Boomerang was also planned to be included in ''[[The Legend of Zelda: Majora's Mask|Majora's Mask]]'', but was scrapped. | ||
*During development of {{SS}}, a Remote Boomerang was planned to be included. With it, Link would have been able to drop anywhere after grabbing it and controlling its trajectory. The idea was later abandoned as it might have led to the skipping of important items and areas. This idea eventually evolved into the creation of the [[Beetle (Item)|Beetle]].<ref>{{Cite Book|quote= |book= E |publisher= |page= 297}}</ref> | *During development of {{SS}}, a Remote Boomerang was planned to be included. With it, Link would have been able to drop anywhere after grabbing it and controlling its trajectory. The idea was later abandoned as it might have led to the skipping of important items and areas. This idea eventually evolved into the creation of the [[Beetle (Item)|Beetle]].<ref>{{Cite Book|quote= |book= E |publisher= |page= 297}}</ref> | ||
**At another point during development of | **At another point during development of {{SS|-}}, a Rocket Punch was proposed for grabbing items. This idea as well led to the creation of the Beetle. | ||
*Despite being incredibly useful in {{ALttP}}, it is not required to complete the game and can be completely skipped. | *Despite being incredibly useful in {{ALttP}}, it is not required to complete the game and can be completely skipped. | ||
| Line 268: | Line 395: | ||
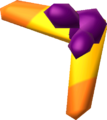
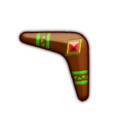
File:TLoZ Boomerang Sprite 4.png|A Boomerang from the All Treasures section of the intro from {{TLoZ|-}} | File:TLoZ Boomerang Sprite 4.png|A Boomerang from the All Treasures section of the intro from {{TLoZ|-}} | ||
File:TLoZ Boomerang Artwork 2.png|Artwork of a Boomerang from {{TLoZ|-}} | File:TLoZ Boomerang Artwork 2.png|Artwork of a Boomerang from {{TLoZ|-}} | ||
File:ALttP Boomerang Sprite.png|A Boomerang from {{ALttP|-}} | File:TLoZ Link in Ladder Throwing Boomerang at Red Octorok Figure.png|Action figure of Link using the Boomerang from {{TLoZ|-}} | ||
File:LA Boomerang.png|Link obtaining the Boomerang from {{ | File:ALttP Boomerang Inventory Sprite.png|A Boomerang from {{ALttP|-}} in the Inventory | ||
File:LA Boomerang.png|Link obtaining the Boomerang from {{LADX|-}} | |||
File:ALBW Ravio Boomerang Artwork.png|Ravio demonstrating the Boomerang's use from {{ALBW|-}} | File:ALBW Ravio Boomerang Artwork.png|Ravio demonstrating the Boomerang's use from {{ALBW|-}} | ||
File:ALBW Rented Boomerang Model.png|The {{Term|ALBW| | File:ALBW Rented Boomerang Model.png|The {{Term|ALBW|Rented Boomerang}} from {{ALBW|-}} | ||
File:ALBW Rented Boomerang Icon.png|The Rented Boomerang icon from {{ALBW|-}} | File:ALBW Rented Boomerang Icon.png|The {{Term|ALBW|Rented Boomerang}} icon from {{ALBW|-}} | ||
File:TFH Nice Boomerang Icon.png|The Boomerang equipped with the Boomeranger Outfit from {{TFH|-}} | File:TFH Nice Boomerang Icon.png|The Boomerang equipped with the Boomeranger Outfit from {{TFH|-}} | ||
File:TFH Nice Boomerang Model.png|The Boomerang equipped with the Boomeranger Outfit from {{TFH|-}} | File:TFH Nice Boomerang Model.png|The Boomerang equipped with the Boomeranger Outfit from {{TFH|-}} | ||
File:ZA Boomerang.png|The Boomerang Spell icon from {{ZA|-}} | File:ZA Boomerang.png|The Boomerang Spell icon from {{ZA|-}} | ||
File:SSBM Adult Boomerang.jpg|Link using the Boomerang | File:SSBM Adult Boomerang.jpg|Link using the Boomerang from {{SSBM|-}} | ||
File:SSBM Young Boomerang.jpg|Young Link using the Boomerang | File:SSBM Young Boomerang.jpg|Young Link using the Boomerang from {{SSBM|-}} | ||
File:SCII Link Using Boomerang.png|Link using the Boomerang | File:SCII Link Using Boomerang.png|Link using the Boomerang from {{SCII|-}} | ||
File:HW Lana Boomerang.png|Lana obtaining the Boomerang | File:HW Lana Boomerang.png|Lana obtaining the Boomerang from {{HW|-}} | ||
File:HW 8-Bit Boomerang? Icon.png|The 8-Bit Boomerang Weapon from {{HW|-}} | File:HW 8-Bit Boomerang? Icon.png|The 8-Bit Boomerang Weapon from {{HW|-}} | ||
File:HW Boomerang Icon.png|The Boomerang icon from {{HW|-}} | File:HW Boomerang Icon.png|The Boomerang icon from {{HW|-}} | ||
File: | File:HWDE Boomerang Icon.png|A {{Term|HWDE|Boomerang}} {{Term|HWDE|Item Card}} from {{HWDE|-}} | ||
File:CoH Boomerang Red Goriya Sprite.png|A {{Term|CoH|Boomerang}} thrown by a {{Term|CoH|Red Goriya}} from {{CoH|-}} | |||
File:CoH Boomerang Blue Goriya Sprite.png|A {{Term|CoH|Boomerang}} thrown by a {{Term|CoH|Blue Goriya}} from {{CoH|-}} | |||
File:BSTLoZ Item Mighty Boomerang.png|The Mighty Boomerang from {{BSTLoZ|-}} | |||
</gallery> | </gallery> | ||
| Line 292: | Line 423: | ||
{{Notes}} | {{Notes}} | ||
{{Ref}} | {{Ref}} | ||
{{Categories | {{Categories | ||
|Boomerangs, Spells, Weapons | |Boomerangs, Spells, Weapons | ||
|items= TLoZ, ALttP, LA, LADX, LANS, OoT, OoT3D, OoS, OoA, FS, TWW, TWWHD, FSA, TMC, PH, ST, ALBW, TFH, BotW, SSB, SSBM, SSBB, HW, HWL, HWDE, SSBfN3DS, SSBfWU, SSBU, HWAoC | |items= TLoZ, ALttP, LA, LADX, LANS, OoT, OoT3D, OoS, OoA, FS, TWW, TWWHD, FSA, TMC, PH, ST, ALBW, TFH, BotW, TotK, TLoZ (TV Series), TLoZGW, TLoZ (Valiant Comics), ZA, AST, SSB, SSBM, SCII, SSBB, PH (Himekawa), HW, HWL, HWDE, SSBfN3DS, SSBfWU, SSBU, CoH, HWAoC | ||
}} | }} | ||
[[de:Bumerang]] | |||
Revision as of 17:32, 27 April 2024
Boomerangs are recurring Items in The Legend of Zelda series.(TLoZ | ALttP | LA | OoT | OoS | OoA | FS | TWW | FSA | TMC | PH | ST | ALBW | TFH | BotW | TotK)[1][2][3][name references needed]
Location and Uses
The Boomerang is an item that Link can throw, at which point it will return to him. It can be used for both combat and Puzzle solving. It can be used to stun enemies, although a single hit will defeat weak enemies, such as Keese.[4] It can also be used to retrieve items that are out of Link's reach.[5] The Boomerang first appeared in The Legend of Zelda and has gone through several design changes since then. In Phantom Hourglass and Spirit Tracks, Link can draw the path that the Boomerang will take, allowing a more direct control of it.[4] Moreover, the Boomerang can also be used to turn Sparks and Bubbles into Fairies in certain games.
The Legend of Zelda
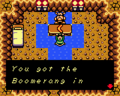
In The Legend of Zelda, Link can acquire a Boomerang by defeating all of the red Goriyas in a certain room within Level 1 of both the First Quest and the Second Quest. Goriyas attack Link with Boomerangs. Link can use the Boomerang to stun certain enemies for a brief period of time.[6] He can also use it to instantly defeat Keese and Gels.[7] The Boomerang can also be used to collect items from a distance. The Boomerang can be replaced with the Magical Boomerang, which can be thrown further.[8]
| Defeats | Stuns | No Effect |
|---|---|---|
Gel |
Armos |
Aquamentus |
Keese |
Digdogger |
Bubble |
Ghini |
Darknut | |
Gibdo |
Dodongo | |
Goriya |
Gleeok | |
Red Leever |
Blue Gohma | |
Like Like |
Gleeok Head | |
Red Lynel |
Red Lanmola | |
Red Moblin |
Manhandla | |
Red Octorok |
Moldorm | |
Peahat |
Patra | |
Rope |
Pols Voice | |
Stalfos |
Red Wizzrobe | |
Tektite |
Zora | |
Vire | ||
Wallmaster | ||
Zol |
A Link to the Past
BoomerangIf you hit an enemy with this, it will be stunned for a short time (some enemies will sustain damage when hit by the boomerang). The boomerang can also retrieve distant Rupees and Hearts.
BoomerangThis temmporarily paralyzes enemies when it strikes them. You can also use it to retrieve Rupees and other items in hard-to-reach places.
In A Link to the Past, Link can obtain a Boomerang in Hyrule Castle. It is contained in a Treasure Chest a few rooms before the prison where the Ball and Chain Trooper holds Princess Zelda captive. It appears as a Big Chest on the Map, but is in fact a Small Chest. If Link fails to collect the Boomerang in the Hyrule Castle, he can find another one in the house of the Sweeping Lady in Kakariko Village. If Link does not open either Chest, he can obtain a Magical Boomerang from a Chest in the Village of Outcasts. Link can also obtain a Magical Boomerang as an upgrade to the Boomerang at the Waterfall of Wishing. The Boomerang is blue, while the Magical Boomerang is red, faster and can be thrown farther.[9] Both varieties can be used to stun enemies, hit Switches, and collect items from a distance.
Link's Awakening
In Link's Awakening, Link can obtain the Boomerang by completing the Trading Quest and using the Magnifying Lens inside a hidden Cave at the eastern side of Toronbo Shores. Here Link will meet a Goriya who will offer to give Link a Boomerang in exchange for an item. The Boomerang can be used to stun enemies, hit Switches, collect items from a distance, and cut bushes. The Boomerang is one of the two items able to destroy Anti-Fairies, the other being the Magic Powder. It is also the only weapon able to defeat a Spark. It can also defeat certain enemies in one hit, such as Ghinis. The Boomerang is the most effective weapon against the final form of Nightmare, as it can be defeated in one hit.
Ocarina of Time
BoomerangIf you throw it, it comes back! The Boomerang can stun or defeat enemies. Use Z Targeting to improve your accuracy. Some enemies can only be defeated with the Boomerang.
In Ocarina of Time, the Boomerang can only be used by Link as a child. It is the main item Inside Jabu-Jabu's Belly. The Boomerang is needed in order to defeat Tailpasarans, Parasitic Tentacles, the Big Octo, and the Boss of the Dungeon, Barinade. It also allows Link to collect distant items such as Gold Skulltula Tokens. It can be used to stun and defeat certain enemies. Before being thrown, the camera shifts to a first-person perspective, allowing Link to aim. The camera will remain in a third-person perspective if Link is Targeting something. When Targeting, the Boomerang will follow its target until impact.
Oracle of Seasons
BoomerangThe Boomerang returns to you after you have thrown it. Use it to get objects like Pieces of Hearts and Rupees when those objects are out of your reach.
In Oracle of Seasons, the Boomerang can be found in Subrosia as a prize from the Dance Hall. It is upgraded to the Magical Boomerang in the Ancient Ruins. The Magical Boomerang is faster, can fly higher distances and can be controlled at will. The normal Boomerang is an optional item in this game, whereas the Magical Boomerang is a required item.
In certain dungeons, red Moblins wield Boomerangs. They are blue in color, but do damage to Link instead of having the stun effect of Link's Boomerang. Also, the miniboss of the first dungeon features a pair of Brother Goriyas who throw a Boomerang to each other, injuring Link when in the way.
Oracle of Ages
In Oracle of Ages, the Boomerang can be found in the Rolling Ridge as a prize from either the Goron Shooting Gallery or the Target Carts. It is an optional item in this game.
In certain dungeons, red Moblins wield Boomerangs. They are blue in color, but do damage to Link instead of having the stun effect of Link's Boomerang.
Four Swords
BoomerangUse this weapon to attack enemies from a distance. You can also use this to retrieve hard-to-reach Rupees and hearts. Some enemies might even get stunned when hit...
In Four Swords, the Boomerang appears in various Stages. It can only be used in the Stage where it was obtained. It is useful for collecting Rupees.
The Wind Waker
The Boomerang is the main item of the Forbidden Woods in The Wind Waker. In addition to stunning and defeating enemies, collecting distant items, and activating Switches, the Boomerang can lock on to up to five different targets.[10] This ability can be used for solving puzzles involving Switches or for collecting multiple items in one throw. The Boomerang is needed in order to defeat Kalle Demos, the Boss of the Forbidden Woods, and Puppet Ganon.
Four Swords Adventures
BoomerangDaze enemies by hitting them with this weapon. You can also use it to pull items like Force Gems, Hearts, and even other characters close to you. Hold the A Button to make it hover in midair.
Lev. 2
This faster boomerang flies even farther.
In Four Swords Adventures, the Boomerang can be held in place before returning to Link. This is useful for retrieving moving Force Gems. The Boomerang can be upgraded to the Level 2 Boomerang, which is faster and has a longer reach.
The Minish Cap
BoomerangHit an enemy to daze him: he’ll stop moving for a short period time. You can also use the boomerang to nab Rupees and other items beyond your reach.
In The Minish Cap, the Boomerang can be bought in Stockwell's Shop for 300 Rupees. It can be upgraded to the Magical Boomerang by Fusing Kinstones with the Tingle Siblings?.
Phantom Hourglass
In Phantom Hourglass, the Boomerang allows Link to to draw a specific path for it to follow. The Boomerang's path has a range limit.[4] It can be used to stun and defeat enemies, hit Switches, and collect items from a distance. It is the main item of the Temple of Fire.
Spirit Tracks
The Boomerang's flight path can be drawn in Spirit Tracks, similarly to how it behaved in Phantom Hourglass. It can be used to stun and defeat enemies, collect distant items, and hit Switches from afar. It can also fly through Fire to light Torches or fly through ice to freeze water. It is the main item of the Snow Temple.
A Link Between Worlds
In A Link Between Worlds, the Boomerang can be obtained from Ravio's Shop. Like all items in the game, it uses Link's Energy Gauge with each use. The Boomerang can be rented for 50 Rupees and bought permanently for 800.[note 1] The Boomerang can be upgraded to the Nice Boomerang by bringing 10 Lost Maiamais to Mother Maiamai. The upgrade improves the speed and range of the Boomerang and allows Link to throw three Boomerangs at a time. The Boomerang can be thrown in any direction according to which way Link is facing.
Tri Force Heroes
In Tri Force Heroes, the Boomerang can be used to grab another Link and pull him toward the wielder, and has the ability to hover in place for several seconds at its furthest point by holding the Item button. While wearing the Boomeranger Outfit, the Boomerang becomes larger and gains the ability to carry two Links, pass through enemies, and deal damage to them.
Boomerangs first appear in the Blazing Trail where all three Links acquire one, then reappear in Hinox Mine (two Boomerangs), Den of Flames, Fire Temple, Snowball Ravine, Sealed Gateway (two Boomerangs), The Lady's Lair, Stone Corridors, Desert Temple, Illusory Mansion (three Boomerangs), Grim Temple, Dragon Citadel, and Sky Temple (one Boomerang per Stage). They also appear in the Forest Zone, Frozen Zone, Shadow Zone and Baneful Zone of the Den of Trials, as well as the Coliseum's Volcano and The Ruins arenas.
Breath of the Wild
202 (207) Boomerang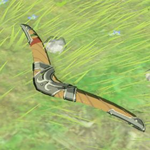 |
Description |
Common Locations Faron Grasslands | |
Properties | |
Boomerangs are a throwing Weapon in Breath of the Wild originally used by Koroks.[2] Several other varieties of Boomerangs can also be found, including Lizal Boomerangs, Lizal Forked Boomerangs, Lizal Tri-Boomerangs, and Giant Boomerangs. The Sea-Breeze Boomerang, which is based on the Boomerang from The Wind Waker, can also be obtained at random from using the amiibo Rune. After being thrown, Link must manually catch the Boomerang when it returns to him. If the Boomerang flies into an object or wall, it will fall to the ground and will not return to Link.
A regular Boomerang has a chance to appear in a Treasure Chest spawned by scanning the following amiibo with the amiibo Rune:
- Super Smash Bros. Series Toon Link amiibo
- The Legend of Zelda series Series Toon Link amiibo
Being made from wood, Boomerangs will catch on Fire if they make contact with a Campfire or if they are exposed to a Scorching Climate. They will not attract Lightning during a Thunderstorm, and they do not conduct Electricity either. They will float if dropped in Water. Finally, the Magnesis Rune is unable to pick up Boomerangs.
| Name | ActorName |
|---|---|
| Value | "Weapon_Sword_051" |
| Description | Internal name |
| Name | Life |
| Value | 18 |
| Description | Durability of the weapon |
| Name | Power |
| Value | 8 |
| Description | Damage dealt with the weapon |
| Name | SpHitActor |
| Value | "" |
| Description | Objects that receive additional damage from the weapon |
| Name | SpHitRatio |
| Value | 2.0 |
| Description | Damage multiplier appplied to SpHitActor objects |
| Name | IsHammer |
| Value | false |
| Description | Whether or not the weapon can break ore deposits in one hit |
| Name | IsWeakBreaker |
| Value | false |
| Description | Unknown use, maybe was used during dev to one hit kill weaker enemies ? |
| Name | IsBoomerang |
| Value | true |
| Description | Whether or not the weapon comes back to the player if they throw it |
| Name | IsLuckyWeapon |
| Value | false |
| Description | Unknown use, maybe was used to have random crits during dev ? |
| Name | IsPikohan |
| Value | false |
| Description | Whether or not the weapon launches the enemies at the end of a combo or after a charged attack (Spring-Loaded Hammer behavior) |
| Name | IsThrowingWeapon |
| Value | true |
| Description | Whether or not the weapon can be thrown |
| Name | IsThrowingBreakWeapon |
| Value | false |
| Description | Whether or not the weapon breaks instantly when thrown to an enemy |
| Name | ThrowRange |
| Value | 20.0 |
| Description | After being thrown, travelled distance of the weapon before getting affected with gravity |
| Name | ChemicalEnergyMax |
| Value | 0 |
| Description | The maximal amount of energy elemental weapons have. If it falls to zero, the weapon is uncharged and you have to wait until it's charged again [a] |
| Name | ChemicalEnergyAmountUsed |
| Value | 0 |
| Description | The energy cost elemental weapons have when using their power |
| Name | ChemicalEnergyRecoverRate |
| Value | 0.0 |
| Description | Speed, in unit/frame, of the energy recovery of the weapon |
| Name | ChemicalEnergyRecoverInterval |
| Value | 60 |
| Description | Frames you have to wait, after your last attack, before the weapon starts to recharge itself |
| Name | ShootBeam |
| Value | "" |
| Description | If specified, what actor to launch when throwing the weapon |
| Name | SharpWeaponAddAtkMin |
| Value | 5 |
| Description | Minimal value for level 1 attack up modifier |
| Name | SharpWeaponAddAtkMax |
| Value | 8 |
| Description | Maximal value for level 1 attack up modifier |
| Name | SharpWeaponAddLifeMin |
| Value | 2 |
| Description | Minimal value for level 1 durability up modifier |
| Name | SharpWeaponAddLifeMax |
| Value | 4 |
| Description | Maximal value for level 1 durability up modifier |
| Name | SharpWeaponAddCrit |
| Value | true |
| Description | Whether or not the weapon can get the critical hit modifier |
| Name | PoweredSharpAddAtkMin |
| Value | 9 |
| Description | Minimal value for level 2 attack up modifier |
| Name | PoweredSharpAddAtkMax |
| Value | 13 |
| Description | Maximal value for level 2 attack up modifier |
| Name | PoweredSharpAddLifeMin |
| Value | 5 |
| Description | Minimal value for level 2 durability up modifier |
| Name | PoweredSharpAddLifeMax |
| Value | 9 |
| Description | Maximal value for level 2 durability up modifier |
| Name | PoweredSharpAddThrowMin |
| Value | 1.0 |
| Description | Minimal value for throw distance up modifier |
| Name | PoweredSharpAddThrowMax |
| Value | 1.0 |
| Description | Maximal value for throw distance up modifier |
| Name | ThrowSpeed |
| Value | 1.0 |
| Description | Initial speed of the weapon when thrown |
| Name | ThrowRotSpeed |
| Value | 1500.0 |
| Description | Rotation speed, in radian per second, of the weapon when thrown |
| Name | SellingPrice |
| Value | 25 |
| Description | Unused value for the weapons, probably a leftover from a dev build where you could sell your weapons |
| Name | BuyingPrice |
| Value | 100 |
| Description | Unused value for the weapons, probably a leftover from a dev build where you could buy weapons |
| Name | Value | Description |
|---|---|---|
ActorName | "Weapon_Sword_051" | Internal name |
Life | 18 | Durability of the weapon |
Power | 8 | Damage dealt with the weapon |
SpHitActor | "" | Objects that receive additional damage from the weapon |
SpHitRatio | 2.0 | Damage multiplier appplied to SpHitActor objects |
IsHammer | false | Whether or not the weapon can break ore deposits in one hit |
IsWeakBreaker | false | Unknown use, maybe was used during dev to one hit kill weaker enemies ? |
IsBoomerang | true | Whether or not the weapon comes back to the player if they throw it |
IsLuckyWeapon | false | Unknown use, maybe was used to have random crits during dev ? |
IsPikohan | false | Whether or not the weapon launches the enemies at the end of a combo or after a charged attack (Spring-Loaded Hammer behavior) |
IsThrowingWeapon | true | Whether or not the weapon can be thrown |
IsThrowingBreakWeapon | false | Whether or not the weapon breaks instantly when thrown to an enemy |
ThrowRange | 20.0 | After being thrown, travelled distance of the weapon before getting affected with gravity |
ChemicalEnergyMax | 0 | The maximal amount of energy elemental weapons have. If it falls to zero, the weapon is uncharged and you have to wait until it's charged again [a] |
ChemicalEnergyAmountUsed | 0 | The energy cost elemental weapons have when using their power |
ChemicalEnergyRecoverRate | 0.0 | Speed, in unit/frame, of the energy recovery of the weapon |
ChemicalEnergyRecoverInterval | 60 | Frames you have to wait, after your last attack, before the weapon starts to recharge itself |
ShootBeam | "" | If specified, what actor to launch when throwing the weapon |
SharpWeaponAddAtkMin | 5 | Minimal value for level 1 attack up modifier |
SharpWeaponAddAtkMax | 8 | Maximal value for level 1 attack up modifier |
SharpWeaponAddLifeMin | 2 | Minimal value for level 1 durability up modifier |
SharpWeaponAddLifeMax | 4 | Maximal value for level 1 durability up modifier |
SharpWeaponAddCrit | true | Whether or not the weapon can get the critical hit modifier |
PoweredSharpAddAtkMin | 9 | Minimal value for level 2 attack up modifier |
PoweredSharpAddAtkMax | 13 | Maximal value for level 2 attack up modifier |
PoweredSharpAddLifeMin | 5 | Minimal value for level 2 durability up modifier |
PoweredSharpAddLifeMax | 9 | Maximal value for level 2 durability up modifier |
PoweredSharpAddThrowMin | 1.0 | Minimal value for throw distance up modifier |
PoweredSharpAddThrowMax | 1.0 | Maximal value for throw distance up modifier |
ThrowSpeed | 1.0 | Initial speed of the weapon when thrown |
ThrowRotSpeed | 1500.0 | Rotation speed, in radian per second, of the weapon when thrown |
SellingPrice | 25 | Unused value for the weapons, probably a leftover from a dev build where you could sell your weapons |
BuyingPrice | 100 | Unused value for the weapons, probably a leftover from a dev build where you could buy weapons |
- ↑ You can switch weapons to instantly recharge your elemental weapons
Tears of the Kingdom
Boomerangs are a throwing Weapon in Tears of the Kingdom.[2]
Other Appearances
The Legend of Zelda TV Series


The Boomerang is one of the most used items in The Legend of Zelda TV series, and one hit from this weapon is capable of defeating most of Ganon's minions. It is mostly used by Princess Zelda, although Link, Moblins, and Goriyas wield it as well. The Boomerang first appears in "Cold Spells", where Zelda defeats various magically-possessed cleaning supplies with it. Later, in "Sing for the Unicorn", Zelda once again uses it to defeat an Armos Knight and Ganon, rescuing Link and her father in the process. The Boomerang shown in "That Sinking Feeling" is given to Zelda by Link so that the two of them can fight off several Tektites that have ambushed them. Link is not shown wielding this item until the "Stinging a Stinger" episode, which he uses it to defeat a Gohma with the help of Zelda's Magic Rope. Although the series mostly exemplifies the use of the Boomerang for fighting enemies, the "Doppelganger" episode demonstrates how Zelda uses the Boomerang to break free from the ropes that Ganon had tied around her hands.
The Legend of Zelda Game Watch

The Boomerang appears in The Legend of Zelda Game Watch. One appears in each room, and Link must collect it and use it to defeat all the Iron Balls.
The Legend of Zelda (Valiant Comics)
The Magic Boomerang from The Legend of Zelda makes an appearance in the Day of the Triforce story of The Legend of Zelda comics by Valiant Comics comic. After Princess Zelda and Cassiopia arrive to the Water Town of Saria to fight off the monsters that have attacked the town, Cassiopia uses the Magic Boomerang to free her husband, the River Man, from the chains that bind him.[11]
Zelda's Adventure
In Zelda's Adventure, the Boomerang appears as a Spell which lets Zelda cast Boomerang projectiles with her Wand. It can be found in a small area in western Plain of Andor with a lone Goriya, which drops the Spell after being defeated. The Spell costs 1 Rupee to use.
Ancient Stone Tablets
Super Smash Bros.

The Boomerang functions as Link's Neutral Special Move in Super Smash Bros.. The Boomerang is based on its iteration from Ocarina of Time.
Super Smash Bros. Melee
The Boomerang is Link's Side Special Move in Super Smash Bros. Melee. Young Link also wields the Boomerang as his Side Special Move. Both Boomerangs are based on their Ocarina of Time iteration.
SoulCalibur II
- How to perform:


In SoulCalibur II, the Boomerang from Ocarina of Time is part of Link's fighting style. To get into the Boomerang Stance, the player must press the horizontal attack button and the kick button at the same time. Pressing the horizontal attack again will cause Link to release the Boomerang towards his enemy. The Boomerang attack is considered to be a high attack, dealing 25 HP worth of damage to the opponent.
Super Smash Bros. Brawl
The Boomerang is Link and Toon Link's Side Special Move in Super Smash Bros. Brawl. Link's Boomerang resembles the Gale Boomerang from Twilight Princess whereas Toon Link's Boomerang resembles the Boomerang from The Wind Waker.
The Boomerang from The Wind Waker also appears as a collectible Sticker.
Sticker Information
| Sticker | Artwork from | Effect in The Subspace Emissary | Usable by |
|---|---|---|---|
Boomerang |
The Wind Waker | [Weapon] - Attack +4 |
Phantom Hourglass (Himekawa)
As Link battles Blaaz in the Temple of Fire, Ciela points out the location of a Treasure Chest.[12][13] Link opens the Chest to find the Boomerang.[14] With Ciela's guidance, Link uses the Boomerang to defeat Blaaz's split form and eventually destroys the monster.
Hyrule Warriors
The Boomerang appears as an item in Hyrule Warriors. It can be upgraded temporarily to the Gale Boomerang by collecting the Boomerang power ups. The Boomerang is able to slice through vines that block pathways. Manhandlas and their Stalks are weak to the Boomerang and it is also one of the items used to fight Ganon with. In the Master Quest DLC pack, the 8-Bit Boomerang from The Legend of Zelda appears as a weapon for Impa. It is statistically identical to and part of the Biggoron's Sword weapon type.
Super Smash Bros. for Nintendo 3DS / Wii U
The Boomerang is Link and Toon Link's Side Special Move in Super Smash Bros. for Nintendo 3DS / Wii U. Like in Super Smash Bros. Brawl, Link's Boomerang resembles the Gale Boomerang from Twilight Princess and Toon Link's Boomerang resembles the Boomerang from The Wind Waker.
Super Smash Bros. Ultimate
In Super Smash Bros. Ultimate, the Boomerang is used by Link, Toon Link, and Young Link as their Side Special Move. Link uses the Boomerang from Breath of the Wild whereas Toon Link uses the Boomerang from The Wind Waker, and Young Link uses the Boomerang from Ocarina of Time. A Boomerang also appears as an item that can be used by Spirits in Spirit Battles.
Cadence of Hyrule
The Boomerang appears as an item in Cadence of Hyrule, where it can be wielded by Cadence, Link, and Zelda. Its primary use is to stun enemies, though it can be used to break open Treasure Chests and retrieve their contents from afar.[15]
Hyrule Warriors: Age of Calamity
Trivia
- Though Link cannot obtain a Boomerang in The Adventure of Link, Goriyas use them as weapons.
- The Boomerang was also planned to be included in Majora's Mask, but was scrapped.
- During development of Skyward Sword, a Remote Boomerang was planned to be included. With it, Link would have been able to drop anywhere after grabbing it and controlling its trajectory. The idea was later abandoned as it might have led to the skipping of important items and areas. This idea eventually evolved into the creation of the Beetle.[16]
- At another point during development of Skyward Sword, a Rocket Punch was proposed for grabbing items. This idea as well led to the creation of the Beetle.
- Despite being incredibly useful in A Link to the Past, it is not required to complete the game and can be completely skipped.
Nomenclature
| Language | Names | Meanings |
|---|---|---|
Japanese |
| |
ChineseTR | 飛旋鏢 (Fēixuán biāo) (BotW) | |
ChineseSI |
| |
Dutch |
| |
FrenchCA | Boomerang (ST | ALBW | TFH)[55][56][57] | |
FrenchEU |
| |
German |
| |
Italian |
| |
Korean |
| |
Russian | Бумеранг (Bumerang) (BotW) | |
SpanishLA | Bumerán (ST | ALBW | TFH | BotW)[43][44][45] | |
SpanishEU | Bumerán (ST | ALBW | TFH)[58] | |
| This table was generated using translation pages. To request an addition, please contact a staff member with a reference. | ||
Gallery
-

A Boomerang while Link is wearing the Blue Ring from The Legend of Zelda
-

A Boomerang while Link is wearing the Red Ring from The Legend of Zelda
-

A Boomerang from the All Treasures section of the intro from The Legend of Zelda
-
Artwork of a Boomerang from The Legend of Zelda
-
Action figure of Link using the Boomerang from The Legend of Zelda
-

A Boomerang from A Link to the Past in the Inventory
-
Link obtaining the Boomerang from Link's Awakening DX
-

Ravio demonstrating the Boomerang's use from A Link Between Worlds
-
The Rented Boomerang from A Link Between Worlds
-

The Rented Boomerang icon from A Link Between Worlds
-

The Boomerang equipped with the Boomeranger Outfit from Tri Force Heroes
-

The Boomerang equipped with the Boomeranger Outfit from Tri Force Heroes
-

The Boomerang Spell icon from Zelda's Adventure
-

Link using the Boomerang from Super Smash Bros. Melee
-
Young Link using the Boomerang from Super Smash Bros. Melee
-
Link using the Boomerang from SoulCalibur II
-

Lana obtaining the Boomerang from Hyrule Warriors
-

The 8-Bit Boomerang Weapon from Hyrule Warriors
-
The Boomerang icon from Hyrule Warriors
-

A Boomerang Item Card from Hyrule Warriors: Definitive Edition
-

A Boomerang thrown by a Red Goriya from Cadence of Hyrule
-

A Boomerang thrown by a Blue Goriya from Cadence of Hyrule
-

The Mighty Boomerang from BS The Legend of Zelda


See Also
Notes
- ↑ The first item purchased from Ravio always costs 400 Rupees
References
- ↑ Encyclopedia, Dark Horse Books, pg. 118 (TLoZ | ALttP | LA | OoT | OoS | OoA | FS | TWW | FSA | TMC | PH | ST | ALBW | TFH)
- ↑ 2.0 2.1 2.2 "Boomerang
This throwing weapon was originally used by the forest-dwelling Koroks. Its unique shape allows it to return after being thrown." — Inventory (Breath of the Wild) - ↑ "Boomerang
A decayed wooden boomerang. A useful tool that comes back after you throw it. Its current state has not lessened its performance." — Inventory (Tears of the Kingdom) - ↑ 4.0 4.1 4.2 The Legend of Zelda: Phantom Hourglass—Prima Official Game Guide, Prima Games, pg. 11
- ↑ "If you hit an enemy with this, it will be stunned for a short time (some enemies will sustain damage when hit by the boomerang). The boomerang can also retrieve distant Rupees and Hearts." (A Link to the Past manual, pg. 37)
- ↑ "He can also stop most of the enemy in their tracks if he throws the boomerang on target." (The Legend of Zelda manual, pg. 24)
- ↑ "Link can use these to inflict damage on weak enemies." (The Legend of Zelda manual, pg. 24)
- ↑ "The magical boomerang flies further than the wooden boomerang." (The Legend of Zelda manual, pg. 24)
- ↑ "You got the Magical Boomerang! You can throw this faster and farther than your old one!" — N/A (A Link to the Past)
- ↑ "You got the Boomerang! Set it to and throw it with [Y], [Z], or [X]. Target specific objects by holding the button you set it to and aiming at something until the red targeting cursor changes to a [Target lock mark]. You can target up to five objects at once." — N/A (The Wind Waker)
- ↑ "Wait till I have freed you with the magic boomerang!" (The Legend of Zelda comic, Valiant Comics, pg. 4)
- ↑ "Look!" (Phantom Hourglass manga, VIZ Media, pg. 56)
- ↑ "A Treasure Chest?!" (Phantom Hourglass manga, VIZ Media, pg. 56)
- ↑ "A Boomerang!" (Phantom Hourglass manga, VIZ Media, pg. 56)
- ↑ "Boomerang -- Assign it to


Throw this at enemies to stun them. It always finds its way back to you." — Inventory (Cadence of Hyrule) - ↑ Encyclopedia, Dark Horse Books, pg. 297
- ↑ "Hai ottenuto il Bommerang! Segue il percorso che tracci sullo schermo." — N/A (Spirit Tracks)
- ↑ "Link può accumulare armi come il "boomerang" sconfiggendo i nemici e poi può usarlo per raccogliere altri oggetti." (Link can collect weapons such as the boomerang by defeating the enemy, then use the boomerang to pick other items.) (The Legend of Zelda manual, Italian localization, [which page?])
- ↑ "Hai ottenuto il Boomerang!" — N/A (A Link to the Past, Italian localization)
- ↑ Enciclopedia di Hyrule, Magazzini Salani, pg. 118
- ↑ "Hai ottenuto il boomerang!" — N/A (Ocarina of Time 3D, Italian localization)
- ↑ "Ecco il Boomerang!" — N/A (Oracle of Seasons, Italian localization)
- ↑ "Ecco il Boomerang!" — N/A (Oracle of Ages, Italian localization)
- ↑ "Hai ottenuto il Boomerang!" — N/A (The Wind Waker, Italian localization)
- ↑ "Hai preso il Boomerang!" — N/A (Four Swords Adventures, Italian localization)
- ↑ "Boomerang
Può attivare interruttori lontani. Ma i nemici li stordisce soltanto!" — Inventory (A Link Between Worlds, Italian localization) - ↑ "Hai ottenuto il boomerang!
Usalo per tirare verso di te
gli altri giocatori!" — N/A (Tri Force Heroes) - ↑ "Boomerang" — Inventory (Cadence of Hyrule, Italian localization)
- ↑ The Legend of Zelda manual, pg. 23
- ↑ A Link to the Past manual, pg. 42 Nintendo Official Guidebook: The Legend of Zelda: A Link to the Past Vol. 1, Shogakukan, pg. 23 Nintendo Official Guidebook—The Legend of Zelda: A Link to the Past & Four Swords, Shogakukan, pg. 13
- ↑ Nintendo Official Guidebook—The Legend of Zelda: Ocarina of Time, Shogakukan, pg. 151
- ↑ The Minish Cap manual, Japanese localization, pg. 18
- ↑ "ブーメランを手に入れた!" — N/A (Spirit Tracks)
- ↑ "ブーメラン
遠くの仕掛けもこれでスイッチON
だけど敵は気絶するだけ
軌道を上手く利用するのがコツ!" — Inventory (A Link Between Worlds) - ↑ "ブーメランを手に入れた!
他のプレイヤーを
引き寄せることができるぞ!" — N/A (Tri Force Heroes) - ↑ 36.0 36.1 The Legend of Zelda manual, pg. 24
- ↑ "Boomerang
Une arme qui revient vers son lanceur. Elle permet aussi de récupérer des objets hors de votre portée." — Inventory (Ocarina of Time 3D) - ↑ "Vous obtenez le boomerang! Cet objet suit le trajet tracé à l'écran." — N/A (Spirit Tracks)
- ↑ "Boomerang
Optimisez sa trajectoire pour étourdir les monstres et activer les interrupteurs !" — Inventory (A Link Between Worlds) - ↑ "Vous avez obtenu le boomerang !
Utilisez-le pour ramener vos
compagnons vers vous !" — N/A (Tri Force Heroes) - ↑ "Boemerang" — Inventory (Breath of the Wild)
- ↑ "Boemerang" — Weapons (Hyrule Warriors: Age of Calamity)
- ↑ "¡Has conseguido el bumerán! Volará según la trayectoria que dibujes." — N/A (Spirit Tracks)
- ↑ "Bumerán
Activa interruptores a cierta distancia y aturde. ¡Sírvete de su trayectoria!" — Inventory (A Link Between Worlds) - ↑ "¡Obtienes el bumerán!
Úsalo para agarrar a otros
jugadores." — N/A (Tri Force Heroes) - ↑ "Du hast den Bumerang erhalten! Diese Waffe folgt dem Pfad, den du für sie auf den Touchscreen zeichnest." — N/A (Spirit Tracks)
- ↑ "Bumerang
Aktiviere damit entfernte Schalter, sammele Rubine und betäube Feinde." — Inventory (A Link Between Worlds) - ↑ "Der Bumerang!
Verwende ihn, um andere
Spieler zu dir zu holen!" — N/A (Tri Force Heroes) - ↑ "Du hast den Bumerang erhalten! Mit ihm kannst du Gegner betäuben, und nach dem Werfen kommt er selbstverständlich wieder zurück!" — N/A (Hyrule Warriors: Definitive Edition)
- ↑ "부메랑" — Inventory (Link's Awakening for Nintendo Switch, Korean localization)
- ↑ "부메랑
멀리 있는 장치도 이걸로 스위치 ON
하지만 적은 잠시 기절할 뿐
궤도를 잘 계산하는 것이 비결!" — Inventory (A Link Between Worlds) - ↑ "부메랑을 획득했다!
다른 플레이어를
잡아당길 수가 있다!" — N/A (Tri Force Heroes) - ↑ 塞尔达传说:百科全书, New Star Press, pg. 124
- ↑ Encyclopedia, New Star Press, pg. 124
- ↑ "Vous avez obtenu le boomerang! Cet objet suit le trajet tracé à l'écran!" — N/A (Spirit Tracks)
- ↑ "Boomerang
Optimisez sa trajectoire pour étourdir les monstres et activer les interrupteurs!" — Inventory (A Link Between Worlds) - ↑ "Vous avez obtenu un boomerang!
Lancez-le avec pour récupérer
vos compagnons!" — N/A (Tri Force Heroes) - ↑ "¡Has conseguido el bumerán! Vuela según la trayectoria que le marques." — N/A (Spirit Tracks)
- Boomerangs
- Items
- Spells
- Weapons
- Items in The Legend of Zelda
- Items in A Link to the Past
- Items in Link's Awakening
- Items in Link's Awakening DX
- Items in Link's Awakening (Nintendo Switch)
- Items in Ocarina of Time
- Items in Ocarina of Time 3D
- Items in Oracle of Seasons
- Items in Oracle of Ages
- Items in Four Swords
- Items in The Wind Waker
- Items in The Wind Waker HD
- Items in Four Swords Adventures
- Items in The Minish Cap
- Items in Phantom Hourglass
- Items in Spirit Tracks
- Items in A Link Between Worlds
- Items in Tri Force Heroes
- Items in Breath of the Wild
- Items in Tears of the Kingdom
- Items in The Legend of Zelda (TV Series)
- Items in The Legend of Zelda Game Watch
- Items in The Legend of Zelda (Valiant Comics)
- Items in Zelda's Adventure
- Items in Ancient Stone Tablets
- Items in Super Smash Bros.
- Items in Super Smash Bros. Melee
- Items in SoulCalibur II
- Items in Super Smash Bros. Brawl
- Items in Phantom Hourglass (Himekawa)
- Items in Hyrule Warriors
- Items in Hyrule Warriors Legends
- Items in Hyrule Warriors: Definitive Edition
- Items in Super Smash Bros. for Nintendo 3DS
- Items in Super Smash Bros. for Wii U
- Items in Super Smash Bros. Ultimate
- Items in Cadence of Hyrule
- Items in Hyrule Warriors: Age of Calamity