Outfit: Difference between revisions
Htwretched (talk | contribs) m (→List of Outfits: Heart Container) |
Htwretched (talk | contribs) m (→Trivia: Link to Status Report) |
||
| (48 intermediate revisions by 7 users not shown) | |||
| Line 1: | Line 1: | ||
:'' | :''For other items similar to {{Plural|TFH|Outfit}}, see [[Clothes (Disambiguation)]].'' | ||
{{Item | {{Infobox Item | ||
|image= | |image= File:TFH Costumes Art.png | ||
|caption= | |caption= | ||
|game= TFH | |||
|game= | |||
|other= | |other= | ||
|cost= | |cost= | ||
|location= | |location= | ||
|uses= Various | |uses= Various | ||
|comp= | |comp= {{Term|Series|Clothes|link}} | ||
|sample= | |sample= | ||
|theme | |theme= | ||
}} | }} | ||
{{Term/Store|Outfit|Outfits|Series, TFH|plural}} are special articles of [[Clothes|Clothing]] which empower the | {{Term/Store|Outfit|Outfits|Series, TFH|plural}} are special articles of [[Clothes|Clothing]] which empower the {{Plural|TFH|Links|link}} with special abilities in {{TFH}}.<ref>{{Cite Web|quote= OUTFITS|author= |published= January 12, 2016|retrieved= December 2, 2019|url= http://web.archive.org/web/20160112121853/http://www.zelda.com/tri-force-heroes/|title= The Legend of Zelda™: Tri Force Heroes for Nintendo 3DS - Official Site - Gameplay Pictures, Videos|site= Zelda.com|type= }}</ref> | ||
==Locations and Uses== | ==Locations and Uses== | ||
{{Plural|TFH|Outfit}} grant each {{Term|TFH|Links}} a special ability based on the theme of the attire. Certain {{Plural|TFH|Outfit}} may bolster a {{Term|TFH|Link}}'s defensive capabilities, while others may increase the power or range of certain weapons. Most {{Plural|TFH|Outfit}} are obtained by making custom orders at {{Term|TFH|Madame Couture's|link}}, and providing {{Term|TFH|Madame Couture|link}} with {{Plural|TFH|Material|link}} and {{Plural|TFH|Rupee|link}} collected from [[Levels in Tri Force Heroes|Levels]]. Initially, only seven {{Plural|TFH|Outfit}} are available for order (besides the {{Term|TFH|Bear Minimum|link}} worn by {{Term|TFH|Link}} at the onset of his adventure), with many more becoming unlocked as {{Term|TFH|Link}} meets certain conditions; mainly, clearing {{Plural|TFH|Level}} in the {{Term|TFH|Drablands|link}}. {{Term|TFH|Link}} can change {{Plural|TFH|Outfit}} in the {{Term|TFH|Fitting Room|link}}. | |||
<!-- These sentences about Materials are untrue and/or outdated (due to game patches) and/or more relevant to an article about Materials. I'm hiding them instead of deleting because the references may be useful elsewhere. ~Htwretched | |||
Rare Materials from [[Drablands Challenge]]s will yield more powerful Outfits.<ref>{{Cite Web|quote= So, as you clear courses in this game, you're going to receive materials. And you use those materials to go and then make these costumes. [...] And of course to create the really powerful costumes, you need special materials. And you're only going to get those special materials on the really difficult courses. [...] So what I'd like to do today is introduce one of those more difficult courses, which again, once you clear you'll get this special material, that allows you to create one of the more powerful suits in the game.|author= Hiromasa Shikata|published= June 18, 2015|retrieved=August 22, 2015|url= https://www.youtube.com/watch?v=FnQl8A2vx4k|title= Nintendo Treehouse Live @ E3 2015 Day 3 The Legend of Zelda: Tri Force Heroes|site= YouTube|type= Video}}</ref> Some Outfit Materials are exclusive to the [[Coliseum]] [[Multiplayer]] mode, as well.<ref>{{Cite Web|quote= The Coliseum can be visited through local or online multiplayer, and winning gives the players exclusive materials available only in this mode of play. With these materials players can craft better, more beneficial clothes that will give them an edge in competing.|author= Alex Aul|published= June 20, 2015|retrieved=August 22, 2015|url= http://zeldauniverse.net/2015/06/20/details-arise-regarding-tri-force-heroes-player-vs-player-mode/|title= Details arise regarding Tri Force Heroes Player vs. Player mode|site= Zelda Universe|type=}}</ref> | |||
--> | |||
When two or more {{Plural|TFH|Links}} have gathered and each has been assigned a color—green, blue, or red—some elements of their {{Plural|TFH|Outfit}} may change colors accordingly. For example, the {{Term|TFH|Hero's Tunic|link}}, {{Term|TFH|Kokiri Clothes|link}} and {{Term|TFH|Tingle Tights|link}} are changed completely to match a {{Term|TFH|Link}}'s assigned color. Some {{Plural|TFH|Outfit}} like the {{Term|TFH|Cacto Clothes|link}} and {{Term|TFH|Goron Garb|link}} have small portions that change color. Others like the {{Term|TFH|Legendary Dress|link}} and {{Term|TFH|Linebeck's Uniform|link}} do not change color at all, making the {{Plural|TFH|Links}}' hair colors their only distinguishing feature. Certain {{Plural|TFH|Outfit}} also change the appearance of the {{Term|TFH|Sword|link}} that each {{Term|TFH|Links}} uses.<ref>{{Cite Web|quote= I love that with my costume, like, it also changes my sword. I have, like, a different sword than you guys.|author= Eric Smith|published= June 17, 2015|retrieved=August 18, 2015|url= https://www.youtube.com/watch?v=pCyknYNAo4s|title= Nintendo Treehouse Live @ E3 2015 Day 1 The Legend of Zelda: Tri Force Heroes|site= YouTube|type= Video}}</ref> | |||
[[Miiverse]] stamps for each obtained {{Term|TFH|Outfit}} are available for use in the {{Term|TFH|Miiverse Gallery|link}}.<ref>{{Cite|By the way, did you know? If you buy an outfit here, you can use it as a stamp in Miiverse. Try it!|Stylish Woman|TFH}}</ref> | |||
If any of the {{Plural|TFH|Links}} have joined the game via [[Download Play]], they will be wearing the {{Term|TFH|Hero's Tunic}} by default. Custom orders for new {{Plural|TFH|Outfit}} can be placed by speaking to {{Term|TFH|Madame Couture's Apprentice|link}} inside the [[Multiplayer]] lobby.<ref>{{Cite|If you need some new clothes, I'm at your service! I'll help you as a special favor, just...please don't tell {{Color|TFH Blue|Madame}}! Let's see...You're currently wearing the {{Color|TFH Blue|Hero's Tunic}}. Which outfit would you like to order?|Madame Couture's Apprentice|TFH}}</ref> However, as {{Term|TFH|Madame Couture's Apprentice|display=the Apprentice}} is slower at tailoring than {{Term|TFH|Madame Couture}} herself, the {{Term|TFH|Outfit}} will not be completed until the {{Plural|TFH|Links}} return from the next {{Term|TFH|Level}} they visit.<ref>{{Cite|Wonderful! I'll get right on that. Remember that things like this take time. Please be patient! I'll be sure to have it finished by time you've completed your next mission. Look forward to it!|Madame Couture's Apprentice|TFH}}</ref> Additionally, {{Term|TFH|Madame Couture's Apprentice|display=the Apprentice}} can only craft up to two {{Plural|TFH|Outfit}} for each {{Term|TFH|Link}},<ref>{{Cite|Er, I hate to burst your bubble, but... {{Color|TFH Blue|Madame}} is sure to find out about this arrangement of ours if we keep this up. Sorry, but I can't risk that. Mostly because {{Color|TFH Blue|Madame}} is terrifying when she's angry. That said, if you want more outfits, you'll have to visit {{Color|TFH Blue|Madame Couture}}'s shop in town. I think you need something called a "full version of the game" to go there. Whatever THAT means...|Madame Couture's Apprentice|TFH}}</ref> and some {{Plural|TFH|Outfit}} are unavailable due to the nature of Download Play not allowing for certain unlocking conditions to be met, or certain {{Plural|TFH|Material}} to be collected. | |||
<div style="display:none"> | <div style="display:none"> | ||
{{#vardefine:Ancient Fin|[[File:TFH Ancient Fin.png|24px]] ''' | {{#vardefine:Ancient Fin|[[File:TFH Ancient Fin Icon.png|24px]] '''{{Term|TFH|Ancient Fin|link}}'''}} | ||
{{#vardefine:Antique Coin|[[File:TFH Antique Coin.png|24px]] ''' | {{#vardefine:Antique Coin|[[File:TFH Antique Coin Icon.png|24px]] '''{{Term|TFH|Antique Coin|link}}'''}} | ||
{{#vardefine:Aqua Crown|[[File:TFH Aqua Crown.png|24px]] ''' | {{#vardefine:Aqua Crown|[[File:TFH Aqua Crown Icon.png|24px]] '''{{Term|TFH|Aqua Crown|link}}'''}} | ||
{{#vardefine:Armos Spirit|[[File:TFH Armos Spirit.png|24px]] ''' | {{#vardefine:Armos Spirit|[[File:TFH Armos Spirit Icon.png|24px]] '''{{Term|TFH|Armos Spirit|link}}'''}} | ||
{{#vardefine:Aurora Stone|[[File:TFH Aurora Stone.png|24px]] ''' | {{#vardefine:Aurora Stone|[[File:TFH Aurora Stone Icon.png|24px]] '''{{Term|TFH|Aurora Stone|link}}'''}} | ||
{{#vardefine:Beastie Patch|[[File:TFH Beastie Patch.png|24px]] ''' | {{#vardefine:Beastie Patch|[[File:TFH Beastie Patch Icon.png|24px]] '''{{Term|TFH|Beastie Patch|link}}'''}} | ||
{{#vardefine:Blin Bling|[[File:TFH Blin Bling.png|24px]] ''' | {{#vardefine:Blin Bling|[[File:TFH Blin Bling Icon.png|24px]] '''{{Term|TFH|Blin Bling|link}}'''}} | ||
{{#vardefine:Blob Jelly|[[File:TFH Blob Jelly.png|24px]] ''' | {{#vardefine:Blob Jelly|[[File:TFH Blob Jelly Icon.png|24px]] '''{{Term|TFH|Blob Jelly|link}}'''}} | ||
{{#vardefine:Brittle Papyrus|[[File:TFH Brittle Papyrus.png|24px]] ''' | {{#vardefine:Brittle Papyrus|[[File:TFH Brittle Papyrus Icon.png|24px]] '''{{Term|TFH|Brittle Papyrus|link}}'''}} | ||
{{#vardefine:Carmine Pearl|[[File:TFH Carmine Pearl.png|24px]] ''' | {{#vardefine:Carmine Pearl|[[File:TFH Carmine Pearl Icon.png|24px]] '''{{Term|TFH|Carmine Pearl|link}}'''}} | ||
{{#vardefine:Carrumpkin|[[File:TFH Carrumpkin.png|24px]] ''' | {{#vardefine:Carrumpkin|[[File:TFH Carrumpkin Icon.png|24px]] '''{{Term|TFH|Carrumpkin|link}}'''}} | ||
{{#vardefine:Chill Stone|[[File:TFH Chill Stone.png|24px]] ''' | {{#vardefine:Chill Stone|[[File:TFH Chill Stone Icon.png|24px]] '''{{Term|TFH|Chill Stone|link}}'''}} | ||
{{#vardefine:Crimson Shell|[[File:TFH Crimson Shell.png|24px]] ''' | {{#vardefine:Crimson Shell|[[File:TFH Crimson Shell Icon.png|24px]] '''{{Term|TFH|Crimson Shell|link}}'''}} | ||
{{#vardefine:Crystal Skull|[[File:TFH Crystal Skull.png|24px]] ''' | {{#vardefine:Crystal Skull|[[File:TFH Crystal Skull Icon.png|24px]] '''{{Term|TFH|Crystal Skull|link}}'''}} | ||
{{#vardefine:Cucco Feathers|[[File:TFH Cucco Feathers.png|24px]] ''' | {{#vardefine:Cucco Feathers|[[File:TFH Cucco Feathers Icon.png|24px]] '''{{Term|TFH|Cucco Feathers|link}}'''}} | ||
{{#vardefine:Demon Fossil|[[File:TFH Demon Fossil.png|24px]] ''' | {{#vardefine:Demon Fossil|[[File:TFH Demon Fossil Icon.png|24px]] '''{{Term|TFH|Demon Fossil|link}}'''}} | ||
{{#vardefine:Divine Whiskers|[[File:TFH Divine Whiskers.png|24px]] ''' | {{#vardefine:Divine Whiskers|[[File:TFH Divine Whiskers Icon.png|24px]] '''{{Term|TFH|Divine Whiskers|link}}'''}} | ||
{{#vardefine:Exquisite Lace|[[File:TFH Exquisite Lace.png|24px]] ''' | {{#vardefine:Exquisite Lace|[[File:TFH Exquisite Lace Icon.png|24px]] '''{{Term|TFH|Exquisite Lace|link}}'''}} | ||
{{#vardefine:Fabled Butterfly|[[File:TFH Fabled Butterfly.png|24px]] ''' | {{#vardefine:Fabled Butterfly|[[File:TFH Fabled Butterfly Icon.png|24px]] '''{{Term|TFH|Fabled Butterfly|link}}'''}} | ||
{{#vardefine:Fairy Dust|[[File:TFH Fairy Dust.png|24px]] ''' | {{#vardefine:Fairy Dust|[[File:TFH Fairy Dust Icon.png|24px]] '''{{Term|TFH|Fairy Dust|link}}'''}} | ||
{{#vardefine:Fancy Fabric|[[File:TFH Fancy Fabric.png|24px]] ''' | {{#vardefine:Fancy Fabric|[[File:TFH Fancy Fabric Icon.png|24px]] '''{{Term|TFH|Fancy Fabric|link}}'''}} | ||
{{#vardefine:Fluffy Fuzz|[[File:TFH Fluffy Fuzz.png|24px]] ''' | {{#vardefine:Fluffy Fuzz|[[File:TFH Fluffy Fuzz Icon.png|24px]] '''{{Term|TFH|Fluffy Fuzz|link}}'''}} | ||
{{#vardefine:Freebie|[[File:TFH Freebie.png|24px]] ''' | {{#vardefine:Freebie|[[File:TFH Freebie Icon.png|24px]] '''{{Term|TFH|Freebie|link}}'''}} | ||
{{#vardefine:Freezard Water|[[File:TFH Freezard Water.png|24px]] ''' | {{#vardefine:Freezard Water|[[File:TFH Freezard Water Icon.png|24px]] '''{{Term|TFH|Freezard Water|link}}'''}} | ||
{{#vardefine:Fresh Kelp|[[File:TFH Fresh Kelp.png|24px]] ''' | {{#vardefine:Fresh Kelp|[[File:TFH Fresh Kelp Icon.png|24px]] '''{{Term|TFH|Fresh Kelp|link}}'''}} | ||
{{#vardefine:Friendly Token|[[File:TFH Friendly Token.png|24px]] ''' | {{#vardefine:Friendly Token|[[File:TFH Friendly Token Icon.png|24px]] '''{{Term|TFH|Friendly Token|link}}'''}} | ||
{{#vardefine:Frilly Fabric|[[File:TFH Frilly Fabric.png|24px]] ''' | {{#vardefine:Frilly Fabric|[[File:TFH Frilly Fabric Icon.png|24px]] '''{{Term|TFH|Frilly Fabric|link}}'''}} | ||
{{#vardefine:Gibdo Bandage|[[File:TFH Gibdo Bandage.png|24px]] ''' | {{#vardefine:Gibdo Bandage|[[File:TFH Gibdo Bandage Icon.png|24px]] '''{{Term|TFH|Gibdo Bandage|link}}'''}} | ||
{{#vardefine:Gohma's Eye|[[File:TFH Gohma's Eye.png|24px]] ''' | {{#vardefine:Gohma's Eye|[[File:TFH Gohma's Eye Icon.png|24px]] '''{{Term|TFH|Gohma's Eye|link}}'''}} | ||
{{#vardefine:Gold Dust|[[File:TFH Gold Dust.png|24px]] ''' | {{#vardefine:Gold Dust|[[File:TFH Gold Dust Icon.png|24px]] '''{{Term|TFH|Gold Dust|link}}'''}} | ||
{{#vardefine:Golden Insect|[[File:TFH Golden Insect.png|24px]] ''' | {{#vardefine:Golden Insect|[[File:TFH Golden Insect Icon.png|24px]] '''{{Term|TFH|Golden Insect|link}}'''}} | ||
{{#vardefine:Goron Ore|[[File:TFH Goron Ore.png|24px]] ''' | {{#vardefine:Goron Ore|[[File:TFH Goron Ore Icon.png|24px]] '''{{Term|TFH|Goron Ore|link}}'''}} | ||
{{#vardefine:Hytopian Silk|[[File:TFH Hytopian Silk.png|24px]] ''' | {{#vardefine:Hytopian Silk|[[File:TFH Hytopian Silk Icon.png|24px]] '''{{Term|TFH|Hytopian Silk|link}}'''}} | ||
{{#vardefine:Ice Rose|[[File:TFH Ice Rose.png]] ''' | {{#vardefine:Ice Rose|[[File:TFH Ice Rose Icon.png]] '''{{Term|TFH|Ice Rose|link}}'''}} | ||
{{#vardefine:Keese Wing|[[File:TFH Keese Wing.png]] ''' | {{#vardefine:Keese Wing|[[File:TFH Keese Wing Icon.png]] '''{{Term|TFH|Keese Wing|link}}'''}} | ||
{{#vardefine:Kodongo Tail|[[File:TFH Kodongo Tail.png]] ''' | {{#vardefine:Kodongo Tail|[[File:TFH Kodongo Tail Icon.png]] '''{{Term|TFH|Kodongo Tail|link}}'''}} | ||
{{#vardefine:Lady's Collar|[[File:TFH Lady's Collar.png|24px]] ''' | {{#vardefine:Lady's Collar|[[File:TFH Lady's Collar Icon.png|24px]] '''{{Term|TFH|Lady's Collar|link}}'''}} | ||
{{#vardefine:Lady's Glasses|[[File:TFH Lady's Glasses.png|24px]] ''' | {{#vardefine:Lady's Glasses|[[File:TFH Lady's Glasses Icon.png|24px]] '''{{Term|TFH|Lady's Glasses|link}}'''}} | ||
{{#vardefine:Lady's Parasol|[[File:TFH Lady's Parasol.png|24px]] ''' | {{#vardefine:Lady's Parasol|[[File:TFH Lady's Parasol Icon.png|24px]] '''{{Term|TFH|Lady's Parasol|link}}'''}} | ||
{{#vardefine:Lava Drop|[[File:TFH Lava Drop.png|24px]] ''' | {{#vardefine:Lava Drop|[[File:TFH Lava Drop Icon.png|24px]] '''{{Term|TFH|Lava Drop|link}}'''}} | ||
{{#vardefine:Mock Fairy|[[File:TFH Mock Fairy.png|24px]] ''' | {{#vardefine:Mock Fairy|[[File:TFH Mock Fairy Icon.png|24px]] '''{{Term|TFH|Mock Fairy|link}}'''}} | ||
{{#vardefine:Monster Guts|[[File:TFH Monster Guts.png|24px]] ''' | {{#vardefine:Monster Guts|[[File:TFH Monster Guts Icon.png|24px]] '''{{Term|TFH|Monster Guts|link}}'''}} | ||
{{#vardefine:Mystery Extract|[[File:TFH Mystery Extract.png|24px]] ''' | {{#vardefine:Mystery Extract|[[File:TFH Mystery Extract Icon.png|24px]] '''{{Term|TFH|Mystery Extract|link}}'''}} | ||
{{#vardefine:Mystery Jade|[[File:TFH Mystery Jade.png|24px]] ''' | {{#vardefine:Mystery Jade|[[File:TFH Mystery Jade Icon.png|24px]] '''{{Term|TFH|Mystery Jade|link}}'''}} | ||
{{#vardefine:Octorok Sucker|[[File:TFH Octorok Sucker.png|24px]] ''' | {{#vardefine:Octorok Sucker|[[File:TFH Octorok Sucker Icon.png|24px]] '''{{Term|TFH|Octorok Sucker|link}}'''}} | ||
{{#vardefine:Palm Cone|[[File:TFH Palm Cone.png|24px]] ''' | {{#vardefine:Palm Cone|[[File:TFH Palm Cone Icon.png|24px]] '''{{Term|TFH|Palm Cone|link}}'''}} | ||
{{#vardefine:Poe Soul|[[File:TFH Poe Soul.png|24px]] ''' | {{#vardefine:Poe Soul|[[File:TFH Poe Soul Icon.png|24px]] '''{{Term|TFH|Poe Soul|link}}'''}} | ||
{{#vardefine:Pretty Plume|[[File:TFH Pretty Plume.png|24px]] ''' | {{#vardefine:Pretty Plume|[[File:TFH Pretty Plume Icon.png|24px]] '''{{Term|TFH|Pretty Plume|link}}'''}} | ||
{{#vardefine:Rainbow Coral|[[File:TFH Rainbow Coral.png|24px]] ''' | {{#vardefine:Rainbow Coral|[[File:TFH Rainbow Coral Icon.png|24px]] '''{{Term|TFH|Rainbow Coral|link}}'''}} | ||
{{#vardefine:Royal Ring|[[File:TFH Royal Ring.png|24px]] ''' | {{#vardefine:Royal Ring|[[File:TFH Royal Ring Icon.png|24px]] '''{{Term|TFH|Royal Ring|link}}'''}} | ||
{{#vardefine:Rugged Horn|[[File:TFH Rugged Horn.png|24px]] ''' | {{#vardefine:Rugged Horn|[[File:TFH Rugged Horn Icon.png|24px]] '''{{Term|TFH|Rugged Horn|link}}'''}} | ||
{{#vardefine:Sanctuary Mask|[[File:TFH Sanctuary Mask.png|24px]] ''' | {{#vardefine:Sanctuary Mask|[[File:TFH Sanctuary Mask Icon.png|24px]] '''{{Term|TFH|Sanctuary Mask|link}}'''}} | ||
{{#vardefine:Sandy Ribbon|[[File:TFH Sandy Ribbon.png|24px]] ''' | {{#vardefine:Sandy Ribbon|[[File:TFH Sandy Ribbon Icon.png|24px]] '''{{Term|TFH|Sandy Ribbon|link}}'''}} | ||
{{#vardefine:Serpent Fangs|[[File:TFH Serpent Fangs.png|24px]] ''' | {{#vardefine:Serpent Fangs|[[File:TFH Serpent Fangs Icon.png|24px]] '''{{Term|TFH|Serpent Fangs|link}}'''}} | ||
{{#vardefine:Silver Thread|[[File:TFH Silver Thread.png|24px]] ''' | {{#vardefine:Silver Thread|[[File:TFH Silver Thread Icon.png|24px]] '''{{Term|TFH|Silver Thread|link}}'''}} | ||
{{#vardefine:Sky Dragon Tail|[[File:TFH Sky Dragon Tail.png|24px]] ''' | {{#vardefine:Sky Dragon Tail|[[File:TFH Sky Dragon Tail Icon.png|24px]] '''{{Term|TFH|Sky Dragon Tail|link}}'''}} | ||
{{#vardefine:Spider Silk Lace|[[File:TFH Spider Silk Lace.png|24px]] ''' | {{#vardefine:Spider Silk Lace|[[File:TFH Spider Silk Lace Icon.png|24px]] '''{{Term|TFH|Spider Silk Lace|link}}'''}} | ||
{{#vardefine:Stal Skull|[[File:TFH Stal Skull.png|24px]] ''' | {{#vardefine:Stal Skull|[[File:TFH Stal Skull Icon.png|24px]] '''{{Term|TFH|Stal Skull|link}}'''}} | ||
{{#vardefine:Star Fragment|[[File:TFH Star Fragment Icon.png|24px]] ''' | {{#vardefine:Star Fragment|[[File:TFH Star Fragment Icon.png|24px]] '''{{Term|TFH|Star Fragment|link}}'''}} | ||
{{#vardefine:Steel Mask|[[File:TFH Steel Mask.png|24px]] ''' | {{#vardefine:Steel Mask|[[File:TFH Steel Mask Icon.png|24px]] '''{{Term|TFH|Steel Mask|link}}'''}} | ||
{{#vardefine:Stiff Puff|[[File:TFH Stiff Puff.png|24px]] ''' | {{#vardefine:Stiff Puff|[[File:TFH Stiff Puff Icon.png|24px]] '''{{Term|TFH|Stiff Puff|link}}'''}} | ||
{{#vardefine:Supple Leaf|[[File:TFH Supple Leaf.png|24px]] ''' | {{#vardefine:Supple Leaf|[[File:TFH Supple Leaf Icon.png|24px]] '''{{Term|TFH|Supple Leaf|link}}'''}} | ||
{{#vardefine:Sweet Shroom|[[File:TFH Sweet Shroom.png|24px]] ''' | {{#vardefine:Sweet Shroom|[[File:TFH Sweet Shroom Icon.png|24px]] '''{{Term|TFH|Sweet Shroom|link}}'''}} | ||
{{#vardefine:Tektite Shell|[[File:TFH Tektite Shell.png|24px]] ''' | {{#vardefine:Tektite Shell|[[File:TFH Tektite Shell Icon.png|24px]] '''{{Term|TFH|Tektite Shell|link}}'''}} | ||
{{#vardefine:Thornberry|[[File:TFH Thornberry.png|24px]] ''' | {{#vardefine:Thornberry|[[File:TFH Thornberry Icon.png|24px]] '''{{Term|TFH|Thornberry|link}}'''}} | ||
{{#vardefine:Tiny Snowflake|[[File:TFH Tiny Snowflake.png|24px]] ''' | {{#vardefine:Tiny Snowflake|[[File:TFH Tiny Snowflake Icon.png|24px]] '''{{Term|TFH|Tiny Snowflake|link}}'''}} | ||
{{#vardefine:Twisted Twig|[[File:TFH Twisted Twig.png|24px]] ''' | {{#vardefine:Twisted Twig|[[File:TFH Twisted Twig Icon.png|24px]] '''{{Term|TFH|Twisted Twig|link}}'''}} | ||
{{#vardefine:Vibrant Brooch|[[File:TFH Vibrant Brooch.png|24px]] ''' | {{#vardefine:Vibrant Brooch|[[File:TFH Vibrant Brooch Icon.png|24px]] '''{{Term|TFH|Vibrant Brooch|link}}'''}} | ||
{{#vardefine:Vintage Linen|[[File:TFH Vintage Linen.png|24px]] ''' | {{#vardefine:Vintage Linen|[[File:TFH Vintage Linen Icon.png|24px]] '''{{Term|TFH|Vintage Linen|link}}'''}} | ||
{{#vardefine:Zora Scale|[[File:TFH Zora Scale.png|24px]] ''' | {{#vardefine:Zora Scale|[[File:TFH Zora Scale Icon.png|24px]] '''{{Term|TFH|Zora Scale|link}}'''}} | ||
{{#vardefine:cost|[[File:TFH Rupee Icon.png|18px|Cost]]}} | {{#vardefine:cost|[[File:TFH Rupee Icon.png|18px|Cost]]}} | ||
{{#vardefine:Dark|{{!}}style="background-color: | {{#vardefine:Dark|{{!}}style="background-color:#163d5f"}} | ||
{{#vardefine:Light|{{!}}style="background-color: | {{#vardefine:Light|{{!}}style="background-color:#17456e"}} | ||
</div> | </div> | ||
{{clear}} | {{clear}} | ||
==List of Outfits== | ==List of Outfits== | ||
{| class=" | {| class="wikitable" cellpadding="4" style="text-align:center; width:100%;" | ||
|- | |- | ||
!style="width:18%"| Outfit | !style="width:18%"| {{Term|TFH|Outfit}} | ||
!style="width:45%"| Effect | !style="width:45%"| Effect | ||
!style="width:15%"| | !style="width:15%"| Unlock Condition | ||
!colspan="2"| Cost | !colspan="2"| Cost | ||
!style="width:10%"| Obtainable in [[Download Play]]? | |||
|- | |- | ||
| {{Section|Bear Minimum|[[File:TFH Bear Minimum Icon.png|link=Bear Minimum]]<br>'''{{Term|TFH|Bear Minimum|link}}'''}} | | {{Section|Bear Minimum|[[File:TFH Bear Minimum Icon.png|link=Bear Minimum]]<br/>'''{{Term|TFH|Bear Minimum|link}}'''}} | ||
| Forces Link to take double damage and also reduces one | | Forces {{Term|TFH|Link}} to take double damage and also reduces one {{Term|TFH|Heart Container|link}} from the {{Plural|TFH|Links}}' total capacity.<br/>After acquiring 30 {{Plural|TFH|Hero Point|link}} it grants two extra {{Plural|TFH|Heart Container|link}}, a sparkling visual effect and a high chance to dodge attacks, but {{Term|TFH|Link}} still takes double damage. | ||
|colspan="3"| Link's default Outfit. | |colspan="3"| {{Term|TFH|Link}}'s default Outfit. | ||
| {{N}} | |||
|- | |- | ||
|rowspan="3"| {{Section|Big Bomb Outfit|[[File:TFH Big Bomb Outfit Icon.png|link=Big Bomb Outfit]]<br>'''{{Term|TFH|Big Bomb Outfit|link}}'''}} | |rowspan="3"| {{Section|Big Bomb Outfit|[[File:TFH Big Bomb Outfit Icon.png|link=Big Bomb Outfit]]<br/>'''{{Term|TFH|Big Bomb Outfit|link}}'''}} | ||
|rowspan="3"| Transforms all | |rowspan="3"| Transforms all {{Plural|TFH|Bomb|link}} used into {{Plural|TFH|Big Bomb|link}}. | ||
|rowspan="3"| | |rowspan="3"| Unlocked by default. | ||
| '''1x''' | | '''1x''' | ||
|{{#var:Armos Spirit}} | |{{#var:Armos Spirit}} | ||
|rowspan="3"| {{Y}} | |||
|- | |- | ||
|style="background-color: | |style="background-color:#163d5f; width:5%"| '''1×''' | ||
|style="background-color: | |style="background-color:#163d5f; width:17%"| {{#var:Tektite Shell}} | ||
|- | |- | ||
|colspan="2"| {{#var:cost}} '''100 | |colspan="2"| {{#var:cost}} '''100 {{Plural|TFH|Rupee}}''' | ||
|- | |- | ||
|rowspan="4"| {{Section|Boomeranger|[[File:TFH Boomeranger Icon.png|link=Boomeranger]]<br>'''{{Term|TFH|Boomeranger|link}}'''}} | |rowspan="4"| {{Section|Boomeranger|[[File:TFH Boomeranger Icon.png|link=Boomeranger]]<br/>'''{{Term|TFH|Boomeranger|link}}'''}} | ||
|rowspan="4"| Allows larger | |rowspan="4"| Allows larger {{Plural|TFH|Boomerang|link}} to pass through and damage foes. Can also carry over two {{Plural|TFH|Links}} at once. | ||
|rowspan="4"| | |rowspan="4"| Complete the {{Term|TFH|Forest Temple|link}}. | ||
| '''1×''' | | '''1×''' | ||
| {{#var:Goron Ore}} | | {{#var:Goron Ore}} | ||
{{#var:Light}} rowspan="4"| {{Y}} | |||
|- | |- | ||
{{#var:Light}}| '''1×''' | {{#var:Light}}| '''1×''' | ||
| Line 134: | Line 145: | ||
| {{#var:Rugged Horn}} | | {{#var:Rugged Horn}} | ||
|- | |- | ||
{{#var:Light}} colspan="2"| {{#var:cost}} '''800 | {{#var:Light}} colspan="2"| {{#var:cost}} '''800 {{Plural|TFH|Rupee}}''' | ||
|- | |- | ||
{{#var:Dark}} rowspan="3"| {{Section|Cacto Clothes|[[File:TFH Cacto Clothes Icon.png|link=Cacto Clothes]]<br>'''{{Term|TFH|Cacto Clothes|link}}'''}} | {{#var:Dark}} rowspan="3"| {{Section|Cacto Clothes|[[File:TFH Cacto Clothes Icon.png|link=Cacto Clothes]]<br/>'''{{Term|TFH|Cacto Clothes|link}}'''}} | ||
{{#var:Dark}} rowspan="3"| Damages foes that come in contact with it. | {{#var:Dark}} rowspan="3"| Damages foes that come in contact with it. | ||
{{#var:Dark}} rowspan="3"| | {{#var:Dark}} rowspan="3"| Complete the {{Term|TFH|Forest Temple}}. | ||
{{#var:Dark}}| '''1×''' | {{#var:Dark}}| '''1×''' | ||
{{#var:Dark}}| {{#var:Supple Leaf}} | {{#var:Dark}}| {{#var:Supple Leaf}} | ||
{{#var:Dark}} rowspan="3"| {{N}}{{Note|This {{Term|TFH|Outfit}} can appear in the {{Term|TFH|Catalog}} but cannot be purchased due to the required {{Plural|TFH|Material}} being unobtainable.|Catalog}} | |||
|- | |- | ||
| '''1×''' | | '''1×''' | ||
| {{#var:Thornberry}} | | {{#var:Thornberry}} | ||
|- | |- | ||
{{#var:Dark}} colspan="2"| {{#var:cost}} '''1000 | {{#var:Dark}} colspan="2"| {{#var:cost}} '''1000 {{Plural|TFH|Rupee}}''' | ||
|- | |- | ||
{{#var:Light}} rowspan="2"| {{Section|Cheer Outfit|[[File:TFH Cheer Outfit Icon.png|link=Cheer Outfit]]<br>'''{{Term|TFH|Cheer Outfit|link}}'''}} | {{#var:Light}} rowspan="2"| {{Section|Cheer Outfit|[[File:TFH Cheer Outfit Icon.png|link=Cheer Outfit]]<br/>'''{{Term|TFH|Cheer Outfit|link}}'''}} | ||
{{#var:Light}} rowspan="2"| Increases Link's allies' Energy | {{#var:Light}} rowspan="2"| Increases {{Term|TFH|Link}}'s allies' {{Plural|TFH|Energy Gauge|link}} by 50%.<br/>In single-player, increases all {{Plural|TFH|Links}}' {{Plural|TFH|Energy Gauge}} by 50%. | ||
{{#var:Light}} rowspan="2"| | {{#var:Light}} rowspan="2"| When the {{Term|TFH|Street Merchant|link}} arrives.<br/>(Complete three [[Levels in Tri Force Heroes|Levels]] or {{Plural|TFH|Drablands Challenge|display=Challenges|link}}) | ||
{{#var:Light}}| '''3×''' | {{#var:Light}}| '''3×''' | ||
{{#var:Light}}| {{#var:Frilly Fabric}} | {{#var:Light}}| {{#var:Frilly Fabric}} | ||
{{#var:Light}} rowspan="2"| {{N}}{{Note||Catalog}} | |||
|- | |- | ||
|colspan="2"|{{#var:cost}} '''100 | |colspan="2"|{{#var:cost}} '''100 {{Plural|TFH|Rupee}}''' | ||
|- | |- | ||
|rowspan="4"| {{Section|Cheetah Costume|[[File:TFH Cheetah Costume Icon.png|link=Cheetah Costume]]<br>'''{{Term|TFH|Cheetah Costume|link}}'''}} | |rowspan="4"| {{Section|Cheetah Costume|[[File:TFH Cheetah Costume Icon.png|link=Cheetah Costume]]<br/>'''{{Term|TFH|Cheetah Costume|link}}'''}} | ||
|rowspan="4"| Allows Link to run at a faster pace. | |rowspan="4"| Allows {{Term|TFH|Link}} to run at a faster pace. | ||
|rowspan="4"| | |rowspan="4"| Complete the {{Term|TFH|Water Temple|link}}, {{Term|TFH|Fire Temple|link}} and {{Term|TFH|Ice Temple|link}}. | ||
| '''1×''' | | '''1×''' | ||
| {{#var:Divine Whiskers}} | | {{#var:Divine Whiskers}} | ||
{{#var:Dark}} rowspan="4"| {{N}}{{Note||Catalog}} | |||
|- | |- | ||
{{#var:Dark}}| '''1×''' | {{#var:Dark}}| '''1×''' | ||
| Line 167: | Line 181: | ||
| {{#var:Brittle Papyrus}} | | {{#var:Brittle Papyrus}} | ||
|- | |- | ||
{{#var:Dark}} colspan="2"|{{#var:cost}} '''1500 | {{#var:Dark}} colspan="2"|{{#var:cost}} '''1500 {{Plural|TFH|Rupee}}''' | ||
|- | |- | ||
{{#var:Light}} rowspan="3"| {{Section|Cozy Parka|[[File:TFH Cozy Parka Icon.png|link=Cozy Parka]]<br>'''{{Term|TFH|Cozy Parka|link}}'''}} | {{#var:Light}} rowspan="3"| {{Section|Cozy Parka|[[File:TFH Cozy Parka Icon.png|link=Cozy Parka]]<br/>'''{{Term|TFH|Cozy Parka|link}}'''}} | ||
{{#var:Light}} rowspan="3"| Gives Link better traction on ice and prevents him from becoming frozen. Also allows Link to attack ice-based enemies without freezing. | {{#var:Light}} rowspan="3"| Gives {{Term|TFH|Link}} better traction on ice and prevents him from becoming frozen. Also allows {{Term|TFH|Link}} to attack ice-based enemies without freezing. | ||
{{#var:Light}} rowspan="3"| | {{#var:Light}} rowspan="3"| Complete the {{Term|TFH|Forest Temple}}. | ||
{{#var:Light}}| '''1×''' | {{#var:Light}}| '''1×''' | ||
{{#var:Light}}| {{#var:Fluffy Fuzz}} | {{#var:Light}}| {{#var:Fluffy Fuzz}} | ||
{{#var:Light}} rowspan="3"| {{Y}} | |||
|- | |- | ||
| '''1×''' | | '''1×''' | ||
| {{#var:Serpent Fangs}} | | {{#var:Serpent Fangs}} | ||
|- | |- | ||
{{#var:Light}} colspan="2"| {{#var:cost}} '''800 | {{#var:Light}} colspan="2"| {{#var:cost}} '''800 {{Plural|TFH|Rupee}}''' | ||
|- | |- | ||
{{#var:Dark}}| {{Section|Cursed Tights|[[File:TFH Cursed Tights Icon.png|link=Cursed Tights]]<br>'''{{Term|TFH|Cursed Tights|link}}'''}} {{Exp|Initially known as Kinda Cursed Tights when given.}} | {{#var:Dark}}| {{Section|Cursed Tights|[[File:TFH Cursed Tights Icon.png|link=Cursed Tights]]<br/>'''{{Term|TFH|Cursed Tights|link}}'''}} {{Exp|Initially known as Kinda Cursed Tights when given.}} | ||
{{#var:Dark}}| Allows Link to dodge 50% of attacks, but attacks that do hit deal twice as much damage. | {{#var:Dark}}| Allows {{Term|TFH|Link}} to dodge 50% of attacks, but attacks that do hit deal twice as much damage. | ||
{{#var:Dark}} colspan="3"| Gift from | {{#var:Dark}} colspan="3"| Gift from {{Term|TFH|King Tuft|link}} after breaking the curse on {{Term|TFH|Princess Styla|link}}. | ||
{{#var:Dark}}| {{N}} | |||
|- | |- | ||
{{#var:Light}} rowspan="2"| {{Section|Dapper Spinner|[[File:TFH Dapper Spinner Icon.png|link=Dapper Spinner]]<br>'''{{Term|TFH|Dapper Spinner|link}}'''}} | {{#var:Light}} rowspan="2"| {{Section|Dapper Spinner|[[File:TFH Dapper Spinner Icon.png|link=Dapper Spinner]]<br/>'''{{Term|TFH|Dapper Spinner|link}}'''}} | ||
{{#var:Light}} rowspan="2"| Allows Link to execute quick Spin | {{#var:Light}} rowspan="2"| Allows {{Term|TFH|Link}} to execute quick {{Plural|TFH|Spin Attack|link}} by pressing the B Button three times in a row. | ||
{{#var:Light}} rowspan="2"| | {{#var:Light}} rowspan="2"| Lose in {{Term|TFH|Daily Riches|link}} five times. | ||
{{#var:Light}}| '''10×''' | {{#var:Light}}| '''10×''' | ||
{{#var:Light}}| {{#var:Freebie}} | {{#var:Light}}| {{#var:Freebie}} | ||
{{#var:Light}} rowspan="2"| {{N}} | |||
|- | |- | ||
|colspan="2"| {{#var:cost}} '''300 | |colspan="2"| {{#var:cost}} '''300 {{Plural|TFH|Rupee}}''' | ||
|- | |- | ||
|rowspan="4"| {{Section|Dunewalker Duds|[[File:TFH Dunewalker Duds Icon.png|link=Dunewalker Duds]]<br>'''{{Term|TFH|Dunewalker Duds|link}}'''}} | |rowspan="4"| {{Section|Dunewalker Duds|[[File:TFH Dunewalker Duds Icon.png|link=Dunewalker Duds]]<br/>'''{{Term|TFH|Dunewalker Duds|link}}'''}} | ||
|rowspan="4"| Allows Link to safely walk on quicksand. | |rowspan="4"| Allows {{Term|TFH|Link}} to safely walk on quicksand. | ||
|rowspan="4"| | |rowspan="4"| Complete {{Term|TFH|The Lady's Lair|link}}. | ||
| '''1×''' | | '''1×''' | ||
| {{#var:Palm Cone}} | | {{#var:Palm Cone}} | ||
{{#var:Dark}} rowspan="4"| {{Y}} | |||
|- | |- | ||
{{#var:Dark}}| '''1×''' | {{#var:Dark}}| '''1×''' | ||
| Line 204: | Line 222: | ||
| {{#var:Stal Skull}} | | {{#var:Stal Skull}} | ||
|- | |- | ||
{{#var:Dark}} colspan="2"| {{#var:cost}} '''1200 | {{#var:Dark}} colspan="2"| {{#var:cost}} '''1200 {{Plural|TFH|Rupee}}''' | ||
|- | |- | ||
{{#var:Light}} rowspan="5"| {{Section|Energy Gear|[[File:TFH Energy Gear Icon.png|link=Energy Gear]]<br>'''{{Term|TFH|Energy Gear|link}}'''}} | {{#var:Light}} rowspan="5"| {{Section|Energy Gear|[[File:TFH Energy Gear Icon.png|link=Energy Gear]]<br/>'''{{Term|TFH|Energy Gear|link}}'''}} | ||
{{#var:Light}} rowspan="5"| Increases Link's Energy Gauge by 50%.<br>In single-player, increases all Links' Energy | {{#var:Light}} rowspan="5"| Increases {{Term|TFH|Link}}'s {{Term|TFH|Energy Gauge}} by 50%.<br/>In single-player, increases all {{Plural|TFH|Links}}' {{Plural|TFH|Energy Gauge}} by 50%. | ||
{{#var:Light}} rowspan="5"| | {{#var:Light}} rowspan="5"| Complete the {{Term|TFH|Forest Temple}}. | ||
{{#var:Light}}| '''1×''' | {{#var:Light}}| '''1×''' | ||
{{#var:Light}}| {{#var:Monster Guts}} | {{#var:Light}}| {{#var:Monster Guts}} | ||
{{#var:Light}} rowspan="5"| {{Y}} | |||
|- | |- | ||
| '''1×''' | | '''1×''' | ||
| Line 221: | Line 240: | ||
| {{#var:Keese Wing}} | | {{#var:Keese Wing}} | ||
|- | |- | ||
{{#var:Light}} colspan="2"| {{#var:cost}} '''800 | {{#var:Light}} colspan="2"| {{#var:cost}} '''800 {{Plural|TFH|Rupee}}''' | ||
|- | |- | ||
{{#var:Dark}}| {{Section|Fierce Deity Armor|[[File:TFH Fierce Deity Armor Icon.png|link=Fierce Deity Armor]]<br>'''{{Term|TFH|Fierce Deity Armor|link}}'''}} | {{#var:Dark}}| {{Section|Fierce Deity Armor|[[File:TFH Fierce Deity Armor Icon.png|link=Fierce Deity Armor]]<br/>'''{{Term|TFH|Fierce Deity Armor|link}}'''}} | ||
{{#var:Dark}}| Added through the | {{#var:Dark}}| Added through the Version 2.0.0 update.<br/>Doubles the damage of the {{Term|TFH|Sword|link}} and allows {{Term|TFH|Link}} to shoot four {{Plural|TFH|Sword Beam|link}} around him. These {{Plural|TFH|Sword Beam|display=Beams}} are also fired when performing a {{Term|TFH|Spin Attack|link}}, even when health is not full.<br/>Additionally {{Term|TFH|Link}} remains steadfast at all times and won't get knocked back from enemies. | ||
{{#var:Dark}} colspan="3"| Obtained | {{#var:Dark}} colspan="3"| Obtained by completing the {{Term|TFH|Den of Trials|link}} for the first time. | ||
{{#var:Dark}}| {{N}} | |||
|- | |- | ||
{{#var:Light}} rowspan="4"| {{Section|Fire Blazer|[[File:TFH Fire Blazer Icon.png|link=Fire Blazer]]<br>'''{{Term|TFH|Fire Blazer|link}}'''}} | {{#var:Light}} rowspan="4"| {{Section|Fire Blazer|[[File:TFH Fire Blazer Icon.png|link=Fire Blazer]]<br/>'''{{Term|TFH|Fire Blazer|link}}'''}} | ||
{{#var:Light}} rowspan="4"| Allows Link to shoot three fireballs at once with the | {{#var:Light}} rowspan="4"| Allows {{Term|TFH|Link}} to shoot three fireballs at once with the {{Term|TFH|Fire Gloves|link}}. | ||
{{#var:Light}} rowspan="4"| | {{#var:Light}} rowspan="4"| Complete {{Term|TFH|The Lady's Lair}}. | ||
{{#var:Light}}| '''1×''' | {{#var:Light}}| '''1×''' | ||
{{#var:Light}}| {{#var:Mystery Extract}} | {{#var:Light}}| {{#var:Mystery Extract}} | ||
{{#var:Light}} rowspan="4"| {{Y}} | |||
|- | |- | ||
| '''1×''' | | '''1×''' | ||
| Line 239: | Line 260: | ||
{{#var:Light}}| {{#var:Lava Drop}} | {{#var:Light}}| {{#var:Lava Drop}} | ||
|- | |- | ||
|colspan="2"| {{#var:cost}} '''1500 | |colspan="2"| {{#var:cost}} '''1500 {{Plural|TFH|Rupee}}''' | ||
|- | |- | ||
|rowspan="3"| {{Section|Goron Garb|[[File:TFH Goron Garb Icon.png|link=Goron Garb]]<br>'''{{Term|TFH|Goron Garb|link}}'''}} | |rowspan="3"| {{Section|Goron Garb|[[File:TFH Goron Garb Icon.png|link=Goron Garb]]<br/>'''{{Term|TFH|Goron Garb|link}}'''}} | ||
|rowspan="3"| Allows Link to swim through lava and pass through fire unharmed. Also allows Link to attack fire-based enemies without being harmed. | |rowspan="3"| Allows {{Term|TFH|Link}} to swim through lava and pass through fire unharmed. Also allows {{Term|TFH|Link}} to attack fire-based enemies without being harmed. | ||
|rowspan="3"| | |rowspan="3"| Complete the {{Term|TFH|Forest Temple}}. | ||
| '''1×''' | | '''1×''' | ||
| {{#var:Goron Ore}} | | {{#var:Goron Ore}} | ||
{{#var:Dark}} rowspan="3"| {{Y}} | |||
|- | |- | ||
{{#var:Dark}}| '''1×''' | {{#var:Dark}}| '''1×''' | ||
{{#var:Dark}}| {{#var:Monster Guts}} | {{#var:Dark}}| {{#var:Monster Guts}} | ||
|- | |- | ||
|colspan="2"| {{#var:cost}} '''600 | |colspan="2"| {{#var:cost}} '''600 {{Plural|TFH|Rupee}}''' | ||
|- | |- | ||
|rowspan="4"| {{Section|Gust Garb|[[File:TFH Gust Garb Icon.png|link=Gust Garb]]<br>'''{{Term|TFH|Gust Garb|link}}'''}} | |rowspan="4"| {{Section|Gust Garb|[[File:TFH Gust Garb Icon.png|link=Gust Garb]]<br/>'''{{Term|TFH|Gust Garb|link}}'''}} | ||
|rowspan="4"| Increases the | |rowspan="4"| Increases the {{Term|TFH|Gust Jar|link}}'s firing speed and reach. | ||
|rowspan="4"| | |rowspan="4"| Complete {{Term|TFH|The Lady's Lair}}. | ||
| '''1×''' | | '''1×''' | ||
| {{#var:Vintage Linen}} | | {{#var:Vintage Linen}} | ||
{{#var:Light}} rowspan="4"| {{Y}} | |||
|- | |- | ||
{{#var:Light}}| '''1×''' | {{#var:Light}}| '''1×''' | ||
| Line 264: | Line 287: | ||
| {{#var:Sandy Ribbon}} | | {{#var:Sandy Ribbon}} | ||
|- | |- | ||
{{#var:Light}} colspan="2"| {{#var:cost}} '''1500 | {{#var:Light}} colspan="2"| {{#var:cost}} '''1500 {{Plural|TFH|Rupee}}''' | ||
|- | |- | ||
{{#var:Dark}} rowspan="5"| {{Section|Hammerwear|[[File:TFH Hammerwear Icon.png|link=Hammerwear]]<br>'''{{Term|TFH|Hammerwear|link}}'''}} | {{#var:Dark}} rowspan="5"| {{Section|Hammerwear|[[File:TFH Hammerwear Icon.png|link=Hammerwear]]<br/>'''{{Term|TFH|Hammerwear|link}}'''}} | ||
{{#var:Dark}} rowspan="5"| Makes the | {{#var:Dark}} rowspan="5"| Makes the {{Term|TFH|Magic Hammer|link}} twice as powerful. It can be swung more quickly, and creates a shock wave. | ||
{{#var:Dark}} rowspan="5"| | {{#var:Dark}} rowspan="5"| Complete the {{Term|TFH|Forest Temple}}. | ||
{{#var:Dark}}| '''1×''' | {{#var:Dark}}| '''1×''' | ||
{{#var:Dark}}| {{#var:Tiny Snowflake}} | {{#var:Dark}}| {{#var:Tiny Snowflake}} | ||
{{#var:Dark}} rowspan="5"| {{Y}} | |||
|- | |- | ||
| '''1×''' | | '''1×''' | ||
| Line 281: | Line 305: | ||
| {{#var:Chill Stone}} | | {{#var:Chill Stone}} | ||
|- | |- | ||
{{#var:Dark}} colspan="2"| {{#var:cost}} '''1000 | {{#var:Dark}} colspan="2"| {{#var:cost}} '''1000 {{Plural|TFH|Rupee}}''' | ||
|- | |- | ||
{{#var:Light}} rowspan="2"| {{Section|Hero's Tunic|[[File:TFH Hero's Tunic Icon.png|link=Hero's Tunic]]<br>'''{{Term|TFH|Hero's Tunic|link}}'''}} | {{#var:Light}} rowspan="2"| {{Section|Hero's Tunic|[[File:TFH Hero's Tunic Icon.png|link=Hero's Tunic]]<br/>'''{{Term|TFH|Hero's Tunic|link}}'''}} | ||
{{#var:Light}} rowspan="2"| None. | {{#var:Light}} rowspan="2"| None. | ||
{{#var:Light}} rowspan="2"| | {{#var:Light}} rowspan="2"| Unlocked by default. | ||
{{#var:Light}}| '''1×''' | {{#var:Light}}| '''1×''' | ||
{{#var:Light}}| {{#var:Hytopian Silk}} | {{#var:Light}}| {{#var:Hytopian Silk}} | ||
{{#var:Light}} rowspan="2"| {{Y}}{{Note|Link's default Outfit when joining the game via Download Play.}} | |||
|- | |- | ||
|colspan="2"| {{#var:cost}} '''0 | |colspan="2"| {{#var:cost}} '''0 {{Plural|TFH|Rupee}}''' | ||
|- | |- | ||
|rowspan="4"| {{Section|Jack of Hearts|[[File:TFH Jack of Hearts Icon.png|link=Jack of Hearts]]<br>'''{{Term|TFH|Jack of Hearts|link}}'''}} | |rowspan="4"| {{Section|Jack of Hearts|[[File:TFH Jack of Hearts Icon.png|link=Jack of Hearts]]<br/>'''{{Term|TFH|Jack of Hearts|link}}'''}} | ||
|rowspan="4"| Gives the Links an extra | |rowspan="4"| Gives the {{Plural|TFH|Links}} an extra {{Term|TFH|Heart Container|link}}. | ||
|rowspan="4"| | |rowspan="4"| Complete the {{Term|TFH|Forest Temple}}. | ||
| '''1×''' | | '''1×''' | ||
| {{#var:Hytopian Silk}} | | {{#var:Hytopian Silk}} | ||
{{#var:Dark}} rowspan="4"| {{Y}} | |||
|- | |- | ||
{{#var:Dark}}| '''1×''' | {{#var:Dark}}| '''1×''' | ||
| Line 303: | Line 329: | ||
| {{#var:Fairy Dust}} | | {{#var:Fairy Dust}} | ||
|- | |- | ||
{{#var:Dark}} colspan="2"| {{#var:cost}} '''600 | {{#var:Dark}} colspan="2"| {{#var:cost}} '''600 {{Plural|TFH|Rupee}}''' | ||
|- | |- | ||
{{#var:Light}} rowspan="3"| {{Section|Kokiri Clothes|[[File:TFH Kokiri Clothes Icon.png|link=Kokiri Clothes]]<br>'''{{Term|TFH|Kokiri Clothes|link}}'''}} | {{#var:Light}} rowspan="3"| {{Section|Kokiri Clothes|[[File:TFH Kokiri Clothes Icon.png|link=Kokiri Clothes]]<br/>'''{{Term|TFH|Kokiri Clothes|link}}'''}} | ||
{{#var:Light}} rowspan="3"| Allows Link to shoot three | {{#var:Light}} rowspan="3"| Allows {{Term|TFH|Link}} to shoot three {{Plural|TFH|Arrow|link}} at once with the {{Term|TFH|Bow|link}}. | ||
{{#var:Light}} rowspan="3"| | {{#var:Light}} rowspan="3"| Unlocked by default. | ||
{{#var:Light}}| '''1×''' | {{#var:Light}}| '''1×''' | ||
{{#var:Light}}| {{#var:Blob Jelly}} | {{#var:Light}}| {{#var:Blob Jelly}} | ||
{{#var:Light}} rowspan="3"| {{Y}} | |||
|- | |- | ||
| '''1×''' | | '''1×''' | ||
| {{#var:Armos Spirit}} | | {{#var:Armos Spirit}} | ||
|- | |- | ||
{{#var:Light}} colspan="2"| {{#var:cost}} '''100 | {{#var:Light}} colspan="2"| {{#var:cost}} '''100 {{Plural|TFH|Rupee}}''' | ||
|- | |- | ||
{{#var:Dark}} rowspan="4"| {{Section|Lady's Ensemble|[[File:TFH Lady's Ensemble Icon.png|link=Lady's Ensemble]]<br>'''{{Term|TFH|Lady's Ensemble|link}}'''}} | {{#var:Dark}} rowspan="4"| {{Section|Lady's Ensemble|[[File:TFH Lady's Ensemble Icon.png|link=Lady's Ensemble]]<br/>'''{{Term|TFH|Lady's Ensemble|link}}'''}} | ||
{{#var:Dark}} rowspan="4"| Causes | {{#var:Dark}} rowspan="4"| Causes {{Plural|TFH|Heart|link}} to appear more frequently and adds one {{Term|TFH|Heart Container|link}} to the {{Plural|TFH|Links}}' total capacity. | ||
{{#var:Dark}} rowspan="4"| | {{#var:Dark}} rowspan="4"| Complete the {{Term|TFH|Forest Temple}}. | ||
{{#var:Dark}}| '''1×''' | {{#var:Dark}}| '''1×''' | ||
{{#var:Dark}}| {{#var:Lady's Glasses}} | {{#var:Dark}}| {{#var:Lady's Glasses}} | ||
{{#var:Dark}} rowspan="4"| {{N}} | |||
|- | |- | ||
| '''1×''' | | '''1×''' | ||
| Line 328: | Line 356: | ||
{{#var:Dark}}| {{#var:Lady's Parasol}} | {{#var:Dark}}| {{#var:Lady's Parasol}} | ||
|- | |- | ||
|colspan="2"| {{#var:cost}} '''0 | |colspan="2"| {{#var:cost}} '''0 {{Plural|TFH|Rupee}}''' | ||
|- | |- | ||
|rowspan="3"| [[File:TFH Legendary Dress Icon.png|link=Legendary Dress]]<br>'''{{Term|TFH|Legendary Dress|link}}''' | |rowspan="3"| [[File:TFH Legendary Dress Icon.png|link=Legendary Dress]]<br/>'''{{Term|TFH|Legendary Dress|link}}''' | ||
|rowspan="3"| Causes | |rowspan="3"| Causes {{Plural|TFH|Heart|link}} to appear more frequently. | ||
|rowspan="3"| | |rowspan="3"| Unlocked by default. | ||
| '''1×''' | | '''1×''' | ||
| {{#var:Tektite Shell}} | | {{#var:Tektite Shell}} | ||
{{#var:Light}} rowspan="3"| {{Y}} | |||
|- | |- | ||
{{#var:Light}}| '''1×''' | {{#var:Light}}| '''1×''' | ||
{{#var:Light}}| {{#var:Sweet Shroom}} | {{#var:Light}}| {{#var:Sweet Shroom}} | ||
|- | |- | ||
|colspan="2"| {{#var:cost}} '''200 | |colspan="2"| {{#var:cost}} '''200 {{Plural|TFH|Rupee}}''' | ||
|- | |- | ||
|rowspan="4"| {{Section|Light Armor|[[File:TFH Light Armor Icon.png|link=Light Armor]]<br>'''{{Term|TFH|Light Armor|link}}'''}} | |rowspan="4"| {{Section|Light Armor|[[File:TFH Light Armor Icon.png|link=Light Armor]]<br/>'''{{Term|TFH|Light Armor|link}}'''}} | ||
|rowspan="4"| Illuminates the area around Link.<br>In Coliseum matches, it burns the other Links when touched. | |rowspan="4"| Illuminates the area around {{Term|TFH|Link}}.<br/>In {{Term|TFH|Coliseum|link}} matches, it burns the other {{Plural|TFH|Links}} when touched. | ||
|rowspan="4"| | |rowspan="4"| Complete {{Term|TFH|The Lady's Lair}}. | ||
| '''1×''' | | '''1×''' | ||
| {{#var:Carrumpkin}} | | {{#var:Carrumpkin}} | ||
{{#var:Dark}} rowspan="4"| {{Y}} | |||
|- | |- | ||
{{#var:Dark}}| '''1×''' | {{#var:Dark}}| '''1×''' | ||
| Line 353: | Line 383: | ||
| {{#var:Poe Soul}} | | {{#var:Poe Soul}} | ||
|- | |- | ||
{{#var:Dark}} colspan="2"|{{#var:cost}} '''1200 | {{#var:Dark}} colspan="2"|{{#var:cost}} '''1200 {{Plural|TFH|Rupee}}''' | ||
|- | |- | ||
{{#var:Light}} rowspan="6"| {{Section|Linebeck's Uniform|[[File:TFH Linebeck's Uniform Icon.png|link=Linebeck's Uniform]]<br>'''{{Term|TFH|Linebeck's Uniform|link}}'''}} | {{#var:Light}} rowspan="6"| {{Section|Linebeck's Uniform|[[File:TFH Linebeck's Uniform Icon.png|link=Linebeck's Uniform]]<br/>'''{{Term|TFH|Linebeck's Uniform|link}}'''}} | ||
{{#var:Light}} rowspan="6"| Added through the | {{#var:Light}} rowspan="6"| Added through the Version 2.0.0 update.<br/>Allows {{Term|TFH|Link}} to see the contents of {{Plural|TFH|Treasure Chest|link}}, including {{Term|TFH|Material}} chests, before opening them. Does not work on the {{Term|TFH|Daily Riches|link}} {{Plural|TFH|Treasure Chest}}. In [[multiplayer]], if one {{Term|TFH|Link}} wears the {{Term|TFH|Outfit}}, then all {{Plural|TFH|Links}} will be able to see the contents of chests. Does not work after switching {{Plural|TFH|Doppel|link}}.<br/>In timed {{Plural|TFH|Drablands Challenge|link}}, this {{Term|TFH|Outfit}} also gives 10 extra seconds for each {{Term|TFH|Link}} wearing it at the start of the Level, and grants 50% more time for each {{Term|TFH|Hourglass|link}} picked up (but only if the {{Term|TFH|Link}} who picks up the {{Term|TFH|Hourglass}} is wearing the {{Term|TFH|Outfit}}). | ||
{{#var:Light}} rowspan="6"| | {{#var:Light}} rowspan="6"| Unlock the {{Term|TFH|Den of Trials|link}}.<br/>(Complete nine [[Levels in Tri Force Heroes|Levels]] or {{Plural|TFH|Drablands Challenge|display=Challenges}}) | ||
{{#var:Light}}| '''1×''' | {{#var:Light}}| '''1×''' | ||
{{#var:Light}}| {{#var:Mystery Jade}} | {{#var:Light}}| {{#var:Mystery Jade}} | ||
{{#var:Light}} rowspan="6"| {{N}} | |||
|- | |- | ||
| '''1×''' | | '''1×''' | ||
| Line 373: | Line 404: | ||
{{#var:Light}}| {{#var:Carmine Pearl}} | {{#var:Light}}| {{#var:Carmine Pearl}} | ||
|- | |- | ||
|colspan="2"| {{#var:cost}} '''3000 | |colspan="2"| {{#var:cost}} '''3000 {{Plural|TFH|Rupee}}''' | ||
|- | |- | ||
|rowspan="4"| {{Section|Lucky Loungewear|[[File:TFH Lucky Loungewear Icon.png|link=Lucky Loungewear]]<br>'''{{Term|TFH|Lucky Loungewear|link}}'''}} | |rowspan="4"| {{Section|Lucky Loungewear|[[File:TFH Lucky Loungewear Icon.png|link=Lucky Loungewear]]<br/>'''{{Term|TFH|Lucky Loungewear|link}}'''}} | ||
|rowspan="4"| Allows Link to dodge 25% of attacks. | |rowspan="4"| Allows {{Term|TFH|Link}} to dodge 25% of attacks. | ||
|rowspan="4"| | |rowspan="4"| Unlocked by default. | ||
| '''1×''' | | '''1×''' | ||
| {{#var:Sweet Shroom}} | | {{#var:Sweet Shroom}} | ||
{{#var:Dark}} rowspan="4"| {{Y}} | |||
|- | |- | ||
{{#var:Dark}}| '''1×''' | {{#var:Dark}}| '''1×''' | ||
| Line 387: | Line 419: | ||
| {{#var:Gohma's Eye}} | | {{#var:Gohma's Eye}} | ||
|- | |- | ||
{{#var:Dark}} colspan="2"| {{#var:cost}} '''200 | {{#var:Dark}} colspan="2"| {{#var:cost}} '''200 {{Plural|TFH|Rupee}}''' | ||
|- | |- | ||
{{#var:Light}} rowspan="6"| {{Section|Ninja Gi|[[File:TFH Ninja Gi Icon.png|link=Ninja Gi]]<br>'''{{Term|TFH|Ninja Gi|link}}'''}} | {{#var:Light}} rowspan="6"| {{Section|Ninja Gi|[[File:TFH Ninja Gi Icon.png|link=Ninja Gi]]<br/>'''{{Term|TFH|Ninja Gi|link}}'''}} | ||
{{#var:Light}} rowspan="6"| Allows Link to do triple damage while dashing | {{#var:Light}} rowspan="6"| Allows {{Term|TFH|Link}} to {{Term|TFH|Dash Attack|link}} instantly and do triple damage while dashing. | ||
{{#var:Light}} rowspan="6"| | {{#var:Light}} rowspan="6"| Complete {{Term|TFH|The Lady's Lair}}. | ||
{{#var:Light}}| '''1×''' | {{#var:Light}}| '''1×''' | ||
{{#var:Light}}| {{#var:Rainbow Coral}} | {{#var:Light}}| {{#var:Rainbow Coral}} | ||
{{#var:Light}} rowspan="6"| {{Y}} | |||
|- | |- | ||
| '''1×''' | | '''1×''' | ||
| Line 407: | Line 440: | ||
{{#var:Light}}| {{#var:Stal Skull}} | {{#var:Light}}| {{#var:Stal Skull}} | ||
|- | |- | ||
|colspan="2"| {{#var:cost}} '''1500 | |colspan="2"| {{#var:cost}} '''1500 {{Plural|TFH|Rupee}}''' | ||
|- | |- | ||
|rowspan="5"| {{Section|Queen of Hearts|[[File:TFH Queen of Hearts Icon.png|link=Queen of Hearts]]<br>'''{{Term|TFH|Queen of Hearts|link}}'''}} | |rowspan="5"| {{Section|Queen of Hearts|[[File:TFH Queen of Hearts Icon.png|link=Queen of Hearts]]<br/>'''{{Term|TFH|Queen of Hearts|link}}'''}} | ||
|rowspan="5"| Gives the Links three extra | |rowspan="5"| Gives the {{Plural|TFH|Links}} three extra {{Plural|TFH|Heart Container|link}}. | ||
|rowspan="5"| | |rowspan="5"| Complete the {{Term|TFH|Water Temple}}, {{Term|TFH|Fire Temple}} and {{Term|TFH|Ice Temple}}. | ||
| '''1×''' | | '''1×''' | ||
| {{#var:Mystery Jade}} | | {{#var:Mystery Jade}} | ||
{{#var:Dark}} rowspan="5"| {{Y}} | |||
|- | |- | ||
{{#var:Dark}}| '''1×''' | {{#var:Dark}}| '''1×''' | ||
| Line 424: | Line 458: | ||
{{#var:Dark}}| {{#var:Exquisite Lace}} | {{#var:Dark}}| {{#var:Exquisite Lace}} | ||
|- | |- | ||
|colspan="2"| {{#var:cost}} '''1200 | |colspan="2"| {{#var:cost}} '''1200 {{Plural|TFH|Rupee}}''' | ||
|- | |- | ||
|rowspan="5"| {{Section|Robowear|[[File:TFH Robowear Icon.png|link=Robowear]]<br>'''{{Term|TFH|Robowear|link}}'''}} | |rowspan="5"| {{Section|Robowear|[[File:TFH Robowear Icon.png|link=Robowear]]<br/>'''{{Term|TFH|Robowear|link}}'''}} | ||
|rowspan="5"| Increases | |rowspan="5"| Increases speed, damage, and pulling power of the {{Term|TFH|Gripshot|link}}. | ||
|rowspan="5"| | |rowspan="5"| Complete the {{Term|TFH|Desert Temple|link}} and {{Term|TFH|Grim Temple|link}}. | ||
| '''1×''' | | '''1×''' | ||
| {{#var:Cucco Feathers}} | | {{#var:Cucco Feathers}} | ||
{{#var:Light}} rowspan="5"| {{Y}} | |||
|- | |- | ||
{{#var:Light}}| '''1×''' | {{#var:Light}}| '''1×''' | ||
| Line 441: | Line 476: | ||
{{#var:Light}}| {{#var:Pretty Plume}} | {{#var:Light}}| {{#var:Pretty Plume}} | ||
|- | |- | ||
|colspan="2"| {{#var:cost}} '''1500 | |colspan="2"| {{#var:cost}} '''1500 {{Plural|TFH|Rupee}}''' | ||
|- | |- | ||
|rowspan="4"| {{Section|Rupee Regalia|[[File:TFH Rupee Regalia Icon.png|link=Rupee Regalia]]<br>'''{{Term|TFH|Rupee Regalia|link}}'''}} | |rowspan="4"| {{Section|Rupee Regalia|[[File:TFH Rupee Regalia Icon.png|link=Rupee Regalia]]<br/>'''{{Term|TFH|Rupee Regalia|link}}'''}} | ||
|rowspan="4"| Causes | |rowspan="4"| Causes {{Plural|TFH|Rupee|link}} to appear more frequently and in pairs when dropped after defeating enemies, cutting grass or breaking {{Plural|TFH|Pot|link}}. This does not apply to all enemies. | ||
|rowspan="4"| | |rowspan="4"| Complete the {{Term|TFH|Water Temple}}, {{Term|TFH|Fire Temple}} and {{Term|TFH|Ice Temple}}. | ||
| '''1×''' | | '''1×''' | ||
| {{#var:Royal Ring}} | | {{#var:Royal Ring}} | ||
{{#var:Dark}} rowspan="4"| {{Y}} | |||
|- | |- | ||
{{#var:Dark}}| '''1×''' | {{#var:Dark}}| '''1×''' | ||
| Line 455: | Line 491: | ||
| {{#var:Fancy Fabric}} | | {{#var:Fancy Fabric}} | ||
|- | |- | ||
{{#var:Dark}} colspan="2"| {{#var:cost}} '''1200 | {{#var:Dark}} colspan="2"| {{#var:cost}} '''1200 {{Plural|TFH|Rupee}}''' | ||
|- | |- | ||
{{#var:Light}} rowspan="6"| {{Section|Serpent's Toga|[[File:TFH Serpent's Toga Icon.png|link=Serpent's Toga]]<br>'''{{Term|TFH|Serpent's Toga|link}}'''}} | {{#var:Light}} rowspan="6"| {{Section|Serpent's Toga|[[File:TFH Serpent's Toga Icon.png|link=Serpent's Toga]]<br/>'''{{Term|TFH|Serpent's Toga|link}}'''}} | ||
{{#var:Light}} rowspan="6"| Turns Link into a statue while standing still, causing enemy attacks to do no damage. | {{#var:Light}} rowspan="6"| Turns {{Term|TFH|Link}} into a statue while standing still, causing enemy attacks to do no damage. | ||
{{#var:Light}} rowspan="6"| | {{#var:Light}} rowspan="6"| Complete {{Term|TFH|The Lady's Lair}}. | ||
{{#var:Light}}| '''1×''' | {{#var:Light}}| '''1×''' | ||
{{#var:Light}}| {{#var:Ice Rose}} | {{#var:Light}}| {{#var:Ice Rose}} | ||
{{#var:Light}} rowspan="6"| {{Y}} | |||
|- | |- | ||
| '''1×''' | | '''1×''' | ||
| Line 475: | Line 512: | ||
{{#var:Light}}| {{#var:Twisted Twig}} | {{#var:Light}}| {{#var:Twisted Twig}} | ||
|- | |- | ||
|colspan="2"| {{#var:cost}} '''1500 | |colspan="2"| {{#var:cost}} '''1500 {{Plural|TFH|Rupee}}''' | ||
|- | |- | ||
|rowspan="5"| {{Section|Showstopper|[[File:TFH Showstopper Icon.png|link=Showstopper]]<br>'''{{Term|TFH|Showstopper|link}}'''}} | |rowspan="5"| {{Section|Showstopper|[[File:TFH Showstopper Icon.png|link=Showstopper]]<br/>'''{{Term|TFH|Showstopper|link}}'''}} | ||
|rowspan="5"| Draws the enemy's attention.<br>Does not work in single-player. | |rowspan="5"| Draws the enemy's attention.<br/>Does not work in single-player. | ||
|rowspan="5"| | |rowspan="5"| Complete the {{Term|TFH|Desert Temple}} and {{Term|TFH|Grim Temple}}. | ||
| '''1×''' | | '''1×''' | ||
| {{#var:Vibrant Brooch}} | | {{#var:Vibrant Brooch}} | ||
{{#var:Dark}} rowspan="5"| {{Y}} | |||
|- | |- | ||
{{#var:Dark}}| '''1×''' | {{#var:Dark}}| '''1×''' | ||
| Line 492: | Line 530: | ||
{{#var:Dark}}| {{#var:Aurora Stone}} | {{#var:Dark}}| {{#var:Aurora Stone}} | ||
|- | |- | ||
|colspan="2"| {{#var:cost}} '''2000 | |colspan="2"| {{#var:cost}} '''2000 {{Plural|TFH|Rupee}}''' | ||
|- | |- | ||
|rowspan="4"| {{Section|Spin Attack Attire|[[File:TFH Spin Attack Attire Icon.png|link=Spin Attack Attire]]<br>'''{{Term|TFH|Spin Attack Attire|link}}'''}} | |rowspan="4"| {{Section|Spin Attack Attire|[[File:TFH Spin Attack Attire Icon.png|link=Spin Attack Attire]]<br/>'''{{Term|TFH|Spin Attack Attire|link}}'''}} | ||
|rowspan="4"| Allows Link to execute a | |rowspan="4"| Allows {{Term|TFH|Link}} to execute a {{Term|TFH|Great Spin|link}}.<br/>{{Plural|TFH|Spin Attack|link}} with this {{Term|TFH|Outfit}} are unaffected by electric, fire, and ice-based enemies. | ||
|rowspan="4"| | |rowspan="4"| Complete the {{Term|TFH|Desert Temple}} and {{Term|TFH|Grim Temple}}. | ||
| '''1×''' | | '''1×''' | ||
| {{#var:Crystal Skull}} | | {{#var:Crystal Skull}} | ||
{{#var:Light}} rowspan="4"| {{Y}} | |||
|- | |- | ||
{{#var:Light}}| '''1×''' | {{#var:Light}}| '''1×''' | ||
| Line 506: | Line 545: | ||
| {{#var:Steel Mask}} | | {{#var:Steel Mask}} | ||
|- | |- | ||
{{#var:Light}} colspan="2"| {{#var:cost}} '''2000 | {{#var:Light}} colspan="2"| {{#var:cost}} '''2000 {{Plural|TFH|Rupee}}''' | ||
|- | |- | ||
{{#var:Dark}} rowspan="4"| {{Section|Sword Suit|[[File:TFH Sword Suit Icon.png|link=Sword Suit]]<br>'''{{Term|TFH|Sword Suit|link}}'''}} | {{#var:Dark}} rowspan="4"| {{Section|Sword Master Suit|[[File:TFH Sword Master Suit Icon.png|link=Sword Master Suit]]<br/>'''{{Term|TFH|Sword Master Suit|link}}'''}} | ||
{{#var:Dark}} rowspan="4"| Allows Link to shoot | {{#var:Dark}} rowspan="4"| Allows {{Term|TFH|Link}} to shoot {{Plural|TFH|Sword Beam}} from his {{Term|TFH|Sword}} at full health, deal double damage, and have twice as much range with his {{Term|TFH|Sword}}. | ||
{{#var:Dark}} rowspan="4"| | {{#var:Dark}} rowspan="4"| Complete the {{Term|TFH|Desert Temple}} and {{Term|TFH|Grim Temple}}. | ||
{{#var:Dark}}| '''1×''' | {{#var:Dark}}| '''1×''' | ||
{{#var:Dark}}| {{#var: | {{#var:Dark}}| {{#var:Golden Insect}} | ||
{{#var:Dark}} rowspan="4"| {{N}}{{Note||Catalog}} | |||
|- | |- | ||
| '''1×''' | {{#var:Dark}}| '''1×''' | ||
| {{#var: | {{#var:Dark}}| {{#var:Gold Dust}} | ||
|- | |- | ||
{{#var:Dark}}| '''1×''' | {{#var:Dark}}| '''1×''' | ||
{{#var:Dark}}| {{#var: | {{#var:Dark}}| {{#var:Fabled Butterfly}} | ||
|- | |- | ||
{{#var:Dark}} colspan="2"| {{#var:cost}} '''2000 {{Plural|TFH|Rupee}}''' | |||
|- | |- | ||
{{#var:Light}} rowspan="4"| {{Section|Sword Suit|[[File:TFH Sword Suit Icon.png|link=Sword Suit]]<br/>'''{{Term|TFH|Sword Suit|link}}'''}} | |||
{{#var:Light}} rowspan="4"| Allows {{Term|TFH|Link}} to shoot {{Plural|TFH|Sword Beam|link}} from his {{Term|TFH|Sword}} at full health, and doubles the damage of his {{Term|TFH|Sword}}'s attacks. | |||
{{#var:Light}} rowspan="4"| Complete the {{Term|TFH|Water Temple}}, {{Term|TFH|Fire Temple}} and {{Term|TFH|Ice Temple}}. | |||
| '''1×''' | {{#var:Light}}| '''1×''' | ||
| {{#var: | {{#var:Light}}| {{#var:Stiff Puff}} | ||
{{#var:Light}} rowspan="4"| {{Y}} | |||
|- | |- | ||
{{#var:Light}}| '''1×''' | {{#var:Light}}| '''1×''' | ||
{{#var:Light}}| {{#var: | {{#var:Light}}| {{#var:Silver Thread}} | ||
|- | |- | ||
| '''1×''' | {{#var:Light}}| '''1×''' | ||
| {{#var: | {{#var:Light}}| {{#var:Royal Ring}} | ||
|- | |- | ||
{{#var:Light}} colspan="2"| {{#var:cost}} ''' | {{#var:Light}} colspan="2"| {{#var:cost}} '''1000 {{Plural|TFH|Rupee}}''' | ||
|- | |- | ||
{{#var:Dark}} rowspan="2"| {{Section|Timeless Tunic|[[File:TFH Timeless Tunic Icon.png|link=Timeless Tunic]]<br>'''{{Term|TFH|Timeless Tunic|link}}'''}} | {{#var:Dark}} rowspan="2"| {{Section|Timeless Tunic|[[File:TFH Timeless Tunic Icon.png|link=Timeless Tunic]]<br/>'''{{Term|TFH|Timeless Tunic|link}}'''}} | ||
{{#var:Dark}} rowspan="2"| Changes the music to resemble chiptune tracks.<br>During multiplayer, only the | {{#var:Dark}} rowspan="2"| Changes the music to resemble chiptune tracks.<br/>During multiplayer, only the {{Term|TFH|Links}} wearing the {{Term|TFH|Outfit}} will hear the changed tracks. | ||
{{#var:Dark}} rowspan="2"| | {{#var:Dark}} rowspan="2"| Unlocked by default. | ||
{{#var:Dark}}| '''3×''' | {{#var:Dark}}| '''3×''' | ||
{{#var:Dark}}| {{#var:Friendly Token}} | {{#var:Dark}}| {{#var:Friendly Token}} | ||
{{#var:Dark}} rowspan="2"| {{N}}{{Note|This {{Term|TFH|Outfit}} appears in the {{Term|TFH|Catalog}} but cannot be purchased due to the required {{Plural|TFH|Material}} being unobtainable.|Catalog2}} | |||
|- | |- | ||
|colspan="2"| {{#var:cost}} '''100 | |colspan="2"| {{#var:cost}} '''100 {{Plural|TFH|Rupee}}''' | ||
|- | |- | ||
|rowspan="4"| {{Section|Tingle Tights|[[File:TFH Tingle Tights Icon.png|link=Tingle Tights]]<br>'''{{Term|TFH|Tingle Tights|link}}'''}} | |rowspan="4"| {{Section|Tingle Tights|[[File:TFH Tingle Tights Icon.png|link=Tingle Tights]]<br/>'''{{Term|TFH|Tingle Tights|link}}'''}} | ||
|rowspan="4"| Provides Link with three balloons. One balloon pops each time Link falls down a pit, allowing him to preserve his | |rowspan="4"| Provides {{Term|TFH|Link}} with three balloons. One balloon pops each time {{Term|TFH|Link}} falls down a pit, allowing him to preserve his Health. | ||
|rowspan="4"| | |rowspan="4"| Complete the {{Term|TFH|Forest Temple}}. | ||
| '''1×''' | | '''1×''' | ||
| {{#var:Fluffy Fuzz}} | | {{#var:Fluffy Fuzz}} | ||
{{#var:Light}} rowspan="4"| {{Y}} | |||
|- | |- | ||
{{#var:Light}}| '''1×''' | {{#var:Light}}| '''1×''' | ||
| Line 556: | Line 599: | ||
| {{#var:Freezard Water}} | | {{#var:Freezard Water}} | ||
|- | |- | ||
{{#var:Light}} colspan="2"| {{#var:cost}} '''1000 | {{#var:Light}} colspan="2"| {{#var:cost}} '''1000 {{Plural|TFH|Rupee}}''' | ||
|- | |- | ||
{{#var:Dark}} rowspan="4"| {{Section|Torrent Robe|[[File:TFH Torrent Robe Icon.png|link=Torrent Robe]]<br>'''{{Term|TFH|Torrent Robe|link}}'''}} | {{#var:Dark}} rowspan="4"| {{Section|Torrent Robe|[[File:TFH Torrent Robe Icon.png|link=Torrent Robe]]<br/>'''{{Term|TFH|Torrent Robe|link}}'''}} | ||
{{#var:Dark}} rowspan="4"| Doubles the size of the | {{#var:Dark}} rowspan="4"| Doubles the size of the {{Term|TFH|Water Rod|link}}'s pillar. | ||
{{#var:Dark}} rowspan="4"| | {{#var:Dark}} rowspan="4"| Complete the {{Term|TFH|Forest Temple}}. | ||
{{#var:Dark}}| '''1×''' | {{#var:Dark}}| '''1×''' | ||
{{#var:Dark}}| {{#var:Fresh Kelp}} | {{#var:Dark}}| {{#var:Fresh Kelp}} | ||
{{#var:Dark}} rowspan="4"| {{Y}} | |||
|- | |- | ||
| '''1×''' | | '''1×''' | ||
| Line 570: | Line 614: | ||
{{#var:Dark}}| {{#var:Aqua Crown}} | {{#var:Dark}}| {{#var:Aqua Crown}} | ||
|- | |- | ||
|colspan="2"| {{#var:cost}} '''600 | |colspan="2"| {{#var:cost}} '''600 {{Plural|TFH|Rupee}}''' | ||
|- | |- | ||
|rowspan="2"| {{Section|Tri Suit|[[File:TFH Tri Suit Icon.png|link=Tri Suit]]<br>'''{{Term|TFH|Tri Suit|link}}'''}} | |rowspan="2"| {{Section|Tri Suit|[[File:TFH Tri Suit Icon.png|link=Tri Suit]]<br/>'''{{Term|TFH|Tri Suit|link}}'''}} | ||
|rowspan="2"| When all three Links wear this outfit, they will have 50% more Energy, dodge 25% of attacks, and find | |rowspan="2"| When all three {{Plural|TFH|Links}} wear this outfit, they will have 50% more Energy, dodge 25% of attacks, and find {{Plural|TFH|Heart}} and {{Plural|TFH|Rupee}} more frequently. | ||
|rowspan="2"| | |rowspan="2"| Unlocked by default. | ||
| '''5×''' | | '''5×''' | ||
| {{#var:Friendly Token}} | | {{#var:Friendly Token}} | ||
{{#var:Light}} rowspan="2"| {{N}}{{Note||Catalog2}} | |||
|- | |- | ||
{{#var:Light}} colspan="2"| {{#var:cost}} '''300 | {{#var:Light}} colspan="2"| {{#var:cost}} '''300 {{Plural|TFH|Rupee}}''' | ||
|- | |- | ||
{{#var:Dark}} rowspan="3"| {{Section|Zora Costume|[[File:TFH Zora Costume Icon.png|link=Zora Costume]]<br>'''{{Term|TFH|Zora Costume|link}}'''}} | {{#var:Dark}} rowspan="3"| {{Section|Zora Costume|[[File:TFH Zora Costume Icon.png|link=Zora Costume]]<br/>'''{{Term|TFH|Zora Costume|link}}'''}} | ||
{{#var:Dark}} rowspan="3"| Allows Link to swim faster in water and swim against strong currents, as well as damage enemies while swimming past them. | {{#var:Dark}} rowspan="3"| Allows {{Term|TFH|Link}} to swim faster in water and swim against strong currents, as well as damage enemies while swimming past them. | ||
{{#var:Dark}} rowspan="3"| | {{#var:Dark}} rowspan="3"| Complete the {{Term|TFH|Forest Temple}}. | ||
{{#var:Dark}}| '''1×''' | {{#var:Dark}}| '''1×''' | ||
{{#var:Dark}}| {{#var:Fresh Kelp}} | {{#var:Dark}}| {{#var:Fresh Kelp}} | ||
{{#var:Dark}} rowspan="3"| {{Y}} | |||
|- | |- | ||
| '''1×''' | | '''1×''' | ||
| {{#var:Zora Scale}} | | {{#var:Zora Scale}} | ||
|- | |- | ||
{{#var:Dark}} colspan="2"| {{#var:cost}} '''400 | {{#var:Dark}} colspan="2"| {{#var:cost}} '''400 {{Plural|TFH|Rupee}}''' | ||
|} | |} | ||
==Trivia== | ==Trivia== | ||
* | *The total cost to to obtain all {{Plural|TFH|Outfit}} is 32,800 {{Plural|TFH|Rupee|link}} and 115 {{Plural|TFH|Material|link}}. | ||
*Crafting certain {{Plural|TFH|Outfit}} will prompt a different sound effect while {{Term|TFH|Madame Couture}} is tailoring them, as opposed to her usual cheer. Crafting the {{Term|TFH|Big Bomb Outfit}} produces an explosion, followed by Couture's coughing. The {{Term|TFH|Tingle Tights}} produce the sound of balloons being blown up, then popping, and Madame exclaiming {{Term|TFH|Tingle|link}}'s signature "Kooloo-Limpah". The {{Term|TFH|Lady's Ensemble}} produces the sound effect of Couture gasping. | |||
*Due to technical limitations of Download Play, 8-bit music had to be created especially for that mode.<ref>{{Cite | *According to the game's official Japanese site, some {{Plural|TFH|Outfit}} are said to contain the souls of individuals skilled in whatever ability they grant. For example, the {{Term|TFH|Spin Attack Attire}} contains the soul of a samurai who trained diligently to master the {{Term|TFH|Spin Attack|link}},<ref>{{Cite Web|quote= {{Exp|Clothing in which the soul of a samurai who trained everyday, mastering the Spin Attack, dwells.|回転斬りの極み日々、鍛錬を欠かさず回転斬りを極めた武士の魂が宿った一着。}}|author= Nintendo|published= September 16, 2015|retrieved=September 24, 2015|url= http://www.nintendo.co.jp/3ds/ea3j/costumes/index.html|title= ゼルダの伝説 トライフォース3銃士 <nowiki>|</nowiki> ニンテンドー3DS <nowiki>|</nowiki> 任天堂|site= Zelda.co.jp|type=}} <sup>(Translation: [http://zeldauniverse.net/forums/index.php/Thread/178050-The-Legend-of-Zelda-TriForce-Heroes-Gameplay-spoilers-beware/?postID=5657575#post5657575 kaialone])</sup></ref> and the {{Term|TFH|Sword Suit}} contains the soul of a swordfighter.<ref>{{Cite Web|quote= {{Exp|Clothing for swordfighting, in which the soul of a swordfighter dwells. Your sword is twice as strong! And it shoots beams too!|剣士の魂が宿った剣使いのための一着。剣の力が2倍に! 剣からビームも!}}|author= Nintendo|published= September 16, 2015|retrieved=September 24, 2015|url= http://www.nintendo.co.jp/3ds/ea3j/costumes/index.html|title= ゼルダの伝説 トライフォース3銃士 <nowiki>|</nowiki> ニンテンドー3DS <nowiki>|</nowiki> 任天堂|site= Zelda.co.jp|type=}} <sup>(Translation: [http://zeldauniverse.net/forums/index.php/Thread/178050-The-Legend-of-Zelda-TriForce-Heroes-Gameplay-spoilers-beware/?postID=5657575#post5657575 kaialone])</sup></ref> Both the {{Term|TFH|Kokiri Clothes}} and the {{Term|TFH|Zora Costume}} contain the souls of members of their tribes, the {{Term|TFH|Kokiri|link}} and {{Plural|TFH|Zora|link}}, respectively.<ref>{{Cite Web|quote= {{Exp|Clothing in which the soul of a member of the Kokiri Tribe, the people of the forest, dwells. They enable you to shoot three arrows at once.|森の民コキリ族の魂が宿った一着。一度に3本の矢を放つことができる。}}|author= Nintendo|published= September 16, 2015|retrieved=September 24, 2015|url= http://www.nintendo.co.jp/3ds/ea3j/costumes/index.html|title= ゼルダの伝説 トライフォース3銃士 <nowiki>|</nowiki> ニンテンドー3DS <nowiki>|</nowiki> 任天堂|site= Zelda.co.jp|type=}} <sup>(Translation: [http://zeldauniverse.net/forums/index.php/Thread/178050-The-Legend-of-Zelda-TriForce-Heroes-Gameplay-spoilers-beware/?postID=5657575#post5657575 kaialone])</sup></ref><ref>{{Cite Web|quote= {{Exp|Clothing in which the soul of a Zora, one of the people of water, dwells. You can swim against the current, and if there is no current, you swim even faster!|水の民ゾーラの魂が宿った一着。 水流の影響を受けず加速での泳ぎも強力に!}}|author= Nintendo|published= September 16, 2015|retrieved=September 24, 2015|url= http://www.nintendo.co.jp/3ds/ea3j/costumes/index.html|title= ゼルダの伝説 トライフォース3銃士 <nowiki>|</nowiki> ニンテンドー3DS <nowiki>|</nowiki> 任天堂|site= Zelda.co.jp|type=}} <sup>(Translation: [http://zeldauniverse.net/forums/index.php/Thread/178050-The-Legend-of-Zelda-TriForce-Heroes-Gameplay-spoilers-beware/?postID=5657575#post5657575 kaialone])</sup></ref> | ||
*Several more | *Due to technical limitations of [[Download Play]], 8-bit music had to be created especially for that mode.<ref>{{Cite Person|quote= This is related to the technical limitations of Download Play. Tri Force Heroes supports Download Play, which allows people to play the game even if they don’t own it by receiving data to Nintendo 3DS. There is a memory limit for Download Play, so music couldn't be transmitted normally. At first we removed the BGM, but as one would except it feels desolate without music. Therefore staff that was responsible of sound said: "If we created NES-like music, the data would become smaller."|name= Hiromasa Shikata|url= http://nintendoeverything.com/zelda-tri-force-heroes-cheer-outfits-idol-origins-how-the-timeless-tunic-came-to-be/|title= Cheer Outfit’s idol origins, how the Timeless Tunic came to be}}</ref> Thus, the {{Term|TFH|Timeless Tunic}} was created, so the 8-bit music could be heard at any time.<ref>{{Cite Person|quote= As we had created NES-like music under these circumstances, you'd want to listen to it when you like to and not just when using Download Play, and thus Timeless Tunic was born.|name= Hiromasa Shikata|url= http://nintendoeverything.com/zelda-tri-force-heroes-cheer-outfits-idol-origins-how-the-timeless-tunic-came-to-be/|title= Cheer Outfit’s idol origins, how the Timeless Tunic came to be}}</ref> | ||
*Some | *Several more {{Plural|TFH|Outfit}} were planned during the game's development. These include the Stinky Costume which would keep enemies at bay, the Kansai Outfit which would put the {{Plural|TFH|Status Report|link}} into the Kansai dialect of Japanese,<ref>{{Cite Person|quote= There weren't any outfits that we created but ended up cutting from the game, but we did abandon a few ideas in the planning phase. Let's see... We thought about creating a "Stinky Costume" which would keep {{Plural|TFH|Enemy}} at bay, or a "Kansai Outfit" which would put the situation reports into the Kansai dialect of Japanese.|name= Hiromasa Shikata|url= https://web.archive.org/web/20171104193912/https://miiverse.nintendo.net/replies/AYMHAAACAAADVHkor8L_IA|title= Tri Force Heroes Miiting part 2}}</ref> the Emperor's New Clothes which would make {{Term|TFH|Link}} look naked to others, the Handsome Outfit that made {{Term|TFH|Link}} look good in photos,<ref>{{Cite Person|quote= We also considered "Emperor's New Clothes", which would make you look naked to other players, and a "Handsome Outfit" that made you look really cool in photos.|name= Mikiharu Oiwa|url= https://web.archive.org/web/20171104193912/https://miiverse.nintendo.net/replies/AYMHAAACAAADVHkor8L_IA|title= Tri Force Heroes Miiting part 2}}</ref> and a [[Great Fairy]] Outfit.<ref>{{Cite Web|quote= |author= Pedalpowerluigi|published= November 5, 2015|retrieved= November 23, 2015|url= https://www.youtube.com/watch?v=oRjkl36Nj2A|title= Tri Force Heroes: Unused Great Fairy Link Outfit|site= YouTube|type=}}</ref> | ||
** | *Some {{Plural|TFH|Outfit}} appear to be based on characters from other [[Nintendo]] games and other non-Nintendo media: | ||
**The Tri Suit appears to be loosely based on the uniforms from the ''{{Wp|Super Sentai}}'' series (otherwise known as ''{{Wp|Power Rangers}}'' in the West). | **{{Term|TFH|Hammerwear}} is based on the {{smw|Hammer Bro|Hammer Bros.}} from the {{smw|Mario (series)|''Mario'' series}}.<ref>{{Cite|Did you use a koopon to buy that? I mean, a coupon? ♥|Stylish Woman|TFH}}</ref> Its name in the French translations, Carapace Marto ("Marto Shell"), furthers this reference. Marto is a misspelling of marteau ("hammer") made to resemble the name Mario.{{Note|As evidenced by the word "Marto" being capitalized, whereas improper nouns ("marteau") remain lower-case in French.}} | ||
**The Queen of Hearts and Jack of Hearts | **The {{Term|TFH|Tri Suit}} appears to be loosely based on the uniforms from the ''{{Wp|Super Sentai}}'' series (otherwise known as ''{{Wp|Power Rangers}}'' in the West). | ||
**The Cozy Parka appears to be based on Popo from ''{{Wp|Ice Climber}}'', whose garb is strikingly similar. | **The {{Term|TFH|Queen of Hearts}} and {{Term|TFH|Jack of Hearts}} {{Plural|TFH|Outfit}} are likely a reference to the Queen of Hearts and the Card Soldiers from the book ''{{Wp|Alice's Adventures in Wonderland}}''. | ||
**The {{Term|TFH|Cozy Parka}} appears to be based on Popo from ''{{Wp|Ice Climber}}'', whose garb is strikingly similar. | |||
**The {{Term|TFH|Dapper Spinner}} may be a reference to the outfits worn by {{Wp|The Three Musketeers}}. | |||
**Concept art for the {{Term|TFH|Cursed Tights}} resembled the Blue Pikmin from the ''{{Pk|Pikmin series|Pikmin}}'' series. | |||
==Gallery== | ==Gallery== | ||
<gallery> | <gallery> | ||
File:TFH Links Artwork.png|The Links standing on a Triforce Gateway while wearing different | File:TFH Links Artwork.png|The {{Plural|TFH|Links}} standing on a {{Term|TFH|Triforce Gateway}} while wearing different {{Plural|TFH|Outfit}} | ||
File:TFH | File:TFH Stalchampion Artwork.png|The {{Plural|TFH|Links}} fighting {{Term|TFH|Stalchampion|link}} with different {{Plural|TFH|Outfit}} | ||
File:TFH Links Map.png|The Links observing a Map while wearing different | File:TFH Links Map.png|The {{Plural|TFH|Links}} observing a Map while wearing different {{Plural|TFH|Outfit}} | ||
File:TFH Energy Gear Artwork.png|Blue | File:TFH Energy Gear Artwork.png|Blue {{Term|TFH|Links}} wearing the {{Term|TFH|Energy Gear}} | ||
File:TFH Cheetah Costume Artwork.png|Red | File:TFH Cheetah Costume Artwork.png|Red {{Term|TFH|Links}} wearing the {{Term|TFH|Cheetah Costume}} | ||
File:TFH Red Link Cacto Clothes Artwork.png|Red | File:TFH Red Link Cacto Clothes Artwork.png|Red {{Term|TFH|Links}} trying on the {{Term|TFH|Cacto Clothes}} | ||
File:TFH Blue Link Lucky Loungewear Artwork.png|Blue | File:TFH Blue Link Lucky Loungewear Artwork.png|Blue {{Term|TFH|Links}} trying on the {{Term|TFH|Lucky Loungewear}} | ||
File:TFH Link Sign.png|Link wearing the Bear Minimum | File:TFH Link Sign.png|{{Term|TFH|Link}} wearing the {{Term|TFH|Bear Minimum}} while reading a Sign | ||
File:TFH Link Hero's Tunic.png|Link trying on the Hero's Tunic | File:TFH Link Hero's Tunic.png|{{Term|TFH|Link}} trying on the {{Term|TFH|Hero's Tunic}} | ||
File:TFH Link Sword Suit EN.png|Link posing after donning the Sword Suit | File:TFH Link Sword Suit EN.png|{{Term|TFH|Link}} posing after donning the {{Term|TFH|Sword Suit}} | ||
File:TFH Outfits Concept Art.jpg|Concept art of several | File:TFH Outfits Concept Art.jpg|Concept art of several {{Plural|TFH|Outfit}} | ||
File:TFH Cheer Outfit Concept Art.jpg|Concept art of the Cheer Outfit | File:TFH Cheer Outfit Concept Art.jpg|Concept art of the {{Term|TFH|Cheer Outfit}} | ||
</gallery> | </gallery> | ||
Latest revision as of 18:46, 25 November 2023
- For other items similar to Outfits, see Clothes (Disambiguation).
Outfits are special articles of Clothing which empower the Links with special abilities in Tri Force Heroes.[1]
Locations and Uses
Outfits grant each Link a special ability based on the theme of the attire. Certain Outfits may bolster a Link's defensive capabilities, while others may increase the power or range of certain weapons. Most Outfits are obtained by making custom orders at Madame Couture's, and providing Madame Couture with Materials and Rupees collected from Levels. Initially, only seven Outfits are available for order (besides the Bear Minimum worn by Link at the onset of his adventure), with many more becoming unlocked as Link meets certain conditions; mainly, clearing Levels in the Drablands. Link can change Outfits in the Fitting Room.
When two or more Links have gathered and each has been assigned a color—green, blue, or red—some elements of their Outfits may change colors accordingly. For example, the Hero's Tunic, Kokiri Clothes and Tingle Tights are changed completely to match a Link's assigned color. Some Outfits like the Cacto Clothes and Goron Garb have small portions that change color. Others like the Legendary Dress and Linebeck's Uniform do not change color at all, making the Links' hair colors their only distinguishing feature. Certain Outfits also change the appearance of the Sword that each Link uses.[2]
Miiverse stamps for each obtained Outfit are available for use in the Miiverse Gallery.[3]
If any of the Links have joined the game via Download Play, they will be wearing the Hero's Tunic by default. Custom orders for new Outfits can be placed by speaking to Madame Couture's Apprentice inside the Multiplayer lobby.[4] However, as the Apprentice is slower at tailoring than Madame Couture herself, the Outfit will not be completed until the Links return from the next Level they visit.[5] Additionally, the Apprentice can only craft up to two Outfits for each Link,[6] and some Outfits are unavailable due to the nature of Download Play not allowing for certain unlocking conditions to be met, or certain Materials to be collected.
List of Outfits
| Outfit | Effect | Unlock Condition | Cost | Obtainable in Download Play? | |
|---|---|---|---|---|---|
Bear Minimum |
Forces Link to take double damage and also reduces one Heart Container from the Links' total capacity. After acquiring 30 Hero Points it grants two extra Heart Containers, a sparkling visual effect and a high chance to dodge attacks, but Link still takes double damage. |
Link's default Outfit. | |||
Big Bomb Outfit |
Transforms all Bombs used into Big Bombs. | Unlocked by default. | 1x | ||
| 1× | |||||
Boomeranger |
Allows larger Boomerangs to pass through and damage foes. Can also carry over two Links at once. | Complete the Forest Temple. | 1× | ||
| 1× | |||||
| 1× | |||||
Cacto Clothes |
Damages foes that come in contact with it. | Complete the Forest Temple. | 1× | ||
| 1× | |||||
Cheer Outfit |
Increases Link's allies' Energy Gauges by 50%. In single-player, increases all Links' Energy Gauges by 50%. |
When the Street Merchant arrives. (Complete three Levels or Challenges) |
3× | ||
Cheetah Costume |
Allows Link to run at a faster pace. | Complete the Water Temple, Fire Temple and Ice Temple. | 1× | ||
| 1× | |||||
| 1× | |||||
Cozy Parka |
Gives Link better traction on ice and prevents him from becoming frozen. Also allows Link to attack ice-based enemies without freezing. | Complete the Forest Temple. | 1× | ||
| 1× | |||||
Cursed Tights |
Allows Link to dodge 50% of attacks, but attacks that do hit deal twice as much damage. | Gift from King Tuft after breaking the curse on Princess Styla. | |||
Dapper Spinner |
Allows Link to execute quick Spin Attacks by pressing the B Button three times in a row. | Lose in Daily Riches five times. | 10× | ||
Dunewalker Duds |
Allows Link to safely walk on quicksand. | Complete The Lady's Lair. | 1× | ||
| 1× | |||||
| 1× | |||||
Energy Gear |
Increases Link's Energy Gauge by 50%. In single-player, increases all Links' Energy Gauges by 50%. |
Complete the Forest Temple. | 1× | ||
| 1× | |||||
| 1× | |||||
| 1× | |||||
Fierce Deity Armor |
Added through the Version 2.0.0 update. Doubles the damage of the Sword and allows Link to shoot four Sword Beams around him. These Beams are also fired when performing a Spin Attack, even when health is not full. Additionally Link remains steadfast at all times and won't get knocked back from enemies. |
Obtained by completing the Den of Trials for the first time. | |||
Fire Blazer |
Allows Link to shoot three fireballs at once with the Fire Gloves. | Complete The Lady's Lair. | 1× | ||
| 1× | |||||
| 1× | |||||
Goron Garb |
Allows Link to swim through lava and pass through fire unharmed. Also allows Link to attack fire-based enemies without being harmed. | Complete the Forest Temple. | 1× | ||
| 1× | |||||
Gust Garb |
Increases the Gust Jar's firing speed and reach. | Complete The Lady's Lair. | 1× | ||
| 1× | |||||
| 1× | |||||
Hammerwear |
Makes the Magic Hammer twice as powerful. It can be swung more quickly, and creates a shock wave. | Complete the Forest Temple. | 1× | ||
| 1× | |||||
| 1× | |||||
| 1× | |||||
Hero's Tunic |
None. | Unlocked by default. | 1× | ||
Jack of Hearts |
Gives the Links an extra Heart Container. | Complete the Forest Temple. | 1× | ||
| 1× | |||||
| 1× | |||||
Kokiri Clothes |
Allows Link to shoot three Arrows at once with the Bow. | Unlocked by default. | 1× | ||
| 1× | |||||
Lady's Ensemble |
Causes Hearts to appear more frequently and adds one Heart Container to the Links' total capacity. | Complete the Forest Temple. | 1× | ||
| 1× | |||||
| 1× | |||||
Legendary Dress |
Causes Hearts to appear more frequently. | Unlocked by default. | 1× | ||
| 1× | |||||
Light Armor |
Illuminates the area around Link. In Coliseum matches, it burns the other Links when touched. |
Complete The Lady's Lair. | 1× | ||
| 1× | |||||
| 1× | |||||
Linebeck's Uniform |
Added through the Version 2.0.0 update. Allows Link to see the contents of Treasure Chests, including Material chests, before opening them. Does not work on the Daily Riches Treasure Chests. In multiplayer, if one Link wears the Outfit, then all Links will be able to see the contents of chests. Does not work after switching Doppels. In timed Drablands Challenges, this Outfit also gives 10 extra seconds for each Link wearing it at the start of the Level, and grants 50% more time for each Hourglass picked up (but only if the Link who picks up the Hourglass is wearing the Outfit). |
Unlock the Den of Trials. (Complete nine Levels or Challenges) |
1× | ||
| 1× | |||||
| 1× | |||||
| 1× | |||||
| 1× | |||||
Lucky Loungewear |
Allows Link to dodge 25% of attacks. | Unlocked by default. | 1× | ||
| 1× | |||||
| 1× | |||||
Ninja Gi |
Allows Link to Dash Attack instantly and do triple damage while dashing. | Complete The Lady's Lair. | 1× | ||
| 1× | |||||
| 1× | |||||
| 1× | |||||
| 1× | |||||
Queen of Hearts |
Gives the Links three extra Heart Containers. | Complete the Water Temple, Fire Temple and Ice Temple. | 1× | ||
| 1× | |||||
| 1× | |||||
| 1× | |||||
Robowear |
Increases speed, damage, and pulling power of the Gripshot. | Complete the Desert Temple and Grim Temple. | 1× | ||
| 1× | |||||
| 1× | |||||
| 1x | |||||
Rupee Regalia |
Causes Rupees to appear more frequently and in pairs when dropped after defeating enemies, cutting grass or breaking Jars. This does not apply to all enemies. | Complete the Water Temple, Fire Temple and Ice Temple. | 1× | ||
| 1× | |||||
| 1× | |||||
Serpent's Toga |
Turns Link into a statue while standing still, causing enemy attacks to do no damage. | Complete The Lady's Lair. | 1× | ||
| 1× | |||||
| 1× | |||||
| 1× | |||||
| 1× | |||||
Showstopper |
Draws the enemy's attention. Does not work in single-player. |
Complete the Desert Temple and Grim Temple. | 1× | ||
| 1× | |||||
| 1× | |||||
| 1x | |||||
Spin Attack Attire |
Allows Link to execute a Great Spin Attack. Spin Attacks with this Outfit are unaffected by electric, fire, and ice-based enemies. |
Complete the Desert Temple and Grim Temple. | 1× | ||
| 1× | |||||
| 1× | |||||
Sword Master Suit |
Allows Link to shoot Sword Beams from his Sword at full health, deal double damage, and have twice as much range with his Sword. | Complete the Desert Temple and Grim Temple. | 1× | ||
| 1× | |||||
| 1× | |||||
Sword Suit |
Allows Link to shoot Sword Beams from his Sword at full health, and doubles the damage of his Sword's attacks. | Complete the Water Temple, Fire Temple and Ice Temple. | 1× | ||
| 1× | |||||
| 1× | |||||
Timeless Tunic |
Changes the music to resemble chiptune tracks. During multiplayer, only the Link wearing the Outfit will hear the changed tracks. |
Unlocked by default. | 3× | ||
Tingle Tights |
Provides Link with three balloons. One balloon pops each time Link falls down a pit, allowing him to preserve his Health. | Complete the Forest Temple. | 1× | ||
| 1× | |||||
| 1× | |||||
Torrent Robe |
Doubles the size of the Water Rod's pillar. | Complete the Forest Temple. | 1× | ||
| 1× | |||||
| 1× | |||||
Tri Suit |
When all three Links wear this outfit, they will have 50% more Energy, dodge 25% of attacks, and find Hearts and Rupees more frequently. | Unlocked by default. | 5× | ||
Zora Costume |
Allows Link to swim faster in water and swim against strong currents, as well as damage enemies while swimming past them. | Complete the Forest Temple. | 1× | ||
| 1× | |||||
Trivia
- The total cost to to obtain all Outfits is 32,800 Rupees and 115 Materials.
- Crafting certain Outfits will prompt a different sound effect while Madame Couture is tailoring them, as opposed to her usual cheer. Crafting the Big Bomb Outfit produces an explosion, followed by Couture's coughing. The Tingle Tights produce the sound of balloons being blown up, then popping, and Madame exclaiming Tingle's signature "Kooloo-Limpah". The Lady's Ensemble produces the sound effect of Couture gasping.
- According to the game's official Japanese site, some Outfits are said to contain the souls of individuals skilled in whatever ability they grant. For example, the Spin Attack Attire contains the soul of a samurai who trained diligently to master the Spin Attack,[7] and the Sword Suit contains the soul of a swordfighter.[8] Both the Kokiri Clothes and the Zora Costume contain the souls of members of their tribes, the Kokiri and Zora, respectively.[9][10]
- Due to technical limitations of Download Play, 8-bit music had to be created especially for that mode.[11] Thus, the Timeless Tunic was created, so the 8-bit music could be heard at any time.[12]
- Several more Outfits were planned during the game's development. These include the Stinky Costume which would keep enemies at bay, the Kansai Outfit which would put the Status Reports into the Kansai dialect of Japanese,[13] the Emperor's New Clothes which would make Link look naked to others, the Handsome Outfit that made Link look good in photos,[14] and a Great Fairy Outfit.[15]
- Some Outfits appear to be based on characters from other Nintendo games and other non-Nintendo media:
- Hammerwear is based on the Hammer Bros. from the Mario series.[16] Its name in the French translations, Carapace Marto ("Marto Shell"), furthers this reference. Marto is a misspelling of marteau ("hammer") made to resemble the name Mario.[note 4]
- The Tri Suit appears to be loosely based on the uniforms from the Super Sentai series (otherwise known as Power Rangers in the West).
- The Queen of Hearts and Jack of Hearts Outfits are likely a reference to the Queen of Hearts and the Card Soldiers from the book Alice's Adventures in Wonderland.
- The Cozy Parka appears to be based on Popo from Ice Climber, whose garb is strikingly similar.
- The Dapper Spinner may be a reference to the outfits worn by The Three Musketeers.
- Concept art for the Cursed Tights resembled the Blue Pikmin from the Pikmin series.
Gallery
-
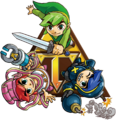
The Links standing on a Triforce Gateway while wearing different Outfits
-
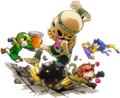
The Links fighting Stalchampion with different Outfits
-
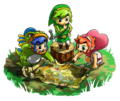
The Links observing a Map while wearing different Outfits
-

Blue Link wearing the Energy Gear
-

Red Link wearing the Cheetah Costume
-
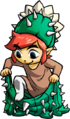
Red Link trying on the Cacto Clothes
-

Blue Link trying on the Lucky Loungewear
-
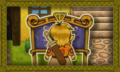
Link wearing the Bear Minimum while reading a Sign
-
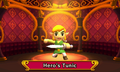
Link trying on the Hero's Tunic
-
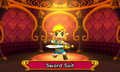
Link posing after donning the Sword Suit
-
Concept art of several Outfits
-
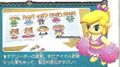
Concept art of the Cheer Outfit


Notes
- ↑ 1.0 1.1 1.2 1.3 This Outfit can appear in the Catalog but cannot be purchased due to the required Materials being unobtainable.
- ↑ Link's default Outfit when joining the game via Download Play.
- ↑ 3.0 3.1 This Outfit appears in the Catalog but cannot be purchased due to the required Materials being unobtainable.
- ↑ As evidenced by the word "Marto" being capitalized, whereas improper nouns ("marteau") remain lower-case in French.
References
- ↑ "OUTFITS" — The Legend of Zelda™: Tri Force Heroes for Nintendo 3DS - Official Site - Gameplay Pictures, Videos , Zelda.com, published January 12, 2016, retrieved December 2, 2019.
- ↑ "I love that with my costume, like, it also changes my sword. I have, like, a different sword than you guys." — Eric Smith, Nintendo Treehouse Live @ E3 2015 Day 1 The Legend of Zelda: Tri Force Heroes , YouTube (Video), published June 17, 2015, retrieved August 18, 2015.
- ↑ "By the way, did you know? If you buy an outfit here, you can use it as a stamp in Miiverse. Try it!" — Stylish Woman (Tri Force Heroes)
- ↑ "If you need some new clothes, I'm at your service! I'll help you as a special favor, just...please don't tell Madame! Let's see...You're currently wearing the Hero's Tunic. Which outfit would you like to order?" — Madame Couture's Apprentice (Tri Force Heroes)
- ↑ "Wonderful! I'll get right on that. Remember that things like this take time. Please be patient! I'll be sure to have it finished by time you've completed your next mission. Look forward to it!" — Madame Couture's Apprentice (Tri Force Heroes)
- ↑ "Er, I hate to burst your bubble, but... Madame is sure to find out about this arrangement of ours if we keep this up. Sorry, but I can't risk that. Mostly because Madame is terrifying when she's angry. That said, if you want more outfits, you'll have to visit Madame Couture's shop in town. I think you need something called a "full version of the game" to go there. Whatever THAT means..." — Madame Couture's Apprentice (Tri Force Heroes)
- ↑ "回転斬りの極み日々、鍛錬を欠かさず回転斬りを極めた武士の魂が宿った一着。" — Nintendo, ゼルダの伝説 トライフォース3銃士 | ニンテンドー3DS | 任天堂 , Zelda.co.jp, published September 16, 2015, retrieved September 24, 2015. (Translation: kaialone)
- ↑ "剣士の魂が宿った剣使いのための一着。剣の力が2倍に! 剣からビームも!" — Nintendo, ゼルダの伝説 トライフォース3銃士 | ニンテンドー3DS | 任天堂 , Zelda.co.jp, published September 16, 2015, retrieved September 24, 2015. (Translation: kaialone)
- ↑ "森の民コキリ族の魂が宿った一着。一度に3本の矢を放つことができる。" — Nintendo, ゼルダの伝説 トライフォース3銃士 | ニンテンドー3DS | 任天堂 , Zelda.co.jp, published September 16, 2015, retrieved September 24, 2015. (Translation: kaialone)
- ↑ "水の民ゾーラの魂が宿った一着。 水流の影響を受けず加速での泳ぎも強力に!" — Nintendo, ゼルダの伝説 トライフォース3銃士 | ニンテンドー3DS | 任天堂 , Zelda.co.jp, published September 16, 2015, retrieved September 24, 2015. (Translation: kaialone)
- ↑ "This is related to the technical limitations of Download Play. Tri Force Heroes supports Download Play, which allows people to play the game even if they don’t own it by receiving data to Nintendo 3DS. There is a memory limit for Download Play, so music couldn't be transmitted normally. At first we removed the BGM, but as one would except it feels desolate without music. Therefore staff that was responsible of sound said: "If we created NES-like music, the data would become smaller."" —Hiromasa Shikata (Cheer Outfit’s idol origins, how the Timeless Tunic came to be.)
- ↑ "As we had created NES-like music under these circumstances, you'd want to listen to it when you like to and not just when using Download Play, and thus Timeless Tunic was born." —Hiromasa Shikata (Cheer Outfit’s idol origins, how the Timeless Tunic came to be.)
- ↑ "There weren't any outfits that we created but ended up cutting from the game, but we did abandon a few ideas in the planning phase. Let's see... We thought about creating a "Stinky Costume" which would keep Enemies at bay, or a "Kansai Outfit" which would put the situation reports into the Kansai dialect of Japanese." —Hiromasa Shikata (Tri Force Heroes Miiting part 2.)
- ↑ "We also considered "Emperor's New Clothes", which would make you look naked to other players, and a "Handsome Outfit" that made you look really cool in photos." —Mikiharu Oiwa (Tri Force Heroes Miiting part 2.)
- ↑ Pedalpowerluigi, Tri Force Heroes: Unused Great Fairy Link Outfit , YouTube, published November 5, 2015, retrieved November 23, 2015.
- ↑ "Did you use a koopon to buy that? I mean, a coupon? ♥" — Stylish Woman (Tri Force Heroes)