Torch (Object): Difference between revisions
m (CamelChip moved page Torchlight to Torch (Object): Latest Term (TotK)) |
No edit summary |
||
| (4 intermediate revisions by 4 users not shown) | |||
| Line 1: | Line 1: | ||
{{Improve}} | {{Improve}} | ||
{{Hatnote|This article is about the recurring {{Term|Series|Object|link}} in {{TLoZ|Series}}. For the recurring {{Term|Series|Weapon|link}} of the same name, see {{Term|Series|Torch|link}}.}} | |||
{{Infobox Object | {{Infobox Object | ||
|image= | |image= | ||
{{Media | {{Media | ||
|Artwork ALttP= File:ALttP Torch Artwork.jpg | |Artwork ALttP= File:ALttP Torch Artwork.jpg | ||
|Model LANS= File:LANS Torch Model.png | |||
|Model OoT= File:OoT Torch Model.png | |Model OoT= File:OoT Torch Model.png | ||
|Model OoT3D= File:OoT3D Torch Model.png | |Model OoT3D= File:OoT3D Torch Model.png | ||
| Line 18: | Line 19: | ||
|Model SSHD= File:SSHD Torch Model.png | |Model SSHD= File:SSHD Torch Model.png | ||
|Model ALBW= File:ALBW Brazier Model.png | |Model ALBW= File:ALBW Brazier Model.png | ||
|Model BotW= File:BotW Torch | |Model BotW= File:BotW Torch Model 2.png | ||
|Model TotK= File:TotK Torch | |Model TotK= File:TotK Torch Model 2.png | ||
|Sprite ALttP= File:ALttP Torchlight Sprite.png | |Sprite ALttP= File:ALttP Torchlight Sprite.png | ||
|Sprite LA= File:LA Lamp Sprite.png | |||
|Sprite LADX= File:LADX Lamp Sprite.png | |||
|Sprite OoS= File:OoS Face Lamp Sprite.png | |Sprite OoS= File:OoS Face Lamp Sprite.png | ||
|Sprite OoA= File:OoA Face Lamp Sprite.png | |Sprite OoA= File:OoA Face Lamp Sprite.png | ||
|Sprite FS= File:FS Lamp Sprite.png | |Sprite FS= File:FS Lamp Sprite.png | ||
|Sprite FSA= File:FSA Torch Sprite.png | |Sprite FSA= File:FSA Torch Sprite.png | ||
|Sprite TMC= File:TMC | |Sprite TMC= File:TMC Torch Sprite.png | ||
}} | }} | ||
|caption= | |caption= | ||
|game= ALttP, LA, OoT, MM, OoS, OoA, FS, TWW, FSA, TMC, TP, PH, ST, SS, ALBW, BotW, TotK | |game= ALttP, LA, OoT, MM, OoS, OoA, FS, TWW, FSA, TMC, TP, PH, ST, SS, ALBW, BotW, TotK | ||
|other= HW | |other= HW, CoH | ||
|uses= {{List|Lighting dark areas, Solving puzzles}} | |uses= {{List|Lighting dark areas, Solving puzzles}} | ||
|comp= | |comp= | ||
}} | }} | ||
{{Term/Store|Torch|Torches|Series, ALttP, OoT, OoT3D, FS, TWW, TWWHD, FSA, TotK|plural}},{{Exp Game|ALttP, OoT, MM, FS, TWW, FSA, TotK}}<ref>{{Cite Guide|quote= |game= ALttP |guide= Nintendo |page= 32}}</ref><ref>{{Cite Guide|game= OoT |publisher= Prima |page= 78}}</ref><ref>{{Cite|This... This {{Color|OoT3D White|torch}} looks like the ones we saw at the entrance to the temple, doesn't it?|Navi|OoT3D}}</ref><ref>{{Cite|I'm going to light the {{Color|MM3D Red|torches}} on each of the surrounding {{Color|MM3D Red|four islands}} in a particular order. {{Color|MM3D Red|Jump}} to the island that has the {{Color|MM3D Red|lit torch}}. If you can jump to it before the torch goes out, you'll get {{Color|MM3D Red|one point}}!|Fisherman|MM3D}}</ref><ref>{{Cite Guide|game= ALttP&FS |guide= Prima |page= 177 {{Exp Game|FS}}}}</ref><ref>{{Cite Guide|quote= |game= TWW |publisher= Prima |page= 12}}</ref><ref>{{Cite Guide|game= FSA |publisher= Nintendo |page= 102}}</ref><ref>{{Cite|I'll hide it in the {{Color|TotK Red|throne room}} so he won't find it until after our investigation. Even he would never expect that the {{Color|TotK Red|torches}} are the key.|Zelda's Diary|TotK}}</ref> also known as {{Term/Store|Lamp|Lamps|LA, LADX|plural}},{{Exp Game|LA}}<ref>{{Cite Guide|game= LA |publisher= Nintendo |page= 91}}</ref> {{Term/Store|Torchlight|Torchlights|MM, MM3D|plural}},{{Exp Game|MM}}<ref>{{Cite|Now... The next thing we have to do is something about the {{Color|MM3D Red|torchlights}} in this room...|Goron|MM3D}}</ref> and {{Term/Store|Brazier|Braziers|ALBW|plural}},{{Exp Game|ALBW}}<ref>{{Cite Guide|quote= |game= ALBW |publisher= Prima |page= 16}}</ref> are recurring {{Plural|Series|Object|link}} in {{TLoZ|Series}}. | {{Term/Store|Torch|Torches|Series, ALttP, OoT, OoT3D, FS, TWW, TWWHD, FSA, BotW, TotK|plural}},{{Exp Game|ALttP, OoT, MM, FS, TWW, FSA, BotW, TotK}}<ref>{{Cite Guide|quote= |game= ALttP |guide= Nintendo |page= 32}}</ref><ref>{{Cite Guide|game= OoT |publisher= Prima |page= 78}}</ref><ref>{{Cite|This... This {{Color|OoT3D White|torch}} looks like the ones we saw at the entrance to the temple, doesn't it?|Navi|OoT3D}}</ref><ref>{{Cite|I'm going to light the {{Color|MM3D Red|torches}} on each of the surrounding {{Color|MM3D Red|four islands}} in a particular order. {{Color|MM3D Red|Jump}} to the island that has the {{Color|MM3D Red|lit torch}}. If you can jump to it before the torch goes out, you'll get {{Color|MM3D Red|one point}}!|Fisherman|MM3D}}</ref><ref>{{Cite Guide|game= ALttP&FS |guide= Prima |page= 177 {{Exp Game|FS}}}}</ref><ref>{{Cite Guide|quote= |game= TWW |publisher= Prima |page= 12}}</ref><ref>{{Cite Guide|game= FSA |publisher= Nintendo |page= 102}}</ref><ref>{{Cite|You forgot already?! You were going to {{Color|BotW Red|light}} the {{Color|BotW Red|torches}} by the {{Color|BotW Red|Goddess Statue}}. I'm looking forward to it, so don't mess it up!|Rola|BotW}}</ref><ref>{{Cite|I'll hide it in the {{Color|TotK Red|throne room}} so he won't find it until after our investigation. Even he would never expect that the {{Color|TotK Red|torches}} are the key.|Zelda's Diary|TotK}}</ref> also known as {{Term/Store|Lamp|Lamps|LA, LADX|plural}},{{Exp Game|LA}}<ref>{{Cite Guide|game= LA |publisher= Nintendo |page= 91}}</ref> {{Term/Store|Torchlight|Torchlights|MM, MM3D|plural}},{{Exp Game|MM}}<ref>{{Cite|Now... The next thing we have to do is something about the {{Color|MM3D Red|torchlights}} in this room...|Goron|MM3D}}</ref> and {{Term/Store|Brazier|Braziers|ALBW, CoH|plural}},{{Exp Game|ALBW, CoH}}<ref>{{Cite Guide|quote= |game= ALBW |publisher= Prima |page= 16}}</ref><ref>{{Cite|Long ago, I added a secret mechanism to the {{Color|CoH Blue|brazier}} on the right of the entrance hall.|King of Hyrule|CoH}}</ref> are recurring {{Plural|Series|Object|link}} in {{TLoZ|Series}}.{{Name Ref|LANS}} | ||
==Location and Uses== | ==Location and Uses== | ||
| Line 46: | Line 49: | ||
==={{ALttP|-}}=== | ==={{ALttP|-}}=== | ||
{{Stub|ALttP}} | {{Stub|ALttP}} | ||
==={{LA|-}}=== | |||
{{Stub|LA}} | |||
==={{OoT|-}}=== | ==={{OoT|-}}=== | ||
| Line 95: | Line 101: | ||
{{Noncanon|End}} | {{Noncanon|End}} | ||
==={{CoH|-}}=== | |||
{{Ambig|Start}} | |||
{{Stub|CoH}} | |||
{{Ambig|End}} | |||
==Nomenclature== | ==Nomenclature== | ||
| Line 101: | Line 113: | ||
==Gallery== | ==Gallery== | ||
<gallery> | <gallery> | ||
File:TMC Torchlight Sprite 2.png|A {{Term|TMC|Torchlight}} in {{Term|TMC|Dark Hyrule Castle}} from {{TMC|-}} | File:TMC Torchlight Sprite 2.png|A stationary {{Term|TMC|Torchlight}} in {{Term|TMC|Dark Hyrule Castle}} from {{TMC|-}} | ||
File:Torch2 TP.png|A {{Term|TP| | File:Torch2 TP.png|A stationary {{Term|TP|Torch}} from {{TP|-}} | ||
File:Torch3 TP.png|A {{Term|TP| | File:Torch3 TP.png|A stationary {{Term|TP|Torch}} from {{TP|-}} | ||
File:Torch4 TP.png|A {{Term|TP| | File:Torch4 TP.png|A stationary {{Term|TP|Torch}} from {{TP|-}} | ||
File:Torch5 TP.png|A {{Term|TP| | File:Torch5 TP.png|A stationary {{Term|TP|Torch}} from {{TP|-}} | ||
File:Torch6 TP.png|A {{Term|TP| | File:Torch6 TP.png|A stationary {{Term|TP|Torch}} from {{TP|-}} | ||
File:Torch7 TP.png|A {{Term|TP| | File:Torch7 TP.png|A stationary {{Term|TP|Torch}} from {{TP|-}} | ||
File:TPHD Lakebed Temple Wall Torch Model.png|A wall {{Term|TPHD|Torch}} | File:TPHD Lakebed Temple Wall Torch Model.png|A wall {{Term|TPHD|Torch}} from {{TPHD|-}} | ||
File:SS Unlit Torches.png|Unlit {{Plural|SS| | File:SS Unlit Torches.png|Unlit stationary {{Plural|SS|Torch}} from {{SS|-}} | ||
File:SS Lit Torches.png|Lit {{Plural|SS| | File:SS Lit Torches.png|Lit stationary {{Plural|SS|Torch}} from {{SS|-}} | ||
File:ALBW Torches.png|{{Plural|ALBW| | File:ALBW Torches.png|A stationary {{Plural|ALBW|Brazier}} from {{ALBW|-}} | ||
File:HW Torch Model.png|A {{Term|HW| | File:HW Torch Model.png|A stationary {{Term|HW|Torch}} from {{HW|-}} | ||
File:CoH Brazier Sprite.png|An unlit {{Term|CoH|Brazier}} from {{CoH|-}} | |||
File:CoH Brazier Lit Sprite.png|A lit {{Term|CoH|Brazier}} from {{CoH|-}} | |||
</gallery> | </gallery> | ||
| Line 119: | Line 133: | ||
{{Categories | {{Categories | ||
|Torches | |Torches | ||
|objects= LA, LADX, LANS, TotK | |objects= LA, LADX, LANS, BotW, TotK | ||
}} | }} | ||
Latest revision as of 19:34, 29 December 2023

Torches,(ALttP | OoT | MM | FS | TWW | FSA | BotW | TotK)[1][2][3][4][5][6][7][8][9] also known as Lamps,(LA)[10] Torchlights,(MM)[11] and Braziers,(ALBW | CoH)[12][13] are recurring Objects in The Legend of Zelda series.[name references needed]
Location and Uses
Torches are often found within caves or dungeons. They have a variety of uses from illuminating the surrounding area to being a key aspect in solving a puzzle or unlocking a hidden secret. Because of their nature of being lit or unlit, dungeons and other areas can be designed with the prospect of Link having to take advantage of this-lighting them to cause an event or sequence like unlocking a door or revealing a Treasure Chest.
Outside of being decorative, Torches are primarily used in puzzles. They can be lit by using a fire source such as a burning Deku Stick, a Fire Arrow, the Fire Rod, Din's Fire, or the Lamp. Sometimes they can only be lit by pressing a switch or clearing a room of enemies. In dark areas, Link can light a Torch to light up the room.
Some torches known as Face Lamps can appear as traps shooting fireballs at Link, similar to Medusas. They are usually invulnerable to any form of attack. Additionally, In Phantom Hourglass, some of them can be deactivated by hitting a nearby switch, or defeating all the enemies in the room.
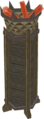
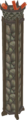
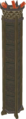
Torches vary across the series from housing a simple group of sticks tied together as well as more elaborately designed metal ones. Twilight Princess has the most variety of Torch designs in the series, with various wooden Torches, stone Torches, and other, more ancient-themed Torches.
A Link to the Past
Link's Awakening
Ocarina of Time
Majora's Mask
Oracle of Seasons
Oracle of Ages
Four Swords
The Wind Waker
The Minish Cap
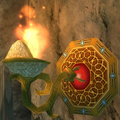
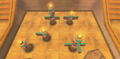
Torches serve as simple decorative objects, sources of light, Switches, and Enemies in The Minish Cap. Some (such as four in Deepwood Shrine and the four hidden in Trees in North Hyrule Field) are directly connected to Floor Switches, which, when stepped on, illuminate the Torches and produce some kind of effect. Others (such as those in the Fortress of Winds, the Temple of Droplets, and the Palace of Winds) shoot balls of energy at Link, damaging him. These attacks can be blocked with the Small Shield.
Twilight Princess
Phantom Hourglass
Spirit Tracks
Skyward Sword
A Link Between Worlds
Breath of the Wild
Tears of the Kingdom
Other Appearances
Hyrule Warriors
Cadence of Hyrule
Nomenclature
| Language | Names | |
|---|---|---|
| This table was generated using translation pages. To request an addition, please contact a staff member with a reference. | ||
Gallery
-

A stationary Torch in Dark Hyrule Castle from The Minish Cap
-

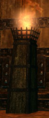
A stationary Torch from Twilight Princess
-

A stationary Torch from Twilight Princess
-
A stationary Torch from Twilight Princess
-
A stationary Torch from Twilight Princess
-
A stationary Torch from Twilight Princess
-

A stationary Torch from Twilight Princess
-
A wall Torch from Twilight Princess HD
-

Unlit stationary Torches from Skyward Sword
-
Lit stationary Torches from Skyward Sword
-
A stationary Braziers from A Link Between Worlds
-
A stationary Torch from Hyrule Warriors
-

An unlit Brazier from Cadence of Hyrule
-

A lit Brazier from Cadence of Hyrule


References
- ↑ The Legend of Zelda: A Link to the Past—Nintendo Player's Guide, Nintendo of America, pg. 32
- ↑ The Legend of Zelda: Ocarina of Time—Prima's Official Strategy Guide, Prima Games, pg. 78
- ↑ "This... This torch looks like the ones we saw at the entrance to the temple, doesn't it?" — Navi (Ocarina of Time 3D)
- ↑ "I'm going to light the torches on each of the surrounding four islands in a particular order. Jump to the island that has the lit torch. If you can jump to it before the torch goes out, you'll get one point!" — Fisherman (Majora's Mask 3D)
- ↑ The Legend of Zelda: A Link to the Past & Four Swords—Prima's Official Strategy Guide, Prima Games, pg. 177 (FS)
- ↑ The Legend of Zelda: The Wind Waker—Prima's Official Strategy Guide, Prima Games, pg. 12
- ↑ The Legend of Zelda: Four Swords Adventures—The Official Nintendo Player's Guide, Nintendo of America, pg. 102
- ↑ "You forgot already?! You were going to light the torches by the Goddess Statue. I'm looking forward to it, so don't mess it up!" — Rola (Breath of the Wild)
- ↑ "I'll hide it in the throne room so he won't find it until after our investigation. Even he would never expect that the torches are the key." — Zelda's Diary (Tears of the Kingdom)
- ↑ The Legend of Zelda: Link's Awakening—Nintendo Player's Guide, Nintendo of America, pg. 91
- ↑ "Now... The next thing we have to do is something about the torchlights in this room..." — Goron (Majora's Mask 3D)
- ↑ The Legend of Zelda: A Link Between Worlds Prima Official Game Guide, Prima Games, pg. 16
- ↑ "Long ago, I added a secret mechanism to the brazier on the right of the entrance hall." — King of Hyrule (Cadence of Hyrule)