Coliseum Ruins: Difference between revisions
TriforceTony (talk | contribs) |
|||
| (43 intermediate revisions by 14 users not shown) | |||
| Line 1: | Line 1: | ||
{{ | {{Infobox Location | ||
| | |image= | ||
| | {{Media | ||
|Screenshot BotW= File:BotW Coliseum Ruins.png | |||
|Screenshot TotK= File:TotK Coliseum Ruins.png | |||
}} | |||
|caption= | |caption= | ||
|game= | |pronunciation= | ||
|game= BotW, TotK | |||
|other= | |other= | ||
|inhab= | |inhab= | ||
|items= | {{Infobox Game Blocks | ||
| | |BotW= {{Term|BotW|Dai|link}} | ||
}} | |||
|items= | |||
|services= | |||
|season= | |season= | ||
|theme | |temperature= | ||
|counter= | |||
{{List| | |||
{{Term|Series|Coliseum|link}} {{Small|(past)}}, | |||
{{Term|Series|Floating Coliseum|link}} {{Small|({{Term|Series|Depths|link}})}} | |||
}} | |||
|theme= | |||
|related= {{Term|Series|Coliseum Ruins Cave|link}} | |||
|strategy= | |||
|zu= | |||
}} | }} | ||
The ''' | The {{Term/Store|Coliseum Ruins||Series, BotW, TotK}} are a recurring location in {{TLoZ|Series}}.<ref>{{Cite|'''Coliseum Ruins'''|Map|BotW}}</ref><ref>{{Cite|'''Coliseum Ruins'''|Map|TotK}}</ref> | ||
==Features and Overview== | ==Features and Overview== | ||
The | ==={{BotW|-}}=== | ||
The Coliseum Ruins are located in [[Central Hyrule]], northwest of the [[Great Plateau]]. The Ruins were once an arena for combat but has since become run-down and overrun by monsters.<ref>{{Cite|A long time ago, there used to be an arena for combat nearby, but it's fallen to ruin and is a home for foul monsters. I suppose you could say it still IS an arena for combat, but more the life-or- death-against-monsters variety.|Botrick|BotW}}</ref><ref>{{Cite|A long time ago, there used to be an arena for combat nearby, but it's fallen to ruin and is a home for foul monsters.|Botrick|BotW}}</ref> [[Pool of Malice|Pools of Malice]] coat the outer walls while several monsters patrol the interior. A [[Lynel]] can also be found in the center of the Coliseum. Weapons wielded by these enemies and the Lynel both scale up depending on how many [[Divine Beast]]s have been freed. If the four Beasts are released, all the enemies inside will carry elemental weapons. Due to the danger it poses, only scavengers such as [[Dai]] approach the Ruins in search of Weapons and treasure,<ref>{{Cite|On the other side of those rocky mountains to the east are the ancient {{Color|BotW Blue|Coliseum Ruins}}... It's a fell place, teeming with monsters. Only scavengers hunting for weapons dare to go near the ruins.|Botrick|BotW}}</ref><ref>{{Cite|These monsters don't stand a chance against me! If...I mean, WHEN I beat them, I'll be rewarded with valuable weapons and treasure!|Dai|BotW}}</ref> though he hides behind a wall among the rubble outside them. [[Bomb Barrel]]s can also be found among the rubble and Malice. | |||
A metallic [[Treasure Chest]] containing a bundle of five [[Bomb Arrow]]s can be found on the northern wall. A metallic Chest containing an [[Amber]] is located on the southern wall. In the "[[EX Treasure: Phantasma]]" [[Side Quest]] exclusive to [[The Master Trials]] DLC Pack, the [[Phantom Helmet]] can be found inside a metallic Treasure Chest stuck in the ground at the northwest side of the Coliseum. | |||
A [[Korok]] can be found under a [[Rock]] on the northern wall of the Coliseum. Another Korok can be found by completing the Race puzzle activated by standing on the [[Tree]] stump on top of a dead Tree surrounded by Malice northwest of the main Ruins entrance. | |||
===={{Plural|BotW|Creature}}==== | |||
{{Gallery List|Creatures | |||
|BotW= Blue-Winged Heron, Fairy, Grassland Fox, Hightail Lizard, Pink Heron, Restless Cricket, Warm Darner | |||
}} | |||
====Minor Enemies==== | |||
=====Normal Mode===== | |||
{{Tabs | |||
|align= | |||
|default= 1 | |||
|tab1= Default | |||
|content1= | |||
{{Gallery List|Enemies | |||
|BotW= Black Bokoblin {{Equipment|BotW|Soldier's Broadsword}}{{Equipment|BotW|Soldier's Shield}}, | |||
Black Bokoblin {{Equipment|BotW|Soldier's Claymore}}, | |||
Black Bokoblin {{Equipment|BotW|Soldier's Spear}}, | |||
Black Lizalfos {{Equipment|BotW|Soldier's Broadsword}}{{Equipment|BotW|Soldier's Shield}}, | |||
Black Lizalfos {{Equipment|BotW|Soldier's Claymore}}, | |||
Black Lizalfos {{Equipment|BotW|Soldier's Spear}}, | |||
Black Moblin {{Equipment|BotW|Soldier's Broadsword}}{{Equipment|BotW|Soldier's Shield}}, | |||
Black Moblin {{Equipment|BotW|Soldier's Claymore}}, | |||
Black Moblin {{Equipment|BotW|Soldier's Spear}}, | |||
Chuchu [3], | |||
Keese, | |||
Lynel {{Equipment|BotW|Lynel Sword}}{{Equipment|BotW|Lynel Shield}}{{Equipment|BotW|Lynel Bow}}{{Equipment|BotW|Shock Arrow}}, | |||
Pool of Malice, | |||
Stalmoblin, | |||
Stalmoblin {{Equipment|BotW|Spiked Moblin Spear}}, | |||
Stalmoblin {{Equipment|BotW|Soldier's Bow}}{{Equipment|BotW|Arrow}}, | |||
Stone Pebblit, | |||
Yiga Footsoldier {{Equipment|BotW|Duplex Bow}}{{Equipment|BotW|Arrow}} | |||
}} | |||
|tab2= 2 Divine Beasts | |||
|content2= | |||
{{Gallery List|Enemies | |||
|BotW= Black Bokoblin {{Equipment|BotW|Knight's Broadsword}}{{Equipment|BotW|Knight's Shield}}, | |||
Black Bokoblin {{Equipment|BotW|Knight's Claymore}}, | |||
Black Bokoblin {{Equipment|BotW|Knight's Halberd}}, | |||
Black Lizalfos {{Equipment|BotW|Knight's Broadsword}}{{Equipment|BotW|Knight's Shield}}, | |||
Black Lizalfos {{Equipment|BotW|Knight's Claymore}}, | |||
Black Lizalfos {{Equipment|BotW|Knight's Halberd}}, | |||
Black Moblin {{Equipment|BotW|Knight's Broadsword}}{{Equipment|BotW|Knight's Shield}}, | |||
Black Moblin {{Equipment|BotW|Knight's Claymore}}, | |||
Black Moblin {{Equipment|BotW|Knight's Halberd}}, | |||
Blue-Maned Lynel {{Equipment|BotW|Mighty Lynel Sword}}{{Equipment|BotW|Mighty Lynel Shield}}{{Equipment|BotW|Mighty Lynel Bow}}{{Equipment|BotW|Shock Arrow}}, | |||
Chuchu [3], | |||
Keese, | |||
Pool of Malice, | |||
Stalmoblin, | |||
Stalmoblin {{Equipment|BotW|Spiked Moblin Spear}}, | |||
Stalmoblin {{Equipment|BotW|Soldier's Bow}}{{Equipment|BotW|Arrow}}, | |||
Stone Pebblit, | |||
Yiga Footsoldier {{Equipment|BotW|Duplex Bow}}{{Equipment|BotW|Arrow}} | |||
}} | |||
|tab3= 3 Divine Beasts | |||
|content3= | |||
{{Gallery List|Enemies | |||
|BotW= Black Bokoblin {{Equipment|BotW|Royal Broadsword}}{{Equipment|BotW|Royal Shield}}, | |||
Black Bokoblin {{Equipment|BotW|Royal Claymore}}, | |||
Black Bokoblin {{Equipment|BotW|Royal Halberd}}, | |||
Black Lizalfos {{Equipment|BotW|Royal Broadsword}}{{Equipment|BotW|Royal Shield}}, | |||
Black Lizalfos {{Equipment|BotW|Royal Claymore}}, | |||
Black Lizalfos {{Equipment|BotW|Royal Halberd}}, | |||
Black Moblin {{Equipment|BotW|Royal Broadsword}}{{Equipment|BotW|Royal Shield}}, | |||
Black Moblin {{Equipment|BotW|Royal Claymore}}, | |||
Black Moblin {{Equipment|BotW|Royal Halberd}}, | |||
Chuchu [3], | |||
Keese, | |||
Pool of Malice, | |||
Stalmoblin, | |||
Stalmoblin {{Equipment|BotW|Spiked Moblin Spear}}, | |||
Stalmoblin {{Equipment|BotW|Soldier's Bow}}{{Equipment|BotW|Arrow}}, | |||
Stone Pebblit, | |||
White-Maned Lynel {{Equipment|BotW|Savage Lynel Sword}}{{Equipment|BotW|Savage Lynel Shield}}{{Equipment|BotW|Savage Lynel Bow}}{{Equipment|BotW|Shock Arrow}}, | |||
Yiga Footsoldier {{Equipment|BotW|Duplex Bow}}{{Equipment|BotW|Arrow}} | |||
}} | |||
|tab4= All Divine Beasts | |||
|content4= | |||
{{Gallery List|Enemies | |||
|BotW= Black Bokoblin {{Equipment|BotW|Flameblade}}{{Equipment|BotW|Royal Shield}}, | |||
Black Bokoblin {{Equipment|BotW|Great Flameblade}}, | |||
Black Bokoblin {{Equipment|BotW|Flamespear}}, | |||
Black Lizalfos {{Equipment|BotW|Frostblade}}{{Equipment|BotW|Royal Shield}}, | |||
Black Lizalfos {{Equipment|BotW|Great Frostblade}}, | |||
Black Lizalfos {{Equipment|BotW|Frostspear}}, | |||
Black Moblin {{Equipment|BotW|Thunderblade}}{{Equipment|BotW|Royal Shield}}, | |||
Black Moblin {{Equipment|BotW|Great Thunderblade}}, | |||
Black Moblin {{Equipment|BotW|Thunderspear}}, | |||
Chuchu [3], | |||
Keese, | |||
Pool of Malice, | |||
Silver Lynel {{Equipment|BotW|Savage Lynel Sword}}{{Equipment|BotW|Savage Lynel Shield}}{{Equipment|BotW|Savage Lynel Bow}}{{Equipment|BotW|Shock Arrow}}, | |||
Stalmoblin, | |||
Stalmoblin {{Equipment|BotW|Spiked Moblin Spear}}, | |||
Stalmoblin {{Equipment|BotW|Soldier's Bow}}{{Equipment|BotW|Arrow}}, | |||
Stone Pebblit, | |||
Yiga Footsoldier {{Equipment|BotW|Duplex Bow}}{{Equipment|BotW|Arrow}} | |||
}} | |||
}} | |||
== | =====Master Mode===== | ||
<gallery> | {{Tabs | ||
File: | |align= | ||
File:BotW Malice Model.png|[[Malice]] | |default= 1 | ||
File: | |tab1= Default | ||
File: | |content1= <gallery> | ||
File:BotW Blue-Maned Lynel Model.png|[[Blue-Maned Lynel]]{{Enemy Weapon|Weapon|Lynel Sword}}{{Enemy Weapon|Shield|Lynel Shield}}{{Enemy Weapon|Bow|Lynel Bow}}{{Enemy Weapon|Bow|Shock Arrows}} | |||
File:BotW Chuchu Model 3.png|[[Chuchu]] | |||
File:BotW Keese Model.png|[[Keese]] | |||
File:BotW Pool of Malice Model.png|[[Pool of Malice]] | |||
File:BotW Silver Bokoblin Model.png|[[Silver Bokoblin]]{{Enemy Weapon|Weapon|Soldier's Broadsword}}{{Enemy Weapon|Shield|Soldier's Shield}} | |||
File:BotW Silver Bokoblin Model.png|[[Silver Bokoblin]]{{Enemy Weapon|Weapon|Soldier's Claymore}} | |||
File:BotW Silver Bokoblin Model.png|[[Silver Bokoblin]]{{Enemy Weapon|Weapon|Soldier's Spear}} | |||
File:BotW Silver Lizalfos Model.png|[[Silver Lizalfos]]{{Enemy Weapon|Weapon|Soldier's Broadsword}}{{Enemy Weapon|Shield|Soldier's Shield}} | |||
File:BotW Silver Lizalfos Model.png|[[Silver Lizalfos]]{{Enemy Weapon|Weapon|Soldier's Claymore}} | |||
File:BotW Silver Lizalfos Model.png|[[Silver Lizalfos]]{{Enemy Weapon|Weapon|Soldier's Spear}} | |||
File:BotW Silver Moblin Model.png|[[Silver Moblin]]{{Enemy Weapon|Weapon|Soldier's Broadsword}}{{Enemy Weapon|Shield|Soldier's Shield}} | |||
File:BotW Silver Moblin Model.png|[[Silver Moblin]]{{Enemy Weapon|Weapon|Soldier's Claymore}} | |||
File:BotW Silver Moblin Model.png|[[Silver Moblin]]{{Enemy Weapon|Weapon|Soldier's Spear}} | |||
File:BotW Stalmoblin Model.png|[[Stalmoblin]] | |||
File:BotW Stalmoblin Model.png|[[Stalmoblin]]{{Enemy Weapon|Weapon|Spiked Moblin Spear}} | |||
File:BotW Stalmoblin Model.png|[[Stalmoblin]]{{Enemy Weapon|Bow|Soldier's Bow}}{{Enemy Weapon|Bow|Arrows}} | |||
File:BotW Stone Pebblit Model.png|[[Stone Pebblit]] | |||
File:BotW Yiga Footsoldier Model.png|[[Yiga Footsoldier]]{{Enemy Weapon|Bow|Duplex Bow}}{{Enemy Weapon|Bow|Arrows}} | |||
</gallery> | |||
|tab2= 2 Divine Beasts | |||
|content2= <gallery> | |||
File:BotW Chuchu Model 3.png|[[Chuchu]] | |||
File:BotW Keese Model.png|[[Keese]] | |||
File:BotW Pool of Malice Model.png|[[Pool of Malice]] | |||
File:BotW Silver Bokoblin Model.png|[[Silver Bokoblin]]{{Enemy Weapon|Weapon|Knight's Broadsword}}{{Enemy Weapon|Shield|Knight's Shield}} | |||
File:BotW Silver Bokoblin Model.png|[[Silver Bokoblin]]{{Enemy Weapon|Weapon|Knight's Claymore}} | |||
File:BotW Silver Bokoblin Model.png|[[Silver Bokoblin]]{{Enemy Weapon|Weapon|Knight's Halberd}} | |||
File:BotW Silver Lizalfos Model.png|[[Silver Lizalfos]]{{Enemy Weapon|Weapon|Knight's Broadsword}}{{Enemy Weapon|Shield|Knight's Shield}} | |||
File:BotW Silver Lizalfos Model.png|[[Silver Lizalfos]]{{Enemy Weapon|Weapon|Knight's Claymore}} | |||
File:BotW Silver Lizalfos Model.png|[[Silver Lizalfos]]{{Enemy Weapon|Weapon|Knight's Halberd}} | |||
File:BotW Silver Moblin Model.png|[[Silver Moblin]]{{Enemy Weapon|Weapon|Knight's Broadsword}}{{Enemy Weapon|Shield|Knight's Shield}} | |||
File:BotW Silver Moblin Model.png|[[Silver Moblin]]{{Enemy Weapon|Weapon|Knight's Claymore}} | |||
File:BotW Silver Moblin Model.png|[[Silver Moblin]]{{Enemy Weapon|Weapon|Knight's Halberd}} | |||
File:BotW Stalmoblin Model.png|[[Stalmoblin]] | |||
File:BotW Stalmoblin Model.png|[[Stalmoblin]]{{Enemy Weapon|Weapon|Spiked Moblin Spear}} | |||
File:BotW Stalmoblin Model.png|[[Stalmoblin]]{{Enemy Weapon|Bow|Soldier's Bow}}{{Enemy Weapon|Bow|Arrows}} | |||
File:BotW Stone Pebblit Model.png|[[Stone Pebblit]] | |||
File:BotW White-Maned Lynel Model.png|[[White-Maned Lynel]]{{Enemy Weapon|Weapon|Mighty Lynel Sword}}{{Enemy Weapon|Shield|Mighty Lynel Shield}}{{Enemy Weapon|Bow|Mighty Lynel Bow}}{{Enemy Weapon|Bow|Shock Arrows}} | |||
File:BotW Yiga Footsoldier Model.png|[[Yiga Footsoldier]]{{Enemy Weapon|Bow|Duplex Bow}}{{Enemy Weapon|Bow|Arrows}} | |||
</gallery> | |||
|tab3= 3 Divine Beasts | |||
|content3= <gallery> | |||
File:BotW Chuchu Model 3.png|[[Chuchu]] | |||
File:BotW Keese Model.png|[[Keese]] | |||
File:BotW Pool of Malice Model.png|[[Pool of Malice]] | |||
File:BotW Silver Bokoblin Model.png|[[Silver Bokoblin]]{{Enemy Weapon|Weapon|Royal Broadsword}}{{Enemy Weapon|Shield|Royal Shield}} | |||
File:BotW Silver Bokoblin Model.png|[[Silver Bokoblin]]{{Enemy Weapon|Weapon|Royal Claymore}} | |||
File:BotW Silver Bokoblin Model.png|[[Silver Bokoblin]]{{Enemy Weapon|Weapon|Royal Halberd}} | |||
File:BotW Silver Lizalfos Model.png|[[Silver Lizalfos]]{{Enemy Weapon|Weapon|Royal Broadsword}}{{Enemy Weapon|Shield|Royal Shield}} | |||
File:BotW Silver Lizalfos Model.png|[[Silver Lizalfos]]{{Enemy Weapon|Weapon|Royal Claymore}} | |||
File:BotW Silver Lizalfos Model.png|[[Silver Lizalfos]]{{Enemy Weapon|Weapon|Royal Halberd}} | |||
File:BotW Silver Lynel Model.png|[[Silver Lynel]]{{Enemy Weapon|Weapon|Savage Lynel Sword}}{{Enemy Weapon|Shield|Savage Lynel Shield}}{{Enemy Weapon|Bow|Savage Lynel Bow}}{{Enemy Weapon|Bow|Shock Arrows}} | |||
File:BotW Silver Moblin Model.png|[[Silver Moblin]]{{Enemy Weapon|Weapon|Royal Broadsword}}{{Enemy Weapon|Shield|Royal Shield}} | |||
File:BotW Silver Moblin Model.png|[[Silver Moblin]]{{Enemy Weapon|Weapon|Royal Claymore}} | |||
File:BotW Silver Moblin Model.png|[[Silver Moblin]]{{Enemy Weapon|Weapon|Royal Halberd}} | |||
File:BotW Stalmoblin Model.png|[[Stalmoblin]] | |||
File:BotW Stalmoblin Model.png|[[Stalmoblin]]{{Enemy Weapon|Weapon|Spiked Moblin Spear}} | |||
File:BotW Stalmoblin Model.png|[[Stalmoblin]]{{Enemy Weapon|Bow|Soldier's Bow}}{{Enemy Weapon|Bow|Arrows}} | |||
File:BotW Stone Pebblit Model.png|[[Stone Pebblit]] | |||
File:BotW Yiga Footsoldier Model.png|[[Yiga Footsoldier]]{{Enemy Weapon|Bow|Duplex Bow}}{{Enemy Weapon|Bow|Arrows}} | |||
</gallery> | </gallery> | ||
|tab4= All Divine Beasts | |||
|content4= <gallery> | |||
File:BotW Chuchu Model 3.png|[[Chuchu]] | |||
File:BotW Golden Lynel Model.png|[[Golden Lynel]]{{Enemy Weapon|Weapon|Flameblade}}{{Enemy Weapon|Shield|Savage Lynel Shield}}{{Enemy Weapon|Bow|Savage Lynel Bow}}{{Enemy Weapon|Bow|Shock Arrows}} | |||
File:BotW Keese Model.png|[[Keese]] | |||
File:BotW Pool of Malice Model.png|[[Pool of Malice]] | |||
File:BotW Silver Bokoblin Model.png|[[Silver Bokoblin]]{{Enemy Weapon|Weapon|Flameblade}}{{Enemy Weapon|Shield|Royal Shield}} | |||
File:BotW Silver Bokoblin Model.png|[[Silver Bokoblin]]{{Enemy Weapon|Weapon|Great Flameblade}} | |||
File:BotW Silver Bokoblin Model.png|[[Silver Bokoblin]]{{Enemy Weapon|Weapon|Flamespear}} | |||
File:BotW Silver Lizalfos Model.png|[[Silver Lizalfos]]{{Enemy Weapon|Weapon|Frostblade}}{{Enemy Weapon|Shield|Royal Shield}} | |||
File:BotW Silver Lizalfos Model.png|[[Silver Lizalfos]]{{Enemy Weapon|Weapon|Great Frostblade}} | |||
File:BotW Silver Lizalfos Model.png|[[Silver Lizalfos]]{{Enemy Weapon|Weapon|Frostspear}} | |||
File:BotW Silver Moblin Model.png|[[Silver Moblin]]{{Enemy Weapon|Weapon|Thunderblade}}{{Enemy Weapon|Shield|Royal Shield}} | |||
File:BotW Silver Moblin Model.png|[[Silver Moblin]]{{Enemy Weapon|Weapon|Great Thunderblade}} | |||
File:BotW Silver Moblin Model.png|[[Silver Moblin]]{{Enemy Weapon|Weapon|Thunderspear}} | |||
File:BotW Stalmoblin Model.png|[[Stalmoblin]] | |||
File:BotW Stalmoblin Model.png|[[Stalmoblin]]{{Enemy Weapon|Weapon|Spiked Moblin Spear}} | |||
File:BotW Stalmoblin Model.png|[[Stalmoblin]]{{Enemy Weapon|Bow|Soldier's Bow}}{{Enemy Weapon|Bow|Arrows}} | |||
File:BotW Stone Pebblit Model.png|[[Stone Pebblit]] | |||
File:BotW Yiga Footsoldier Model.png|[[Yiga Footsoldier]]{{Enemy Weapon|Bow|Duplex Bow}}{{Enemy Weapon|Bow|Arrows}} | |||
</gallery> | |||
}} | |||
====Equipment==== | |||
{{Gallery List|Objects | |||
|BotW= Wooden Shield | |||
}} | |||
==={{TotK|-}}=== | |||
{{TotK Quest/Container|width= 43rem| | |||
{{TotK Quest | |||
|name= Misko's Treasure of Awakening II | |||
|type= Side Quest | |||
|giver= [[Misko's Letter]] | |||
|location= [[Ancient Columns Cave]] | |||
}} | |||
{{TotK Quest | |||
|name= Misko's Treasure of Awakening III | |||
|type= Side Quest | |||
|giver= [[Misko's Letter]] | |||
|location= [[Coliseum Ruins Cave]] | |||
}} | |||
{{TotK Quest | |||
|name= The Beckoning Woman | |||
|type= Side Adventure | |||
|giver= [[Penn]] | |||
|location= [[Outskirt Stable]] | |||
}} | |||
}} | |||
{{Stub|TotK}} | |||
The {{Term|TotK|Coliseum Ruins}} are home to a secret underground location known as the {{Term|TotK|Coliseum Ruins Cave|link}}. To enter the {{Term|TotK|Coliseum Ruins Cave|display=Cave}}, {{Term|TotK|Link|link}} must return a {{Term|TotK|Soldier's Claymore|link}} to one of the {{Term|TotK|Soldier|link}} {{Plural|TotK|Statue|link}}. The {{Term|TotK|Coliseum Ruins}} have a counterpart in the {{Term|TotK|Central Hyrule Depths|link}} known as the {{Term|TotK|Floating Coliseum|link}}. | |||
====Areas==== | |||
{{Gallery List|Locations | |||
|TotK= Coliseum Ruins Cave | |||
}} | |||
===={{Plural|TotK|Creature}}==== | |||
{{Gallery List|Creatures | |||
|TotK= Blue-Winged Heron, Pink Heron, Restless Cricket, Warm Darner | |||
}} | |||
===={{Plural|TotK|Enemy}}==== | |||
;{{Term|TotK|Monster Encampment}} north of the {{Term|TotK|Coliseum Ruins|display=Ruins}} | |||
{{Gallery List|Enemies | |||
|TotK= Blue Bokoblin [Qty:2], Blue Bokoblin [Qty:1]{{Equipment|TotK|Rock Armor}} | |||
}} | |||
====={{Plural|TotK|Sub-Boss}}===== | |||
{{Gallery List|Bosses | |||
|TotK= Thunder Gleeok [Qty:1] | |||
}} | |||
===={{Plural|TotK|Material}}==== | |||
{{Gallery List|Materials | |||
|TotK= Apple, Courser Bee Honey, Fire Fruit, Golden Apple, Hylian Shroom | |||
}} | |||
====Equipment==== | |||
{{Gallery List|Equipment | |||
|TotK= Rock Hammer<!-- Sturdy Wooden Stick + Rock -->, Rusty Halberd, Rusty Shield, Soldier's Claymore, Spiked Boko Bow, Sturdy Wooden Stick | |||
}} | |||
===={{Plural|TotK|Zonai Device}}==== | |||
{{Gallery List|Zonai Devices | |||
|TotK= Big Wheel, Rocket, Spring, Stabilizer, Stake, Time Bomb | |||
}} | |||
===={{Plural|TotK|Korok Seed}}==== | |||
{{Korok Seeds|game= TotK | |||
|- | |||
| Coliseum Ruins | |||
| Catch the Dandelion Bud | |||
| -1053, -1327, 0067 | |||
| Atop the ruins in the pond southeast of the {{Term|TotK|Coliseum Ruins}} | |||
|- | |||
| Coliseum Ruins [2] | |||
| Traveling Korok Duo | |||
| -1356, -1310, 0047 | |||
| At the western base of the mountain behind the {{Term|TotK|Coliseum Ruins|display=Ruins}}<br/>The corresponding {{Term|TotK|Korok|link}} is located further up on the west side of the mountain at -1301, -1332, 0138 | |||
}} | |||
==Nomenclature== | |||
{{Nomenclature}} | |||
==See Also== | |||
* {{Term|Series|Coliseum|link}} | |||
* {{Term|Series|Coliseum Ruins Cave|link}} | |||
* {{Term|Series|Dai|link}} | |||
* {{Term|Series|EX Treasure: Phantasma|link}} | |||
* {{Term|Series|Floating Coliseum|link}} | |||
* {{Term|Series|Hyrule Field|link}} | |||
{{Ref}} | |||
{{Categories | |||
|Coliseums, Hyrule Field, Ruins | |||
|locations= BotW, TotK | |||
}} | |||
Latest revision as of 22:37, 19 March 2024
The Coliseum Ruins are a recurring location in The Legend of Zelda series.[1][2]
Features and Overview
Breath of the Wild
The Coliseum Ruins are located in Central Hyrule, northwest of the Great Plateau. The Ruins were once an arena for combat but has since become run-down and overrun by monsters.[3][4] Pools of Malice coat the outer walls while several monsters patrol the interior. A Lynel can also be found in the center of the Coliseum. Weapons wielded by these enemies and the Lynel both scale up depending on how many Divine Beasts have been freed. If the four Beasts are released, all the enemies inside will carry elemental weapons. Due to the danger it poses, only scavengers such as Dai approach the Ruins in search of Weapons and treasure,[5][6] though he hides behind a wall among the rubble outside them. Bomb Barrels can also be found among the rubble and Malice.
A metallic Treasure Chest containing a bundle of five Bomb Arrows can be found on the northern wall. A metallic Chest containing an Amber is located on the southern wall. In the "EX Treasure: Phantasma" Side Quest exclusive to The Master Trials DLC Pack, the Phantom Helmet can be found inside a metallic Treasure Chest stuck in the ground at the northwest side of the Coliseum.
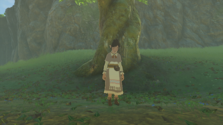
A Korok can be found under a Rock on the northern wall of the Coliseum. Another Korok can be found by completing the Race puzzle activated by standing on the Tree stump on top of a dead Tree surrounded by Malice northwest of the main Ruins entrance.
Creatures


Minor Enemies
Normal Mode


Master Mode


Equipment

Tears of the Kingdom
- Related Quests

|
The Beckoning Woman | |||
| Side Adventure | ||||
The Beckoning Woman | |
|
|
The Beckoning Woman | |||
| Side Adventure | ||||
The Beckoning Woman | |
The Coliseum Ruins are home to a secret underground location known as the Coliseum Ruins Cave. To enter the Cave, Link must return a Soldier's Claymore to one of the Soldier Statues. The Coliseum Ruins have a counterpart in the Central Hyrule Depths known as the Floating Coliseum.
Areas

Creatures


Enemies
- Monster Outpost north of the Ruins

Sub-Bosses

Materials


Equipment


Zonai Devices
Korok Seeds
| Korok |  |
|---|---|
| Type | |
| Coordinates | -1053, -1327, 0067 |
| Notes | Atop the ruins in the pond southeast of the Coliseum Ruins |
| Korok |  |
| Type | |
| Coordinates | -1356, -1310, 0047 |
| Notes | At the western base of the mountain behind the Ruins |


| Korok | Type | Coordinates | Notes |
|---|---|---|---|
| -1053, -1327, 0067 | Atop the ruins in the pond southeast of the Coliseum Ruins | |
| -1356, -1310, 0047 | At the western base of the mountain behind the Ruins |
Nomenclature
| Language | Names | |
|---|---|---|
Japanese | とうぎじょうあとち闘技場跡地 | |
ChineseTR | 競技場遺跡 (Jìngjìchǎng yíjì) | |
ChineseSI | 竞技场遗迹 (Jìngjìchǎng yíjì) | |
FrenchCA | Ruines de l'amphithéâtre | |
FrenchEU | Ruines de l'amphithéâtre | |
German | Arena-Ruine | |
Italian | Arena | |
Korean | 투기장 옛터 | |
SpanishEU | Coliseo | |
| This table was generated using translation pages. To request an addition, please contact a staff member with a reference. | ||
See Also
References
- ↑ "Coliseum Ruins" — Map (Breath of the Wild)
- ↑ "Coliseum Ruins" — Map (Tears of the Kingdom)
- ↑ "A long time ago, there used to be an arena for combat nearby, but it's fallen to ruin and is a home for foul monsters. I suppose you could say it still IS an arena for combat, but more the life-or- death-against-monsters variety." — Botrick (Breath of the Wild)
- ↑ "A long time ago, there used to be an arena for combat nearby, but it's fallen to ruin and is a home for foul monsters." — Botrick (Breath of the Wild)
- ↑ "On the other side of those rocky mountains to the east are the ancient Coliseum Ruins... It's a fell place, teeming with monsters. Only scavengers hunting for weapons dare to go near the ruins." — Botrick (Breath of the Wild)
- ↑ "These monsters don't stand a chance against me! If...I mean, WHEN I beat them, I'll be rewarded with valuable weapons and treasure!" — Dai (Breath of the Wild)