Bosses in Hyrule Warriors: Difference between revisions
| Line 28: | Line 28: | ||
<center><gallery> | <center><gallery> | ||
File:HW King Dodongo.png|''Fire Breathing:'' [[King Dodongo]]<br><small>''({{c|Hyrule Field|hw|The Armies of Ruin}})''<br>''({{c|Gerudo Desert|hw|Ganondorf's Return}})''<br>''([[Eldin Caves|The Dragon of the Caves]])''</small> | File:HW King Dodongo.png|''Fire Breathing:'' [[King Dodongo]]<br><small>''({{c|Hyrule Field|hw|The Armies of Ruin}})''<br>''({{c|Gerudo Desert|hw|Ganondorf's Return}})''<br>''([[Eldin Caves|The Dragon of the Caves]])''</small> | ||
File:HW Gohma.png|''Arthropod Cyclops Monster:'' [[Gohma]]<br><small>''({{c|Faron Woods|hw|The Sorceress of the Woods}})''<br>''({{c|Gerudo Desert|hw|Ganondorf's Return}})''<br>''([[Valley of Seers|Darkness Falls]])''</small> | File:HW Gohma.png|''Arthropod Cyclops Monster:'' [[Gohma]]<br><small>''({{c|Faron Woods|hw|The Sorceress of the Woods}})''<br>''({{c|Gerudo Desert|hw|Ganondorf's Return}})''<br>''([[Valley of Seers|Darkness Falls]])''<br>''({{c|Wind and Earth Temples|hw|Watchers of the Triforce}}) {{ExpGame|HWL}}''</small> | ||
File:HW Manhandla.png|''Poisonous Tree:'' [[Manhandla]]<br><small>''([[Valley of Seers|The Sorceress of the Valley]])''<br>''({{c|Gerudo Desert|hw|Ganondorf's Return}})''<br>''([[Valley of Seers|Darkness Falls]])''</small> | File:HW Manhandla.png|''Poisonous Tree:'' [[Manhandla]]<br><small>''([[Valley of Seers|The Sorceress of the Valley]])''<br>''({{c|Gerudo Desert|hw|Ganondorf's Return}})''<br>''([[Valley of Seers|Darkness Falls]])''<br>''({{c|Wind and Earth Temples|hw|Watchers of the Triforce}}) {{ExpGame|HWL}}''</small> | ||
File:HW King Dodongo OoT.png|''Infernal Dinosaur:'' [[King Dodongo]]<br><small>''({{c|Lake Hylia|hw|The Water Temple}})''<br>''({{c|Ganon's Tower|hw|The Other Hero}}) {{ExpGame|HWL}}''</small> | File:HW King Dodongo OoT.png|''Infernal Dinosaur:'' [[King Dodongo]]<br><small>''({{c|Lake Hylia|hw|The Water Temple}})''<br>''({{c|Ganon's Tower|hw|The Other Hero}}) {{ExpGame|HWL}}''</small> | ||
File:HW Argorok.png|''Twilit Dragon:'' [[Argorok]]<br><small>''({{c|Palace of Twilight|hw|The Shadow King}})''<br>''({{c|Ganon's Tower|hw|Liberation of the Triforce}})''<br>''({{c|Palace of Twilight|hw|The Usurper King}})''</small> | File:HW Argorok.png|''Twilit Dragon:'' [[Argorok]]<br><small>''({{c|Palace of Twilight|hw|The Shadow King}})''<br>''({{c|Ganon's Tower|hw|Liberation of the Triforce}})''<br>''({{c|Palace of Twilight|hw|The Usurper King}})''</small> | ||
| Line 37: | Line 37: | ||
File:HW Ganon.png|''Dark Beast:'' [[Ganon]]<br><small>''({{c|Ganon's Tower|hw|Liberation of the Triforce}})''</small> | File:HW Ganon.png|''Dark Beast:'' [[Ganon]]<br><small>''({{c|Ganon's Tower|hw|Liberation of the Triforce}})''</small> | ||
File:HW Link Great Fairy.png|[[Great Fairy]]<br><small>''(Ganon's Fury Mode DLC Exclusive)''</small> | File:HW Link Great Fairy.png|[[Great Fairy]]<br><small>''(Ganon's Fury Mode DLC Exclusive)''</small> | ||
File:HWL Helmaroc King Artwork.png|[[Helmaroc King]]<br><small>({{HWL}} | File:HWL Helmaroc King Artwork.png|[[Helmaroc King]]<br><small>''({{c|Gerudo Desert|hw|The Search for Cia}}) {{ExpGame|HWL}}''</small> | ||
File:HWL Phantom Ganon Artwork.png|[[Phantom Ganon]]<br><small>({{HWL}} | File:HWL Phantom Ganon Artwork.png|[[Phantom Ganon]]<br><small>''({{c|Wind and Earth Temples|hw|Watchers of the Triforce}}) {{ExpGame|HWL}}''</small> | ||
</gallery></center> | </gallery></center> | ||
<noinclude>{{BossNav}} | <noinclude>{{BossNav}} | ||
[[Category:Boss Galleries]]</noinclude> | [[Category:Boss Galleries]]</noinclude> | ||
Revision as of 18:44, 29 April 2016
Enemy Characters
-
The Dark Sorceress: Cia
(Shining Beacon) -
Twisted Wizard: Wizzro
(The Sheikah Tribesman)
(The Sacred Sword)
(The Dragon of the Caves)
(Darkness Falls) -
Princess of Hyrule: Zelda?
(Template:C) -
The Hero: Link
(Template:C) -
The White Sorceress: Lana
(March of the Demon King)
(Template:C) -
Princess of Hyrule: Zelda
(Template:C)
(Template:C) -
Hyrulean General: Impa
(March of the Demon King)
(Template:C)
(Template:C) -
The Demon King: Ganondorf
(A War of Spirit)
(Template:C)
(Darkness Falls) -
Goron Chief: Darunia
(Template:C) -
Insect...Princess?: Agitha
(Template:C) -
Twilight Princess: Midna
(Land of Twilight)
(Template:C) -
The Goddess Sword: Fi
(Template:C) -
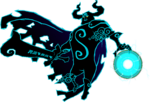
Demon Lord: Ghirahim
(Template:C)
(Template:C)
(Template:C)
(Template:C)
(Template:C) Template:ExpGame -
Usurper King: Zant
(Template:C)
(Template:C)
(Template:C) -
Majora's Puppet: Skull Kid
(Template:C) Template:ExpGame
Large Bosses
-
Fire Breathing: King Dodongo
(Template:C)
(Template:C)
(The Dragon of the Caves) -
Arthropod Cyclops Monster: Gohma
(Template:C)
(Template:C)
(Darkness Falls)
(Template:C) Template:ExpGame -
Poisonous Tree: Manhandla
(The Sorceress of the Valley)
(Template:C)
(Darkness Falls)
(Template:C) Template:ExpGame -
Infernal Dinosaur: King Dodongo
(Template:C)
(Template:C) Template:ExpGame -
Twilit Dragon: Argorok
(Template:C)
(Template:C)
(Template:C)
-
Dark Beast: Ganon
(Template:C) -
Great Fairy
(Ganon's Fury Mode DLC Exclusive)
