Temple of Courage: Difference between revisions
m (Text replace - "Head Statue" to "Tribal Head Statue") |
No edit summary |
||
| Line 19: | Line 19: | ||
[[File:Arrow Orb Activated.png|thumb|left|Link activating an [[Arrow Orb]]]] | [[File:Arrow Orb Activated.png|thumb|left|Link activating an [[Arrow Orb]]]] | ||
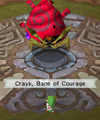
The Temple of Courage consists of four floors. Thematically, the dungeon's puzzles test the courage and faith of the venturing visitor. For example, one huge room with pillars has an invisible passage over a cliff, while another room has a cliff that must be traversed using a controllable platform. The dungeon's item is the [[Bow]] and [[Arrow]]s, useful to press switches and [[Arrow Orb|redirecting orbs]]. On the last floor is the boss, [[Crayk]]. Upon defeating it, Link will free the last [[Servant Spirits|Servant Spirit]] (who actually turns out to be part of [[Ciela]]) as well as earn another [[Heart Container]] and more [[Sand of Hours]]. | The Temple of Courage consists of four floors. Thematically, the dungeon's puzzles test the courage and faith of the venturing visitor. For example, one huge room with pillars has an invisible passage over a cliff, while another room has a cliff that must be traversed using a controllable platform. The dungeon's item is the [[Bow]] and [[Arrow]]s, useful to press switches and [[Arrow Orb|redirecting orbs]]. On the last floor is the boss, [[Crayk]]. Upon defeating it, Link will free the last [[Servant Spirits|Servant Spirit]] (who actually turns out to be part of [[Ciela]]) as well as earn another [[Heart Container]] and more [[Sand of Hours]]. | ||
{{clear}} | |||
===Minor Traps and Enemies=== | |||
<gallery> | |||
File:Beamos PH.png|[[Beamos]] | |||
File:Blade Trap PH.png|[[Blade Trap]] | |||
File:Gel PH.png|[[Gel]] | |||
File:Green ChuChu.png|[[Chuchu|Green ChuChu]] | |||
File:Hardhat Beetle PH.png|[[Hardhat Beetle]] | |||
File:Keese PH.png|[[Keese]] | |||
File:Moldorm PH.png|[[Moldorm]] | |||
File:Land Octorok PH.png|[[Octorok]] | |||
File:Pols Voice.png|[[Pols Voice]] | |||
File:Spiked Roller PH.png|[[Spiked Roller]] | |||
File:Winder PH.png|[[Winder]] | |||
</gallery> | |||
==Gallery== | ==Gallery== | ||
Revision as of 23:35, 17 December 2015
Template:Dungeons The Temple of Courage is the third dungeon in Phantom Hourglass, situated on Molida Island. It protects a clone of Ciela, which contains some of her lost powers and memories.[1]
Entrance to the Temple
The dungeon is located north of Molida Island. The path to the dungeon is blocked by a large door within the Old Wayfarer's secret cave that can only be opened by using the Sun Key.[2] In order to gain entrance to the temple itself, Link must explore the dense northern forest and find three Tribal Head Statues to make them shine intersecting beams on the outer gate.[3]

The Temple of Courage consists of four floors. Thematically, the dungeon's puzzles test the courage and faith of the venturing visitor. For example, one huge room with pillars has an invisible passage over a cliff, while another room has a cliff that must be traversed using a controllable platform. The dungeon's item is the Bow and Arrows, useful to press switches and redirecting orbs. On the last floor is the boss, Crayk. Upon defeating it, Link will free the last Servant Spirit (who actually turns out to be part of Ciela) as well as earn another Heart Container and more Sand of Hours.
Minor Traps and Enemies
Gallery
-
The first floor of the temple
-
The basement floor of the temple
-
The second floor of the temple
-
The third floor of the temple
-
The fourth floor of the temple, where Crayk is fought
-
Alternate view of the entrance
-
Spiked Rollers in the Temple of Courage
-
Link encountering Crayk within the temple
References
- ↑ "I understand how you feel. You lost your memory... The spirit you just freed holds the powers you lost." — Oshus (Phantom Hourglass)
- ↑ "The Temple of Courage will open to the holder of the Sun Key." — N/A (Phantom Hourglass)
- ↑ "Only statues can urge the temple door open, so focus their light gaze on it!" — N/A (Phantom Hourglass)
| Language | Name | Meaning | |
|---|---|---|---|
| Japanese | 勇気の神殿 (Yûki no Shinden) | Temple of Courage | |
| FrenchCA | Temple du Courage | ||
| Italian | Santuario del Coraggio | ||
| Spanish | Templo del Valor | Temple of Courage | |


