Lake Hylia (Stage): Difference between revisions
mNo edit summary |
mNo edit summary |
||
| (40 intermediate revisions by 12 users not shown) | |||
| Line 1: | Line 1: | ||
{{ | {{Infobox Dungeon | ||
|image= File:FSA Lake Hylia.png | |||
|caption= | |||
|pronunciation= | |||
|location= | |||
|image = | |game= FSA | ||
| | |other= HW | ||
| | |item= | ||
| | |quest= | ||
| | |mini-boss= | ||
| | |boss= | ||
| | {{Infobox Game Blocks | ||
| | |FSA= {{Term|FSA|Chief Soldier|link}} | ||
| | }} | ||
| | |temperature= | ||
| | |theme= | ||
{{Infobox Game Blocks | |||
| | |HW= "{{Term|HWDE|Sequence of Drops|link}}" | ||
| | }} | ||
|strategy= | |||
| | {{Infobox Game Blocks | ||
| | |FSA= {{StrategyWiki|The Legend of Zelda: Four Swords Adventures/Lake Hylia|Lake Hylia}} | ||
| | }} | ||
| | |zu= | ||
|map= <!-- Don't remove this until it can be added to the HW sections/pages --><imagemap> | |||
| | |||
| | |||
| | |||
| | |||
| | |||
|map = <imagemap> | |||
File:HW Lake Hylia Map.png | File:HW Lake Hylia Map.png | ||
rect 188 23 217 52 [[##|King's Hall]] | rect 188 23 217 52 [[##|King's Hall]] | ||
| Line 47: | Line 39: | ||
<center><small>'''Hover over a region to view its name.'''</small></center> | <center><small>'''Hover over a region to view its name.'''</small></center> | ||
}} | }} | ||
{{Term/Store|Lake Hylia||Series, FSA, HW, HWL, HWDE}} is a recurring {{Term|Series|Stage|link}} in {{TLoZ|Series}}.{{Exp Game|FSA, HW}}<ref>{{Cite Book|quote= |book= E |publisher= |page= 265}}</ref>{{Name Ref|HWDE}} | |||
==Overview== | |||
==={{FSA|-}}=== | |||
{{Term|FSA|Lake Hylia (Stage)}} is the first stage in the {{Term|FSA|Whereabouts of the Wind|link}}. After being flung away by the twister created by [[Vaati]] in the [[Four Sword Sanctuary]], the [[Links]] find themselves in a small field near Lake Hylia, stirred awake by the voice of [[Kaepora Gaebora]]. The owl explains to them that before they face Vaati, they must find and rescue [[Princess Zelda]] and the six [[Maiden]]s first; by doing so, they will surely find Vaati. He tells them that their [[Four Sword]] at present is weak, but can have its power restored by collecting and infusing it with [[Force Gem]]s. He bids them good luck, and says they will meet again soon. | |||
Unlike in the other games where Lake Hylia is a singular lake, Lake Hylia appears as a series of small lakes connected by rivers. It is located in the eastern portion of Hyrule, and consists of mainly grassy areas, caves, rivers, and mountainside waterfalls where rainbows form in the light of the sun. As the first stage in the game, Lake Hylia features basic enemies and obstacles that serves to introduce controls, maneuvering and basic team-coordination skills. Close to the field where the Links awaken, they find a house belonging to the {{Term|FSA|Formation Old-Timer|link}} who spends his days teaching his {{Term|FSA|Formation Sisters|link|display=grandchildren}} {{Plural|FSA|Formation|link}}, and offers to give the Links a quick lesson as well. | |||
Among the enemies encountered in this stage include resident [[Octorok]]s and [[River Zora|Zora]]s, as well as [[Shadow Link]], who had locked an old woman inside her house.<ref>{{Cite|Oh, thank goodness! That stupid door was really getting on my nerves! It never occurred to me that someone might have locked it from the outside! I'm convinced it was that shadowy boy, the one who looks just like you.|Old Woman|FSA}}</ref> Also encountered are enemy [[Soldier (Enemy)|Soldier]]s, who are under the control of Vaati and patrol the grounds close to the lake's bridge. Underneath this bridge, the Links find [[Tingle]] trapped beneath a large rock. Tingle thanks them for saving him, and explains that he is on the look-out for Force Gems as well, believing that he will become a [[Fairy]] if he collects enough. He believes that the Links must also be looking for Force Gems for the same reason, and insists that they all share the Force Gems they find equally. From there on, Tingle will appear at certain points throughout the game hoping to take large Force Gems for himself, which the Links must race against him for. | |||
Using her position as the Princess of [[Hyrule]], Zelda harshly and continually urges the Hyrulean soldiers to cease their attack and instead follow her "royal command." This causes conflicting thoughts within the army and lowers their [[morale]]; Impa realizes that this Zelda is an impostor and repeatedly urges the Hyrulean Forces not to listen.<ref>{{Cite|Hyrulean soldiers! Cease fighting for the unworthy, and follow my royal command!|Zelda|HW}}</ref><ref>{{Cite|Zelda's harsh rhetoric has cost Hyrulean Forces some morale!|N/A|HW}}</ref><ref>{{Cite|Don't be deceived! This is not our Zelda! Anything she says will be a lie!|Impa|HW}}</ref> In light of this, Ruto suggests that they use the [[Lens of Truth]], somewhere within the Water Temple, to reveal the identity of the fake Zelda. While the Hyrulean Forces advance to the inside of the temple, the Zora Princess goes underwater to search for the relic.<ref>{{Cite|I'll go underwater and find the Lens of Truth. We can meet back up later.|Ruto|HW}}</ref> Ruto easily infiltrates the temple from underneath and finds the Lens of Truth, but Zelda closes the hall and imprisons her before she can rejoin her allies.<ref>{{Cite|Getting in was easy. Now I just need to find the Lens of Truth itself... Here it is! The Lens of Truth! This is exactly what we need... [...] Oh, of course. I feared they were planning to trap me in here, and they have.|Ruto|HW}}</ref><ref>{{Cite|Zelda's strategy has closed the Central Hall!|N/A|HW}}</ref> Ruto, seeking help from the Hyrulean Forces, instructs them to open the floodgates inside the temple in order to free her.<ref>{{Cite|Go and open the floodgates inside the temple! Doing that should free me! You have to seek out all the keeps with floodgate switches. Understand?|Ruto|HW}}</ref> Pulling the two | After swimming through the lake's rivers and maneuvering through its caves, the Links eventually arrive to the wooden bridge, where they fight the Soldiers patrolling the area. They then shortly fight their commander, a [[Chief Soldier]], at the lakeside's end. At the very end of the stage, the Links find [[Barrier#Vaati's Barrier|dark barrier]]s blocking the entrance to the next stage, the [[Cave of No Return]], which Kaepora Gaebora explains can only be dispelled with the powered up [[Four Sword]]. | ||
{|border=1 class="wikitable" | |||
!width="400"|'''Items Obtained in this Area''' | |||
|- | |||
| | |||
{{col-begin}} | |||
{{col-break|width=50%}} | |||
* [[Blue Bracelet]] | |||
* [[Boomerang]] | |||
* [[Fire Rod]] | |||
{{col-end}} | |||
|} | |||
====Minor {{Plural|FSA|Enemy}}==== | |||
{{Gallery List|Enemies | |||
|FSA= Blue Zol, Cheep-Cheep{{List Note|These {{Plural|FSA|Enemy}} cannot be fought as they only appear swimming in flooded caverns that the {{Plural|FSA|Links}} cannot enter.}}, Red Octorok, Shadow Link, Blue Soldier, Zora (Enemy) | |||
}} | |||
{{List Notes}} | |||
==Other Appearances== | |||
==={{HW|-}}=== | |||
{{Noncanon|Start}} | |||
[[File:HWDE Lake Hylia Promotional Screenshot.png|thumb|right|240px]] | |||
{{Term|HWDE|Lake Hylia (Stage)}} contains the {{Plural|HWDE|Scenario|link}} "{{Term|HWDE|The Water Temple|link}}" and "{{Term|HWDE|Powers Collide|link}}", the second {{Plural|HWDE|Scenario}} in the {{Term|HWDE|Ocarina of Time (Arc)|link}} and {{Term|HWDE|Linkle's Tale|link}} arcs, respectively. | |||
It is separated into two halves: the northern half is [[Lake Hylia]] itself, and the southern half is the {{Term|OoT3D|Water Temple|link}}. Pieces of [[Zora's Domain]] in its frozen state appear in the Lake Hylia portion of the stage. | |||
====Areas==== | |||
{{Gallery List|Locations | |||
|HW= Central Hall, Cliffside Keep, East Room, Entrance of the Water Temple, Frozen Waterfall Cliff, Hidden Passageway, King's Hall, Lakeside Keep, SE Room, SW Room, Temple Face Keep, Water Temple, West Room | |||
}} | |||
====The Water Temple==== | |||
After rescuing [[Princess Ruto]] atop the [[Death Mountain (Stage)|Death Mountain summit]] from a brainwashed [[Darunia]], [[Impa]] and [[Sheik]] learn that the [[Gate of Souls]] located inside the {{Term|OoT3D|Water Temple|link}} is teeming with monsters apparently being led by [[Princess Zelda|Zelda]]. The Hyrulean Forces, now joined by the Princess of [[Zora]]s and the [[Goron]] chieftain, venture to Lake Hylia to investigate Zelda's apparent change of heart.<ref>{{Cite|At the fairy's request, Impa had fought her way to the summit of Death Mountain to rescue Princess Ruto. There, she subdued the Goron chieftain, Darunia, who had temporarily lost his senses. Upon freeing Princess Ruto, however, Impa was shocked to learn the reason for the conflict between the Zora and Goron people. The ancient Water Temple was teeming with monsters that poured from the Gate of Souls. What's more, the monsters were apparently led by Princess Zelda herself! Hoping to make sense of this disturbing revelation, Impa and her newfound allies journeyed to Lake Hylia. When they arrived, they were greeted by a Zelda seemingly consumed by evil...|N/A|HW}}</ref> | |||
As the [[Hyrulean Forces]] arrive at [[Zora's Domain]], Princess Zelda orders her minions to attack them.<ref>{{Cite|Hm. Invaders. Someone destroy them for me.|Zelda|HW}}</ref> The allies, however, use the domain's frozen waterfall to attack from the rear and surprise the [[Dark Forces]], lowering their [[morale]].<ref>{{Cite|Jump from the frozen waterfall cliff, and attack from the rear!|N/A|HW}}</ref> They soon discover that Ruto is being attacked by a group of monsters, and they quickly rush to help her since she is the only one who knows how to gain entrance to the Water Temple, where Zelda and the Gate of Souls are.<ref>{{Cite|He-ey there! Help me!|Ruto|HW}}</ref><ref>{{Cite|Princess Ruto is the only one who knows how to get into the temple! Keep her safe!|Impa|HW}}</ref> After rescuing the Zora Princess from a group of [[Lizalfos]], she heads to the Lakeside Keep to open the floodgates and thus reveal the entrance to the Water Temple.<ref>{{Cite|The only way into the Water Temple requires we open the floodgates. Let's hurry!|Ruto|HW}}</ref> | |||
Using her position as the Princess of [[Hyrule]], Zelda harshly and continually urges the Hyrulean soldiers to cease their attack and instead follow her "royal command." This causes conflicting thoughts within the army and lowers their [[morale]]; Impa realizes that this Zelda is an impostor and repeatedly urges the Hyrulean Forces not to listen.<ref>{{Cite|Hyrulean soldiers! Cease fighting for the unworthy, and follow my royal command!|Zelda|HW}}</ref><ref>{{Cite|Zelda's harsh rhetoric has cost Hyrulean Forces some morale!|N/A|HW}}</ref><ref>{{Cite|Don't be deceived! This is not our Zelda! Anything she says will be a lie!|Impa|HW}}</ref> In light of this, Ruto suggests that they use the [[Lens of Truth]], somewhere within the Water Temple, to reveal the identity of the fake Zelda. While the Hyrulean Forces advance to the inside of the temple, the Zora Princess goes underwater to search for the relic.<ref>{{Cite|I'll go underwater and find the Lens of Truth. We can meet back up later.|Ruto|HW}}</ref> Ruto easily infiltrates the temple from underneath and finds the Lens of Truth, but Zelda closes the hall and imprisons her before she can rejoin her allies.<ref>{{Cite|Getting in was easy. Now I just need to find the Lens of Truth itself... Here it is! The Lens of Truth! This is exactly what we need... [...] Oh, of course. I feared they were planning to trap me in here, and they have.|Ruto|HW}}</ref><ref>{{Cite|Zelda's strategy has closed the Central Hall!|N/A|HW}}</ref> Ruto, seeking help from the Hyrulean Forces, instructs them to open the floodgates inside the temple in order to free her.<ref>{{Cite|Go and open the floodgates inside the temple! Doing that should free me! You have to seek out all the keeps with floodgate switches. Understand?|Ruto|HW}}</ref> Pulling the two {{Plural|HWDE|Floodgate Switch|link}} found in the Southeast and Southwest Room of the temple recedes the water from the Central Hall, allowing the allies to rescue the Zora Princess from within. She hands over the Lens of Truth to Sheik before she retreats from the battlefield. | |||
The newly-acquired relic reveals the room where the impostor and the Gate of Souls are located, and the Hyrulean Forces quickly engage in combat with the false Zelda. Angered, the fake Princess of Hyrule summons [[King Dodongo]] to the battlefield to use as a distraction,<ref>{{Cite|I have no idea how you broke my spell... But no matter. You leave me no recourse... My loyal servant, King Dodongo! Come forth! Burn these fools to the bone!|Zelda|HW}}</ref> but Sheik and Impa manage to defeat the impostor before any grave damage is done. Sheik then holds the Lens of Truth toward Zelda, revealing [[Wizzro]] as the impostor. As Wizzro expresses his surprise at how they managed to see through his disguise, Sheik states that the wizard could not have been Zelda before twirling around in a flash of light and revealing her own true identity: Princess Zelda.<ref>{{Cite|How did you see through my disguise?|Wizzro|HW}}</ref><ref>{{Cite|You can't be Zelda. Because... I am Zelda!|Zelda|HW}}</ref> Impa is overjoyed at the sight of the princess alive,<ref>{{Cite|Princess! You're alive!|Impa|HW}}</ref> with Zelda apologizing for not having told her before.<ref>{{Cite|Impa, forgive me for not telling you.|Zelda|HW}}</ref> After Wizzro escapes, the real Princess of Hyrule and her top general combine their powers to close the Gate of Souls, stemming the flow of monsters from the era of the [[Hero of Time]].<ref>{{Cite|Let us close this gate together.|Zelda|HW}}</ref> | The newly-acquired relic reveals the room where the impostor and the Gate of Souls are located, and the Hyrulean Forces quickly engage in combat with the false Zelda. Angered, the fake Princess of Hyrule summons [[King Dodongo]] to the battlefield to use as a distraction,<ref>{{Cite|I have no idea how you broke my spell... But no matter. You leave me no recourse... My loyal servant, King Dodongo! Come forth! Burn these fools to the bone!|Zelda|HW}}</ref> but Sheik and Impa manage to defeat the impostor before any grave damage is done. Sheik then holds the Lens of Truth toward Zelda, revealing [[Wizzro]] as the impostor. As Wizzro expresses his surprise at how they managed to see through his disguise, Sheik states that the wizard could not have been Zelda before twirling around in a flash of light and revealing her own true identity: Princess Zelda.<ref>{{Cite|How did you see through my disguise?|Wizzro|HW}}</ref><ref>{{Cite|You can't be Zelda. Because... I am Zelda!|Zelda|HW}}</ref> Impa is overjoyed at the sight of the princess alive,<ref>{{Cite|Princess! You're alive!|Impa|HW}}</ref> with Zelda apologizing for not having told her before.<ref>{{Cite|Impa, forgive me for not telling you.|Zelda|HW}}</ref> After Wizzro escapes, the real Princess of Hyrule and her top general combine their powers to close the Gate of Souls, stemming the flow of monsters from the era of the [[Hero of Time]].<ref>{{Cite|Let us close this gate together.|Zelda|HW}}</ref> | ||
| Line 63: | Line 93: | ||
After the Scenario finishes, Zelda becomes a playable character and her weapon, the Polished Rapier, becomes available for use. | After the Scenario finishes, Zelda becomes a playable character and her weapon, the Polished Rapier, becomes available for use. | ||
====Combatants==== | =====Combatants===== | ||
{| class= | {| class=wikitable style="text-align:center; width:100%; max-width:40em;" | ||
!width="50%"| Hyrulean Forces | !width="50%"| Hyrulean Forces | ||
!width="50%"| Zelda's Forces | !width="50%"| Zelda's Forces | ||
|- | |- | ||
| [[File: | | [[File:HWDE Goron Mini Map Icon.png]]<br/>'''[[Goron]]s''' | ||
| [[File: | | [[File:HWDE Beamos Mini Map Icon.png]]<br/>'''[[Beamos]]''' | ||
|- | |- | ||
| [[File: | | [[File:HWDE Goron Captain Mini Map Icon.png]]<br/>'''[[Goron Captain]]s''' | ||
| [[File: | | [[File:HWDE Big Poe Mini Map Icon.png]]<br/>'''[[Big Poe]]s''' | ||
|- | |- | ||
|style="background-color: | |style="background-color:#0c2236" rowspan="5"| | ||
| [[File: | | [[File:HWDE Stalchild Captain Mini Map Icon.png]]<br/>'''{{Term|HWDE|Gatekeeper (Hyrule Warriors)|link}}''' | ||
|- | |- | ||
| [[File: | | [[File:HWDE Lizalfos Mini Map Icon.png]]<br/>'''[[Lizalfos]]''' | ||
|- | |- | ||
| '''[[Stalchild]]ren''' | | '''[[Stalchild]]ren''' | ||
|- | |- | ||
| [[File: | | [[File:HWDE Stalchild Captain Mini Map Icon.png]]<br/>'''[[Stalchild Captain]]s''' | ||
|- | |- | ||
| [[File: | | [[File:HWDE Stalchild Summoner Mini Map Icon.png]]<br/>'''[[Stalchild Summoner]]s''' | ||
|- | |- | ||
!colspan="2"| Commanders | !colspan="2"| Commanders | ||
|- | |- | ||
|style="background-color: | |style="background-color:#163d5f"| [[File:HWDE Darunia Mini Map Icon.png]]<br/>'''[[Darunia]]''' | ||
|style="background-color: | |style="background-color:#163d5f"| [[File:HWDE Zelda Mini Map Icon.png]]<br/>'''[[Princess Zelda|Zelda]]''' | ||
|- | |- | ||
|style="background-color: | |style="background-color:#17456e"| [[File:HWDE Ruto Mini Map Icon.png]]<br/>'''[[Princess Ruto|Ruto]]''' | ||
|style="background-color: | |style="background-color:#17456e"| [[File:HWDE King Dodongo Mini Map Icon 2.png]]<br/>'''[[King Dodongo]]''' {{Exp|Optional.}} | ||
|- | |- | ||
|style="background-color: | |style="background-color:#163d5f"| [[File:HWDE Sheik Mini Map Icon.png]]<br/>'''[[Sheik]]''' | ||
|style="background-color: | |style="background-color:#0c2236" rowspan="2"| | ||
|- | |- | ||
|style="background-color: | |style="background-color:#17456e"| [[File:HWDE Impa Mini Map Icon.png]]<br/>'''[[Impa]]''' | ||
|} | |} | ||
===Powers Collide=== | ====Powers Collide==== | ||
[[File: | [[File:HWDE Lake Hylia Alt.png|right|thumb|250px|Lake Hylia in "Powers Collide"]] | ||
"Powers Collide" takes place after the events of "The Water Temple", after Zelda and Impa leave to rejoin [[Link]] at the [[Temple of the Sacred Sword]]. In their absence, [[Volga]] launches an attack on Ruto and Darunia, who stayed behind to watch over Lake Hylia.<ref>{{Cite|At the Water Temple, Princess Zelda and Impa had defeated Wizzro, the twisted wizard. they returned to their own realm ahead of the others. Ruto and Darunia stayed behind in order to patrol the grounds and keep vigil. But they suddenly found themselves drawn into battle when they were attacked by a new wave of monsters. It was the Dragon Knight, Volga, who led them. He set his wrath upon Ruto and Darunia, and drew them into a vicious battle. It was then that Linkle, in her quest to find Hyrule Castle, stumbled onto the scene. She was quick to answer Ruto's plea for aid, for she knew a hero must always help those in need. Linkle leapt into battle.| | "Powers Collide" takes place after the events of "The Water Temple", after Zelda and Impa leave to rejoin [[Link]] at the [[Temple of the Sacred Sword]]. In their absence, [[Volga]] launches an attack on Ruto and Darunia, who stayed behind to watch over Lake Hylia.<ref>{{Cite|At the Water Temple, Princess Zelda and Impa had defeated Wizzro, the twisted wizard. they returned to their own realm ahead of the others. Ruto and Darunia stayed behind in order to patrol the grounds and keep vigil. But they suddenly found themselves drawn into battle when they were attacked by a new wave of monsters. It was the Dragon Knight, Volga, who led them. He set his wrath upon Ruto and Darunia, and drew them into a vicious battle. It was then that Linkle, in her quest to find Hyrule Castle, stumbled onto the scene. She was quick to answer Ruto's plea for aid, for she knew a hero must always help those in need. Linkle leapt into battle.|N/A|HWL}}</ref> | ||
Shortly after the battle begins, Darunia's Forces retreat into the Water Temple as Darunia seals the door to it, accidentally breaking the door.<ref>{{Cite|Oops, I think I might have broke the door... In any case, they should be safe inside.|Darunia|HWL}}</ref> Meanwhile, he leaves them to fight Volga alone. Ruto pleads to Linkle to find a way to help Darunia, as it's too dangerous for him alone to handle. Linkle is directed to the Water Temple's entrance to find a way to join Darunia.<ref>{{Cite|To join with him, you'll first need to open the temple's entrance.|Ruto|HWL}}</ref> Goron Engineers appear, offering to fix the door while tasking Linkle with the duty of escorting them.<ref>{{Cite|Leave it to us! We'll get that door open!|Engineer|HWL}}</ref> | Shortly after the battle begins, Darunia's Forces retreat into the Water Temple as Darunia seals the door to it, accidentally breaking the door.<ref>{{Cite|Oops, I think I might have broke the door... In any case, they should be safe inside.|Darunia|HWL}}</ref> Meanwhile, he leaves them to fight Volga alone. Ruto pleads to Linkle to find a way to help Darunia, as it's too dangerous for him alone to handle. Linkle is directed to the Water Temple's entrance to find a way to join Darunia.<ref>{{Cite|To join with him, you'll first need to open the temple's entrance.|Ruto|HWL}}</ref> Goron Engineers appear, offering to fix the door while tasking Linkle with the duty of escorting them.<ref>{{Cite|Leave it to us! We'll get that door open!|Engineer|HWL}}</ref> | ||
Upon aiding all three Engineers, they join forces to open the front gate, allowing Linkle to come to Darunia's side. Afterwards, the [[Lizalfos | Upon aiding all three Engineers, they join forces to open the front gate, allowing Linkle to come to Darunia's side. Afterwards, the [[Lizalfos Chieftain|Lizalfos]] and [[Dinolfos Chieftain]]s direct a portion of the Enemy Forces to the Temple East Gate, forcing it open. Guided by [[Dinolfos]], they rush toward the Allied Base in an attempt to overwhelm Darunia's Forces and quickly end the battle. If the Dinolfos are defeated, the assault will be squandered allowing Darunia's Forces to continue their advance. | ||
Defeating the [[Lizalfos]] dotted along Lake Hylia will force the Lizalfos and Dinolfos | Defeating the [[Lizalfos]] dotted along Lake Hylia will force the Lizalfos and Dinolfos Chieftains to open a number of Keeps controlled by the Dark Forces as a last-ditch effort to defeat the Allied Forces,<ref>{{Cite|Kya! Swarm their base!|Lizalfos Chieftain|HWL}}</ref><ref>{{Cite|Gya! Gorons too tough! Destroy them!|Dinolfos Chieftain|HWL}}</ref> including the Temple Face Keep where they were hiding. They will race toward the Allied Base, attempting to capture it unless intercepted, while Darunia rushes Volga's position in the Enemy Base at the King's Hall Keep. Defeating both Chieftans will halt all enemy advances, allowing Darunia's Forces to sweep all enemy strongholds. | ||
After escorting Darunia's Forces to the Enemy Base, Darunia challenges Volga directly.<ref>{{Cite|Hey, Volga! If you're so tough, why don't you fight me yourself! Leave the cronies outta this!|Darunia|HWL}}</ref> Accepting, Volga opens the Enemy Base, initiating confrontation.<ref>{{Cite|An interesting proposition indeed. If you've made it this far, then you're worth my true strength!|Volga|HWL}}</ref> Upon his defeat, Volga calls for his troops to retreat, ending the battle.<ref>{{Cite|Haaa... I hate being forced to retreat, but we must. Full retreat!|Volga|HWL}}</ref> Afterwards, Linkle notes that compass glows again as it had in "[[The Girl in the Green Tunic]]" before leaving once more to find Hyrule Castle.<ref>{{Cite|Brother? More like SISTER! Ha ha ha! Oh wait, the compass! It's glowing again! Must be because we drove off the monsters. Anyway, off to Hyrule Castle!|Linkle|HWL}}</ref> | After escorting Darunia's Forces to the Enemy Base, Darunia challenges Volga directly.<ref>{{Cite|Hey, Volga! If you're so tough, why don't you fight me yourself! Leave the cronies outta this!|Darunia|HWL}}</ref> Accepting, Volga opens the Enemy Base, initiating confrontation.<ref>{{Cite|An interesting proposition indeed. If you've made it this far, then you're worth my true strength!|Volga|HWL}}</ref> Upon his defeat, Volga calls for his troops to retreat, ending the battle.<ref>{{Cite|Haaa... I hate being forced to retreat, but we must. Full retreat!|Volga|HWL}}</ref> Afterwards, Linkle notes that compass glows again as it had in "[[The Girl in the Green Tunic]]" before leaving once more to find Hyrule Castle.<ref>{{Cite|Brother? More like SISTER! Ha ha ha! Oh wait, the compass! It's glowing again! Must be because we drove off the monsters. Anyway, off to Hyrule Castle!|Linkle|HWL}}</ref> | ||
====Combatants==== | =====Combatants===== | ||
{| class= | {| class=wikitable style="text-align:center; width:100%; max-width:40em;" | ||
!width="50%"| Goron Forces | !width="50%"| Goron Forces | ||
!width="50%"| Dark Forces | !width="50%"| Dark Forces | ||
|- | |- | ||
| [[File: | | [[File:HWDE Goron Captain Mini Map Icon.png]]<br/>'''[[Captain (Hyrule Warriors)#Engineer|Engineers]]''' | ||
| [[File: | | [[File:HWDE Bokoblin Mini Map Icon.png]]<br/>'''[[Bokoblin]]s''' | ||
|- | |- | ||
| [[File: | | [[File:HWDE Goron Mini Map Icon.png]]<br/>'''[[Goron]]s''' | ||
| [[File: | | [[File:HWDE Bokoblin Captain Mini Map Icon.png]]<br/>'''[[Bokoblin Captain]]s''' | ||
|- | |- | ||
| [[File: | | [[File:HWDE Goron Captain Mini Map Icon.png]]<br/>'''[[Goron Captain]]s''' | ||
| [[File: | | [[File:HWDE Dinolfos Mini Map Icon.png]]<br/>'''[[Dinolfos]]''' | ||
|- | |- | ||
|style="background-color: | |style="background-color:#0c2236" rowspan="3"| | ||
| [[File: | | [[File:HWDE Dinolfos Mini Map Icon.png]]<br/>'''[[Dinolfos Chieftain]]''' | ||
|- | |- | ||
| [[File: | | [[File:HWDE Lizalfos Mini Map Icon.png]]<br/>'''[[Lizalfos]]''' | ||
|- | |- | ||
| [[File: | | [[File:HWDE Lizalfos Mini Map Icon.png]]<br/>'''[[Lizalfos Chieftain]]''' | ||
|- | |- | ||
!colspan="2"| Commanders | !colspan="2"| Commanders | ||
|- | |- | ||
|style="background-color: | |style="background-color:#17456e"| [[File:HWDE Linkle Mini Map Icon.png]]<br/>'''[[Linkle]]''' | ||
|style="background-color: | |style="background-color:#17456e"| [[File:HWDE Volga Mini Map Icon.png]]<br/>'''[[Volga]]''' | ||
|- | |- | ||
|style="background-color: | |style="background-color:#163d5f"| [[File:HWDE Ruto Mini Map Icon.png]]<br/>'''[[Princess Ruto|Ruto]]''' | ||
|style="background-color: | |style="background-color:#0c2236" rowspan="2"| | ||
|- | |- | ||
|style="background-color: | |style="background-color:#17456e"| [[File:HWDE Darunia Mini Map Icon.png]]<br/>'''[[Darunia]]''' | ||
|} | |} | ||
==Collectibles== | ====Collectibles==== | ||
<div style="display:none"> | <div style="display:none"> | ||
{{#vardefine:Center|{{!}}style="text-align:center;}} | {{#vardefine:Center|{{!}}style="text-align:center;}} | ||
{{#vardefine:GS|{{!}} [[File:HW Gold Skulltula Icon.png|60px]]<br>'''[[Gold Skulltula]]'''}} | {{#vardefine:GS|{{!}} [[File:HW Gold Skulltula Icon.png|60px]]<br/>'''[[Gold Skulltula]]'''}} | ||
{{#vardefine:PoH|{{!}} [[File:HW Piece of Heart Icon.png|60px]]<br>'''[[Piece of Heart]]'''}} | {{#vardefine:PoH|{{!}} [[File:HW Piece of Heart Icon.png|60px]]<br/>'''[[Piece of Heart]]'''}} | ||
{{#vardefine:HC|{{!}} [[File:HW Heart Container Icon.png|60px]]<br>'''[[Heart Container]]'''}} | {{#vardefine:HC|{{!}} [[File:HW Heart Container Icon.png|60px]]<br/>'''[[Heart Container]]'''}} | ||
{{#vardefine:Dark|background-color: | {{#vardefine:Dark|background-color:#163d5f;"}} | ||
</div> | </div> | ||
{| class=wikitable style="width:100%" | {| class=wikitable style="width:100%" | ||
| Line 162: | Line 192: | ||
| Defeat 1000 enemies. | | Defeat 1000 enemies. | ||
|- | |- | ||
{{#var:Center}}{{#var:Dark}}{{#var:GS}}<br>(Hard Mode) | {{#var:Center}}{{#var:Dark}}{{#var:GS}}<br/>(Hard Mode) | ||
|style="{{#var:Dark}}| Atop the waterfall cliff in the northernmost portion of the Stage. | |style="{{#var:Dark}}| Atop the waterfall cliff in the northernmost portion of the Stage. | ||
|style="{{#var:Dark}}| As Impa equipped with the Giant Blade, defeat King Dodongo within three minutes of him appearing while keeping Sheik safe. | |style="{{#var:Dark}}| As Impa equipped with the Giant Blade, defeat King Dodongo within three minutes of him appearing while keeping Sheik safe. | ||
| Line 180: | Line 210: | ||
| Defeat 1000 enemies. | | Defeat 1000 enemies. | ||
|- | |- | ||
{{#var:Center}}{{#var:Dark}}{{#var:GS}}<br>(Hard Mode) | {{#var:Center}}{{#var:Dark}}{{#var:GS}}<br/>(Hard Mode) | ||
|style="{{#var:Dark}}| Northwest from the Temple Face Keep behind a wall of vines. | |style="{{#var:Dark}}| Northwest from the Temple Face Keep behind a wall of vines. | ||
|style="{{#var:Dark}}| As Linkle, open the Enemy Base before either Darunia or the Allied Base become endangered. | |style="{{#var:Dark}}| As Linkle, open the Enemy Base before either Darunia or the Allied Base become endangered. | ||
| Line 192: | Line 222: | ||
|style="{{#var:Dark}}| Play as Ruto. | |style="{{#var:Dark}}| Play as Ruto. | ||
|} | |} | ||
{{Noncanon|End}} | |||
==Nomenclature== | |||
{{Nomenclature}} | |||
==Gallery== | ==Gallery== | ||
<gallery> | <gallery> | ||
File:Zora's Domain HW.jpg|Frozen Zora's Domain | File:HW Lake Hylia.png|{{Term|HW|Lake Hylia (Stage)}} from {{HW|-}} | ||
File:HW Water Temple.png|The Water Temple | File:Zora's Domain HW.jpg|Frozen Zora's Domain from {{HW|-}} | ||
File:HW Water Temple.png|The Water Temple from {{HW|-}} | |||
File:HWL Lake Hylia.jpg|{{Term|HWL|Lake Hylia (Stage)}} from {{HWL|-}} | |||
File:HWDE Lake Hylia Map.png|The level map from {{HWDE|-}} | |||
File:HWDE Lake Hylia Map 2.png|The level map from {{HWDE|-}} | |||
</gallery> | </gallery> | ||
{{Ref}} | {{Ref}} | ||
{{ | {{DungeonNav2|FSA}} | ||
{{HW Stages}} | |||
{{Categories | |||
|Lakes | |||
|stages= FSA, HW, HWL, HWDE | |||
}} | |||
Latest revision as of 02:28, 1 May 2024
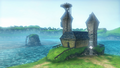
Lake Hylia is a recurring Stage in The Legend of Zelda series.(FSA | HW)[1][name references needed]
Overview
Four Swords Adventures
Lake Hylia is the first stage in the Whereabouts of the Wind. After being flung away by the twister created by Vaati in the Four Sword Sanctuary, the Links find themselves in a small field near Lake Hylia, stirred awake by the voice of Kaepora Gaebora. The owl explains to them that before they face Vaati, they must find and rescue Princess Zelda and the six Maidens first; by doing so, they will surely find Vaati. He tells them that their Four Sword at present is weak, but can have its power restored by collecting and infusing it with Force Gems. He bids them good luck, and says they will meet again soon.
Unlike in the other games where Lake Hylia is a singular lake, Lake Hylia appears as a series of small lakes connected by rivers. It is located in the eastern portion of Hyrule, and consists of mainly grassy areas, caves, rivers, and mountainside waterfalls where rainbows form in the light of the sun. As the first stage in the game, Lake Hylia features basic enemies and obstacles that serves to introduce controls, maneuvering and basic team-coordination skills. Close to the field where the Links awaken, they find a house belonging to the Formation Old-Timer who spends his days teaching his grandchildren Formations, and offers to give the Links a quick lesson as well.
Among the enemies encountered in this stage include resident Octoroks and Zoras, as well as Shadow Link, who had locked an old woman inside her house.[2] Also encountered are enemy Soldiers, who are under the control of Vaati and patrol the grounds close to the lake's bridge. Underneath this bridge, the Links find Tingle trapped beneath a large rock. Tingle thanks them for saving him, and explains that he is on the look-out for Force Gems as well, believing that he will become a Fairy if he collects enough. He believes that the Links must also be looking for Force Gems for the same reason, and insists that they all share the Force Gems they find equally. From there on, Tingle will appear at certain points throughout the game hoping to take large Force Gems for himself, which the Links must race against him for.
After swimming through the lake's rivers and maneuvering through its caves, the Links eventually arrive to the wooden bridge, where they fight the Soldiers patrolling the area. They then shortly fight their commander, a Chief Soldier, at the lakeside's end. At the very end of the stage, the Links find dark barriers blocking the entrance to the next stage, the Cave of No Return, which Kaepora Gaebora explains can only be dispelled with the powered up Four Sword.
| Items Obtained in this Area | |
|---|---|
|
|
Minor Enemies
- ↑ These Enemies cannot be fought as they only appear swimming in flooded caverns that the Links cannot enter.
Other Appearances
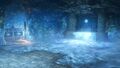
Hyrule Warriors

Lake Hylia contains the Scenarios "The Water Temple" and "Powers Collide", the second Scenarios in the Ocarina of Time and Linkle's Tale arcs, respectively.
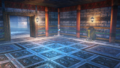
It is separated into two halves: the northern half is Lake Hylia itself, and the southern half is the Water Temple. Pieces of Zora's Domain in its frozen state appear in the Lake Hylia portion of the stage.
Areas

The Water Temple
After rescuing Princess Ruto atop the Death Mountain summit from a brainwashed Darunia, Impa and Sheik learn that the Gate of Souls located inside the Water Temple is teeming with monsters apparently being led by Zelda. The Hyrulean Forces, now joined by the Princess of Zoras and the Goron chieftain, venture to Lake Hylia to investigate Zelda's apparent change of heart.[3]
As the Hyrulean Forces arrive at Zora's Domain, Princess Zelda orders her minions to attack them.[4] The allies, however, use the domain's frozen waterfall to attack from the rear and surprise the Dark Forces, lowering their morale.[5] They soon discover that Ruto is being attacked by a group of monsters, and they quickly rush to help her since she is the only one who knows how to gain entrance to the Water Temple, where Zelda and the Gate of Souls are.[6][7] After rescuing the Zora Princess from a group of Lizalfos, she heads to the Lakeside Keep to open the floodgates and thus reveal the entrance to the Water Temple.[8]
Using her position as the Princess of Hyrule, Zelda harshly and continually urges the Hyrulean soldiers to cease their attack and instead follow her "royal command." This causes conflicting thoughts within the army and lowers their morale; Impa realizes that this Zelda is an impostor and repeatedly urges the Hyrulean Forces not to listen.[9][10][11] In light of this, Ruto suggests that they use the Lens of Truth, somewhere within the Water Temple, to reveal the identity of the fake Zelda. While the Hyrulean Forces advance to the inside of the temple, the Zora Princess goes underwater to search for the relic.[12] Ruto easily infiltrates the temple from underneath and finds the Lens of Truth, but Zelda closes the hall and imprisons her before she can rejoin her allies.[13][14] Ruto, seeking help from the Hyrulean Forces, instructs them to open the floodgates inside the temple in order to free her.[15] Pulling the two Floodgate Switches found in the Southeast and Southwest Room of the temple recedes the water from the Central Hall, allowing the allies to rescue the Zora Princess from within. She hands over the Lens of Truth to Sheik before she retreats from the battlefield.
The newly-acquired relic reveals the room where the impostor and the Gate of Souls are located, and the Hyrulean Forces quickly engage in combat with the false Zelda. Angered, the fake Princess of Hyrule summons King Dodongo to the battlefield to use as a distraction,[16] but Sheik and Impa manage to defeat the impostor before any grave damage is done. Sheik then holds the Lens of Truth toward Zelda, revealing Wizzro as the impostor. As Wizzro expresses his surprise at how they managed to see through his disguise, Sheik states that the wizard could not have been Zelda before twirling around in a flash of light and revealing her own true identity: Princess Zelda.[17][18] Impa is overjoyed at the sight of the princess alive,[19] with Zelda apologizing for not having told her before.[20] After Wizzro escapes, the real Princess of Hyrule and her top general combine their powers to close the Gate of Souls, stemming the flow of monsters from the era of the Hero of Time.[21]
After the Scenario finishes, Zelda becomes a playable character and her weapon, the Polished Rapier, becomes available for use.
Combatants
| Hyrulean Forces | Zelda's Forces |
|---|---|
Gorons |
Beamos |
Goron Captains |
Big Poes |
Gatekeeper | |
Lizalfos | |
| Stalchildren | |
Stalchild Captains | |
Stalchild Summoners | |
| Commanders | |
Darunia |
Zelda |
Ruto |
King Dodongo |
Sheik |
|
Impa | |
Powers Collide

"Powers Collide" takes place after the events of "The Water Temple", after Zelda and Impa leave to rejoin Link at the Temple of the Sacred Sword. In their absence, Volga launches an attack on Ruto and Darunia, who stayed behind to watch over Lake Hylia.[22]
Shortly after the battle begins, Darunia's Forces retreat into the Water Temple as Darunia seals the door to it, accidentally breaking the door.[23] Meanwhile, he leaves them to fight Volga alone. Ruto pleads to Linkle to find a way to help Darunia, as it's too dangerous for him alone to handle. Linkle is directed to the Water Temple's entrance to find a way to join Darunia.[24] Goron Engineers appear, offering to fix the door while tasking Linkle with the duty of escorting them.[25]
Upon aiding all three Engineers, they join forces to open the front gate, allowing Linkle to come to Darunia's side. Afterwards, the Lizalfos and Dinolfos Chieftains direct a portion of the Enemy Forces to the Temple East Gate, forcing it open. Guided by Dinolfos, they rush toward the Allied Base in an attempt to overwhelm Darunia's Forces and quickly end the battle. If the Dinolfos are defeated, the assault will be squandered allowing Darunia's Forces to continue their advance.
Defeating the Lizalfos dotted along Lake Hylia will force the Lizalfos and Dinolfos Chieftains to open a number of Keeps controlled by the Dark Forces as a last-ditch effort to defeat the Allied Forces,[26][27] including the Temple Face Keep where they were hiding. They will race toward the Allied Base, attempting to capture it unless intercepted, while Darunia rushes Volga's position in the Enemy Base at the King's Hall Keep. Defeating both Chieftans will halt all enemy advances, allowing Darunia's Forces to sweep all enemy strongholds.
After escorting Darunia's Forces to the Enemy Base, Darunia challenges Volga directly.[28] Accepting, Volga opens the Enemy Base, initiating confrontation.[29] Upon his defeat, Volga calls for his troops to retreat, ending the battle.[30] Afterwards, Linkle notes that compass glows again as it had in "The Girl in the Green Tunic" before leaving once more to find Hyrule Castle.[31]
Combatants
| Goron Forces | Dark Forces |
|---|---|
Engineers |
Bokoblins |
Gorons |
Bokoblin Captains |
Goron Captains |
Dinolfos |
Dinolfos Chieftain | |
Lizalfos | |
Lizalfos Chieftain | |
| Commanders | |
Linkle |
Volga |
Ruto |
|
Darunia | |
Collectibles
| Item | Location | Condition |
|---|---|---|
| The Water Temple | ||
Gold Skulltula |
North of the Temple Face Keep behind a set of vines. | Defeat 1000 enemies. |
Gold Skulltula (Hard Mode) |
Atop the waterfall cliff in the northernmost portion of the Stage. | As Impa equipped with the Giant Blade, defeat King Dodongo within three minutes of him appearing while keeping Sheik safe. |
Piece of Heart |
East Room. | Play as Sheik, capture the East Room. |
Heart Container |
Beneath a boulder in the eastern portion of Central Hall. | Play as Darunia. |
| Powers Collide | ||
Gold Skulltula |
North of the Temple Face Keep. | Defeat 1000 enemies. |
Gold Skulltula (Hard Mode) |
Northwest from the Temple Face Keep behind a wall of vines. | As Linkle, open the Enemy Base before either Darunia or the Allied Base become endangered. |
Piece of Heart |
Lakeside Keep. | Play as Linkle. |
Heart Container |
East of Cliffside Keep. | Play as Ruto. |
Nomenclature
| Language | Names | Meanings |
|---|---|---|
FrenchCA | Rive du lac Hylia (HWDE)[33] | Shore of lake Hylia |
FrenchEU | Bord du lac Hylia (HWDE)[32] | Lakeside Hylia |
German | Hylia-See (HWDE) | Lake Hylia |
Italian | Lago Hylia (HWDE) | Hylia Lake |
SpanishLA | Lago Hylia (HWDE) | Lake Hylia |
SpanishEU | Lago de Hylia (HWDE) | Hylia Lake |
| This table was generated using translation pages. To request an addition, please contact a staff member with a reference. | ||
Gallery
-
Lake Hylia from Hyrule Warriors
-
Frozen Zora's Domain from Hyrule Warriors
-
The Water Temple from Hyrule Warriors
-
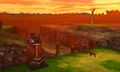
Lake Hylia from Hyrule Warriors Legends
-
The level map from Hyrule Warriors: Definitive Edition
-
The level map from Hyrule Warriors: Definitive Edition


References
- ↑ Encyclopedia, Dark Horse Books, pg. 265
- ↑ "Oh, thank goodness! That stupid door was really getting on my nerves! It never occurred to me that someone might have locked it from the outside! I'm convinced it was that shadowy boy, the one who looks just like you." — Old Woman (Four Swords Adventures)
- ↑ "At the fairy's request, Impa had fought her way to the summit of Death Mountain to rescue Princess Ruto. There, she subdued the Goron chieftain, Darunia, who had temporarily lost his senses. Upon freeing Princess Ruto, however, Impa was shocked to learn the reason for the conflict between the Zora and Goron people. The ancient Water Temple was teeming with monsters that poured from the Gate of Souls. What's more, the monsters were apparently led by Princess Zelda herself! Hoping to make sense of this disturbing revelation, Impa and her newfound allies journeyed to Lake Hylia. When they arrived, they were greeted by a Zelda seemingly consumed by evil..." — N/A (Hyrule Warriors)
- ↑ "Hm. Invaders. Someone destroy them for me." — Zelda (Hyrule Warriors)
- ↑ "Jump from the frozen waterfall cliff, and attack from the rear!" — N/A (Hyrule Warriors)
- ↑ "He-ey there! Help me!" — Ruto (Hyrule Warriors)
- ↑ "Princess Ruto is the only one who knows how to get into the temple! Keep her safe!" — Impa (Hyrule Warriors)
- ↑ "The only way into the Water Temple requires we open the floodgates. Let's hurry!" — Ruto (Hyrule Warriors)
- ↑ "Hyrulean soldiers! Cease fighting for the unworthy, and follow my royal command!" — Zelda (Hyrule Warriors)
- ↑ "Zelda's harsh rhetoric has cost Hyrulean Forces some morale!" — N/A (Hyrule Warriors)
- ↑ "Don't be deceived! This is not our Zelda! Anything she says will be a lie!" — Impa (Hyrule Warriors)
- ↑ "I'll go underwater and find the Lens of Truth. We can meet back up later." — Ruto (Hyrule Warriors)
- ↑ "Getting in was easy. Now I just need to find the Lens of Truth itself... Here it is! The Lens of Truth! This is exactly what we need... [...] Oh, of course. I feared they were planning to trap me in here, and they have." — Ruto (Hyrule Warriors)
- ↑ "Zelda's strategy has closed the Central Hall!" — N/A (Hyrule Warriors)
- ↑ "Go and open the floodgates inside the temple! Doing that should free me! You have to seek out all the keeps with floodgate switches. Understand?" — Ruto (Hyrule Warriors)
- ↑ "I have no idea how you broke my spell... But no matter. You leave me no recourse... My loyal servant, King Dodongo! Come forth! Burn these fools to the bone!" — Zelda (Hyrule Warriors)
- ↑ "How did you see through my disguise?" — Wizzro (Hyrule Warriors)
- ↑ "You can't be Zelda. Because... I am Zelda!" — Zelda (Hyrule Warriors)
- ↑ "Princess! You're alive!" — Impa (Hyrule Warriors)
- ↑ "Impa, forgive me for not telling you." — Zelda (Hyrule Warriors)
- ↑ "Let us close this gate together." — Zelda (Hyrule Warriors)
- ↑ "At the Water Temple, Princess Zelda and Impa had defeated Wizzro, the twisted wizard. they returned to their own realm ahead of the others. Ruto and Darunia stayed behind in order to patrol the grounds and keep vigil. But they suddenly found themselves drawn into battle when they were attacked by a new wave of monsters. It was the Dragon Knight, Volga, who led them. He set his wrath upon Ruto and Darunia, and drew them into a vicious battle. It was then that Linkle, in her quest to find Hyrule Castle, stumbled onto the scene. She was quick to answer Ruto's plea for aid, for she knew a hero must always help those in need. Linkle leapt into battle." — N/A (Hyrule Warriors Legends)
- ↑ "Oops, I think I might have broke the door... In any case, they should be safe inside." — Darunia (Hyrule Warriors Legends)
- ↑ "To join with him, you'll first need to open the temple's entrance." — Ruto (Hyrule Warriors Legends)
- ↑ "Leave it to us! We'll get that door open!" — Engineer (Hyrule Warriors Legends)
- ↑ "Kya! Swarm their base!" — Lizalfos Chieftain (Hyrule Warriors Legends)
- ↑ "Gya! Gorons too tough! Destroy them!" — Dinolfos Chieftain (Hyrule Warriors Legends)
- ↑ "Hey, Volga! If you're so tough, why don't you fight me yourself! Leave the cronies outta this!" — Darunia (Hyrule Warriors Legends)
- ↑ "An interesting proposition indeed. If you've made it this far, then you're worth my true strength!" — Volga (Hyrule Warriors Legends)
- ↑ "Haaa... I hate being forced to retreat, but we must. Full retreat!" — Volga (Hyrule Warriors Legends)
- ↑ "Brother? More like SISTER! Ha ha ha! Oh wait, the compass! It's glowing again! Must be because we drove off the monsters. Anyway, off to Hyrule Castle!" — Linkle (Hyrule Warriors Legends)
- ↑ "Bord du lac Hylia" — Select Scenario (Hyrule Warriors: Definitive Edition)
- ↑ "Rive du lac Hylia" — Select Scenario (Hyrule Warriors: Definitive Edition)
Dungeons in The Legend of Zelda
Level 1 • Level 2 • Level 3 • Level 4 • Level 5 • Level 6 • Level 7 • Level 8 • Level 9
Dungeons in The Adventure of Link
Parapa Palace • Midoro Palace • Island Palace • Maze Island Palace • Palace on the Sea • Three-Eye Rock Palace • Great Palace
Dungeons in A Link to the Past
Hyrule Castle • Castle Dungeon • Eastern Palace • Desert Palace • Tower of Hera
Palace of Darkness • Swamp Palace • Skull Woods • Thieves' Town • Ice Palace • Misery Mire • Turtle Rock • Ganon's Tower • Palace of the Four Sword![]()
Tail Cave • Bottle Grotto • Key Cavern • Angler's Tunnel • Catfish's Maw • Face Shrine • Eagle's Tower • Turtle Rock • Wind Fish's Egg
Color Dungeon (LADX | LANS) • Chamber Dungeon (LANS)
Inside the Deku Tree • Dodongo's Cavern • Inside Jabu-Jabu's Belly
Forest Temple • Fire Temple • Water Temple • Shadow Temple • Spirit Temple • Ganon's Castle
Woodfall Temple • Snowhead Temple • Great Bay Temple • Stone Tower Temple
Swamp Spider House • Pirates' Fortress • Oceanside Spider House • Beneath the Well • Ancient Castle of Ikana • Moon Dungeons
Gnarled Root Dungeon • Snake's Remains • Poison Moth's Lair • Dancing Dragon Dungeon • Unicorn's Cave • Ancient Ruins • Explorer's Crypt • Sword & Shield Maze • Onox's Castle • Room of Rites
Spirit's Grave • Wing Dungeon • Moonlit Grotto • Skull Dungeon • Crown Dungeon • Mermaid's Cave • Jabu-Jabu's Belly • Ancient Tomb • Black Tower • Room of Rites
Maku Road • Great Moblin's Keep • Ambi's Palace • Hero's Cave
Chambers of Insight • Sea of Trees • Talus Cave • Death Mountain • Vaati's Palace
Dragon Roost Cavern • Forbidden Woods • Tower of the Gods • Forsaken Fortress • Earth Temple • Wind Temple • Ganon's Castle
Fire Mountain • Ice Ring Isle • Ghost Ship • Savage Labyrinth
Stages in Four Swords Adventures
Whereabouts of the Wind
Lake Hylia • Cave of No Return • Hyrule Castle (Four Swords Adventures)
Eastern Hyrule
The Coast • Village of the Blue Maiden • Eastern Temple
Death Mountain
Death Mountain Foothills • The Mountain Path • Tower of Flames
Near the Fields
The Field • The Swamp • Infiltration of Hyrule Castle
The Dark World
Lost Woods (Four Swords Adventures) • Kakariko Village (Four Swords Adventures) • Temple of Darkness
The Desert of Doubt
Desert of Doubt • Desert Temple • Pyramid
Frozen Hyrule
Frozen Hyrule • Temple of Ice • Tower of Winds
Realm of the Heavens • The Dark Cloud • Palace of Winds
Deepwood Shrine • Cave of Flames • Fortress of Winds • Temple of Droplets • Palace of Winds • Dark Hyrule Castle
Forest Temple • Goron Mines • Lakebed Temple • Arbiter's Grounds • Snowpeak Ruins • Temple of Time • City in the Sky • Palace of Twilight • Hyrule Castle
Lantern Caverns • Cave of Ordeals • Cave of Shadows (TPHD)
Temple of the Ocean King • Temple of Fire • Temple of Wind • Temple of Courage • Ghost Ship • Goron Temple • Temple of Ice • Mutoh's Temple
Tower of Spirits • Forest Temple • Snow Temple • Ocean Temple • Fire Temple • Sand Temple
Skyview Temple • Earth Temple • Lanayru Mining Facility • Ancient Cistern • Sandship • Fire Sanctuary • Sky Keep
Dungeons in A Link Between Worlds
Eastern Palace • Tower of Hera • House of Gales • Inside Hyrule Castle • Desert Palace
Ice Ruins • Swamp Palace • Thieves' Hideout • Dark Palace • Skull Woods • Turtle Rock • Lorule Castle
Woodlands
Deku Forest • Buzz Blob Cave • Moblin Base • Forest Temple
Riverside
Secret Fortress • Abyss of Agony • Cove of Transition • Water Temple
Volcano
Blazing Trail • Hinox Mine • Den of Flames • Fire Temple
Ice Cavern
Frozen Plateau • Snowball Ravine • Silver Shrine • Ice Temple
Fortress
Sealed Gateway • Bomb Storage • Training Ground • The Lady's Lair
The Dunes
Infinity Dunes • Stone Corridors • Gibdo Mausoleum • Desert Temple
The Ruins
Illusory Mansion • Palace Noir • Lone Labyrinth • Grim Temple
Sky Realm
Floating Garden • Deception Castle • Dragon Citadel • Sky Temple
Forest Zone • Flooded Zone • Scorching Zone • Frozen Zone • Fortified Zone • Desert Zone • Shadow Zone • Baneful Zone
Dungeons in Breath of the Wild
Divine Beast Vah Ruta • Divine Beast Vah Rudania • Divine Beast Vah Medoh • Divine Beast Vah Naboris • Hyrule Castle
Sword Monk's Shrine (TMT) • Final Trial (TCB)
Akh Va'quot • Bareeda Naag • Bosh Kala • Chaas Qeta • Daag Chokah • Dagah Keek • Dah Kaso • Dah Hesho • Daka Tuss • Dako Tah • Daqa Koh • Daqo Chisay • Dila Maag • Dow Na'eh • Dunba Taag • Gee Ha'rah • Goma Asaagh • Gorae Torr • Ha Dahamar • Hawa Koth • Hia Miu • Hila Rao • Ishto Soh • Ja Baij • Jee Noh • Jitan Sa'mi • Joloo Nah • Ka'o Makagh • Kaam Ya'tak • Kah Mael Shrine • Kah Okeo Shrine • Kah Yah Shrine • Kam Urog Shrine • Katah Chuki • Katosa Aug • Kay Noh • Kaya Wan • Kayra Mah • Ke'nai Shakah • Keeha Yoog • Keh Namut • Kema Kosassa • Kema Zoos • Keo Ruug • Ketoh Wawai • Korgu Chideh • Korsh O'hu • Kuh Takkar • Kuhn Sidajj • Lakna Rokee • Lanno Kooh • Maag Halan • Maag No'rah • Maka Rah • Mezza Lo • Mijah Rokee • Mirro Shaz • Misae Suma • Mo'a Keet • Mogg Latan • Monya Toma • Mozo Shenno • Muwo Jeem • Myahm Agana • Namika Ozz • Ne'ez Yohma • Noya Neha • Oman Au • Owa Daim • Pumaag Nitae • Qua Raym • Qaza Tokki • Qukah Nata • Raqa Zunzo • Ree Dahee • Rin Oyaa • Ritaag Zumo • Rok Uwog • Rona Kachta • Rota Ooh • Rucco Maag • Saas Ko'sah • Sah Dahaj • Sasa Kai • Sha Gehma • Sha Warvo • Shada Naw • Shae Katha • Shae Loya • Shae Mo'sah • Shai Utoh • Shai Yota • Shee Vaneer • Shee Venath • Sheem Dagoze • Sheh Rata • Sho Dantu • Shoda Sah • Shoqa Tatone • Shora Hah • Soh Kofi • Suma Sahma • Ta'loh Naeg • Tah Muhl • Tahno O'ah • Tawa Jinn • Tena Ko'sah • Tho Kayu • To Quomo • Toh Yahsa • Toto Sah • Tu Ka'loh • Tutsuwa Nima • Voo Lota • Wahgo Katta • Ya Naga • Yah Rin • Zalta Wa • Ze Kasho • Zuna Kai
Etsu Korima • Kamia Omuna • Kee Dafunia • Keive Tala • Kiah Toza • Kihiro Moh • Mah Eliya • Noe Rajee • Rinu Honika • Rohta Chigah • Ruvo Korbah • Sato Koda • Sharo Lun • Shira Gomar • Takama Shiri • Yowaka Ita
Dungeons in Tears of the Kingdom
Wind Temple • Fire Temple • Water Temple • Lightning Temple • Hyrule Castle • Spirit Temple • Beneath Hyrule Castle
Anedamimik • Apogek • Bamitok • Chichim • Domizuin • Ekochiu • En-oma • Eshos • Eutoum • Ga-ahisas • Ganos • Gasas • Gatakis • Gatanisis • Gemimik • Gikaku • Gutanbac • Igashuk • Igoshon • Ihen-a • Ijo-o • Ikatak • In-isa • Irasak • Ishodag • Ishokin • Isisim • Iun-orok • Jikais • Jinodok • Jiosin • Jiotak • Jirutagumac • Jiukoum • Jochi-ihiga • Jochi-iu • Jochisiu • Jogou • Jojon • Joju-u-u • Joku-u • Joku-usin • Joniu • Jonsau • Josiu • Kadaunar • Kahatanaum • Kamatukis • Kamizun • Karahatag • Kikakin • Kimayat • Kisinona • Kitawak • Kiuyoyou • Kudanisar • Kumamayn • Kurakat • Kyokugon • Kyononis • Makasura • Makurukis • Maoikes • Marakuguc • Marari-in • Mayachideg • Mayachin • Mayahisik • Mayak • Mayam • Mayamats • Mayanas • Mayaotaki • Mayasiar • Mayatat • Mayaumekis • Mayausiy • Minetak • Miryotanog • Mogawak • Mogisari • Momosik • Morok • Moshapin • Motsusis • Musanokir • Nachoyah • Natak • Ninjis • Nouda • O-ogim • Orochium • Oromuwak • Oshozan-u • Otak • Otutsum • Pupunke • Rakakudaj • Rakashog • Rasitakiwak • Rasiwak • Ren-iz • Riogok • Rotsumamu • Runakit • Rutafu-um • Sahirow • Sakunbomar • Sepapa • Serutabomac • Sibajitak • Sifumim • Sihajog • Sikukuu • Simosiwak • Sinakawak • Sinatanika • Sisuran • Sitsum • Siwakama • Sonapan • Soryotanog • Suariwak • Susub • Susuyai • Tadarok • Tajikats • Taki-ihaban • Taninoud • Taunhiy • Tauyosipun • Tenbez • Teniten • Tenmaten • Timawak • Tokiy • Tsutsu-um • Tukarok • Turakamik • Turakawak • Ukoojisi • Ukouh • Usazum • Utojis • Utsushok • Wao-os • Yamiyo • Yansamin • Yomizuk • Zakusu • Zanmik
Dungeons in Freshly-Picked Tingle's Rosy Rupeeland
Hero's Shrine • Pirate Hideaway • Deku Temple • Insect Cavern • Desma's Labyrinth
Stages in Link's Crossbow Training
Level 1
Ordon Target Practice • Gerudo Stalfos: Defender • Arbiter's Grounds: Ranger
Level 2
Goron Target Practice • Zora River: Defender • Skull Shooting
Level 3
Kakariko Target Practice • Fruit Balloons • The Great Bridge: Defender
Level 4
Zora River Target Practice • Hyrule Castle: Defender • Skulltula Forest: Ranger
Level 5
Oocca Target Practice • Gerudo Moldorm: Defender • The Shootout
Level 6
Ordon Target Practice 2 • Bridge of Eldin: Defender • Snowpeak Ruins: Ranger
Level 7
Underground Target Practice • City in the Sky: Defender • Temple of Time: Ranger
Level 8
Horseback Target Practice • Snowpeak Ruins: Defender • Darknut Battle
Ranch Target Practice • Sacred Grove: Defender • Fossil Stallord Battle
Hyrule Field • Eldin Caves • Faron Woods • Valley of Seers • Death Mountain • Lake Hylia • Twilight Field • Palace of Twilight • Skyloft • Sealed Grounds • Temple of the Sacred Sword • Temple of Souls • Gerudo Desert • Ganon's Tower • Forsaken Fortress • Wind and Earth Temples
Frozen Grotto • Gerudo Ruins • Lost Swamp • Temple of Storms • Hyrule Castle • Future World