Wizzrobe: Difference between revisions
No edit summary |
mNo edit summary |
||
| (223 intermediate revisions by 42 users not shown) | |||
| Line 1: | Line 1: | ||
{{Enemy | {{Hatnote|This article is about the recurring enemies. For the {{Plural|Series|Boss}}, see {{Term|Series|Wizzrobe (Boss)|link}}.}} | ||
| | {{Infobox Enemy | ||
| | |image= | ||
| | {{Media | ||
| | |Artwork TLoZ= File:TLoZ Blue Wizzrobe Artwork.png | ||
| | |Artwork ALttP= File:ALttP Wizzrobe Artwork.png | ||
| | |Model LANS= File:LANS Wizzrobe Model.png | ||
| | |Model TWW= File:TWW Wizzrobe Model.png | ||
| | |Model TWWHD= File:TWWHD Wizzrobe Model.png | ||
| | |Model PH= File:PH Wizzrobe Model.png | ||
| | |Model TFH= File:TFH Wizzrobe Model.png | ||
| | |Model BotW= File:BotW Electric Wizzrobe Model.png | ||
| | |Sprite TLoZ= File:TLoZ Red Wizzrobe Sprite.png | ||
| | |Sprite ALttP= File:ALttP Wizzrobe Sprite.png | ||
|Sprite LA= File:LA Wizzrobe Sprite.png | |||
|Sprite LADX= File:LADX Wizzrobe Sprite.png | |||
|Sprite OoS= File:OoS Wizzrobe Sprite.png | |||
|Sprite OoA= File:OoA Wizzrobe Sprite.png | |||
|Sprite FS= File:FS Wizzrobe Sprite.png | |||
|Sprite FSA= File:FSA Wizzrobe Sprite.png | |||
|Sprite TMC= File:TMC Wizzrobe Sprite.png | |||
}} | }} | ||
|caption= | |||
|pronunciation= | |||
|plural= Wizzrobes<ref name="E 212">{{Cite Book|quote= |book= E |publisher= |page= 212 {{Exp Game|TLoZ, ALttP, LA, LADX, OoS, OoA, FS, TWW, TWWHD, FSA, TMC, PH}}}}</ref> | |||
|race= | |||
|game= TLoZ, ALttP, LA, OoS, OoA, FS, TWW, FSA, TMC, PH, TFH, BotW | |||
|other= TLoZ (Valiant Comics), TCT, ALttP (Ishinomori), ZA, AST, CoH | |||
|habitat= {{Spawn Locations}} | |||
|member= | |||
|attack= | |||
{{Infobox Game Blocks | |||
|TLoZ= | |||
{{Small|([[Red Wizzrobe]])}}, | |||
{{Damage | |||
|attack1= Contact | |||
|damage1= 1.00 | |||
|attack2= Magic Blast | |||
|damage2= 4.00 | |||
}}, {{Small|([[Blue Wizzrobe]])}}, | |||
{{Damage | |||
|attack1= Contact | |||
|damage1= 1.00 | |||
|attack2= Magic Blast | |||
|damage2= 2.00 | |||
}} | |||
|LA= | |||
{{Damage | |||
|attack1= Contact | |||
|damage1= 1.00 | |||
|attack2= Magic Blast | |||
|damage2= 1.00 | |||
}} | |||
|TWW= | |||
{{Damage | |||
|attack1= Contact | |||
|damage1= 0.25 | |||
|attack2= Fireball | |||
|damage2= 0.50 | |||
}} | |||
}} | |||
|weapon= {{List|{{Term|Series|Sword|link}}, {{Term|Series|Bow|link}}, {{Plural|Series|Bomb|link}}}} | |||
|spoils= | |||
{{Infobox Game Blocks | |||
|TLoZ= 4 {{Plural|TLoZ|Bomb|link}}, 1 {{Term|TLoZ|Rupee|link}}, {{Term|TLoZ|Clock|link}}, {{Term|TLoZ|Heart|link}}, {{Term|TLoZ|Fairy|link}} | |||
}} | |||
|exp= | |||
|theme= | |||
|health= | |||
{{Infobox Game Blocks | |||
|TLoZ= {{HP|TLoZ|3}} {{Small|([[Red Wizzrobe|Red]])}}, {{HP|TLoZ|5}} {{Small|([[Blue Wizzrobe|Blue]])}} | |||
|TWW= {{HP|TWW|4}} | |||
}}}} | |||
{{Term/Store|Wizzrobe|Wizzrobes|Series, TLoZ, ALttP, LA, LADX, OoS, OoA, FS, TWW, TWWHD, FSA, TMC, PH, BotW, NL|plural}} are recurring {{Plural|Series|Enemy|link}} in {{TLoZ|Series}}.<ref name= "E 212"/><ref>{{Cite|'''{{Color|BotW Shrine Quest|Electric Wizzrobe}}'''|Hyrule Compendium|BotW}}</ref><ref>{{Cite|{{Big|''Wizzrobe''}}|Monita|NL}}</ref>{{Name Ref|TFH}} | |||
{{OTOC}} | {{OTOC}} | ||
==Characteristics | ==Characteristics== | ||
{{Plural|Series|Wizzrobe}} are undead wizards that cast beams of magical energy,<ref>{{Cite Book|quote= |book= E |publisher= |page= 103}}</ref> and are so named because of the cloaks they often wear. While the appearance of {{Plural|Series|Wizzrobe}} has differed in some games, in all their appearances, they possess the ability to vanish and teleport elsewhere, enabling them to engage {{Term|Series|Link|link}} through ambushes and surprise attacks. {{Plural|Series|Wizzrobe (Boss)|link}} have also appeared as {{Plural|Series|Boss|link}} or {{Plural|Series|Sub-Boss|link}} in certain games. | |||
=== | ==={{TLoZ|-}}=== | ||
{{ | {{Manual|TLoZ|Wizzrobe|The Master of Movement. He appears here and there letting out magic spells that Link's little shield can't hold back. He's pretty strong. Watch out!}} | ||
In | {{Plural|TLoZ|Wizzrobe}} appear inside {{Plural|TLoZ|Dungeon|link}} in {{TLoZ}}. They are encountered in {{Term|TLoZ|Level 6|link}} and {{Term|TLoZ|Level 9|link}}. In the {{Term|TLoZ|Second Quest|link}}, they also appear in {{Term|TLoZ|Level 5|link}} in addition to the other two. They resemble humanoids whose faces are entirely hidden in shadow by their hoods. | ||
{{Plural|TLoZ|Wizzrobe}} come in two colors, both with drastically different behaviors. Orange {{Plural|TLoZ|Wizzrobe}} teleport throughout the room, while shooting magical bolts at {{Term|TLoZ|Link|link}}, before disappearing again. Blue {{Plural|TLoZ|Wizzrobe}} are a much stronger variant that take more hits to defeat, and attack by moving across the area while casting spells. They will occasionally vanish to swiftly change direction to another area. These {{Plural|TLoZ|Wizzrobe}} are far more dangerous than the weaker orange variety, especially in cramped rooms where {{Term|TLoZ|Link}} can quickly become surrounded by them. Both of their magic can be blocked with the {{Term|TLoZ|Magical Shield|link}}. They can be dispatched with the {{Term|TLoZ|Sword|link}}; however, due to their nature of teleporting across the area, it is easier to attack them from a distance, such as shooting {{Plural|TLoZ|Sword Beam|link}} at them. When defeated, red {{Plural|TLoZ|Wizzrobe}} may drop either a {{Term|TLoZ|Heart|link}}, one {{Term|TLoZ|Rupee|link}}, four {{Plural|TLoZ|Bomb|link}}, or a {{Term|TLoZ|Clock|link}}, while blue {{Plural|TLoZ|Wizzrobe}} may drop either a {{Term|TLoZ|Heart}}, one {{Term|TLoZ|Rupee}}, or a {{Term|TLoZ|Fairy|link}}.{{Note|If {{Term|TLoZ|Link|link}} defeats 10 enemies without getting hit or teleporting with the {{Term|TLoZ|Recorder|link}}, then the 10th enemy defeated will drop five {{Plural|TLoZ|Rupee|link}}. However, if the 10th enemy is defeated with a {{Term|TLoZ|Bomb|link}}, then it will drop four {{Plural|TLoZ|Bomb}}. If {{Term|TLoZ|Link}} defeats 16 enemies without getting hit or teleporting, then the 16th enemy will drop a {{Term|TLoZ|Fairy|link}}. After the 16th enemy, {{Term|TLoZ|Link}} must get hit and reset the counter to zero in order to achieve this effect again. Defeating {{Plural|TLoZ|Armos|link}}, {{Plural|TLoZ|Like Like|link}}, {{Plural|TLoZ|Keese|link}}, or {{Plural|TLoZ|Gel|link}} will not be counted.<ref>{{Cite Web|quote= |author= n.a. |published= n.d. |retrieved= August 17, 2017 |url= http://redcandle.us/The_Legend_of_Zelda#Forced_drops |title= Forced Drops |site= redcandle.us}}</ref>}} | |||
==={{ALttP|-}}=== | |||
=== | {{Manual|ALttP|Wizzrobe|This wizard appears and disappears using magic. You can only damage him only while he is visible. The Wizzrobe attacks using magical beams of energy.}} | ||
{{ | |||
{{Plural|ALttP|Wizzrobe}} in {{ALttP}} appear in {{Term|ALttP|Misery Mire (Dungeon)|link}} and {{Term|ALttP|Ganon's Tower|link}}. The {{Plural|ALttP|Wizzrobe}} of {{Term|ALttP|Misery Mire}} wear green robes and brimmed hats. Unlike {{Plural|TLoZ|Wizzrobe}} from {{TLoZ}}, they appear and disappear in one place, and cast spells at {{Term|ALttP|Link|link}} in between. Their teleportation spells are slow, however, as they will briefly appear transparent just before emerging and vanishing. They can only be attacked once they take physical form. | |||
A faster variety of {{Term|ALttP|Wizzrobe}} known as {{Plural|ALttP|Purple Wizzrobe}} also appear in {{Term|ALttP|Ganon's Tower}}. | |||
==={{LA|-}}=== | |||
{{Plural|LANS|Wizzrobe}} in {{LA}} appear similarly to their green {{ALttP}} incarnation, staying in one spot as they vanish and reappear. When one emerges, it first appears as a hat on the floor, indicating where it will appear. It then rises and fires an attack in {{Term|LANS|Link|link}}'s general direction before vanishing again. Unlike previous {{Plural|Series|Wizzrobe}}, they cannot be harmed with the {{Term|LANS|Sword|link}}, which will instead only repel them back. They can only be harmed by firing an {{Term|LANS|Arrow|link}} at them with the {{Term|LANS|Bow|link}}, which will defeat them in two hits; by planting a {{Term|LANS|Bomb|link}} near them, which will defeat them in one hit; or by throwing an object at them, such as a pot or a stunned enemy, which will defeat them in one hit. {{Plural|LANS|Wizzrobe}} can also be stunned with the {{Term|LANS|Hookshot|link}} or {{Term|LANS|Boomerang|link}}, making it easier to defeat them with a {{Term|LANS|Bomb}}. They appear in the {{Term|LANS|Face Shrine|link}}. | |||
=== | ==={{OoS|-}}=== | ||
{{Plural|OoS|Wizzrobe}} come in three different color varieties in {{OoS}}, and have the same appearance as in past games. The green variety behaves identically to the {{Plural|LANS|Wizzrobe}} of {{LA}}, staying in one place and attacking {{Term|OoS|Link|link}} with their spells from that spot. The red variety has more health, and teleports around the room, attacking in the same way. The blue {{Term|OoS|Wizzrobe}} behaves more like the blue {{Plural|TLoZ|Wizzrobe}} of {{TLoZ}}, as they move around the room while casting spells. They are also faster at casting than the other two. Like the {{Plural|TLoZ|Wizzrobe}} of {{TLoZ|-}}, the blue variety is able to make itself invulnerable to attack when changing direction. While it does this, it also has the added advantage of moving through objects, but cannot harm {{Term|OoS|Link}}. | |||
=== | ==={{OoA|-}}=== | ||
{{Plural|OoA|Wizzrobe}} come in three different color varieties in {{OoA}}, and have the same appearance as in past games. The green variety behaves identically to the {{Plural|LANS|Wizzrobe}} of {{LA}}, staying in one place and attacking {{Term|OoA|Link|link}} with their spells from that spot. The red variety has more health, and teleports around the room, attacking in the same way. The blue {{Term|OoA|Wizzrobe}} behaves more like the blue {{Plural|TLoZ|Wizzrobe}} of {{TLoZ}}, as they move around the room while casting spells. They are also faster at casting than the other two. Like the {{Plural|TLoZ|Wizzrobe}} of {{TLoZ|-}}, the blue variety is able to make itself invulnerable to attack when changing direction. While it does this, it also has the added advantage of moving through objects, but cannot harm {{Term|OoA|Link}}. | |||
=== | ==={{FS|-}}=== | ||
{{ | Three varieties of {{Plural|FS|Wizzrobe}} appear in {{FS}}, and the game also introduces the red {{Term|FS|Fire Wizzrobe|link}} and the blue {{Term|FS|Ice Wizzrobe|link}}. While the standard green variety attacks normally, the {{Plural|FS|Fire Wizzrobe|display=Fire}} and {{Plural|FS|Ice Wizzrobe}} wield fire and ice magic, respectively. They appear in {{Term|FS|Vaati's Palace|link}}. | ||
{{ | |||
{{ | |||
{{ | |||
| | |||
| | |||
| | |||
}} | |||
{{Plural|FS|Wizzrobe}} return to their original appearance as hooded humanoids. | |||
==={{TWW|-}}=== | |||
{{ | {{Figurines|TWW}} | ||
{{Plural|TWWHD|Wizzrobe}} take on a significantly different look in {{TWW}}, characterized by their {{Wp|toucan}}-like faces and wing-like sleeves. They usually wear dark cloaks with hoods and carry wands that they use to cast their spells. Like previous appearances, they disappear and reappear using magic. When they teleport, a sound is heard to indicate their position. They come in two common, colored varieties and use different strategies. {{Plural|TWWHD|Wizzrobe}} with [[Fire Wizzrobe|red hoods shoot fireballs]], while {{Plural|TWWHD|Wizzrobe}} with yellow hoods can both shoot fireballs and summon other enemies.<ref>{{Cite|Wizzrobe - Habitat: Tower of the Gods - Magic: Fire, summons - These mighty mages are adept at wielding flame and summoning other creatures to their aid. The only way to defeat them is to try to predict their movements and attack them during the brief moments that they assume physical form.|Figurine|TWW}}</ref> There are also {{Plural|TWWHD|Wizzrobe}} with white robes and blue hoods, which behave identically to red-hooded variants, that appear atop {{Plural|TWWHD|Lookout Platform|link}} near the {{Term|TWWHD|Seven-Star Isles|link}}.<ref>{{Cite Guide|quote= |game= TWW|publisher= Prima|page= 150}}</ref> {{Plural|TWWHD|Wizzrobe}} can be defeated in one hit if they are frozen with an {{Term|TWWHD|Ice Arrow|linK}} and then tossed at a wall, shot with a {{Term|TWWHD|Fire Arrow|link}}, or crushed with the {{Term|TWWHD|Skull Hammer|link}}. A {{Term|TWWHD|Wizzrobe (Boss)|link}} {{Term|TWWHD|Sub-Boss|link}} also appears in the {{Term|TWWHD|Wind Temple|link}}, wearing a distinctive orange cloak and crown. | |||
{{ | ==={{FSA|-}}=== | ||
{{ | {{Plural|FSA|Wizzrobe}} are able to steal {{Plural|FSA|Force Gem|link}} from the {{Plural|FSA|Links|link}} in {{FSA}}, while also using fire and ice spells. They closely resemble the {{Plural|ALttP|Wizzrobe}} from {{ALttP}} and first appear in the {{Term|FSA|Eastern Temple|link}}. | ||
=== | ==={{TMC|-}}=== | ||
{{Figurines|TMC}} | |||
{{Plural|TMC|Wizzrobe}} in {{TMC}} appear identically to their appearance in {{FS}}, with three varieties; standard green {{Plural|TMC|Wizzrobe}}, {{Plural|TMC|Fire Wizzrobe|link}}, and {{Plural|TMC|Ice Wizzrobe|link}}. They appear in the {{Term|TMC|Palace of Winds|link}} and {{Term|TMC|Dark Hyrule Castle|link}}. {{Plural|TMC|Ice Wizzrobe}} are weak to fire-based attacks, and can be instantly defeated using the {{Term|TMC|Flame Lantern|link}}. | |||
=== | ==={{PH|-}}=== | ||
{{Plural|PH|Wizzrobe}} in {{PH}} retain their bird-like appearance, but are slightly smaller, wear cloth masks, and carry large scythes instead of wands. In spite of the aesthetic similarities, they take on a completely different role in the game. They appear only in the {{Term|PH|Temple of the Ocean King|link}} and do not use their traditional magic. Instead, they are invisible until right before they attack. They will sneak up to steal 15 seconds from the {{Term|PH|Phantom Hourglass (Item)|link}} with a swipe of their scythes. They appear as {{Plural|PH|Skull|link}} on the map on the top screen, which is the only way to track them without coming in range of their attacks. Defeating one earns {{Term|PH|Link|link}} 30 more seconds of the {{Term|PH|Sand of Hours|link}}. | |||
{{ | ==={{TFH|-}}=== | ||
{{ | {{Stub|TFH}} | ||
{{ | As of the Version 2.0.0 update, dark {{Plural|TFH|Wizzrobe|link}} can be found in the {{Term|TFH|Den of Trials|link}}. | ||
=== | ==={{BotW|-}}=== | ||
{{Main|Blizzrobe, Electric Wizzrobe, Fire Wizzrobe, Ice Wizzrobe, Meteo Wizzrobe, Thunder Wizzrobe}} | |||
Six types of {{Term|BotW|Wizzrobe}} appear in {{BotW}}. There are three base forms of {{Term|BotW|Wizzrobe}}: {{Plural|BotW|Electric Wizzrobe|link}}, {{Plural|BotW|Fire Wizzrobe|link}}, and {{Plural|BotW|Ice Wizzrobe|link}}, which carry {{Plural|BotW|Lightning Rod|link}}, {{Plural|BotW|Fire Rod|link}}, and {{Plural|BotW|Ice Rod|link}} respectively. Three stronger variants of these {{Plural|BotW|Wizzrobe}} also appear. These more powerful {{Plural|BotW|Wizzrobe}} are: {{Plural|BotW|Thunder Wizzrobe|link}} which bear {{Plural|BotW|Thunderstorm Rod|link}}, {{Plural|BotW|Meteo Wizzrobe|link}} which carry {{Plural|BotW|Meteor Rod|link}}, and {{Plural|BotW|Blizzrobe|link}} which carry {{Plural|BotW|Blizzard Rod|link}}. | |||
=== | ==Other Appearances== | ||
[[File: | ==={{TLoZ|-}} (Valiant Comics)=== | ||
{{Noncanon|Start}} | |||
[[File:Wizzrobe VC.png|thumb|right|Wizzrobe in the Valiant Comics]] | |||
The Wizzrobes in the {{TLoZ|Valiant Comics}} highly resemble their original artwork from {{TLoZ|-}}. Although a Wizzrobe makes a brief appearance in "[[He Also Serves]],"<ref>{{Cite Book|quote= When do we spring the trap, Wizzrobe?|book= TLoZ (Valiant Comics)|publisher= |page= 9}}</ref> they play a more important role in "[[To the First Power]]" and, to an extent, in "[[The Legend of Zelda (Valiant Comics)/Issue 4#Queen of Hearts|Queen of Hearts]]." | |||
In "To the First Power," a Wizzrobe commands several of Ganon's minions to tie Link up after [[Princess Zelda|Zelda]] heads inside the [[Level 1|Eagle Labyrinth]] to train against Ganon's minions. However, the Wizzrobe reveals to Link that he filled the Eagle Labyrinth with the most dangerous of enemies so that Zelda may not stand a chance up against them.<ref>{{Cite Book|quote= Grab him! Without his weapons, he's helpless! You thought Eagle Labyrinth was a safe place for Zelda to hone her battle skills! Fool! I filled it with the most lethal enemies in Ganon's army! She won't stand a chance! Let my teleportation spell carry us to the final room of the labyrinth!|book= TLoZ (Valiant Comics)|publisher= |page= 2}}</ref> Although Link confronts the Wizzrobe and tells him that capturing Zelda will do no good since he is the one that [[Ganon]] wants, the Wizzrobe confesses that he is not interested in following Ganon's orders anymore.<ref>{{Cite Book|quote= Why go to all this trouble to get Zelda, Wizzrobe? I'm the one Ganon wants!|book= TLoZ (Valiant Comics)|publisher= |page= 2}}</ref><ref>{{Cite Book|quote= Ganon's desires don't interest me! I'm finished following that loser!|book= TLoZ (Valiant Comics)|publisher= |page= 2}}</ref> He elaborates that he has gathered many other minions who feel the same way, and as soon as he destroys Link and Zelda, all of Ganon's minions will join his renegade army, leaving Ganon to fail.<ref>{{Cite Book|quote= I've gathered many of Ganon's minions who feel the same! Ganon has never been able to stop you OR Zelda! But, if I can destroy you both, Ganon's minions will join my renegade army...and Ganon himself will fall!|book= TLoZ (Valiant Comics)|publisher= |page= 2}}</ref> | |||
In | |||
Eventually, Zelda makes her way to where the Wizzrobe and Link are, delighting the foe since he will now be able to defeat her himself.<ref>{{Cite Book|quote= I don't know how you got past my renegade army, princess! But I'm delighted that I get to destroy you myself!|book= TLoZ (Valiant Comics)|publisher= |page= 9}}</ref> The Wizzrobe shoots a magic beam at her, which Zelda dodges and quickly fires an Arrow from her Bow towards it, making him fall into a fire pit that sends the Wizzrobe back to Ganon.<ref>{{Cite Book|quote= Zelda: And you picked on the WRONG princess, Wizzrobe!|book= TLoZ (Valiant Comics)|publisher= |page= 10}}</ref><ref>{{Cite Book|quote= Wizzrobe: Nooo! This will send be back to Ganon!|book= TLoZ (Valiant Comics)|publisher= |page= 10}}</ref> The story ends with the Wizzrobe kneeling in front of Ganon while the Prince of Darkness praises him since he could make use of a "deceitful and treacherous" man like him.<ref>{{Cite Book|quote= So...you plotted behind my back! You, Wizzrobe, are deceitful and treacherous! [...] Good! I can USE a man like you.|book= TLoZ (Valiant Comics)|publisher= |page= 10}}</ref> | |||
{{ | |||
The Wizzrobe in "Queen of Hearts" is in charge of securing the [[Magic Container]] that holds all of [[Queen Seline]]'s magical powers.<ref>{{Cite Book|quote= The magic container is the key--! If we can break it open, my powers will return!|book= TLoZ (Valiant Comics)|publisher= |page= 8}}</ref> When Link and Seline make their way to where the magic container is, they are confronted by a Wizzrobe and a horde of Ganon's other minions. Link is then heavily injured and faints, and before the Wizzrobe can finish him off, Zelda appears and shoots an Arrow at the Magic Container,<ref>{{Cite Book|quote= Get away from my friends, you creep!|book= TLoZ (Valiant Comics)|publisher= |page= 9}}</ref> restoring Seline's powers and allowing her to easily defeat the Wizzrobe and the rest of the enemies.<ref>{{Cite Book|quote= Ah! My powers have returned! Now then, little wizard....it's time for you to learn about REAL magic.|book= TLoZ (Valiant Comics)|publisher= |page= 9}}</ref> | |||
{{Noncanon|End}} | |||
==={{TCT|-}}=== | |||
{{Noncanon|Start}} | |||
{{Main|Madame Grusha}} | {{Main|Madame Grusha}} | ||
A Wizzrobe disguised as a [[Fortune Teller]] appears in | A Wizzrobe disguised as a [[Fortune Teller]] appears in {{TCT}}. Known as [[Madame Grusha]], she resides in the [[Town of Ruto]]. If Zelda visits Madame Grusha's hut, she will guess that Zelda has traveled far and that she is searching for three things. The Fortune Teller goes on to explain that she knows how to help the princess, but she cannot speak of it in their current location and asks that Zelda follow her into her inner sanctum.<ref>{{Cite Book|quote= Grusha can see far. You are seeking three things. I can help you, but I can't speak of it here. Come into my inner sanctum.|book= TCT|publisher= |page= 116}}</ref> Following Madame Grusha will lead to Zelda's death, while deciding to not follow her will result in a fight between Zelda and the Wizzrobe, along with some Moblins. However, the princess manages to defeat both enemies and come out of the hut alive.<ref>{{Cite Book|quote=She grabs a mirror off the wall and holds it up as a shield just as the wizzrobe lowers his staff. There's a flash of red light. The spell hits the mirror--and bounces back across the room. The wizzrobe and the moblin freeze where they stand. The spell has turned them to stone!|book= TCT|publisher= |page= 27}}</ref> | ||
{{Noncanon|End}} | |||
=== | ==={{AST|-}}=== | ||
{{Noncanon|Start}} | |||
{{Stub|AST}} | |||
{{Noncanon|End}} | |||
=== | ==={{ZA|-}}=== | ||
{{Noncanon|Start}} | |||
In {{ZA}}, Wizzrobes appear wearing blue cloaks and carrying wooden staffs. They walk around and occasionally cast blasts of magic, however unlike their canonical incarnations, they do not teleport at will. They appear in the [[Shrine of Illusion]] and the [[Shrine of Destiny]]. | In {{ZA}}, Wizzrobes appear wearing blue cloaks and carrying wooden staffs. They walk around and occasionally cast blasts of magic, however unlike their canonical incarnations, they do not teleport at will. They appear in the [[Shrine of Illusion]] and the [[Shrine of Destiny]]. | ||
{{Noncanon|End}} | |||
=== | ==={{ALttP|-}} (Ishinomori)=== | ||
{{Noncanon|Start}} | |||
A Wizzrobe appears in Chapter 9 of the | A Wizzrobe appears in Chapter 9 of the {{ALttP|Ishinomori}}. After Link exits the [[Swamp Palace]], he hears Princess Zelda contact him telepathically from beyond the [[Misery Mire (Dungeon)|wasteland]].<ref>{{Cite Book|quote=I...am...nearby... Hurry!|book= ALttP (Ishinomori)|publisher= |page= 9}}</ref><ref>{{Cite Book|quote= Can't you hear her? Zelda is calling from beyond the wasteland!|book= ALttP (Ishinomori)|publisher= |page= 9}}</ref> [[Epheremelda]], who cannot hear Zelda's calling, advises Link against going to the wasteland as it is too dangerous.<ref>{{Cite Book|quote= Now you're hearing things! Anyway, the wasteland is way too harsh! Once you get in there, you can't escape!|book= ALttP (Ishinomori)|publisher= |page= 9}}</ref> Link disregards her suggestion,<ref>{{Cite Book|quote= If this wasteland is as dangerous as you say it is, I've got to get Zelda out of there right away!|book= ALttP (Ishinomori)|publisher= |page= 10}}</ref> heading into the wasteland where he stumbles into an oasis from where Zelda is calling his name. The young hero ventures in and finds her.<ref>{{Cite Book|quote= It's some kind of oasis! This must be where Zelda is being held! Zelda! I'm on my way! [...] Can it be? Zelda! I finally found you!|book= ALttP (Ishinomori)|publisher= |page= 11}}</ref> As he remembers the [[Maiden]]'s words of Zelda being inside {{Term|ALttP (Ishinomori)|Turtle Rock|link}},<ref>{{Cite Book|quote= But wait... The girl in the crystal said Zelda was in a rock shaped like a turtle...|book= ALttP (Ishinomori)|publisher= |page= 12}}</ref> the princess turns out to be an illusion made by a Wizzrobe, who promptly captures Link and conjures [[Vitreous]] from the swamp to devour him.<ref>{{Cite Book|quote= You walked right into my trap, tasty morsel! This is Misery Mire, world famous for its fine aroma of Swamp Gas. You're just in time for dinner with Sir Vitreous, the master of this place... Dinner, with you as the main course!|book= ALttP (Ishinomori)|publisher= |page= 12}}</ref> However, a whirlpool is created that engulfs both Vitreous and the Wizzrobe, and from beneath [[Zora (Ishinomori)|Zora]] appears to rescue Link. | ||
{{ | {{Noncanon|End}} | ||
== | ==={{NL|-}}=== | ||
{{Noncanon|Start}} | |||
{{Monita|These magical foes attack from afar. They've only got one trick up their loosely hanging sleeves, and that's...well, magic!}} | |||
{{Stub|NL}} | |||
{{ | {{Noncanon|End}} | ||
| | |||
| | ==={{CoH|-}}=== | ||
| | {{Ambig|Start}} | ||
Wizzroboes appear as enemies in {{CoH}}. | |||
| | {{Ambig|End}} | ||
==Trivia== | |||
* {{Term|HWDE|Wizzro|link}} from {{HW}} is named after these enemies, and has a similar appearance. | |||
==Nomenclature== | |||
{{Nomenclature}} | |||
==Gallery== | ==Gallery== | ||
<gallery> | <gallery> | ||
File: | File:BotW Wizzrobe Concept Artwork.png|Concept artwork of {{Plural|BotW|Wizzrobe}} from {{BotW|-}} | ||
File: | File:Wizzrobe's Trap.png|{{Term|ALttP|Link}} caught in the {{Term|ALttP|Wizzrobe}}'s trap in the {{ALttP|-}} comic | ||
File:AST Wizzrobe Sprite.png|A {{Term|AST|Light World}} {{Term|AST|Wizzrobe}} from {{AST|-}} | |||
File:ZA Wizzrobe Sprite.png|A {{Term|ZA|Wizzrobe}} from {{ZA|-}} | |||
File:Wizzrobe | File:CoH Fire Wizzrobe Sprite.png|A {{Term|CoH|Wizzroboe}} from {{CoH|-}} | ||
File:CoH Wizzrobe Artwork.png|Artwork of a Wizzrobe from {{CoH|-}} | |||
File:TWW Wizzrobe Figurine Model 2.png|Two regular {{Term|TWW|Wizzrobe}} variants from {{TWW|-}} | |||
File: | |||
File:Wizzrobe | |||
File: | |||
File: | |||
</gallery> | </gallery> | ||
==See Also== | ==See Also== | ||
* | * {{Term|Series|Blizzrobe|link}} | ||
* | * {{Term|Series|Blue Wizzrobe|link}} | ||
* | * {{Term|Series|Carock|link}} | ||
* | * {{Term|Series|Electric Wizzrobe|link}} | ||
* {{Term|Series|Fire Wizzrobe|link}} | |||
* {{Term|Series|Ice Wizzrobe|link}} | |||
* {{Term|Series|Mago|link}} | |||
* {{Term|Series|Meteo Wizzrobe|link}} | |||
* {{Term|Series|Purple Wizzrobe|link}} | |||
* {{Term|Series|Red Wizzrobe|link}} | |||
* {{Term|Series|Thunder Wizzrobe|link}} | |||
* {{Term|Series|Wizard|link}} | |||
* {{Term|Series|Wizzro|link}} | |||
* {{Term|Series|Wizzrobe (Boss)|link}} | |||
{{Notes}} | |||
{{Ref}} | {{Ref}} | ||
{{ | {{Categories | ||
|Humanoid Enemies, Undead Enemies, Wizzrobes | |||
|characters= TLoZ (Valiant Comics), ALttP (Ishinomori) | |||
|enemies= TLoZ, ALttP, LA, LADX, LANS, OoS, OoA, FS, TWW, TWWHD, FSA, TMC, PH, TFH, BotW, ZA, AST, CoH | |||
}} | |||
[[de:Pyromagi]] | |||
[[ | |||
Latest revision as of 22:45, 26 April 2024
Wizzrobes are recurring Enemies in The Legend of Zelda series.[1][2][3][name references needed]
Characteristics
Wizzrobes are undead wizards that cast beams of magical energy,[4] and are so named because of the cloaks they often wear. While the appearance of Wizzrobes has differed in some games, in all their appearances, they possess the ability to vanish and teleport elsewhere, enabling them to engage Link through ambushes and surprise attacks. Wizzrobes have also appeared as Bosses or Sub-Bosses in certain games.
The Legend of Zelda
Wizzrobes appear inside Dungeons in The Legend of Zelda. They are encountered in Level 6 and Level 9. In the Second Quest, they also appear in Level 5 in addition to the other two. They resemble humanoids whose faces are entirely hidden in shadow by their hoods.
Wizzrobes come in two colors, both with drastically different behaviors. Orange Wizzrobes teleport throughout the room, while shooting magical bolts at Link, before disappearing again. Blue Wizzrobes are a much stronger variant that take more hits to defeat, and attack by moving across the area while casting spells. They will occasionally vanish to swiftly change direction to another area. These Wizzrobes are far more dangerous than the weaker orange variety, especially in cramped rooms where Link can quickly become surrounded by them. Both of their magic can be blocked with the Magical Shield. They can be dispatched with the Sword; however, due to their nature of teleporting across the area, it is easier to attack them from a distance, such as shooting Sword Beams at them. When defeated, red Wizzrobes may drop either a Heart, one Rupee, four Bombs, or a Clock, while blue Wizzrobes may drop either a Heart, one Rupee, or a Fairy.[note 1]
A Link to the Past
WizzrobeThis wizard appears and disappears using magic. You can only damage him only while he is visible. The Wizzrobe attacks using magical beams of energy.
Wizzrobes in A Link to the Past appear in Misery Mire and Ganon's Tower. The Wizzrobes of Misery Mire wear green robes and brimmed hats. Unlike Wizzrobes from The Legend of Zelda, they appear and disappear in one place, and cast spells at Link in between. Their teleportation spells are slow, however, as they will briefly appear transparent just before emerging and vanishing. They can only be attacked once they take physical form.
A faster variety of Wizzrobe known as Purple Wizzrobes also appear in Ganon's Tower.
Link's Awakening
Wizzrobes in Link's Awakening appear similarly to their green A Link to the Past incarnation, staying in one spot as they vanish and reappear. When one emerges, it first appears as a hat on the floor, indicating where it will appear. It then rises and fires an attack in Link's general direction before vanishing again. Unlike previous Wizzrobes, they cannot be harmed with the Sword, which will instead only repel them back. They can only be harmed by firing an Arrow at them with the Bow, which will defeat them in two hits; by planting a Bomb near them, which will defeat them in one hit; or by throwing an object at them, such as a pot or a stunned enemy, which will defeat them in one hit. Wizzrobes can also be stunned with the Hookshot or Boomerang, making it easier to defeat them with a Bomb. They appear in the Face Shrine.
Oracle of Seasons
Wizzrobes come in three different color varieties in Oracle of Seasons, and have the same appearance as in past games. The green variety behaves identically to the Wizzrobes of Link's Awakening, staying in one place and attacking Link with their spells from that spot. The red variety has more health, and teleports around the room, attacking in the same way. The blue Wizzrobe behaves more like the blue Wizzrobes of The Legend of Zelda, as they move around the room while casting spells. They are also faster at casting than the other two. Like the Wizzrobes of The Legend of Zelda, the blue variety is able to make itself invulnerable to attack when changing direction. While it does this, it also has the added advantage of moving through objects, but cannot harm Link.
Oracle of Ages
Wizzrobes come in three different color varieties in Oracle of Ages, and have the same appearance as in past games. The green variety behaves identically to the Wizzrobes of Link's Awakening, staying in one place and attacking Link with their spells from that spot. The red variety has more health, and teleports around the room, attacking in the same way. The blue Wizzrobe behaves more like the blue Wizzrobes of The Legend of Zelda, as they move around the room while casting spells. They are also faster at casting than the other two. Like the Wizzrobes of The Legend of Zelda, the blue variety is able to make itself invulnerable to attack when changing direction. While it does this, it also has the added advantage of moving through objects, but cannot harm Link.
Four Swords
Three varieties of Wizzrobes appear in Four Swords, and the game also introduces the red Fire Wizzrobe and the blue Ice Wizzrobe. While the standard green variety attacks normally, the Fire and Ice Wizzrobes wield fire and ice magic, respectively. They appear in Vaati's Palace.
Wizzrobes return to their original appearance as hooded humanoids.
The Wind Waker
| Figurine | |
|---|---|
| Description | Habitat: Tower of the Gods |

| Figurine | Description |
|---|---|
Habitat: Tower of the Gods |
Wizzrobes take on a significantly different look in The Wind Waker, characterized by their toucan-like faces and wing-like sleeves. They usually wear dark cloaks with hoods and carry wands that they use to cast their spells. Like previous appearances, they disappear and reappear using magic. When they teleport, a sound is heard to indicate their position. They come in two common, colored varieties and use different strategies. Wizzrobes with red hoods shoot fireballs, while Wizzrobes with yellow hoods can both shoot fireballs and summon other enemies.[6] There are also Wizzrobes with white robes and blue hoods, which behave identically to red-hooded variants, that appear atop Lookout Platforms near the Seven-Star Isles.[7] Wizzrobes can be defeated in one hit if they are frozen with an Ice Arrow and then tossed at a wall, shot with a Fire Arrow, or crushed with the Skull Hammer. A Wizzrobe Miniboss also appears in the Wind Temple, wearing a distinctive orange cloak and crown.
Four Swords Adventures
Wizzrobes are able to steal Force Gems from the Links in Four Swords Adventures, while also using fire and ice spells. They closely resemble the Wizzrobes from A Link to the Past and first appear in the Eastern Temple.
The Minish Cap
| Figurine | |
|---|---|
| Number | 106 |
| Description | Appears in the Palace of Winds, etc. |
| Figurine | Number | Description |
|---|---|---|
106 | Appears in the Palace of Winds, etc. |
Wizzrobes in The Minish Cap appear identically to their appearance in Four Swords, with three varieties; standard green Wizzrobes, Fire Wizzrobes, and Ice Wizzrobes. They appear in the Palace of Winds and Dark Hyrule Castle. Ice Wizzrobes are weak to fire-based attacks, and can be instantly defeated using the Flame Lantern.
Phantom Hourglass
Wizzrobes in Phantom Hourglass retain their bird-like appearance, but are slightly smaller, wear cloth masks, and carry large scythes instead of wands. In spite of the aesthetic similarities, they take on a completely different role in the game. They appear only in the Temple of the Ocean King and do not use their traditional magic. Instead, they are invisible until right before they attack. They will sneak up to steal 15 seconds from the Phantom Hourglass with a swipe of their scythes. They appear as Skulls on the map on the top screen, which is the only way to track them without coming in range of their attacks. Defeating one earns Link 30 more seconds of the Sand of Hours.
Tri Force Heroes
As of the Version 2.0.0 update, dark Wizzrobes can be found in the Den of Trials.
Breath of the Wild
Six types of Wizzrobe appear in Breath of the Wild. There are three base forms of Wizzrobe: Electric Wizzrobes, Fire Wizzrobes, and Ice Wizzrobes, which carry Lightning Rods, Fire Rods, and Ice Rods respectively. Three stronger variants of these Wizzrobes also appear. These more powerful Wizzrobes are: Thunder Wizzrobes which bear Thunderstorm Rods, Meteo Wizzrobes which carry Meteor Rods, and Blizzrobes which carry Blizzard Rods.
Other Appearances
The Legend of Zelda (Valiant Comics)

The Wizzrobes in the The Legend of Zelda comics by Valiant Comics highly resemble their original artwork from The Legend of Zelda. Although a Wizzrobe makes a brief appearance in "He Also Serves,"[8] they play a more important role in "To the First Power" and, to an extent, in "Queen of Hearts."
In "To the First Power," a Wizzrobe commands several of Ganon's minions to tie Link up after Zelda heads inside the Eagle Labyrinth to train against Ganon's minions. However, the Wizzrobe reveals to Link that he filled the Eagle Labyrinth with the most dangerous of enemies so that Zelda may not stand a chance up against them.[9] Although Link confronts the Wizzrobe and tells him that capturing Zelda will do no good since he is the one that Ganon wants, the Wizzrobe confesses that he is not interested in following Ganon's orders anymore.[10][11] He elaborates that he has gathered many other minions who feel the same way, and as soon as he destroys Link and Zelda, all of Ganon's minions will join his renegade army, leaving Ganon to fail.[12]
Eventually, Zelda makes her way to where the Wizzrobe and Link are, delighting the foe since he will now be able to defeat her himself.[13] The Wizzrobe shoots a magic beam at her, which Zelda dodges and quickly fires an Arrow from her Bow towards it, making him fall into a fire pit that sends the Wizzrobe back to Ganon.[14][15] The story ends with the Wizzrobe kneeling in front of Ganon while the Prince of Darkness praises him since he could make use of a "deceitful and treacherous" man like him.[16]
The Wizzrobe in "Queen of Hearts" is in charge of securing the Magic Container that holds all of Queen Seline's magical powers.[17] When Link and Seline make their way to where the magic container is, they are confronted by a Wizzrobe and a horde of Ganon's other minions. Link is then heavily injured and faints, and before the Wizzrobe can finish him off, Zelda appears and shoots an Arrow at the Magic Container,[18] restoring Seline's powers and allowing her to easily defeat the Wizzrobe and the rest of the enemies.[19]
The Crystal Trap
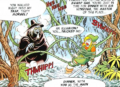
A Wizzrobe disguised as a Fortune Teller appears in The Crystal Trap. Known as Madame Grusha, she resides in the Town of Ruto. If Zelda visits Madame Grusha's hut, she will guess that Zelda has traveled far and that she is searching for three things. The Fortune Teller goes on to explain that she knows how to help the princess, but she cannot speak of it in their current location and asks that Zelda follow her into her inner sanctum.[20] Following Madame Grusha will lead to Zelda's death, while deciding to not follow her will result in a fight between Zelda and the Wizzrobe, along with some Moblins. However, the princess manages to defeat both enemies and come out of the hut alive.[21]
Ancient Stone Tablets
Zelda's Adventure
In Zelda's Adventure, Wizzrobes appear wearing blue cloaks and carrying wooden staffs. They walk around and occasionally cast blasts of magic, however unlike their canonical incarnations, they do not teleport at will. They appear in the Shrine of Illusion and the Shrine of Destiny.
A Link to the Past (Ishinomori)
A Wizzrobe appears in Chapter 9 of the A Link to the Past comic by Shotaro Ishinomori. After Link exits the Swamp Palace, he hears Princess Zelda contact him telepathically from beyond the wasteland.[22][23] Epheremelda, who cannot hear Zelda's calling, advises Link against going to the wasteland as it is too dangerous.[24] Link disregards her suggestion,[25] heading into the wasteland where he stumbles into an oasis from where Zelda is calling his name. The young hero ventures in and finds her.[26] As he remembers the Maiden's words of Zelda being inside Turtle Rock,[27] the princess turns out to be an illusion made by a Wizzrobe, who promptly captures Link and conjures Vitreous from the swamp to devour him.[28] However, a whirlpool is created that engulfs both Vitreous and the Wizzrobe, and from beneath Zora appears to rescue Link.
Nintendo Land
These magical foes attack from afar. They've only got one trick up their loosely hanging sleeves, and that's...well, magic!
Cadence of Hyrule
Wizzroboes appear as enemies in Cadence of Hyrule.
Trivia
- Wizzro from Hyrule Warriors is named after these enemies, and has a similar appearance.
Nomenclature
| Language | Names | Meanings |
|---|---|---|
Japanese |
| |
ChineseSI | 长袍魔法师 (Cháng páo mó fǎ shī) (TLoZ)[40] | Long-Robe Wizard |
Dutch | Woeb-Woeb (TLoZ)[39] | |
FrenchEU | ||
German | Pyromagus (TWW | TMC)[37] | From Greek pyro- ("fire") and magus ("magician") |
Italian |
| |
SpanishEU | Invocantis (TWW)[41] | |
| This table was generated using translation pages. To request an addition, please contact a staff member with a reference. | ||
Gallery
-

Concept artwork of Wizzrobes from Breath of the Wild
-
Link caught in the Wizzrobe's trap in the A Link to the Past comic
-

A Light World Wizzrobe from Ancient Stone Tablets
-

A Wizzrobe from Zelda's Adventure
-

A Wizzroboe from Cadence of Hyrule
-

Artwork of a Wizzrobe from Cadence of Hyrule
-
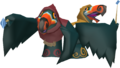
Two regular Wizzrobe variants from The Wind Waker


See Also
- Blizzrobe
- Blue Wizzrobe
- Carock
- Electric Wizzrobe
- Fire Wizzrobe
- Ice Wizzrobe
- Mago
- Meteo Wizzrobe
- Purple Wizzrobe
- Red Wizzrobe
- Thunder Wizzrobe
- Wizard
- Wizzro
- Wizzrobe
Notes
- ↑ If Link defeats 10 enemies without getting hit or teleporting with the Flute, then the 10th enemy defeated will drop five Rupees. However, if the 10th enemy is defeated with a Bomb, then it will drop four Bombs. If Link defeats 16 enemies without getting hit or teleporting, then the 16th enemy will drop a Fairy. After the 16th enemy, Link must get hit and reset the counter to zero in order to achieve this effect again. Defeating Armos, Like Likes, Keese, or Gels will not be counted.[5]
References
- ↑ 1.0 1.1 Encyclopedia, Dark Horse Books, pg. 212 (TLoZ | ALttP | LA | LADX | OoS | OoA | FS | TWW | TWWHD | FSA | TMC | PH)
- ↑ "Electric Wizzrobe" — Hyrule Compendium (Breath of the Wild)
- ↑ "Wizzrobe" — Monita (Nintendo Land)
- ↑ Encyclopedia, Dark Horse Books, pg. 103
- ↑ n.a., Forced Drops , redcandle.us, published n.d., retrieved August 17, 2017.
- ↑ "Wizzrobe - Habitat: Tower of the Gods - Magic: Fire, summons - These mighty mages are adept at wielding flame and summoning other creatures to their aid. The only way to defeat them is to try to predict their movements and attack them during the brief moments that they assume physical form." — Figurine (The Wind Waker)
- ↑ The Legend of Zelda: The Wind Waker—Prima's Official Strategy Guide, Prima Games, pg. 150
- ↑ "When do we spring the trap, Wizzrobe?" (The Legend of Zelda comic, Valiant Comics, pg. 9)
- ↑ "Grab him! Without his weapons, he's helpless! You thought Eagle Labyrinth was a safe place for Zelda to hone her battle skills! Fool! I filled it with the most lethal enemies in Ganon's army! She won't stand a chance! Let my teleportation spell carry us to the final room of the labyrinth!" (The Legend of Zelda comic, Valiant Comics, pg. 2)
- ↑ "Why go to all this trouble to get Zelda, Wizzrobe? I'm the one Ganon wants!" (The Legend of Zelda comic, Valiant Comics, pg. 2)
- ↑ "Ganon's desires don't interest me! I'm finished following that loser!" (The Legend of Zelda comic, Valiant Comics, pg. 2)
- ↑ "I've gathered many of Ganon's minions who feel the same! Ganon has never been able to stop you OR Zelda! But, if I can destroy you both, Ganon's minions will join my renegade army...and Ganon himself will fall!" (The Legend of Zelda comic, Valiant Comics, pg. 2)
- ↑ "I don't know how you got past my renegade army, princess! But I'm delighted that I get to destroy you myself!" (The Legend of Zelda comic, Valiant Comics, pg. 9)
- ↑ "Zelda: And you picked on the WRONG princess, Wizzrobe!" (The Legend of Zelda comic, Valiant Comics, pg. 10)
- ↑ "Wizzrobe: Nooo! This will send be back to Ganon!" (The Legend of Zelda comic, Valiant Comics, pg. 10)
- ↑ "So...you plotted behind my back! You, Wizzrobe, are deceitful and treacherous! [...] Good! I can USE a man like you." (The Legend of Zelda comic, Valiant Comics, pg. 10)
- ↑ "The magic container is the key--! If we can break it open, my powers will return!" (The Legend of Zelda comic, Valiant Comics, pg. 8)
- ↑ "Get away from my friends, you creep!" (The Legend of Zelda comic, Valiant Comics, pg. 9)
- ↑ "Ah! My powers have returned! Now then, little wizard....it's time for you to learn about REAL magic." (The Legend of Zelda comic, Valiant Comics, pg. 9)
- ↑ "Grusha can see far. You are seeking three things. I can help you, but I can't speak of it here. Come into my inner sanctum." (The Crystal Trap, Simon & Schuster, pg. 116)
- ↑ "She grabs a mirror off the wall and holds it up as a shield just as the wizzrobe lowers his staff. There's a flash of red light. The spell hits the mirror--and bounces back across the room. The wizzrobe and the moblin freeze where they stand. The spell has turned them to stone!" (The Crystal Trap, Simon & Schuster, pg. 27)
- ↑ "I...am...nearby... Hurry!" (A Link to the Past manga, VIZ Media, pg. 9)
- ↑ "Can't you hear her? Zelda is calling from beyond the wasteland!" (A Link to the Past manga, VIZ Media, pg. 9)
- ↑ "Now you're hearing things! Anyway, the wasteland is way too harsh! Once you get in there, you can't escape!" (A Link to the Past manga, VIZ Media, pg. 9)
- ↑ "If this wasteland is as dangerous as you say it is, I've got to get Zelda out of there right away!" (A Link to the Past manga, VIZ Media, pg. 10)
- ↑ "It's some kind of oasis! This must be where Zelda is being held! Zelda! I'm on my way! [...] Can it be? Zelda! I finally found you!" (A Link to the Past manga, VIZ Media, pg. 11)
- ↑ "But wait... The girl in the crystal said Zelda was in a rock shaped like a turtle..." (A Link to the Past manga, VIZ Media, pg. 12)
- ↑ "You walked right into my trap, tasty morsel! This is Misery Mire, world famous for its fine aroma of Swamp Gas. You're just in time for dinner with Sir Vitreous, the master of this place... Dinner, with you as the main course!" (A Link to the Past manga, VIZ Media, pg. 12)
- ↑ 29.0 29.1 Enciclopedia di Hyrule, Magazzini Salani, pg. 212
- ↑ Enciclopedia di Hyrule, Magazzini Salani, [which page?]
- ↑ "Sciamanix
Habitat: Torre degli Spiriti.
Magie conosciute: Fuoco e Evocazione." — Nintendo Gallery (The Wind Waker) - ↑ Hyrule Encyclopedia, Tokuma Shoten Publishing Co., Ltd., pg. 164
- ↑ A Link to the Past manual, pg. 51
- ↑ "ウィズローブ
生息場所 神の塔
魔法 火炎、召喚" — Nintendo Gallery (The Wind Waker) - ↑ Nintendo Official Guidebook: The Legend of Zelda: A Link to the Past Vol. 2, Shogakukan, pg. 142
- ↑ Nintendo Official Guidebook: The Legend of Zelda: A Link to the Past Vol. 2, Shogakukan, pg. 143
- ↑ "Pyromagus
Heimat: Der Turm der Götter
Magie: Feuer, Beschwörung" — Nintendo Gallery (The Wind Waker) - ↑ "Sorcier
Lieu de résidence: Tour des Dieux.
Magie: boules de feu, invocation." — Nintendo Gallery (The Wind Waker) - ↑ 39.0 39.1 The Legend of Zelda manual, pg. 36
- ↑ 塞尔达传说:百科全书, New Star Press, pg. 169
- ↑ "Invocantis
Hábitat: Torre de los Dioses
Magia: Bolas de fuego, invocación" — Nintendo Gallery (The Wind Waker)
- Enemies
- Humanoid Enemies
- Undead Enemies
- Wizzrobes
- Characters
- Enemies in The Legend of Zelda
- Enemies in A Link to the Past
- Enemies in Link's Awakening
- Enemies in Link's Awakening DX
- Enemies in Link's Awakening (Nintendo Switch)
- Enemies in Oracle of Seasons
- Enemies in Oracle of Ages
- Enemies in Four Swords
- Enemies in The Wind Waker
- Enemies in The Wind Waker HD
- Enemies in Four Swords Adventures
- Enemies in The Minish Cap
- Enemies in Phantom Hourglass
- Enemies in Tri Force Heroes
- Enemies in Breath of the Wild
- Characters in The Legend of Zelda (Valiant Comics)
- Characters in A Link to the Past (Ishinomori)
- Enemies in Zelda's Adventure
- Enemies in Ancient Stone Tablets
- Enemies in Cadence of Hyrule