Ocarina: Difference between revisions
(Undo revision 51336 by 218.58.136.4 (Talk)) |
m (→Gallery) |
||
| (210 intermediate revisions by 69 users not shown) | |||
| Line 1: | Line 1: | ||
{{Hatnote|This article is about regular {{Plural|Series|Ocarina}}, for the items used in {{OoT}} and {{MM}}, see {{Term|Series|Fairy Ocarina|link}} and {{Term|Series|Ocarina of Time (Item)|link}}.}} | |||
{{Infobox Item | |||
|image= | |||
{{Media | |||
|Artwork ALttP= File:ALttP Flute Artwork.png | |||
|Artwork LA= File:LA Ocarina Red Artwork.png | |||
|Model LANS= File:LANS Ocarina Model.png | |||
|Sprite ALttP= File:Flute Sprite.png | |||
|Sprite LA= File:LA Ocarina Sprite.png | |||
|Sprite LADX= File:LADX Ocarina Sprite.png | |||
|Sprite LANS= File:LANS Ocarina Icon.png | |||
}} | |||
|caption= | |||
|pronunciation= | |||
|plural= | |||
|type= | |||
|game= ALttP, LA | |||
|other= LA (Cagiva), BSTLoZ, AST, HW | |||
|cost= | |||
|value= | |||
|location= | |||
{{Infobox Game Blocks | |||
|ALttP= {{Term|ALttP|Haunted Grove|link}} | |||
|LA= {{Term|LANS|Dream Shrine|link}} | |||
|BSTLoZ= {{Term|BSTLoZ|Level 4|link}} | |||
|HWL= {{Term|HWDE|Faron Woods (Hyrule Warriors)|link}} | |||
}} | |||
|uses= | |||
|strength= | |||
|durability= | |||
|comp= | |||
{{List| | |||
{{Term|Series|Bone Ocarina|link}}, | |||
{{Term|Series|Fairy Ocarina|link}}, | |||
{{Term|Series|Ocarina of Time (Item)|link}}, | |||
{{Term|Series|Ocarina of Wind|link}}, | |||
{{Term|Series|Whistle|link}} | |||
}} | |||
|sample= | |||
|theme= | |||
}} | |||
{{Term/Store|Ocarina|Ocarinas|Series, LA, LADX, LANS|plural}},{{Exp Game|LA, HW}}<ref name="E 133">{{Cite Book|quote= |book= E |publisher= |page= 133 {{Exp Game|ALttP, LA}}}}</ref><ref name="LANS Inventory">{{Cite|Ocarina<br/>A small instrument that plays a haunting tone.|Inventory|LANS}}</ref> also known as {{Term/Store|Flute|Flutes|ALttP|plural}},{{Exp Game|ALttP}}<ref name="E 133"/> are recurring {{Plural|Series|Item|link}} in {{TLoZ|Series}}.{{Name Ref|LA (Cagiva), BSTLoZ, AST, HWDE}} | |||
==Location and Uses== | |||
==={{ALttP|-}}=== | |||
{{Manual|ALttP|Flute|A lonely lad will give you the Flute, which plays a beautiful but slightly sad melody. When you are granted it, be sure to fulfill the request made of you. If you have the Flute, it will make your long and difficult journey a lot easier.}} | |||
{{Manual|ALttP&FS|Flute|When you use the Flute, you can move instantaneously to a set point that you want to visit. Choose the number of the point and press the A Button to transport there.}} | |||
The {{Term|ALttP|Ocarina}} once belonged to the {{Term|ALttP|Flute Boy|link}} in {{ALttP}}. The {{Term|ALttP|Flute Boy}} set out in search of the {{Term|ALttP|Triforce|link}} and never returned. When {{Term|ALttP|Link|link}} talks to the {{Term|ALttP|Flute Boy|display=Boy}} in the {{Term|ALttP|Dark World|link}} he gives the young hero a {{Term|ALttP|Shovel|link}} and asks him to find his {{Term|ALttP|Ocarina}}. {{Term|ALttP|Link}} finds this {{Term|ALttP|Instrument|link}} buried in the {{Term|ALttP|Haunted Grove|link}} in the {{Term|ALttP|Light World|link}} He then plays the {{Term|ALttP|Ocarina}} one last time for the {{Term|ALttP|Flute Boy}}, who is soothed by the music and is then turned into a {{Term|ALttP|Tree|link}}. | |||
When {{Term|ALttP|Link}} brings the {{Term|ALttP|Ocarina}} to the {{Term|ALttP|Man in Tavern|link}}, the {{Term|ALttP|Man in Tavern|display=Man}} understands what has happened to his son and asks {{Term|ALttP|Link}} to keep it. He then tells {{Term|ALttP|Link}} to play the {{Term|ALttP|Ocarina}} in front of the {{Term|ALttP|Weathercock|link}} in the center of {{Term|ALttP|Kakariko Village|link}}. Soon after {{Term|ALttP|Link}} complies with his request, the {{Term|ALttP|Flute Boy's Bird|link}} breaks out of the {{Term|ALttP|Weathercock}} and flies off. Whenever {{Term|ALttP|Link}} plays the {{Term|ALttP|Ocarina}} in the {{Term|ALttP|Light World}} from that point forward, the pet {{Term|ALttP|Bird|link}} can transport him to one of eight locations. The {{Term|ALttP|Ocarina}} is necessary in reaching the sixth {{Term|ALttP|Dark World}} {{Term|ALttP|Dungeon|link}}, the {{Term|ALttP|Misery Mire|link}}. | |||
While the {{Term|ALttP|Flute Boy's Bird}} does not appear when playing the {{Term|ALttP|Ocarina}} in the {{Term|ALttP|Dark World}}, it appears in it when {{Term|ALttP|Link}} plays the {{Term|ALttP|Ocarina}} after defeating {{Term|ALttP|Agahnim|link}} on the top of {{Term|ALttP|Ganon's Tower|link}}. | |||
====Warp Locations==== | |||
# {{Term|ALttP|Death Mountain|link}} | |||
# {{Term|ALttP|Witch's Hut|link}} | |||
# {{Term|ALttP|Kakariko Village|link}} | |||
# {{Term|ALttP|Link's House|link}} | |||
# South of the {{Term|ALttP|Eastern Palace|link}} | |||
# {{Term|ALttP|Desert of Mystery|link}} | |||
# {{Term|ALttP|Great Swamp|link}} | |||
# {{Term|ALttP|Lake Hylia|link}} | |||
# East of {{Term|ALttP|Death Mountain}} ([[Game Boy Advance]] version only) | |||
==={{LA|-}}=== | |||
{{Manual|LA|Ocarina|The Ocarina plays several mystical melodies. You will learn songs from people you meet. There are three different songs you can learn, and each has its own mystical power. After learning a new song, try playing it when you are in trouble.}} | |||
The Ocarina can be found in the [[Dream Shrine]] in {{LA}}, which can only be completed if [[Link]] has the [[Power Bracelet]] and the [[Pegasus Boots]]. It plays in a haunting tone.<ref name="LANS Inventory"/> The Ocarina can be used to play "[[Manbo's Mambo]]", "[[Frog's Song of Soul]]", and the "[[Ballad of the Wind Fish]]". | |||
==See Also== | ==Other Appearances== | ||
*[[ | ==={{LA|-}} (Cagiva)=== | ||
*[[Fairy Ocarina]] | {{Noncanon|Start}} | ||
*[[Ocarina of | In the {{LA|Cagiva}}, {{Term|LA (Cagiva)|Link|link}} receives an {{Term|LA (Cagiva)|Ocarina}} from {{Term|LA (Cagiva)|Madam MeowMeow|link}} after rescuing {{Term|LA (Cagiva)|BowWow|link}} in volume 1. According to her, it has been passed down through her family for ages and has mysterious powers. When visiting {{Term|LA (Cagiva)|Marin|link}} at {{Term|LA (Cagiva)|Toronbo Shores|link}}, {{Term|LA (Cagiva)|Link}} plays with her the "{{Term|LA (Cagiva)|Ballad of the Wind Fish|link}}" with the {{Term|LA (Cagiva)|Ocarina}}. | ||
{{ | In volume 2, {{Term|LA (Cagiva)|Link}} visits {{Term|LA (Cagiva)|Marin}} at {{Term|LA (Cagiva)|Animal Village|link}} to play the {{Term|LA (Cagiva)|Ocarina}} for her animal friends before leaving to {{Term|LA (Cagiva)|Mt. Tamaranch|link}}. Once in the {{Term|LA (Cagiva)|Mt. Tamaranch|display= Mount}}, {{Term|LA (Cagiva)|Link}} plays the "{{Term|LA (Cagiva)|Ballad of the Wind Fish}}" on the {{Term|LA (Cagiva)|Ocarina}} to activate the eight {{Plural|LA (Cagiva)|Instrument of the Sirens|link}} and open the {{Term|LA (Cagiva)|Wind Fish's Egg|link}}. After defeating the {{Plural|LA (Cagiva)|Shadow Nightmare|link}}, {{Term|LA (Cagiva)|Link}} plays the "{{Term|LA (Cagiva)|Ballad of the Wind Fish}}" one last time to wake the {{Term|LA (Cagiva)|Wind Fish|link}}. | ||
{{Noncanon|End}} | |||
==={{BSTLoZ|-}}=== | |||
{{Noncanon|Start}} | |||
The Ocarina can be found in {{Term|BSTLoZ|Level-4|link}} in {{BSTLoZ}}. It can be used to [[Warping|Warp]] to other Dungeons. When the Ocarina is played on a pad near the eastern shore, {{Term|BSTLoZ|Level-6|link}} will appear. | |||
{{Noncanon|End}} | |||
==={{AST|-}}=== | |||
{{Noncanon|Start}} | |||
{{Stub|AST}} | |||
{{Noncanon|End}} | |||
==={{HW|-}}=== | |||
{{Noncanon|Start}} | |||
[[File:HWS Ocarina Adventure Mode Icon.png|left|50px]] | |||
The Ocarina is a class of Weapon used by the [[Skull Kid]] in {{HW}}. It is associated with {{Term|HWDE|Element|link|display=Darkness}}. Skull Kid plays the Ocarina to coordinate attacks between [[Tatl]], [[Tael]], and himself. He can transform it into a trumpet to summon and control [[Puppet]]s from {{TP}} to attack on his behalf. | |||
In {{HW|L}}, a golden Ocarina can be obtained from a [[Treasure Chest]] in the middle of the [[Deku Tree]] [[Keep]] during the [[Legend Mode]] [[Scenario]], "[[The Sorceress of the Woods]]". The Ocarina allows Warriors to warp to any active [[Owl Statue]]s in a Stage.<ref>{{Cite|Use the ocarina to warp to active {{Color|HW Green|owl statues}}. To activate an owl statue, approach the statue and press the button displayed on the screen.|Tutorial|HWL}}</ref> When the Ocarina is used, the Warrior plays the "[[Ballad of Gales]]" to summon a cyclone that warps them to the selected Owl Statue. | |||
====Variations==== | |||
The default Ocarina is the '''Fairy Ocarina''', based after its [[Fairy Ocarina|namesake]]. The second form of the Ocarina is the '''Lunar Ocarina''', followed by '''Majora's Ocarina'''. | |||
In {{HW|L|-}} and {{HW|DE|-}}, the fourth form of the Ocarina is the '''Crackling Ocarina''', which is associated with both the Elements of Darkness and {{Term|HWDE|Element|link|display=Lightning}}. | |||
{| class="wikitable" style="text-align:center; width:100%; max-width:40em" | |||
|+Weapon Power | |||
!colspan="3"|Weapon | |||
!colspan="6"|Number of Stars | |||
|- | |||
! style="width:5%"|Tier | |||
! Icon | |||
! Element(s) | |||
! 0 | |||
! 1 | |||
! 2 | |||
! 3 | |||
! 4 | |||
! 5 | |||
|- | |||
! Lv.1 | |||
| [[File:HW Fairy Ocarina Icon.png|link=]]<br/>'''Fairy Ocarina''' | |||
| {{HW Element|Darkness}} | |||
| 80 | |||
| 88 | |||
| 96 | |||
| 104 | |||
| 112 | |||
| 120 | |||
|- | |||
! Lv.2 | |||
| [[File:HW Lunar Ocarina Icon.png|link=]]<br/>'''Lunar Ocarina''' | |||
| {{HW Element|Darkness}} | |||
| 150 | |||
| 165 | |||
| 180 | |||
| 195 | |||
| 210 | |||
| 225 | |||
|- | |||
! Lv.3 | |||
| [[File:HW Majora's Ocarina Icon.png|link=]]<br/>'''Majora's Ocarina''' | |||
| {{HW Element|Darkness}} | |||
| 280 | |||
| 308 | |||
| 336 | |||
| 364 | |||
| 392 | |||
| 420 | |||
|- | |||
! Lv.4 {{Exp Game|HWL, HWDE}} | |||
| [[File:HW Majora's Ocarina Icon.png|link=]]<br/>'''Majora's Ocarina +''' | |||
| {{HW Element|Darkness}} | |||
| 500 | |||
| 550 | |||
| 600 | |||
| 650 | |||
| 700 | |||
| 750 | |||
|- | |||
! Lv.4+ {{Exp Game|HWL, HWDE}} | |||
| [[File:HW Majora's Ocarina Icon.png|link=]]<br/>'''Crackling Ocarina''' | |||
| {{HW Element|Darkness}}<br/>{{HW Element|Lightning}} | |||
| 500 | |||
| 550 | |||
| 600 | |||
| 650 | |||
| 700 | |||
| 750 | |||
|} | |||
====Attack Combinations==== | |||
{| class="wikitable" style="text-align:center; width:100%;" | |||
|- | |||
!Attack Pattern | |||
!Effect | |||
|- | |||
| '''Y Y Y Y Y Y''' | |||
| | |||
|- | |||
| '''Y Y Y Y X''' | |||
| | |||
|- | |||
| '''Y Y Y Y Y Y Y''' | |||
| | |||
|- | |||
| '''Y Y Y Y Y X ''' | |||
| | |||
|} | |||
=====Weak Point Smash===== | |||
{{Main|Critical Point#Hyrule Warriors}} | |||
Against Captains and Warriors, Skull Kid summons a Puppet behind them. It then rapidly attacks the target by flailing its arms until Skull Kid comes up and finishes off with an energy attack. Against Giant Bosses, Skull Kid uppercuts the monster with Tatl and Tael and then strikes it down while surrounded in a dark barrier. | |||
=====Special Attack===== | |||
{{Main|Special Attack}} | |||
Within a frontal radius, Skull Kid uses the dark magic of Majora's Mask and rattles his head while a large magic circle appears. Enemies are drawn into the circle and are rapidly damaged. Skull Kid then ends the attack with an energy burst. | |||
=====Focus Spirit===== | |||
{{Main|Focus Spirit}} | |||
Upon activation, Skull Kid stomps the ground in anger, bursting in dark energy. The Focus Spirit Attack has Skull Kid kick a miniature [[Moon (Object)|Moon]] into the air before kicking it again at the enemies in front of him. He then mockingly spanks his behind at them afterwards. When the Focus Spirit gauge is depleted, Skull Kid holds his head and squirms violently until dark power is unleashed, damaging enemies around him. | |||
{{Noncanon|End}} | |||
==Nomenclature== | |||
{{Nomenclature}} | |||
==Gallery== | |||
<gallery> | |||
File:ALttP Flute Boy Artwork.png|Artwork of the Flute Boy from {{ALttP|-}} | |||
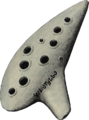
File:LA Ocarina Artwork.png|Ocarina artwork from {{LA|-}} | |||
File:LA Ocarina Artwork 2.png|Ocarina artwork from {{Guide|LA|Nintendo}} | |||
File:LA (Cagiva) Ocarina.jpg|The {{Term|LA (Cagiva)|Ocarina}} from the {{LA|-}} manga by Ataru Cagiva | |||
File:HW Tatl and Tael catching the Ocarina.png|Tatl and Tael catching Majora's Ocarina from {{HW|-}} | |||
File:HWL Fairy Ocarina Artwork.png|Artwork of the Fairy Ocarina from {{HW|L|-}} | |||
File:HWL Lunar Ocarina Artwork.png|Artwork of the Lunar Ocarina from {{HW|L|-}} | |||
File:HWL Majora's Ocarina Artwork.png|Artwork of the Majora's Ocarina from {{HW|L|-}} | |||
File:HWL Skull Kid Ocarina Artwork.png|Artwork of Skull Kid wielding the Fairy Ocarina from {{HW|L|-}} | |||
File:HWDE Crackling Ocarina Model.png|The Crackling Ocarina model from {{HWDE|-}} | |||
File:HWDE Ocarina Icon.png|Ocarina item icon from {{HW|DE|-}} | |||
File:HWDE Ocarina Obtention.png|Link obtaining the Ocarina from {{HW|DE|-}} | |||
File:HWDE Skull Kid Crackling Ocarina.png|Skull Kid wielding the Crackling Ocarina from {{HW|DE|-}} | |||
</gallery> | |||
===Video Gallery=== | |||
{{Youtube|5XVkLm__kT4|200|Ocarina gameplay from {{HW|L|-}}}} | |||
==See Also== | |||
* [[Bone Ocarina]] | |||
* [[Fairy Ocarina]] | |||
* {{Term|OoT3D|Ocarina of Time (Item)|link}} | |||
* [[Ocarina of Wind]] | |||
* [[Whistle]] | |||
{{Ref}} | |||
{{Categories | |||
|Instruments, Ocarinas, Weapons, Wind Instruments | |||
|items= LA, LADX, LANS, BSTLoZ, AST, HW, HWL, HWDE | |||
}} | |||
Latest revision as of 05:03, 18 April 2024
Ocarinas,(LA | HW)[1][2] also known as Flutes,(ALttP)[1] are recurring Items in The Legend of Zelda series.[name references needed]
Location and Uses
A Link to the Past
FluteWhen you use the Flute, you can move instantaneously to a set point that you want to visit. Choose the number of the point and press the A Button to transport there.
The Flute once belonged to the Flute Boy in A Link to the Past. The Flute Boy set out in search of the Triforce and never returned. When Link talks to the Boy in the Dark World he gives the young hero a Shovel and asks him to find his Flute. Link finds this Instrument buried in the Haunted Grove in the Light World He then plays the Flute one last time for the Flute Boy, who is soothed by the music and is then turned into a Tree.
When Link brings the Flute to the Man in Tavern, the Man understands what has happened to his son and asks Link to keep it. He then tells Link to play the Flute in front of the Weathercock in the center of Kakariko Village. Soon after Link complies with his request, the Flute Boy's Bird breaks out of the Weathercock and flies off. Whenever Link plays the Flute in the Light World from that point forward, the pet Bird can transport him to one of eight locations. The Flute is necessary in reaching the sixth Dark World Dungeon, the Misery Mire.
While the Flute Boy's Bird does not appear when playing the Flute in the Dark World, it appears in it when Link plays the Flute after defeating Agahnim on the top of Ganon's Tower.
Warp Locations
- Death Mountain
- Potion Shop
- Kakariko Village
- Link's House
- South of the Eastern Palace
- Desert of Mystery
- Great Swamp
- Lake Hylia
- East of Death Mountain (Game Boy Advance version only)
Link's Awakening
OcarinaThe Ocarina plays several mystical melodies. You will learn songs from people you meet. There are three different songs you can learn, and each has its own mystical power. After learning a new song, try playing it when you are in trouble.
The Ocarina can be found in the Dream Shrine in Link's Awakening, which can only be completed if Link has the Power Bracelet and the Pegasus Boots. It plays in a haunting tone.[2] The Ocarina can be used to play "Manbo's Mambo", "Frog's Song of Soul", and the "Ballad of the Wind Fish".
Other Appearances
Link's Awakening (Cagiva)
In the Link's Awakening manga by Ataru Cagiva, Link receives an Ocarina from Madam MeowMeow after rescuing BowWow in volume 1. According to her, it has been passed down through her family for ages and has mysterious powers. When visiting Marin at Toronbo Shores, Link plays with her the "Ballad of the Wind Fish" with the Ocarina.
In volume 2, Link visits Marin at Animal Village to play the Ocarina for her animal friends before leaving to Mt. Tamaranch. Once in the Mount, Link plays the "Ballad of the Wind Fish" on the Ocarina to activate the eight Instruments of the Sirens and open the Wind Fish's Egg. After defeating the Shadow Nightmares, Link plays the "Ballad of the Wind Fish" one last time to wake the Wind Fish.
BS The Legend of Zelda
The Ocarina can be found in Level 4 in BS The Legend of Zelda. It can be used to Warp to other Dungeons. When the Ocarina is played on a pad near the eastern shore, Level-6 will appear.
Ancient Stone Tablets
Hyrule Warriors
The Ocarina is a class of Weapon used by the Skull Kid in Hyrule Warriors. It is associated with Darkness. Skull Kid plays the Ocarina to coordinate attacks between Tatl, Tael, and himself. He can transform it into a trumpet to summon and control Puppets from Twilight Princess to attack on his behalf.
In Hyrule Warriors Legends, a golden Ocarina can be obtained from a Treasure Chest in the middle of the Deku Tree Keep during the Legend Mode Scenario, "The Sorceress of the Woods". The Ocarina allows Warriors to warp to any active Owl Statues in a Stage.[3] When the Ocarina is used, the Warrior plays the "Ballad of Gales" to summon a cyclone that warps them to the selected Owl Statue.
Variations
The default Ocarina is the Fairy Ocarina, based after its namesake. The second form of the Ocarina is the Lunar Ocarina, followed by Majora's Ocarina.
In Hyrule Warriors Legends and Hyrule Warriors: Definitive Edition, the fourth form of the Ocarina is the Crackling Ocarina, which is associated with both the Elements of Darkness and Lightning.
| Weapon | Number of Stars | |||||||
|---|---|---|---|---|---|---|---|---|
| Tier | Icon | Element(s) | 0 | 1 | 2 | 3 | 4 | 5 |
| Lv.1 | Fairy Ocarina |
80 | 88 | 96 | 104 | 112 | 120 | |
| Lv.2 | Lunar Ocarina |
150 | 165 | 180 | 195 | 210 | 225 | |
| Lv.3 | Majora's Ocarina |
280 | 308 | 336 | 364 | 392 | 420 | |
| Lv.4 (HWL | HWDE) | Majora's Ocarina + |
500 | 550 | 600 | 650 | 700 | 750 | |
| Lv.4+ (HWL | HWDE) | Crackling Ocarina |
500 | 550 | 600 | 650 | 700 | 750 | |
Attack Combinations
| Attack Pattern | Effect |
|---|---|
| Y Y Y Y Y Y | |
| Y Y Y Y X | |
| Y Y Y Y Y Y Y | |
| Y Y Y Y Y X |
Weak Point Smash
Against Captains and Warriors, Skull Kid summons a Puppet behind them. It then rapidly attacks the target by flailing its arms until Skull Kid comes up and finishes off with an energy attack. Against Giant Bosses, Skull Kid uppercuts the monster with Tatl and Tael and then strikes it down while surrounded in a dark barrier.
Special Attack
Within a frontal radius, Skull Kid uses the dark magic of Majora's Mask and rattles his head while a large magic circle appears. Enemies are drawn into the circle and are rapidly damaged. Skull Kid then ends the attack with an energy burst.
Focus Spirit
Upon activation, Skull Kid stomps the ground in anger, bursting in dark energy. The Focus Spirit Attack has Skull Kid kick a miniature Moon into the air before kicking it again at the enemies in front of him. He then mockingly spanks his behind at them afterwards. When the Focus Spirit gauge is depleted, Skull Kid holds his head and squirms violently until dark power is unleashed, damaging enemies around him.
Nomenclature
| Language | Names | Meanings |
|---|---|---|
Japanese | オカリナ (Okarina) (ALttP | LANS)[6][7] | Same as English. |
ChineseSI | 陶笛 (Táo dí) (LANS) | |
German | Okarina (HWDE)[8] | Same as English. |
Italian | Ocarina (ALttP | LA | LADX)[4][5] | |
| This table was generated using translation pages. To request an addition, please contact a staff member with a reference. | ||
Gallery
-
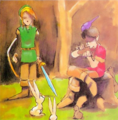
Artwork of the Flute Boy from A Link to the Past
-

Ocarina artwork from Link's Awakening
-
Ocarina artwork from The Legend of Zelda: Link's Awakening—Nintendo Player's Guide by Nintendo of America
-
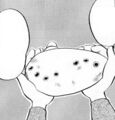
The Ocarina from the Link's Awakening manga by Ataru Cagiva
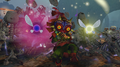
-
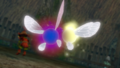
Tatl and Tael catching Majora's Ocarina from Hyrule Warriors
-

Artwork of the Fairy Ocarina from Hyrule Warriors Legends
-

Artwork of the Lunar Ocarina from Hyrule Warriors Legends
-

Artwork of the Majora's Ocarina from Hyrule Warriors Legends
-

Artwork of Skull Kid wielding the Fairy Ocarina from Hyrule Warriors Legends
-
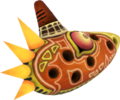
The Crackling Ocarina model from Hyrule Warriors: Definitive Edition
-

Ocarina item icon from Hyrule Warriors: Definitive Edition
-
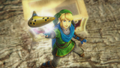
Link obtaining the Ocarina from Hyrule Warriors: Definitive Edition
-
Skull Kid wielding the Crackling Ocarina from Hyrule Warriors: Definitive Edition


_Ocarina.jpg)


Video Gallery
See Also
References
- ↑ 1.0 1.1 Encyclopedia, Dark Horse Books, pg. 133 (ALttP | LA)
- ↑ 2.0 2.1 "Ocarina
A small instrument that plays a haunting tone." — Inventory (Link's Awakening for Nintendo Switch) - ↑ "Use the ocarina to warp to active owl statues. To activate an owl statue, approach the statue and press the button displayed on the screen." — Tutorial (Hyrule Warriors Legends)
- ↑ "Oh! Ecco l'Ocarina!" — N/A (A Link to the Past, Italian localization)
- ↑ Enciclopedia di Hyrule, Magazzini Salani, pg. 133
- ↑ A Link to the Past manual, pg. 45 Nintendo Official Guidebook: The Legend of Zelda: A Link to the Past Vol. 1, Shogakukan, pg. 27 Nintendo Official Guidebook—The Legend of Zelda: A Link to the Past & Four Swords, Shogakukan, pg. 15
- ↑ "オカリナ" — Inventory (Link's Awakening for Nintendo Switch, Japanese localization)
- ↑ "Mithilfe der Okarina kann der Kämpfer, den du gerade steuerst, zu aktivierten Eulenstatuen reisen." — Tutorial (Hyrule Warriors: Definitive Edition)
- Items
- Instruments
- Ocarinas
- Weapons
- Wind Instruments
- Items in Link's Awakening
- Items in Link's Awakening DX
- Items in Link's Awakening (Nintendo Switch)
- Items in BS The Legend of Zelda
- Items in Ancient Stone Tablets
- Items in Hyrule Warriors
- Items in Hyrule Warriors Legends
- Items in Hyrule Warriors: Definitive Edition