Treacherous Tower: Difference between revisions
MannedTooth (talk | contribs) m (Text replacement - "\|image= \[\[File:(.*).png\|300px]]" to "|image= File:$1.png") |
Htwretched (talk | contribs) (New enemy tables) |
||
| Line 6: | Line 6: | ||
|location= {{Term|ALBW|Death Mountain|link}} ({{Term|ALBW|Lorule|link}}) | |location= {{Term|ALBW|Death Mountain|link}} ({{Term|ALBW|Lorule|link}}) | ||
|game= {{ALBW}} | |game= {{ALBW}} | ||
|main_prize= {{Plural|ALBW|Rupee|link}} | |main_prize= {{Plural|ALBW|Rupee|link}} {{Small|(All Levels)}}<br>{{Term|ALBW|Piece of Heart|link}} {{Small|(Intermediate)}}<br>{{Term|ALBW|Super Lantern|link}} {{Small|(Advanced, first time)}}<br>{{Term|ALBW|Super Bug Net|link}} {{Small|(Advanced, second time)}} | ||
|Cost= 100 {{Plural|ALBW|Rupee}} <small>(Beginner)</small><br>200 {{Plural|ALBW|Rupee}} <small>(Intermediate)</small><br>300 {{Plural|ALBW|Rupee}} <small>(Advanced)</small> | |Cost= 100 {{Plural|ALBW|Rupee}} <small>(Beginner)</small><br>200 {{Plural|ALBW|Rupee}} <small>(Intermediate)</small><br>300 {{Plural|ALBW|Rupee}} <small>(Advanced)</small> | ||
|theme= [[File:ALBW Treacherous Tower.ogg]] | |theme= [[File:ALBW Treacherous Tower.ogg]] | ||
| Line 15: | Line 15: | ||
The Treacherous Tower is found on [[Death Mountain]] in [[Lorule]], approximately where the [[Tower of Hera (A Link Between Worlds)|Tower of Hera]] is located in Hyrule. It is host to a mini-game that is run by the [[Devilish Girl]], who pits [[Link]] against several rooms of enemies. When all enemies in the room are defeated, Link is able to carry on to the next, until he reaches the end and receives his prize. There are three modes: Beginner, Intermediate and Advanced. The initial difficulty setting is Beginner, but the Intermediate and Advanced levels are unlocked after Link completes the respective difficulties preceding them. If Link can complete the levels with faster times, he will be rewarded with more [[Rupee]]s.<ref>{{Cite|A new record! Boom boom all around! Here's an extra bonus for you!|Devilish Girl|ALBW}}</ref> | The Treacherous Tower is found on [[Death Mountain]] in [[Lorule]], approximately where the [[Tower of Hera (A Link Between Worlds)|Tower of Hera]] is located in Hyrule. It is host to a mini-game that is run by the [[Devilish Girl]], who pits [[Link]] against several rooms of enemies. When all enemies in the room are defeated, Link is able to carry on to the next, until he reaches the end and receives his prize. There are three modes: Beginner, Intermediate and Advanced. The initial difficulty setting is Beginner, but the Intermediate and Advanced levels are unlocked after Link completes the respective difficulties preceding them. If Link can complete the levels with faster times, he will be rewarded with more [[Rupee]]s.<ref>{{Cite|A new record! Boom boom all around! Here's an extra bonus for you!|Devilish Girl|ALBW}}</ref> | ||
The Beginner level contains five rooms and costs 100 Rupees to play.<ref>{{Cite|Boom boom in the room! Glad to see you back here, sword boy! C'mon and give your luck a try! What's 100 Rupees these days? [Boom boom!] That's the spirit, sword boy! The rules are super simple! A bunch of baddies are gonna attack you. Just beat 'em! You look just like you can take care of yourself, but since it's your first time, just stick to the Beginner course. Just five stages, so it'll be a piece of boom-boom cake for you! That'll be 100 Rupees. Please and thank you! All right! Have fun in there! And do come back in one piece.|Devilish | The Beginner level contains five rooms and costs 100 Rupees to play.<ref>{{Cite|Boom boom in the room! Glad to see you back here, sword boy! C'mon and give your luck a try! What's 100 Rupees these days? [Boom boom!] That's the spirit, sword boy! The rules are super simple! A bunch of baddies are gonna attack you. Just beat 'em! You look just like you can take care of yourself, but since it's your first time, just stick to the Beginner course. Just five stages, so it'll be a piece of boom-boom cake for you! That'll be 100 Rupees. Please and thank you! All right! Have fun in there! And do come back in one piece.|Devilish Girl|ALBW}}</ref> At the end of the fifth room, Link will receive several Rupees from the crowd for completing it. The Intermediate level contains 15 rooms and costs 200 Rupees to play.<ref>{{Cite|Well, boom boom! Check you out! I was wondering if you were going to give it another try! Wanna give the Intermediate course a shot? C'mon--you can't take those Rupees with you, ya know! [Intermediate] YAY! That's the spirit! The Intermediate course has 15 floors! That's tons of baddies for your entertainment at the low cost of only 200 Rupees! Please and thank you! INCOMING!|Devilish Girl|ALBW}}</ref> At the end of the 15th room, Link will receive several Rupees and a [[Piece of Heart]] for completing it the first time.<ref>{{Cite|I can't believe it! Well, I CAN believe it, but...I CAN'T believe it! Amazing! Your clear time was XX minutes, XX seconds! If you can beat your time on this course, I'll give you some extra Rupees for your pockets! And since you cleared this course for the first time, I have something special for you...|Devilish Girl|ALBW}}</ref> The Advanced level contains 50 rooms and costs 300 Rupees to play.<ref>{{Cite|You know what? You should really take a crack at the Advanced course next time! The Advanced course has 50 floors! You can beat up baddies to your heart's delight! It costs 300 Rupees, so give it a try next time! Just lemme know if you want another go at it! I'm not going anywhere!|Devilish Girl|ALBW}}</ref><ref>{{Cite|Well, well, well! Double boom in the room! I'm so impressed! The Advanced course has 50 floors! Beat up baddies to your heart's delight for the bargain price of only 300 Rupees! Please and thank you!|Devilish Girl|ALBW}}</ref> Upon initial completion of the Advanced level, Link's [[Lantern]] will be upgraded to do 8 times the amount of damage.<ref>{{Cite|Boom boom! You brought the doom! You're one of a kind, sword boy! [...] Oh yeah...and I have a wee little something special you might be interested in as well... [...] Now you can even use your lamp on your enemies! It's hot stuff!|Devilish Girl|ALBW}}</ref> A subsequent completion will give the young hero an upgraded [[Bug Net]].<ref>{{Cite|Oh yeah... I've got another very special prize for you. That's only if you're interested, of course. To get it, all you have to do is clear the Advanced course again! When you come back to do that, be sure you have one of those bug-catching thingies with you, OK? Just lemme know if you want another go at it! I'm not going anywhere!|Devilish Girl|ALBW}}</ref><ref>{{Cite|Oh, mah... Oh, mah! That's all I can say. Literally. Just...oh, mah... Boom boom and sweep like a broom! You've cleared the Advanced course twice now, sword boy! As promised, here's an extra-special prize for you! [...] Now you can even use your net to beat up enemies! How fun is that? Even though I've given you my special prizes, will you still visit? Don't forget about me OK?! Please and thank you!|Devilish Girl|ALBW}}</ref> According to the Devilish Girl, nobody has survived the Advanced level.<ref>{{Cite|Silly me! Sorry. Sometimes my mind just goes boom boom! I forgot to mention one teensy-weensy thing... The number of people who have returned alive from this course is... ...a big, fat ZERO! Have fun!|Devilish Girl|ALBW}}</ref> | ||
==Enemies and Traps== | ==Enemies and Traps== | ||
<div style="display:none"> | |||
{{#vardefine:Light|{{!}}style="background-color:#17456e"}} | |||
{{#vardefine:Dark|{{!}}style="background-color:#163d5f"}} | |||
</div> | |||
===Beginner Level=== | ===Beginner Level=== | ||
{| class= | {| class="altrow" style="text-align:left; width:100%; max-width:30em;" | ||
! | !style="text-align:center; width:5%"| Floor | ||
!style="text-align:center"| Wave 1 | |||
! | |||
|- | |- | ||
! | !style="text-align:center"| 1 | ||
{{#var:Light}}| '''8×''' {{Term|ALBW|Mini-Moldorm|link}} | |||
| | |||
|- | |- | ||
! | !style="text-align:center"| 2 | ||
| < | {{#var:Dark}}| '''10×''' {{Term|ALBW|Sand Crab|link}} | ||
|- | |||
!style="text-align:center"| 3 | |||
{{#var:Light}}| '''8×''' {{Term|ALBW|Octorok|link}} | |||
|- | |||
!style="text-align:center"| 4 | |||
{{#var:Dark}}| '''4×''' {{Term|ALBW|Stalfos|link}}<br>'''4×''' {{Term|ALBW|Red Stalfos|link}} | |||
|- | |||
!style="text-align:center"| 5 | |||
{{#var:Light}}| '''1×''' {{Term|ALBW|Moldorm (Boss)|link}} {{Small|(Yellow)}} | |||
|} | |} | ||
===Intermediate Level=== | ===Intermediate Level=== | ||
{| class= | {| class="altrow" style="text-align:left; width:100%; max-width:30em;" | ||
|- | |- | ||
! | !style="text-align:center; width:10%"| Floor | ||
!style="text-align:center; width:45%"| Wave 1 | |||
! | !style="text-align:center; width:45%"| Wave 2 | ||
! | |||
|- | |- | ||
! 10. | !style="text-align:center"| 1 | ||
| < | {{#var:Light}}| '''1×''' {{Term|ALBW|Popo|link}} | ||
! 11. | {{#var:Light}}| '''8×''' {{Term|ALBW|Red Popo|link}} | ||
| | |- | ||
! 12 | !style="text-align:center"| 2 | ||
| | {{#var:Dark}} colspan="2"| '''8×''' {{Term|ALBW|Chasupa|link}} | ||
|- | |- | ||
! 13 | !style="text-align:center"| 3 | ||
| | {{#var:Light}} colspan="2"| '''6×''' {{Term|ALBW|Crow|link}} | ||
! 14 | |- | ||
| | !style="text-align:center"| 4 | ||
! 15 | {{#var:Dark}} colspan="2"| '''11×''' {{Term|ALBW|Terrorpin|link}} | ||
| | |- | ||
!style="text-align:center"| 5 | |||
{{#var:Light}} colspan="2"| '''8×''' {{Term|ALBW|Green Sword Soldier|link}} | |||
|- | |||
!style="text-align:center" rowspan="2"| 6 | |||
|style="background-color:#163d5f; text-align:center" colspan="2"| ''{{Small|Floors 6 to 10 are missing their corners.}}'' | |||
|- | |||
{{#var:Dark}} colspan="2"| '''1×''' {{Term|ALBW|Bumper|link}}<br>'''7×''' {{Term|ALBW|Blue Hardhat Beetle|link}} | |||
|- | |||
!style="text-align:center"| 7 | |||
{{#var:Light}} colspan="2"| '''6×''' {{Term|ALBW|Blue Bow Soldier|link}} | |||
|- | |||
!style="text-align:center"| 8 | |||
{{#var:Dark}} colspan="2"| '''8×''' {{Term|ALBW|Snap Dragon|link}} | |||
|- | |||
!style="text-align:center"| 9 | |||
{{#var:Light}} colspan="2"| '''6×''' {{Term|ALBW|Helmasaur|link}} | |||
|- | |||
!style="text-align:center"| 10 | |||
{{#var:Dark}} colspan="2"| '''8×''' {{Term|ALBW|Gibdo|link}} | |||
|- | |||
!style="text-align:center" rowspan="2"| 11 | |||
|style="background-color:#17456e; text-align:center" colspan="2"| ''{{Small|Floors 11 to 15 are covered in {{Term|ALBW|Ice}}.}}'' | |||
|- | |||
{{#var:Light}} colspan="2"| '''4×''' {{Term|ALBW|Snowball Hinox|link}} | |||
|- | |||
!style="text-align:center"| 12 | |||
{{#var:Dark}} colspan="2"| '''6×''' {{Term|ALBW|Snowball Zirro|link}} | |||
|- | |||
!style="text-align:center"| 13 | |||
{{#var:Light}} colspan="2"| '''7×''' {{Term|ALBW|Ice Gimos|link}} | |||
|- | |||
!style="text-align:center"| 14 | |||
{{#var:Dark}} colspan="2"| '''2×''' Soldier {{Small|(Green, Short Sword)}}<br>'''1×''' {{Term|ALBW|Grey Ball and Chain Soldier|link}} | |||
|- | |||
!style="text-align:center"| 15 | |||
{{#var:Light}} colspan="2"| '''5×''' {{Term|ALBW|Moblin|link}}<br>'''5×''' {{Term|ALBW|Shield Moblin|link}} {{Small|(Red)}} | |||
|} | |} | ||
===Advanced Level=== | ===Advanced Level=== | ||
{| class= | {| class="altrow" style="text-align:left; width:100%; max-width:30em;" | ||
! | |- | ||
| < | !style="text-align:center; width:10%"| Floor | ||
! | !style="text-align:center; width:30%"| Wave 1 | ||
| < | !style="text-align:center; width:30%"| Wave 2 | ||
! | !style="text-align:center; width:30%"| Wave 3 | ||
| < | |- | ||
!style="text-align:center"| 1 | |||
{{#var:Light}}| '''1×''' {{Term|ALBW|Blob|link}} | |||
{{#var:Light}} colspan="2"| {{Exp|Only eight appear at beginning; more appear as they are defeated.|'''20×'''}} {{Term|ALBW|Blob|link}} | |||
|- | |||
!style="text-align:center"| 2 | |||
{{#var:Dark}}| '''12×''' {{Term|ALBW|Rat|link}} | |||
{{#var:Dark}} colspan="2"| '''12×''' {{Term|ALBW|Rope|link}} | |||
|- | |||
!style="text-align:center"| 3 | |||
{{#var:Light}} colspan="3"| '''7×''' {{Term|ALBW|Keese|link}} | |||
|- | |||
!style="text-align:center"| 4 | |||
{{#var:Dark}} colspan="3"| '''10×''' Soldier {{Small|(Green, Short Sword)}} | |||
|- | |||
!style="text-align:center"| 5 | |||
{{#var:Light}}| '''1×''' {{Term|ALBW|Armos|link}} | |||
{{#var:Light}} colspan="2"| '''8×''' {{Term|ALBW|Armos|link}} | |||
|- | |||
!style="text-align:center"| 6 | |||
{{#var:Dark}}| '''4×''' {{Term|ALBW|Poe|link}} | |||
{{#var:Dark}} colspan="2"| '''8×''' {{Term|ALBW|Hyu|link}} | |||
|- | |||
!style="text-align:center"| 7 | |||
{{#var:Light}} colspan="3"| '''5×''' {{Term|ALBW|Red Rupee|link}}<br>'''11×''' {{Term|ALBW|Red Rupee Like|link}} | |||
|- | |||
!style="text-align:center"| 8 | |||
{{#var:Dark}} colspan="3"| '''5×''' {{Term|ALBW|Blue Tektite|link}}<br>'''5×''' {{Term|ALBW|Red Tektite|link}} | |||
|- | |||
!style="text-align:center"| 9 | |||
{{#var:Light}} colspan="3"| '''4×''' {{Term|ALBW|Spear Soldier|link}} {{Small|(Red)}}<br>'''4×''' {{Term|ALBW|Spear Throwing Soldier|link}} | |||
|- | |||
! 10 | |||
!colspan="3"| Recovery Floor<br>'''5×''' {{Term|ALBW|Heart|link}} | |||
|- | |||
!style="text-align:center" rowspan="2"| 11 | |||
|style="background-color:#17456e; text-align:center" colspan="3"| ''{{Small|Floors 11 to 20 are covered in {{Term|ALBW|Ice}}.}}'' | |||
|- | |||
{{#var:Light}} colspan="3"| '''4×''' {{Term|ALBW|Green Kodongo|link}}<br>'''7×''' {{Term|ALBW|Red Kodongo|link}} | |||
|- | |||
!style="text-align:center"| 12 | |||
{{#var:Dark}} colspan="3"| '''8×''' {{Term|ALBW|Slarok|link}} | |||
|- | |||
!style="text-align:center"| 13 | |||
{{#var:Light}}| '''9×''' {{Term|ALBW|Karat Crab|link}} | |||
{{#var:Light}} colspan="2"| {{Exp|Only two appear at beginning; more appear as they are defeated.|'''12×'''}} {{Term|ALBW|Ku|link}} | |||
|- | |||
!style="text-align:center"| 14 | |||
{{#var:Dark}} colspan="3"| '''6×''' {{Term|ALBW|Pengator|link}} | |||
|- | |||
!style="text-align:center"| 15 | |||
{{#var:Light}} colspan="3"| '''6×''' {{Term|ALBW|Blue Bari|link}}<br>'''6×''' {{Term|ALBW|Red Bari|link}} | |||
|- | |||
!style="text-align:center"| 16 | |||
{{#var:Dark}} colspan="3"| '''5×''' {{Term|ALBW|Green Goriya|link}}<br>'''5×''' {{Term|ALBW|Red Goriya|link}} | |||
|- | |||
!style="text-align:center"| 17 | |||
{{#var:Light}} colspan="3"| '''8×''' {{Term|ALBW|Blue Taros|link}} | |||
|- | |||
!style="text-align:center"| 18 | |||
{{#var:Dark}} colspan="3"| '''2×''' {{Term|ALBW|Big Pengator|link}} | |||
|- | |||
!style="text-align:center"| 19 | |||
{{#var:Light}} colspan="3"| '''1×''' {{Term|ALBW|Gigabari|link}} {{Small|(Yellow)}} | |||
|- | |||
! 20 | |||
!colspan="3"| Recovery Floor<br>'''3×''' {{Term|ALBW|Heart|link}} | |||
|- | |||
!style="text-align:center" rowspan="2"| 21 | |||
|style="background-color:#17456e; text-align:center" colspan="3"| ''{{Small|Floors 21 to 29 are missing their corners.}}'' | |||
|- | |||
{{#var:Light}} colspan="3"| '''8×''' {{Term|ALBW|Dacto|link}} | |||
|- | |||
!style="text-align:center"| 22 | |||
{{#var:Dark}}| '''10×''' {{Term|ALBW|Dark Rat|link}} | |||
{{#var:Dark}} colspan="2"| '''10×''' {{Term|ALBW|Skullrope|link}} | |||
|- | |||
!style="text-align:center"| 23 | |||
{{#var:Light}} colspan="3"| '''7×''' {{Term|ALBW|Vulture|link}} | |||
|- | |||
!style="text-align:center"| 24 | |||
{{#var:Dark}} colspan="3"| '''1×''' {{Term|ALBW|Popo|link}}<br>'''4×''' {{Term|ALBW|Fire Wizzrobe|link}} | |||
|- | |||
!style="text-align:center"| 25 | |||
{{#var:Light}} colspan="3"| '''1×''' {{Term|ALBW|Bumper|link}}<br>'''8×''' {{Term|ALBW|Purple Mini-Moldorm|link}} | |||
|- | |||
!style="text-align:center"| 26 | |||
{{#var:Dark}} colspan="3"| '''2×''' {{Term|ALBW|Green Eyegore|link}}<br>'''2×''' {{Term|ALBW|Blue Eyegore|link}}<br>'''2×''' {{Term|ALBW|Red Eyegore|link}} | |||
|- | |||
!style="text-align:center"| 27 | |||
{{#var:Light}} colspan="3"| '''4×''' {{Term|ALBW|Blue Bow Soldier|link}}<br>'''4×''' {{Term|ALBW|Blue Sword Soldier|link}} | |||
|- | |||
!style="text-align:center"| 28 | |||
{{#var:Dark}} colspan="3"| '''4×''' {{Term|ALBW|Spear Throwing Soldier|link}}<br>'''1×''' {{Term|ALBW|Gold Ball and Chain Trooper|link}} | |||
|- | |||
!style="text-align:center"| 29 | |||
{{#var:Light}} colspan="3"| '''3×''' {{Term|ALBW|Lynel|link}} | |||
|- | |||
! 30 | |||
!colspan="3"| Recovery Floor<br>'''1×''' {{Term|ALBW|Heart|link}} | |||
|- | |||
!style="text-align:center" rowspan="2"| 31 | |||
|style="background-color:#17456e; text-align:center" colspan="3"| ''{{Small|Floors 31 to 40 are covered in {{Term|ALBW|Ice}} and missing their corners.}}'' | |||
|- | |||
{{#var:Light}} colspan="3"| '''7×''' {{Term|ALBW|Red Hardhat Beetle|link}}<br>'''4×''' {{Term|ALBW|Buzz Blob|link}} | |||
|- | |||
!style="text-align:center" rowspan="2"| 32 | |||
{{#var:Dark}} colspan="3"| '''5×''' {{Term|ALBW|Dark Ghini|link}}<br>'''5×''' {{Term|ALBW|Light Ghini|link}} | |||
|- | |||
|style="background-color:#163d5f; text-align:center" colspan="3"| ''{{Small|This floor is dark.}}'' | |||
|- | |||
!style="text-align:center"| 33 | |||
{{#var:Light}} colspan="3"| '''4×''' {{Term|ALBW|Freezor|link}} | |||
|- | |||
!style="text-align:center" rowspan="2"| 34 | |||
{{#var:Dark}} colspan="3"| '''7×''' {{Term|ALBW|Chasupa|link}}<br>'''4×''' {{Term|ALBW|Sluggula|link}} | |||
|- | |||
|style="background-color:#163d5f; text-align:center" colspan="3"| ''{{Small|This floor is dark.}}'' | |||
|- | |||
!style="text-align:center"| 35 | |||
{{#var:Light}}| '''1×''' {{Term|ALBW|Heart|link}} | |||
{{#var:Light}} colspan="2"| '''8×''' {{Term|ALBW|Blue Zazak|link}} | |||
|- | |||
!style="text-align:center"| 36 | |||
{{#var:Dark}} colspan="3"| '''4×''' {{Term|ALBW|Ropa|link}}<br>'''4×''' {{Term|ALBW|Snowball Zirro|link}} | |||
|- | |||
!style="text-align:center" rowspan="2"| 37 | |||
{{#var:Light}} colspan="3"| '''8×''' {{Term|ALBW|Red Eyegore|link}} | |||
|- | |||
|style="background-color:#17456e; text-align:center" colspan="3"| ''{{Small|This floor is dark.}}'' | |||
|- | |||
!style="text-align:center" rowspan="2"| 38 | |||
{{#var:Dark}} colspan="3"| '''4×''' {{Term|ALBW|Ice Wizzrobe|link}} | |||
|- | |||
|style="background-color:#163d5f; text-align:center" colspan="3"| ''{{Small|This floor includes two {{Plural|ALBW|Ice Gimos|link}} that do not come alive.}}'' | |||
|- | |||
!style="text-align:center" rowspan="2"| 39 | |||
{{#var:Light}} colspan="3"| '''1×''' {{Term|ALBW|Lorule Ball and Chain Soldier|link}} | |||
|- | |- | ||
|style="background-color:#17456e; text-align:center" colspan="3"| ''{{Small|This floor is dark.}}'' | |||
| | |||
| | |||
|- | |- | ||
! | ! 40 | ||
!colspan="3"| Recovery Floor<br>'''1×''' {{Term|ALBW|Fairy|link}} | |||
! | |||
| | |||
|- | |- | ||
! | !style="text-align:center"| 41 | ||
{{#var:Light}} colspan="3"| '''6×''' {{Term|ALBW|Red Taros|link}}<br>'''4×''' {{Term|ALBW|Zirro|link}} | |||
|- | |- | ||
! | !style="text-align:center" rowspan="2"| 42 | ||
{{#var:Dark}} colspan="3"| '''11×''' {{Term|ALBW|Red Stalfos|link}} | |||
| | |||
|- | |- | ||
|style="background-color:#163d5f; text-align:center" colspan="3"| ''{{Small|The floor is covered in {{Term|ALBW|Ice}}.}}'' | |||
| | |||
|- | |- | ||
! | !style="text-align:center" rowspan="2"| 43 | ||
{{#var:Light}} colspan="3"| '''4×''' {{Term|ALBW|White Bari|link}}<br>'''3×''' {{Term|ALBW|Yellow Bari|link}} | |||
| | |||
|- | |- | ||
|style="background-color:#17456e; text-align:center" colspan="3"| ''{{Small|The floor is missing its corners.}}'' | |||
|- | |- | ||
! | !style="text-align:center" rowspan="2"| 44 | ||
{{#var:Dark}} colspan="3"| '''1×''' {{Term|ALBW|Big Ice Gimos|link}} | |||
| | |||
|- | |- | ||
|style="background-color:#163d5f; text-align:center" colspan="3"| ''{{Small|The floor is both covered in {{Term|ALBW|Ice}} and missing its corners.}}'' | |||
| | |||
|- | |- | ||
! | !style="text-align:center"| 45 | ||
| | {{#var:Light}} colspan="3"| '''6×''' {{Term|ALBW|Shield Moblin|link}} {{Small|(Blue)}}<br>'''4×''' {{Term|ALBW|Bomb Soldier|link}} | ||
| | |||
|- | |- | ||
! | !style="text-align:center" rowspan="2"| 46 | ||
{{#var:Dark}} colspan="3"| '''8×''' {{Term|ALBW|Red Zazak|link}} | |||
|- | |- | ||
|style="background-color:#163d5f; text-align:center" colspan="3"| ''{{Small|The floor is covered in {{Term|ALBW|Ice}}.}}'' | |||
| | |||
|- | |- | ||
! | !style="text-align:center" rowspan="2"| 47 | ||
{{#var:Light}}| '''3×''' {{Term|ALBW|Gimos|link}} | |||
{{#var:Light}}| '''3×''' {{Term|ALBW|Fire Gimos|link}} | |||
{{#var:Light}}| '''3×''' {{Term|ALBW|Ice Gimos|link}} | |||
|- | |- | ||
{{#var:Light}} colspan="3"| '''4×''' Medusa {{Small|(Ice)}} | |||
| | |||
|- | |- | ||
! | !style="text-align:center" rowspan="2"| 48 | ||
{{#var:Dark}} colspan="3"| '''3×''' {{Term|ALBW|Lorule Spear Soldier|link}}<br>'''3×''' {{Term|ALBW|Lorule Soldier|link}} | |||
|- | |- | ||
|style="background-color:#163d5f; text-align:center" colspan="3"| ''{{Small|The floor is covered in {{Term|ALBW|Ice}}.}}'' | |||
| | |||
|- | |- | ||
! | !style="text-align:center"| 49 | ||
{{#var:Light}} colspan="3"| '''3×''' {{Term|ALBW|Black Lynel|link}} | |||
| | |||
|- | |- | ||
! | !style="text-align:center" rowspan="2"| 50 | ||
{{#var:Dark}} colspan="3"| '''1×''' {{Term|ALBW|Moldorm (Boss)|link}} {{Small|(Purple)}} | |||
|- | |- | ||
|style="background-color:#163d5f; text-align:center" colspan="3"| ''{{Small|The floor is covered in {{Term|ALBW|Ice}}.}}'' | |||
|} | |} | ||
| Line 231: | Line 335: | ||
==Gallery== | ==Gallery== | ||
<gallery> | <gallery> | ||
File:ALBW Treacherous Tower Advanced Complete.png|Link after finishing the Advanced level | File:ALBW Treacherous Tower Advanced Complete.png|{{Term|ALBW|Link}} collecting prize {{Plural|ALBW|Rupee}} after finishing the Advanced level | ||
</gallery> | </gallery> | ||
Revision as of 03:46, 17 February 2020

This article has been flagged since April 2014.
Template:Minigame The Treacherous Tower is a location and mini-game in A Link Between Worlds.[1]
Location and Rules
The Treacherous Tower is found on Death Mountain in Lorule, approximately where the Tower of Hera is located in Hyrule. It is host to a mini-game that is run by the Devilish Girl, who pits Link against several rooms of enemies. When all enemies in the room are defeated, Link is able to carry on to the next, until he reaches the end and receives his prize. There are three modes: Beginner, Intermediate and Advanced. The initial difficulty setting is Beginner, but the Intermediate and Advanced levels are unlocked after Link completes the respective difficulties preceding them. If Link can complete the levels with faster times, he will be rewarded with more Rupees.[2]
The Beginner level contains five rooms and costs 100 Rupees to play.[3] At the end of the fifth room, Link will receive several Rupees from the crowd for completing it. The Intermediate level contains 15 rooms and costs 200 Rupees to play.[4] At the end of the 15th room, Link will receive several Rupees and a Piece of Heart for completing it the first time.[5] The Advanced level contains 50 rooms and costs 300 Rupees to play.[6][7] Upon initial completion of the Advanced level, Link's Lantern will be upgraded to do 8 times the amount of damage.[8] A subsequent completion will give the young hero an upgraded Bug Net.[9][10] According to the Devilish Girl, nobody has survived the Advanced level.[11]
Enemies and Traps
Beginner Level
| Floor | Wave 1 |
|---|---|
| 1 | 8× Mini-Moldorm |
| 2 | 10× Sand Crab |
| 3 | 8× Octorok |
| 4 | 4× Stalfos 4× Red Stalfos |
| 5 | 1× Moldorm (Yellow) |
Intermediate Level
| Floor | Wave 1 | Wave 2 |
|---|---|---|
| 1 | 1× Popo | 8× Red Popo |
| 2 | 8× Chasupa | |
| 3 | 6× Crow | |
| 4 | 11× Terrorpin | |
| 5 | 8× Green Sword Soldier | |
| 6 | Floors 6 to 10 are missing their corners. | |
| 1× Bumper 7× Blue Hardhat Beetle | ||
| 7 | 6× Blue Bow Soldier | |
| 8 | 8× Snap Dragon | |
| 9 | 6× Helmasaur | |
| 10 | 8× Gibdo | |
| 11 | Floors 11 to 15 are covered in Ice. | |
| 4× Snowball Hinox | ||
| 12 | 6× Snowball Zirro | |
| 13 | 7× Ice Gimos | |
| 14 | 2× Soldier (Green, Short Sword) 1× Grey Ball and Chain Soldier | |
| 15 | 5× Moblin 5× Shield Moblin (Red) | |
Advanced Level
| Floor | Wave 1 | Wave 2 | Wave 3 |
|---|---|---|---|
| 1 | 1× Blob | 20× Blob | |
| 2 | 12× Rat | 12× Rope | |
| 3 | 7× Keese | ||
| 4 | 10× Soldier (Green, Short Sword) | ||
| 5 | 1× Armos | 8× Armos | |
| 6 | 4× Poe | 8× Hyu | |
| 7 | 5× Red Rupee 11× Red Rupee Like | ||
| 8 | 5× Blue Tektite 5× Red Tektite | ||
| 9 | 4× Spear Soldier (Red) 4× Spear Throwing Soldier | ||
| 10 | Recovery Floor 5× Heart | ||
| 11 | Floors 11 to 20 are covered in Ice. | ||
| 4× Green Kodongo 7× Red Kodongo | |||
| 12 | 8× Slarok | ||
| 13 | 9× Karat Crab | 12× Ku | |
| 14 | 6× Pengator | ||
| 15 | 6× Blue Bari 6× Red Bari | ||
| 16 | 5× Green Goriya 5× Red Goriya | ||
| 17 | 8× Blue Taros | ||
| 18 | 2× Big Pengator | ||
| 19 | 1× Gigabari (Yellow) | ||
| 20 | Recovery Floor 3× Heart | ||
| 21 | Floors 21 to 29 are missing their corners. | ||
| 8× Dacto | |||
| 22 | 10× Dark Rat | 10× Skullrope | |
| 23 | 7× Vulture | ||
| 24 | 1× Popo 4× Fire Wizzrobe | ||
| 25 | 1× Bumper 8× Purple Mini-Moldorm | ||
| 26 | 2× Green Eyegore 2× Blue Eyegore 2× Red Eyegore | ||
| 27 | 4× Blue Bow Soldier 4× Blue Sword Soldier | ||
| 28 | 4× Spear Throwing Soldier 1× Gold Ball and Chain Trooper | ||
| 29 | 3× Lynel | ||
| 30 | Recovery Floor 1× Heart | ||
| 31 | Floors 31 to 40 are covered in Ice and missing their corners. | ||
| 7× Red Hardhat Beetle 4× Buzz Blob | |||
| 32 | 5× Dark Ghini 5× Light Ghini | ||
| This floor is dark. | |||
| 33 | 4× Freezor | ||
| 34 | 7× Chasupa 4× Sluggula | ||
| This floor is dark. | |||
| 35 | 1× Heart | 8× Blue Zazak | |
| 36 | 4× Ropa 4× Snowball Zirro | ||
| 37 | 8× Red Eyegore | ||
| This floor is dark. | |||
| 38 | 4× Ice Wizzrobe | ||
| This floor includes two Ice Gimos that do not come alive. | |||
| 39 | 1× Lorule Ball and Chain Soldier | ||
| This floor is dark. | |||
| 40 | Recovery Floor 1× Fairy | ||
| 41 | 6× Red Taros 4× Zirro | ||
| 42 | 11× Red Stalfos | ||
| The floor is covered in Ice. | |||
| 43 | 4× White Bari 3× Yellow Bari | ||
| The floor is missing its corners. | |||
| 44 | 1× Big Ice Gimos | ||
| The floor is both covered in Ice and missing its corners. | |||
| 45 | 6× Shield Moblin (Blue) 4× Bomb Soldier | ||
| 46 | 8× Red Zazak | ||
| The floor is covered in Ice. | |||
| 47 | 3× Gimos | 3× Fire Gimos | 3× Ice Gimos |
| 4× Medusa (Ice) | |||
| 48 | 3× Lorule Spear Soldier 3× Lorule Soldier | ||
| The floor is covered in Ice. | |||
| 49 | 3× Black Lynel | ||
| 50 | 1× Moldorm (Purple) | ||
| The floor is covered in Ice. | |||
Nomenclature
| Language | Name | Meaning | |
|---|---|---|---|
| FrenchCA | Tour du Péril | Tower of Danger | |
| FrenchEU | Tour de l'escarmouche | Tower of skirmish | |
| German | Ausdauerkampf | Endurance fight | |
| SpanishLA | Fortaleza interminable | Endless fortress | |
Gallery
-
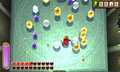
Link collecting prize Rupees after finishing the Advanced level

See Also
- Boss Gauntlet
- Savage Labyrinth
- Simon's Simulations
- Cave of Ordeals
- Take 'Em All On!
- Sword Monk's Shrine
References
- ↑ "Well, boom boom, sword boy! Welcome to the Treacherous Tower!" — Devilish Girl (A Link Between Worlds)
- ↑ "A new record! Boom boom all around! Here's an extra bonus for you!" — Devilish Girl (A Link Between Worlds)
- ↑ "Boom boom in the room! Glad to see you back here, sword boy! C'mon and give your luck a try! What's 100 Rupees these days? [Boom boom!] That's the spirit, sword boy! The rules are super simple! A bunch of baddies are gonna attack you. Just beat 'em! You look just like you can take care of yourself, but since it's your first time, just stick to the Beginner course. Just five stages, so it'll be a piece of boom-boom cake for you! That'll be 100 Rupees. Please and thank you! All right! Have fun in there! And do come back in one piece." — Devilish Girl (A Link Between Worlds)
- ↑ "Well, boom boom! Check you out! I was wondering if you were going to give it another try! Wanna give the Intermediate course a shot? C'mon--you can't take those Rupees with you, ya know! [Intermediate] YAY! That's the spirit! The Intermediate course has 15 floors! That's tons of baddies for your entertainment at the low cost of only 200 Rupees! Please and thank you! INCOMING!" — Devilish Girl (A Link Between Worlds)
- ↑ "I can't believe it! Well, I CAN believe it, but...I CAN'T believe it! Amazing! Your clear time was XX minutes, XX seconds! If you can beat your time on this course, I'll give you some extra Rupees for your pockets! And since you cleared this course for the first time, I have something special for you..." — Devilish Girl (A Link Between Worlds)
- ↑ "You know what? You should really take a crack at the Advanced course next time! The Advanced course has 50 floors! You can beat up baddies to your heart's delight! It costs 300 Rupees, so give it a try next time! Just lemme know if you want another go at it! I'm not going anywhere!" — Devilish Girl (A Link Between Worlds)
- ↑ "Well, well, well! Double boom in the room! I'm so impressed! The Advanced course has 50 floors! Beat up baddies to your heart's delight for the bargain price of only 300 Rupees! Please and thank you!" — Devilish Girl (A Link Between Worlds)
- ↑ "Boom boom! You brought the doom! You're one of a kind, sword boy! [...] Oh yeah...and I have a wee little something special you might be interested in as well... [...] Now you can even use your lamp on your enemies! It's hot stuff!" — Devilish Girl (A Link Between Worlds)
- ↑ "Oh yeah... I've got another very special prize for you. That's only if you're interested, of course. To get it, all you have to do is clear the Advanced course again! When you come back to do that, be sure you have one of those bug-catching thingies with you, OK? Just lemme know if you want another go at it! I'm not going anywhere!" — Devilish Girl (A Link Between Worlds)
- ↑ "Oh, mah... Oh, mah! That's all I can say. Literally. Just...oh, mah... Boom boom and sweep like a broom! You've cleared the Advanced course twice now, sword boy! As promised, here's an extra-special prize for you! [...] Now you can even use your net to beat up enemies! How fun is that? Even though I've given you my special prizes, will you still visit? Don't forget about me OK?! Please and thank you!" — Devilish Girl (A Link Between Worlds)
- ↑ "Silly me! Sorry. Sometimes my mind just goes boom boom! I forgot to mention one teensy-weensy thing... The number of people who have returned alive from this course is... ...a big, fat ZERO! Have fun!" — Devilish Girl (A Link Between Worlds)