Treacherous Tower: Difference between revisions
Htwretched (talk | contribs) (New enemy tables) |
No edit summary |
||
| (21 intermediate revisions by 9 users not shown) | |||
| Line 1: | Line 1: | ||
{{ | {{Infobox Minigame | ||
|image= File:ALBW Treacherous Tower.png | |||
|image= File:ALBW Treacherous Tower | |||
|caption= {{Term|ALBW|Link}} outside the {{Term|ALBW|Treacherous Tower}} | |caption= {{Term|ALBW|Link}} outside the {{Term|ALBW|Treacherous Tower}} | ||
|location= {{Term|ALBW|Death Mountain|link}} ({{Term|ALBW|Lorule|link}}) | |pronunciation= | ||
| | |game= ALBW | ||
|other= | |||
|location= {{Term|ALBW|Death Mountain|link}} ({{Term|ALBW|Lorule|link}}) | |||
|owner= {{Term|ALBW|Devilish Girl|link}} | |||
|prereq= | |||
|cost= | |||
{{List| | |||
100 {{Plural|ALBW|Rupee}} {{Small|(Beginner)}}, | |||
200 {{Plural|ALBW|Rupee}} {{Small|(Intermediate)}}, | |||
300 {{Plural|ALBW|Rupee}} {{Small|(Advanced)}} | |||
}} | }} | ||
The {{Term/Store|Treacherous Tower||Series, ALBW}} is a location and | |prize= | ||
{{List| | |||
{{Plural|ALBW|Rupee|link}} {{Small|(All Levels)}}, | |||
{{Term|ALBW|Piece of Heart|link}} {{Small|(Intermediate)}}, | |||
{{Term|ALBW|Super Lamp|link}} {{Small|(Advanced, first time)}}, | |||
{{Term|ALBW|Super Net|link}} {{Small|(Advanced, second time)}} | |||
}} | |||
|theme= | |||
|comp= | |||
}} | |||
The {{Term/Store|Treacherous Tower||Series, ALBW}} is a location and {{Term|ALBW|Mini-Game|link}} in {{ALBW}}.<ref>{{Cite|Well, boom boom, sword boy! Welcome to the Treacherous Tower!|Devilish Girl|ALBW}}</ref> | |||
==Location and Rules== | ==Location and Rules== | ||
The Treacherous Tower is found on | The {{Term|ALBW|Treacherous Tower}} is found on {{Term|ALBW|Death Mountain|link}} in {{Term|ALBW|Lorule|link}}, approximately where the {{Term|ALBW|Tower of Hera|link}} is located in {{Term|ALBW|Hyrule|link}}. It is host to a mini-game that is run by the {{Term|ALBW|Devilish Girl|link}}, who pits {{Term|ALBW|Link|link}} against a series of rooms full of enemies. These rooms are surrounded by a bottomless pit that {{Term|ALBW|Link}} can fall into and receive damage, which is in turn surrounded by a cheering audience full of monsters. When all enemies in the room are defeated, {{Term|ALBW|Link}} is able to carry on to the next room, until he reaches the end and receives his prize. There are three modes: Beginner, Intermediate and Advanced. Initially only the Beginner level is available, and the Intermediate and Advanced levels are unlocked after {{Term|ALBW|Link}} completes their preceding levels. If {{Term|ALBW|Link}} can complete a level with faster time than his previous record, he will be rewarded with extra {{Plural|ALBW|Rupee|link}} in addition to the usual prizes.<ref>{{Cite|A new record! Boom boom all around! Here's an extra bonus for you!|Devilish Girl|ALBW}}</ref> | ||
The Beginner level contains five rooms and costs 100 | The Beginner level contains five rooms and costs 100 {{Plural|ALBW|Rupee}} to play.<ref>{{Cite|Boom boom in the room! Glad to see you back here, sword boy! C'mon and give your luck a try! What's 100 Rupees these days? [Boom boom!] That's the spirit, sword boy! The rules are super simple! A bunch of baddies are gonna attack you. Just beat 'em! You look just like you can take care of yourself, but since it's your first time, just stick to the Beginner course. Just five stages, so it'll be a piece of boom-boom cake for you! That'll be 100 Rupees. Please and thank you! All right! Have fun in there! And do come back in one piece.|Devilish Girl|ALBW}}</ref> The Intermediate level contains 15 rooms and costs 200 {{Plural|ALBW|Rupee}} to play.<ref>{{Cite|Well, boom boom! Check you out! I was wondering if you were going to give it another try! Wanna give the Intermediate course a shot? C'mon--you can't take those Rupees with you, ya know! [Intermediate] YAY! That's the spirit! The Intermediate course has 15 floors! That's tons of baddies for your entertainment at the low cost of only 200 Rupees! Please and thank you! INCOMING!|Devilish Girl|ALBW}}</ref> The Advanced level contains 50 rooms and costs 300 Rupees to play.<ref>{{Cite|You know what? You should really take a crack at the Advanced course next time! The Advanced course has 50 floors! You can beat up baddies to your heart's delight! It costs 300 Rupees, so give it a try next time! Just lemme know if you want another go at it! I'm not going anywhere!|Devilish Girl|ALBW}}</ref><ref>{{Cite|Well, well, well! Double boom in the room! I'm so impressed! The Advanced course has 50 floors! Beat up baddies to your heart's delight for the bargain price of only 300 Rupees! Please and thank you!|Devilish Girl|ALBW}}</ref> Upon completing the final room of any difficulty level, {{Term|ALBW|Link}} will receive numerous {{Plural|ALBW|Rupee}} thrown from the audience, with higher difficulty levels yielding more valuable {{Plural|ALBW|Rupee}}. Link recieves 300 rupees from the crowd upon completing the Beginner level, for a net profit of 200 rupees. 1000 rupees are gifted from the audience upon completing the Intermediate level, for a net profit of 800 rupees. If Link manages to complete the Advanced level, he gets 5000 rupees from the audience, for a net profit of 4700 rupees. In addition, after completing the Intermediate level for the first time, the {{Term|ALBW|Devilish Girl}} rewards him with a {{Term|ALBW|Piece of Heart|link}}.<ref>{{Cite|I can't believe it! Well, I CAN believe it, but...I CAN'T believe it! Amazing! Your clear time was XX minutes, XX seconds! If you can beat your time on this course, I'll give you some extra Rupees for your pockets! And since you cleared this course for the first time, I have something special for you...|Devilish Girl|ALBW}}</ref> After completing the Advanced level for the first time, she upgrade {{Term|ALBW|Link}}'s {{Term|ALBW|Lantern|link}} to the {{Term|ALBW|Super Lamp|link}}, which deals eight times the amount of damage.<ref>{{Cite|Boom boom! You brought the doom! You're one of a kind, sword boy! [...] Oh yeah...and I have a wee little something special you might be interested in as well... [...] Now you can even use your lamp on your enemies! It's hot stuff!|Devilish Girl|ALBW}}</ref> A subsequent completion will see her upgrade {{Term|ALBW|Link}}'s {{Term|ALBW|Bug Net|link}} to the {{Term|ALBW|Super Net|link}}, which also deals eight times the damage.<ref>{{Cite|Oh yeah... I've got another very special prize for you. That's only if you're interested, of course. To get it, all you have to do is clear the Advanced course again! When you come back to do that, be sure you have one of those bug-catching thingies with you, OK? Just lemme know if you want another go at it! I'm not going anywhere!|Devilish Girl|ALBW}}</ref><ref>{{Cite|Oh, mah... Oh, mah! That's all I can say. Literally. Just...oh, mah... Boom boom and sweep like a broom! You've cleared the Advanced course twice now, sword boy! As promised, here's an extra-special prize for you! [...] Now you can even use your net to beat up enemies! How fun is that? Even though I've given you my special prizes, will you still visit? Don't forget about me OK?! Please and thank you!|Devilish Girl|ALBW}}</ref> According to the {{Term|ALBW|Devilish Girl}}, nobody has survived the Advanced level.<ref>{{Cite|Silly me! Sorry. Sometimes my mind just goes boom boom! I forgot to mention one teensy-weensy thing... The number of people who have returned alive from this course is... ...a big, fat ZERO! Have fun!|Devilish Girl|ALBW}}</ref> | ||
==Enemies and Traps== | ==Enemies and Traps== | ||
{{Store Spawns|Enemies|ALBW= Blue Bow Soldier, Mini-Moldorm, Sand Crab, Octorok, Stalfos, Red Stalfos, Moldorm, Popo, Red Popo, Chasupa, Crow, Terrorpin, Green Sword Soldier, Bumper, Blue Hardhat Beetle, Snap Dragon, Helmasaur, Gibdo, Snowball Hinox, Snowball Zirro, Ice Gimos, Grey Ball and Chain Soldier, Moblin, Shield Moblin, Blob, Rat, Rope, Keese, Armos, Hyu, Poe, Red Rupee Like, Blue Tektite, Red Tektite, Red Spear Soldier, Spear Throwing Soldier, Green Kodongo, Red Kodongo, Slarok, Karat Crab, Ku, Pengator, Blue Bari, Red Bari, Green Goriya, Red Goriya, Blue Taros, Big Pengator, Gigabari, Dacto, Dark Rat, Skullrope, Vulture, Fire Wizzrobe, Purple Mini-Moldorm, Green Eyegore, Blue Eyegore, Red Eyegore, Blue Sword Soldier, Soldier, Short Sword Soldier, Gold Ball and Chain Trooper, Lynel, Red Hardhat Beetle, Buzz Blob, Dark Ghini, Light Ghini, Freezor, Sluggula, Blue Zazak, Ropa, Ice Wizzrobe, Lorule Ball and Chain Soldier, Red Taros, Zirro, White Bari, Yellow Bari, Big Ice Gimos, Bomb Soldier, Red Zazak, Gimos, Fire Gimos, Ice Gimos, Medusa, Lorule Spear Soldier, Lorule Soldier, Black Lynel}} | |||
{{#vardefine:Light|{{!}}style="background-color:#17456e"}} | {{#vardefine:Light|{{!}}style="background-color:#17456e"}} | ||
{{#vardefine:Dark|{{!}}style="background-color:#163d5f"}} | {{#vardefine:Dark|{{!}}style="background-color:#163d5f"}} | ||
</div> | </div> | ||
===Beginner Level=== | ===Beginner Level=== | ||
{| class=" | {| class="wikitable" style="text-align:left; width:100%; max-width:30em;" | ||
!style="text-align:center; width:5%"| Floor | !style="text-align:center; width:5%"| Floor | ||
!style="text-align:center"| Wave 1 | !style="text-align:center"| Wave 1 | ||
| Line 37: | Line 51: | ||
|- | |- | ||
!style="text-align:center"| 4 | !style="text-align:center"| 4 | ||
{{#var:Dark}}| '''4×''' {{Term|ALBW|Stalfos|link}}<br>'''4×''' {{Term|ALBW|Red Stalfos|link}} | {{#var:Dark}}| '''4×''' {{Term|ALBW|Stalfos|link}}<br/>'''4×''' {{Term|ALBW|Red Stalfos|link}} | ||
|- | |- | ||
!style="text-align:center"| 5 | !style="text-align:center"| 5 | ||
| Line 44: | Line 58: | ||
===Intermediate Level=== | ===Intermediate Level=== | ||
{| class=" | {| class="wikitable" style="text-align:left; width:100%; max-width:30em;" | ||
|- | |- | ||
!style="text-align:center; width:10%"| Floor | !style="text-align:center; width:10%"| Floor | ||
| Line 67: | Line 81: | ||
|- | |- | ||
!style="text-align:center" rowspan="2"| 6 | !style="text-align:center" rowspan="2"| 6 | ||
|style="background-color:#163d5f; text-align:center" colspan="2"| ''{{Small|Floors 6 to 10 | |style="background-color:#163d5f; text-align:center" colspan="2"| ''{{Small|Floors 6 to 10 have pits in their corners.}}'' | ||
|- | |- | ||
{{#var:Dark}} colspan="2"| '''1×''' {{Term|ALBW|Bumper|link}}<br>'''7×''' {{Term|ALBW|Blue Hardhat Beetle|link}} | {{#var:Dark}} colspan="2"| '''1×''' {{Term|ALBW|Bumper|link}}<br/>'''7×''' {{Term|ALBW|Blue Hardhat Beetle|link}} | ||
|- | |- | ||
!style="text-align:center"| 7 | !style="text-align:center"| 7 | ||
| Line 95: | Line 109: | ||
|- | |- | ||
!style="text-align:center"| 14 | !style="text-align:center"| 14 | ||
{{#var:Dark}} colspan="2"| '''2×''' Soldier {{Small|(Green, Short Sword)}}<br>'''1×''' {{Term|ALBW|Grey Ball and Chain Soldier|link}} | {{#var:Dark}} colspan="2"| '''2×''' Soldier {{Small|(Green, Short Sword)}}<br/>'''1×''' {{Term|ALBW|Grey Ball and Chain Soldier|link}} | ||
|- | |- | ||
!style="text-align:center"| 15 | !style="text-align:center"| 15 | ||
{{#var:Light}} colspan="2"| '''5×''' {{Term|ALBW|Moblin|link}}<br>'''5×''' {{Term|ALBW|Shield Moblin|link}} {{Small|(Red)}} | {{#var:Light}} colspan="2"| '''5×''' {{Term|ALBW|Moblin|link}}<br/>'''5×''' {{Term|ALBW|Shield Moblin|link}} {{Small|(Red)}} | ||
|} | |} | ||
===Advanced Level=== | ===Advanced Level=== | ||
{| class=" | {| class="wikitable" style="text-align:left; width:100%; max-width:30em;" | ||
|- | |- | ||
!style="text-align:center; width:10%"| Floor | !style="text-align:center; width:10%"| Floor | ||
| Line 132: | Line 146: | ||
|- | |- | ||
!style="text-align:center"| 7 | !style="text-align:center"| 7 | ||
{{#var:Light}} colspan="3"| '''5×''' {{Term|ALBW|Red Rupee|link}}<br>'''11×''' {{Term|ALBW|Red Rupee Like|link}} | {{#var:Light}} colspan="3"| '''5×''' {{Term|ALBW|Red Rupee|link}}<br/>'''11×''' {{Term|ALBW|Red Rupee Like|link}} | ||
|- | |- | ||
!style="text-align:center"| 8 | !style="text-align:center"| 8 | ||
{{#var:Dark}} colspan="3"| '''5×''' {{Term|ALBW|Blue Tektite|link}}<br>'''5×''' {{Term|ALBW|Red Tektite|link}} | {{#var:Dark}} colspan="3"| '''5×''' {{Term|ALBW|Blue Tektite|link}}<br/>'''5×''' {{Term|ALBW|Red Tektite|link}} | ||
|- | |- | ||
!style="text-align:center"| 9 | !style="text-align:center"| 9 | ||
{{#var:Light}} colspan="3"| '''4×''' {{Term|ALBW|Spear Soldier|link}} {{Small|(Red)}}<br>'''4×''' {{Term|ALBW|Spear Throwing Soldier|link}} | {{#var:Light}} colspan="3"| '''4×''' {{Term|ALBW|Spear Soldier|link}} {{Small|(Red)}}<br/>'''4×''' {{Term|ALBW|Spear Throwing Soldier|link}} | ||
|- | |- | ||
! 10 | ! 10 | ||
!colspan="3"| | !colspan="3"| '''5×''' {{Term|ALBW|Heart|link}} | ||
|- | |- | ||
!style="text-align:center" rowspan="2"| 11 | !style="text-align:center" rowspan="2"| 11 | ||
|style="background-color:#17456e; text-align:center" colspan="3"| ''{{Small|Floors 11 to 20 are covered in {{Term|ALBW|Ice}}.}}'' | |style="background-color:#17456e; text-align:center" colspan="3"| ''{{Small|Floors 11 to 20 are covered in {{Term|ALBW|Ice}}.}}'' | ||
|- | |- | ||
{{#var:Light}} colspan="3"| '''4×''' {{Term|ALBW|Green Kodongo|link}}<br>'''7×''' {{Term|ALBW|Red Kodongo|link}} | {{#var:Light}} colspan="3"| '''4×''' {{Term|ALBW|Green Kodongo|link}}<br/>'''7×''' {{Term|ALBW|Red Kodongo|link}} | ||
|- | |- | ||
!style="text-align:center"| 12 | !style="text-align:center"| 12 | ||
| Line 159: | Line 173: | ||
|- | |- | ||
!style="text-align:center"| 15 | !style="text-align:center"| 15 | ||
{{#var:Light}} colspan="3"| '''6×''' {{Term|ALBW|Blue Bari|link}}<br>'''6×''' {{Term|ALBW|Red Bari|link}} | {{#var:Light}} colspan="3"| '''6×''' {{Term|ALBW|Blue Bari|link}}<br/>'''6×''' {{Term|ALBW|Red Bari|link}} | ||
|- | |- | ||
!style="text-align:center"| 16 | !style="text-align:center"| 16 | ||
{{#var:Dark}} colspan="3"| '''5×''' {{Term|ALBW|Green Goriya|link}}<br>'''5×''' {{Term|ALBW|Red Goriya|link}} | {{#var:Dark}} colspan="3"| '''5×''' {{Term|ALBW|Green Goriya|link}}<br/>'''5×''' {{Term|ALBW|Red Goriya|link}} | ||
|- | |- | ||
!style="text-align:center"| 17 | !style="text-align:center"| 17 | ||
| Line 174: | Line 188: | ||
|- | |- | ||
! 20 | ! 20 | ||
!colspan="3"| | !colspan="3"| '''3×''' {{Term|ALBW|Heart|link}} | ||
|- | |- | ||
!style="text-align:center" rowspan="2"| 21 | !style="text-align:center" rowspan="2"| 21 | ||
|style="background-color:#17456e; text-align:center" colspan="3"| ''{{Small|Floors 21 to 29 | |style="background-color:#17456e; text-align:center" colspan="3"| ''{{Small|Floors 21 to 29 have pits in their corners.}}'' | ||
|- | |- | ||
{{#var:Light}} colspan="3"| '''8×''' {{Term|ALBW|Dacto|link}} | {{#var:Light}} colspan="3"| '''8×''' {{Term|ALBW|Dacto|link}} | ||
| Line 189: | Line 203: | ||
|- | |- | ||
!style="text-align:center"| 24 | !style="text-align:center"| 24 | ||
{{#var:Dark}} colspan="3"| '''1×''' {{Term|ALBW|Popo|link}}<br>'''4×''' {{Term|ALBW|Fire Wizzrobe|link}} | {{#var:Dark}} colspan="3"| '''1×''' {{Term|ALBW|Popo|link}}<br/>'''4×''' {{Term|ALBW|Fire Wizzrobe|link}} | ||
|- | |- | ||
!style="text-align:center"| 25 | !style="text-align:center"| 25 | ||
{{#var:Light}} colspan="3"| '''1×''' {{Term|ALBW|Bumper|link}}<br>'''8×''' {{Term|ALBW|Purple Mini-Moldorm|link}} | {{#var:Light}} colspan="3"| '''1×''' {{Term|ALBW|Bumper|link}}<br/>'''8×''' {{Term|ALBW|Purple Mini-Moldorm|link}} | ||
|- | |- | ||
!style="text-align:center"| 26 | !style="text-align:center"| 26 | ||
{{#var:Dark}} colspan="3"| '''2×''' {{Term|ALBW|Green Eyegore|link}}<br>'''2×''' {{Term|ALBW|Blue Eyegore|link}}<br>'''2×''' {{Term|ALBW|Red Eyegore|link}} | {{#var:Dark}} colspan="3"| '''2×''' {{Term|ALBW|Green Eyegore|link}}<br/>'''2×''' {{Term|ALBW|Blue Eyegore|link}}<br/>'''2×''' {{Term|ALBW|Red Eyegore|link}} | ||
|- | |- | ||
!style="text-align:center"| 27 | !style="text-align:center"| 27 | ||
{{#var:Light}} colspan="3"| '''4×''' {{Term|ALBW|Blue Bow Soldier|link}}<br>'''4×''' {{Term|ALBW|Blue Sword Soldier|link}} | {{#var:Light}} colspan="3"| '''4×''' {{Term|ALBW|Blue Bow Soldier|link}}<br/>'''4×''' {{Term|ALBW|Blue Sword Soldier|link}} | ||
|- | |- | ||
!style="text-align:center"| 28 | !style="text-align:center"| 28 | ||
{{#var:Dark}} colspan="3"| '''4×''' {{Term|ALBW|Spear Throwing Soldier|link}}<br>'''1×''' {{Term|ALBW|Gold Ball and Chain Trooper|link}} | {{#var:Dark}} colspan="3"| '''4×''' {{Term|ALBW|Spear Throwing Soldier|link}}<br/>'''1×''' {{Term|ALBW|Gold Ball and Chain Trooper|link}} | ||
|- | |- | ||
!style="text-align:center"| 29 | !style="text-align:center"| 29 | ||
| Line 207: | Line 221: | ||
|- | |- | ||
! 30 | ! 30 | ||
!colspan="3"| | !colspan="3"| '''1×''' {{Term|ALBW|Heart|link}} | ||
|- | |- | ||
!style="text-align:center" rowspan="2"| 31 | !style="text-align:center" rowspan="2"| 31 | ||
|style="background-color:#17456e; text-align:center" colspan="3"| ''{{Small|Floors 31 to 40 are covered in {{Term|ALBW|Ice}} and | |style="background-color:#17456e; text-align:center" colspan="3"| ''{{Small|Floors 31 to 40 are covered in {{Term|ALBW|Ice}} and have pits in their corners.}}'' | ||
|- | |- | ||
{{#var:Light}} colspan="3"| '''7×''' {{Term|ALBW|Red Hardhat Beetle|link}}<br>'''4×''' {{Term|ALBW|Buzz Blob|link}} | {{#var:Light}} colspan="3"| '''7×''' {{Term|ALBW|Red Hardhat Beetle|link}}<br/>'''4×''' {{Term|ALBW|Buzz Blob|link}} | ||
|- | |- | ||
!style="text-align:center" rowspan="2"| 32 | !style="text-align:center" rowspan="2"| 32 | ||
{{#var:Dark}} colspan="3"| '''5×''' {{Term|ALBW|Dark Ghini|link}}<br>'''5×''' {{Term|ALBW|Light Ghini|link}} | {{#var:Dark}} colspan="3"| '''5×''' {{Term|ALBW|Dark Ghini|link}}<br/>'''5×''' {{Term|ALBW|Light Ghini|link}} | ||
|- | |- | ||
|style="background-color:#163d5f; text-align:center" colspan="3"| ''{{Small|This floor is dark.}}'' | |style="background-color:#163d5f; text-align:center" colspan="3"| ''{{Small|This floor is dark.}}'' | ||
| Line 223: | Line 237: | ||
|- | |- | ||
!style="text-align:center" rowspan="2"| 34 | !style="text-align:center" rowspan="2"| 34 | ||
{{#var:Dark}} colspan="3"| '''7×''' {{Term|ALBW|Chasupa|link}}<br>'''4×''' {{Term|ALBW|Sluggula|link}} | {{#var:Dark}} colspan="3"| '''7×''' {{Term|ALBW|Chasupa|link}}<br/>'''4×''' {{Term|ALBW|Sluggula|link}} | ||
|- | |- | ||
|style="background-color:#163d5f; text-align:center" colspan="3"| ''{{Small|This floor is dark.}}'' | |style="background-color:#163d5f; text-align:center" colspan="3"| ''{{Small|This floor is dark.}}'' | ||
| Line 232: | Line 246: | ||
|- | |- | ||
!style="text-align:center"| 36 | !style="text-align:center"| 36 | ||
{{#var:Dark}} colspan="3"| '''4×''' {{Term|ALBW|Ropa|link}}<br>'''4×''' {{Term|ALBW|Snowball Zirro|link}} | {{#var:Dark}} colspan="3"| '''4×''' {{Term|ALBW|Ropa|link}}<br/>'''4×''' {{Term|ALBW|Snowball Zirro|link}} | ||
|- | |- | ||
!style="text-align:center" rowspan="2"| 37 | !style="text-align:center" rowspan="2"| 37 | ||
| Line 242: | Line 256: | ||
{{#var:Dark}} colspan="3"| '''4×''' {{Term|ALBW|Ice Wizzrobe|link}} | {{#var:Dark}} colspan="3"| '''4×''' {{Term|ALBW|Ice Wizzrobe|link}} | ||
|- | |- | ||
|style="background-color:#163d5f; text-align:center" colspan="3"| ''{{Small|This floor includes two {{Plural|ALBW|Ice Gimos|link}} that do not come alive.}}'' | |style="background-color:#163d5f; text-align:center" colspan="3"| ''{{Small|This floor also includes two {{Plural|ALBW|Ice Gimos|link}} that do not come alive.}}'' | ||
|- | |- | ||
!style="text-align:center" rowspan="2"| 39 | !style="text-align:center" rowspan="2"| 39 | ||
| Line 250: | Line 264: | ||
|- | |- | ||
! 40 | ! 40 | ||
!colspan="3"| | !colspan="3"| '''1×''' {{Term|ALBW|Fairy|link}} | ||
|- | |- | ||
!style="text-align:center"| 41 | !style="text-align:center"| 41 | ||
{{#var:Light}} colspan="3"| '''6×''' {{Term|ALBW|Red Taros|link}}<br>'''4×''' {{Term|ALBW|Zirro|link}} | {{#var:Light}} colspan="3"| '''6×''' {{Term|ALBW|Red Taros|link}}<br/>'''4×''' {{Term|ALBW|Zirro|link}} | ||
|- | |- | ||
!style="text-align:center" rowspan="2"| 42 | !style="text-align:center" rowspan="2"| 42 | ||
| Line 261: | Line 275: | ||
|- | |- | ||
!style="text-align:center" rowspan="2"| 43 | !style="text-align:center" rowspan="2"| 43 | ||
{{#var:Light}} colspan="3"| '''4×''' {{Term|ALBW|White Bari|link}}<br>'''3×''' {{Term|ALBW|Yellow Bari|link}} | {{#var:Light}} colspan="3"| '''4×''' {{Term|ALBW|White Bari|link}}<br/>'''3×''' {{Term|ALBW|Yellow Bari|link}} | ||
|- | |- | ||
|style="background-color:#17456e; text-align:center" colspan="3"| ''{{Small|The floor | |style="background-color:#17456e; text-align:center" colspan="3"| ''{{Small|The floor has pits in its corners.}}'' | ||
|- | |- | ||
!style="text-align:center" rowspan="2"| 44 | !style="text-align:center" rowspan="2"| 44 | ||
{{#var:Dark}} colspan="3"| '''1×''' {{Term|ALBW|Big Ice Gimos|link}} | {{#var:Dark}} colspan="3"| '''1×''' {{Term|ALBW|Big Ice Gimos|link}} | ||
|- | |- | ||
|style="background-color:#163d5f; text-align:center" colspan="3"| ''{{Small|The floor is | |style="background-color:#163d5f; text-align:center" colspan="3"| ''{{Small|The floor is covered in {{Term|ALBW|Ice}} and has pits in its corners.}}'' | ||
|- | |- | ||
!style="text-align:center"| 45 | !style="text-align:center"| 45 | ||
{{#var:Light}} colspan="3"| '''6×''' {{Term|ALBW|Shield Moblin|link}} {{Small|(Blue)}}<br>'''4×''' {{Term|ALBW|Bomb Soldier|link}} | {{#var:Light}} colspan="3"| '''6×''' {{Term|ALBW|Shield Moblin|link}} {{Small|(Blue)}}<br/>'''4×''' {{Term|ALBW|Bomb Soldier|link}} | ||
|- | |- | ||
!style="text-align:center" rowspan="2"| 46 | !style="text-align:center" rowspan="2"| 46 | ||
| Line 286: | Line 300: | ||
|- | |- | ||
!style="text-align:center" rowspan="2"| 48 | !style="text-align:center" rowspan="2"| 48 | ||
{{#var:Dark}} colspan="3"| '''3×''' {{Term|ALBW|Lorule Spear Soldier|link}}<br>'''3×''' {{Term|ALBW|Lorule Soldier|link}} | {{#var:Dark}} colspan="3"| '''3×''' {{Term|ALBW|Lorule Spear Soldier|link}}<br/>'''3×''' {{Term|ALBW|Lorule Soldier|link}} | ||
|- | |- | ||
|style="background-color:#163d5f; text-align:center" colspan="3"| ''{{Small|The floor is covered in {{Term|ALBW|Ice}}.}}'' | |style="background-color:#163d5f; text-align:center" colspan="3"| ''{{Small|The floor is covered in {{Term|ALBW|Ice}}.}}'' | ||
| Line 300: | Line 314: | ||
==Nomenclature== | ==Nomenclature== | ||
{{ | {{Nomenclature}} | ||
==Gallery== | ==Gallery== | ||
| Line 340: | Line 323: | ||
==See Also== | ==See Also== | ||
* {{Term|Series|Boss Gauntlet|link}} | * {{Term|Series|Boss Gauntlet|link}} | ||
* {{Term|Series|Cave of Ordeals|link}} | |||
* {{Term|Series|Den of Trials|link}} | |||
* {{Term|Series|Savage Labyrinth|link}} | * {{Term|Series|Savage Labyrinth|link}} | ||
* {{Term|Series|Simon's Simulations|link}} | * {{Term|Series|Simon's Simulations|link}} | ||
* {{Term|Series|Take 'Em All On!|link}} | * {{Term|Series|Take 'Em All On!|link}} | ||
* {{Term|Series|Trial of the Sword|link}} | * {{Term|Series|Trial of the Sword|link}} | ||
{{Ref}} | {{Ref}} | ||
{{Categories | {{Categories | ||
|Towers | |Death Mountain, Lorule, Towers | ||
| | |locations= ALBW | ||
}} | }} | ||
Latest revision as of 17:43, 15 February 2024
The Treacherous Tower is a location and Mini-Game in A Link Between Worlds.[1]
Location and Rules
The Treacherous Tower is found on Death Mountain in Lorule, approximately where the Tower of Hera is located in Hyrule. It is host to a mini-game that is run by the Devilish Girl, who pits Link against a series of rooms full of enemies. These rooms are surrounded by a bottomless pit that Link can fall into and receive damage, which is in turn surrounded by a cheering audience full of monsters. When all enemies in the room are defeated, Link is able to carry on to the next room, until he reaches the end and receives his prize. There are three modes: Beginner, Intermediate and Advanced. Initially only the Beginner level is available, and the Intermediate and Advanced levels are unlocked after Link completes their preceding levels. If Link can complete a level with faster time than his previous record, he will be rewarded with extra Rupees in addition to the usual prizes.[2]
The Beginner level contains five rooms and costs 100 Rupees to play.[3] The Intermediate level contains 15 rooms and costs 200 Rupees to play.[4] The Advanced level contains 50 rooms and costs 300 Rupees to play.[5][6] Upon completing the final room of any difficulty level, Link will receive numerous Rupees thrown from the audience, with higher difficulty levels yielding more valuable Rupees. Link recieves 300 rupees from the crowd upon completing the Beginner level, for a net profit of 200 rupees. 1000 rupees are gifted from the audience upon completing the Intermediate level, for a net profit of 800 rupees. If Link manages to complete the Advanced level, he gets 5000 rupees from the audience, for a net profit of 4700 rupees. In addition, after completing the Intermediate level for the first time, the Devilish Girl rewards him with a Piece of Heart.[7] After completing the Advanced level for the first time, she upgrade Link's Lamp to the Super Lamp, which deals eight times the amount of damage.[8] A subsequent completion will see her upgrade Link's Net to the Super Net, which also deals eight times the damage.[9][10] According to the Devilish Girl, nobody has survived the Advanced level.[11]
Enemies and Traps
Beginner Level
| Floor | Wave 1 |
|---|---|
| 1 | 8× Mini-Moldorm |
| 2 | 10× Sand Crab |
| 3 | 8× Octorok |
| 4 | 4× Stalfos 4× Red Stalfos |
| 5 | 1× Moldorm (Yellow) |
Intermediate Level
| Floor | Wave 1 | Wave 2 |
|---|---|---|
| 1 | 1× Popo | 8× Red Popo |
| 2 | 8× Chasupa | |
| 3 | 6× Crow | |
| 4 | 11× Terrorpin | |
| 5 | 8× Green Sword Soldier | |
| 6 | Floors 6 to 10 have pits in their corners. | |
| 1× Bumper 7× Blue Hardhat Beetle | ||
| 7 | 6× Blue Bow Soldier | |
| 8 | 8× Snap Dragon | |
| 9 | 6× Helmasaur | |
| 10 | 8× Gibdo | |
| 11 | Floors 11 to 15 are covered in Ice. | |
| 4× Snowball Hinox | ||
| 12 | 6× Snowball Zirro | |
| 13 | 7× Ice Gimos | |
| 14 | 2× Soldier (Green, Short Sword) 1× Grey Ball and Chain Soldier | |
| 15 | 5× Moblin 5× Shield Moblin (Red) | |
Advanced Level
| Floor | Wave 1 | Wave 2 | Wave 3 |
|---|---|---|---|
| 1 | 1× Blob | 20× Blob | |
| 2 | 12× Rat | 12× Rope | |
| 3 | 7× Keese | ||
| 4 | 10× Soldier (Green, Short Sword) | ||
| 5 | 1× Armos | 8× Armos | |
| 6 | 4× Poe | 8× Hyu | |
| 7 | 5× Red Rupee 11× Red Rupee Like | ||
| 8 | 5× Blue Tektite 5× Red Tektite | ||
| 9 | 4× Spear Soldier (Red) 4× Spear Throwing Soldier | ||
| 10 | 5× Heart | ||
| 11 | Floors 11 to 20 are covered in Ice. | ||
| 4× Green Kodongo 7× Red Kodongo | |||
| 12 | 8× Slarok | ||
| 13 | 9× Karat Crab | 12× Ku | |
| 14 | 6× Pengator | ||
| 15 | 6× Blue Bari 6× Red Bari | ||
| 16 | 5× Green Goriya 5× Red Goriya | ||
| 17 | 8× Blue Taros | ||
| 18 | 2× Big Pengator | ||
| 19 | 1× Gigabari (Yellow) | ||
| 20 | 3× Heart | ||
| 21 | Floors 21 to 29 have pits in their corners. | ||
| 8× Dacto | |||
| 22 | 10× Dark Rat | 10× Skullrope | |
| 23 | 7× Vulture | ||
| 24 | 1× Popo 4× Fire Wizzrobe | ||
| 25 | 1× Bumper 8× Purple Mini-Moldorm | ||
| 26 | 2× Green Eyegore 2× Blue Eyegore 2× Red Eyegore | ||
| 27 | 4× Blue Bow Soldier 4× Blue Sword Soldier | ||
| 28 | 4× Spear Throwing Soldier 1× Gold Ball and Chain Trooper | ||
| 29 | 3× Lynel | ||
| 30 | 1× Heart | ||
| 31 | Floors 31 to 40 are covered in Ice and have pits in their corners. | ||
| 7× Red Hardhat Beetle 4× Buzz Blob | |||
| 32 | 5× Dark Ghini 5× Light Ghini | ||
| This floor is dark. | |||
| 33 | 4× Freezor | ||
| 34 | 7× Chasupa 4× Sluggula | ||
| This floor is dark. | |||
| 35 | 1× Heart | 8× Blue Zazak | |
| 36 | 4× Ropa 4× Snowball Zirro | ||
| 37 | 8× Red Eyegore | ||
| This floor is dark. | |||
| 38 | 4× Ice Wizzrobe | ||
| This floor also includes two Ice Gimos that do not come alive. | |||
| 39 | 1× Lorule Ball and Chain Soldier | ||
| This floor is dark. | |||
| 40 | 1× Fairy | ||
| 41 | 6× Red Taros 4× Zirro | ||
| 42 | 11× Red Stalfos | ||
| The floor is covered in Ice. | |||
| 43 | 4× White Bari 3× Yellow Bari | ||
| The floor has pits in its corners. | |||
| 44 | 1× Big Ice Gimos | ||
| The floor is covered in Ice and has pits in its corners. | |||
| 45 | 6× Shield Moblin (Blue) 4× Bomb Soldier | ||
| 46 | 8× Red Zazak | ||
| The floor is covered in Ice. | |||
| 47 | 3× Gimos | 3× Fire Gimos | 3× Ice Gimos |
| 4× Medusa (Ice) | |||
| 48 | 3× Lorule Spear Soldier 3× Lorule Soldier | ||
| The floor is covered in Ice. | |||
| 49 | 3× Black Lynel | ||
| 50 | 1× Moldorm (Purple) | ||
| The floor is covered in Ice. | |||
Nomenclature
| Language | Names | Meanings |
|---|---|---|
Japanese | 痛快!大バトル道場 (Tsūkai! Dai Batoru Dōjō)[13] | Exciting! Great Battle Dojo |
FrenchCA | Tour du Péril[18] | |
FrenchEU | Tour de l'escarmouche[15] | |
German | Ausdauerkampf[14] | |
Italian | Torre della Lotta[12] | Tower of Battle |
Korean | 통쾌! 배틀 도장 (Tongkwae! Baeteul Dojang)[16] | Exciting! Battle Dojo |
SpanishLA | Fortaleza interminable[17] | |
SpanishEU | Fortaleza interminable[19] | |
| This table was generated using translation pages. To request an addition, please contact a staff member with a reference. | ||
Gallery
-
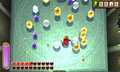
Link collecting prize Rupees after finishing the Advanced level

See Also
- Boss Gauntlet
- Cave of Ordeals
- Den of Trials
- Savage Labyrinth
- Simon's Simulations
- Take 'Em All On!
- Sword Monk's Shrine
References
- ↑ "Well, boom boom, sword boy! Welcome to the Treacherous Tower!" — Devilish Girl (A Link Between Worlds)
- ↑ "A new record! Boom boom all around! Here's an extra bonus for you!" — Devilish Girl (A Link Between Worlds)
- ↑ "Boom boom in the room! Glad to see you back here, sword boy! C'mon and give your luck a try! What's 100 Rupees these days? [Boom boom!] That's the spirit, sword boy! The rules are super simple! A bunch of baddies are gonna attack you. Just beat 'em! You look just like you can take care of yourself, but since it's your first time, just stick to the Beginner course. Just five stages, so it'll be a piece of boom-boom cake for you! That'll be 100 Rupees. Please and thank you! All right! Have fun in there! And do come back in one piece." — Devilish Girl (A Link Between Worlds)
- ↑ "Well, boom boom! Check you out! I was wondering if you were going to give it another try! Wanna give the Intermediate course a shot? C'mon--you can't take those Rupees with you, ya know! [Intermediate] YAY! That's the spirit! The Intermediate course has 15 floors! That's tons of baddies for your entertainment at the low cost of only 200 Rupees! Please and thank you! INCOMING!" — Devilish Girl (A Link Between Worlds)
- ↑ "You know what? You should really take a crack at the Advanced course next time! The Advanced course has 50 floors! You can beat up baddies to your heart's delight! It costs 300 Rupees, so give it a try next time! Just lemme know if you want another go at it! I'm not going anywhere!" — Devilish Girl (A Link Between Worlds)
- ↑ "Well, well, well! Double boom in the room! I'm so impressed! The Advanced course has 50 floors! Beat up baddies to your heart's delight for the bargain price of only 300 Rupees! Please and thank you!" — Devilish Girl (A Link Between Worlds)
- ↑ "I can't believe it! Well, I CAN believe it, but...I CAN'T believe it! Amazing! Your clear time was XX minutes, XX seconds! If you can beat your time on this course, I'll give you some extra Rupees for your pockets! And since you cleared this course for the first time, I have something special for you..." — Devilish Girl (A Link Between Worlds)
- ↑ "Boom boom! You brought the doom! You're one of a kind, sword boy! [...] Oh yeah...and I have a wee little something special you might be interested in as well... [...] Now you can even use your lamp on your enemies! It's hot stuff!" — Devilish Girl (A Link Between Worlds)
- ↑ "Oh yeah... I've got another very special prize for you. That's only if you're interested, of course. To get it, all you have to do is clear the Advanced course again! When you come back to do that, be sure you have one of those bug-catching thingies with you, OK? Just lemme know if you want another go at it! I'm not going anywhere!" — Devilish Girl (A Link Between Worlds)
- ↑ "Oh, mah... Oh, mah! That's all I can say. Literally. Just...oh, mah... Boom boom and sweep like a broom! You've cleared the Advanced course twice now, sword boy! As promised, here's an extra-special prize for you! [...] Now you can even use your net to beat up enemies! How fun is that? Even though I've given you my special prizes, will you still visit? Don't forget about me OK?! Please and thank you!" — Devilish Girl (A Link Between Worlds)
- ↑ "Silly me! Sorry. Sometimes my mind just goes boom boom! I forgot to mention one teensy-weensy thing... The number of people who have returned alive from this course is... ...a big, fat ZERO! Have fun!" — Devilish Girl (A Link Between Worlds)
- ↑ "Questa è la Torre della Lotta! Le spiegazioni A • DO • PO... Tsk!" — Devilish Girl (A Link Between Worlds, Italian localization)
- ↑ "ココは 痛快!大バトル道場!
細かい説明は あ・と・で……ププ!" — Devilish Girl (A Link Between Worlds) - ↑ "Hier geht's zum Ausdauerkampf! Die genaue Erklärung gibt's später!" — Devilish Girl (A Link Between Worlds)
- ↑ "Ici, c'est la tour de l'escarmouche ! Je t'épargne les détails, on verra ça plus tard... pouyoupou !" — Devilish Girl (A Link Between Worlds)
- ↑ "여기는 통쾌! 배틀 도장!
자세한 설명은 나・중・에……뿌뿌!" — Devilish Girl (A Link Between Worlds) - ↑ "¡Estás en la fortaleza interminable! ¡Guaaau! ¡Los detalles, más tarde!" — Devilish Girl (A Link Between Worlds)
- ↑ "Ici, c'est la tour du Péril! Je t'épargne les détails, on verra ça plus tard... pouyoupou!" — Devilish Girl (A Link Between Worlds)
- ↑ "¡Estás en la fortaleza interminable! ¡Pormenores, más tarde!" — Devilish Girl (A Link Between Worlds)