Sword Monk's Shrine: Difference between revisions
m (Wide images should be 300px) |
(Simplifying table code, suggested move to the true name of the dungeon) |
||
| Line 1: | Line 1: | ||
{{Move|Sword Monk's Shrine}} | |||
{{Dungeon | {{Dungeon | ||
|name= Trial of the Sword | |name= Trial of the Sword | ||
| Line 14: | Line 15: | ||
|strategy= | |strategy= | ||
}} | }} | ||
The '''Trial of the Sword''' | The '''Trial of the Sword''', also known as the '''Sword Monk's Shrine''', is a challenge and mini-dungeon in {{BotW}} added in [[The Master Trials]] DLC Pack. | ||
==Themes and Navigation== | ==Themes and Navigation== | ||
| Line 26: | Line 27: | ||
The Beginning Trials are the first 13 floors of the Trial of the Sword. The first 7 floors are forest themed, with each of them containing [[Tree]]s, [[Rock]]s and grass. The sixth floor is the Trial of the [[Stone Talus]]. The seventh floor is a resting stop with a [[Cooking Pot]], a [[Fairy]] and three [[Treasure Chest]]s. Floors 8 through 12 all contain water. The twelfth floor is the Trial of the [[Hinox]]. On the thirteenth and final floor of the Beginning Trials, Link finds himself in an [[Ancient Shrine]] themed room known as the Sword Monk's Shrine, and a mysterious voice tells him that he is now strong enough to wield more of the Master Sword's power.<ref>{{Cite|To the one chosen by the sacred blade...I commend your efforts in this trial. You are now strong enough to wield more of the Master Sword's power than ever before. Courageous hero...chosen by the blade... Take hold of the Master Sword.|N/A|BotW}}</ref> At the end of a long staircase rests the Master Sword in a pedestal, where Link pulls it and is transported back to the Korok Forest. | The Beginning Trials are the first 13 floors of the Trial of the Sword. The first 7 floors are forest themed, with each of them containing [[Tree]]s, [[Rock]]s and grass. The sixth floor is the Trial of the [[Stone Talus]]. The seventh floor is a resting stop with a [[Cooking Pot]], a [[Fairy]] and three [[Treasure Chest]]s. Floors 8 through 12 all contain water. The twelfth floor is the Trial of the [[Hinox]]. On the thirteenth and final floor of the Beginning Trials, Link finds himself in an [[Ancient Shrine]] themed room known as the Sword Monk's Shrine, and a mysterious voice tells him that he is now strong enough to wield more of the Master Sword's power.<ref>{{Cite|To the one chosen by the sacred blade...I commend your efforts in this trial. You are now strong enough to wield more of the Master Sword's power than ever before. Courageous hero...chosen by the blade... Take hold of the Master Sword.|N/A|BotW}}</ref> At the end of a long staircase rests the Master Sword in a pedestal, where Link pulls it and is transported back to the Korok Forest. | ||
{| class=" | {| class="altrow" style="text-align:center; width:100%; max-width:20em;" | ||
!style="width:18%"| Floor | |||
!colspan="2"| Enemies | |||
|- | |- | ||
! | ! 1 | ||
|style="width:18%"| '''3×''' | |||
|style="width:64%"| [[Bokoblin]] | |||
|- | |- | ||
!rowspan="2"| 2 | |||
| '''1×''' | |||
| Big [[Fire Chuchu]] | |||
|- | |- | ||
{{#var:Dark}}| '''4×''' | {{#var:Dark}}| '''4×''' | ||
{{#var:Dark}}| Bokoblins | {{#var:Dark}}| Bokoblins | ||
|- | |- | ||
!rowspan="3"| 3 | |||
{{#var:Light}}| '''1×''' | {{#var:Light}}| '''1×''' | ||
{{#var:Light}}| [[Chuchu]] | {{#var:Light}}| [[Chuchu]] | ||
|- | |- | ||
| '''4×''' | |||
| [[Fire Chuchu]] | |||
|- | |- | ||
{{#var:Light}}| '''4×''' | {{#var:Light}}| '''4×''' | ||
{{#var:Light}}| Big [[Fire Chuchu]] | {{#var:Light}}| Big [[Fire Chuchu]] | ||
|- | |- | ||
!rowspan="2"| 4 | |||
{{#var:Dark}}| '''5×''' | {{#var:Dark}}| '''5×''' | ||
{{#var:Dark}}| [[Bokoblin]] | {{#var:Dark}}| [[Bokoblin]] | ||
|- | |- | ||
| '''3×''' | |||
| [[Blue Bokoblin]] | |||
|- | |- | ||
!rowspan="2"| 5 | |||
| '''2×''' | |||
| [[Moblin]] | |||
|- | |- | ||
{{#var:Light}}| '''3×''' | {{#var:Light}}| '''3×''' | ||
{{#var:Light}}| [[Blue Bokoblin]] | {{#var:Light}}| [[Blue Bokoblin]] | ||
|- | |- | ||
! 6 | |||
{{#var:Dark}}| '''1×''' | {{#var:Dark}}| '''1×''' | ||
{{#var:Dark}}| [[Stone Talus]] | {{#var:Dark}}| [[Stone Talus]] | ||
| Line 74: | Line 73: | ||
!colspan="2"| '''Resting Spot''' | !colspan="2"| '''Resting Spot''' | ||
|- | |- | ||
!rowspan="3"| 8 | |||
{{#var:Dark}}| '''1×''' | {{#var:Dark}}| '''1×''' | ||
{{#var:Dark}}| Big [[Electric Chuchu]] | {{#var:Dark}}| Big [[Electric Chuchu]] | ||
|- | |- | ||
| '''2×''' | |||
| [[Lizalfos]] | |||
|- | |- | ||
{{#var:Dark}}| '''2×''' | {{#var:Dark}}| '''2×''' | ||
{{#var:Dark}}| [[Blue Lizalfos]] | {{#var:Dark}}| [[Blue Lizalfos]] | ||
|- | |- | ||
!rowspan="2"| 9 | |||
{{#var:Light}}| '''2×''' | {{#var:Light}}| '''2×''' | ||
{{#var:Light}}| [[Water Octorok]] | {{#var:Light}}| [[Water Octorok]] | ||
|- | |- | ||
| '''1×''' | |||
| [[Electric Wizzrobe]] | |||
|- | |- | ||
!rowspan="2"| 10 | |||
| '''1×''' | |||
| [[Blue Lizalfos]] | |||
|- | |- | ||
{{#var:Dark}}| '''2×''' | {{#var:Dark}}| '''2×''' | ||
{{#var:Dark}}| [[Black Lizalfos]] | {{#var:Dark}}| [[Black Lizalfos]] | ||
|- | |- | ||
!rowspan="4"| 11 | |||
{{#var:Light}}| '''4×''' | {{#var:Light}}| '''4×''' | ||
{{#var:Light}}| [[Bokoblin]] | {{#var:Light}}| [[Bokoblin]] | ||
|- | |- | ||
| '''3×''' | |||
| [[Blue Bokoblin]] | |||
|- | |- | ||
{{#var:Light}}| '''1×''' | {{#var:Light}}| '''1×''' | ||
{{#var:Light}}| [[Black Bokoblin]] | {{#var:Light}}| [[Black Bokoblin]] | ||
|- | |- | ||
| '''1×''' | |||
| [[Black Moblin]] | |||
|- | |- | ||
! 12 | |||
| '''1×''' | |||
| [[Blue Hinox]] | |||
|- | |- | ||
! 13 | ! 13 | ||
| Line 122: | Line 121: | ||
The Middle Trials are the middle 17 floors of the Trial of the Sword. The first 4 floors are shrine-themed and feature a constant upward draft over a bottomless pit and scattered platforms. The fifth floor is a resting stop with a [[Cooking Pot]], a [[Fairy]] and three [[Treasure Chest]]s, one of which contains [[Hylian Trousers]]. Floors 6 through 10 are in a dark forest setting, not unlike those of [[Thyphlo Ruins]]. The tenth floor is the Trial of the [[Hinox]]. Floor 11 is another resting stop with a Cooking Pot, two fairies, and three Treasure Chests, one of which contains a [[Hylian Tunic]]. Floors 12 through 16 are again shrine-themed, but exclusively feature [[Guardian Scout]]s. On the seventeenth floor, Link returns to the Sword Monk's Shrine, where the Master Sword rests on a different pedestal that is now connected to the previous pedestal by an added walkway. | The Middle Trials are the middle 17 floors of the Trial of the Sword. The first 4 floors are shrine-themed and feature a constant upward draft over a bottomless pit and scattered platforms. The fifth floor is a resting stop with a [[Cooking Pot]], a [[Fairy]] and three [[Treasure Chest]]s, one of which contains [[Hylian Trousers]]. Floors 6 through 10 are in a dark forest setting, not unlike those of [[Thyphlo Ruins]]. The tenth floor is the Trial of the [[Hinox]]. Floor 11 is another resting stop with a Cooking Pot, two fairies, and three Treasure Chests, one of which contains a [[Hylian Tunic]]. Floors 12 through 16 are again shrine-themed, but exclusively feature [[Guardian Scout]]s. On the seventeenth floor, Link returns to the Sword Monk's Shrine, where the Master Sword rests on a different pedestal that is now connected to the previous pedestal by an added walkway. | ||
{| class=" | {| class="altrow" style="text-align:center; width:100%; max-width:20em;" | ||
!style="width:18%"| Floor | |||
!colspan="2"| Enemies | |||
|- | |- | ||
! | ! 1 | ||
|style="width:18%"| '''5×''' | |||
|style="width:64%"| Bokoblin | |||
|- | |- | ||
!rowspan="4"| 2 | |||
| '''2×''' | |||
| Bokoblin | |||
|- | |- | ||
{{#var:Dark}}| '''1×''' | {{#var:Dark}}| '''1×''' | ||
{{#var:Dark}}| [[Blue Bokoblin]] | {{#var:Dark}}| [[Blue Bokoblin]] | ||
|- | |- | ||
| '''1×''' | |||
| [[Fire Wizzrobe]] | |||
|- | |- | ||
{{#var:Dark}}| '''1×''' | {{#var:Dark}}| '''1×''' | ||
{{#var:Dark}}| [[Meteo Wizzrobe]] | {{#var:Dark}}| [[Meteo Wizzrobe]] | ||
|- | |- | ||
!rowspan="2"| 3 | |||
{{#var:Light}}| '''4×''' | {{#var:Light}}| '''4×''' | ||
{{#var:Light}}| Bokoblin | {{#var:Light}}| Bokoblin | ||
|- | |- | ||
| '''3×''' | |||
| Blue Bokoblin | |||
|- | |- | ||
! 4 | |||
| '''1×''' | |||
| [[Decayed Guardian]] | |||
|- | |- | ||
! 5 | ! 5 | ||
!colspan="2"| '''Resting Spot''' | !colspan="2"| '''Resting Spot''' | ||
|- | |- | ||
!rowspan="2"| 6 | |||
| '''5×''' | |||
| [[Fire Keese]] | |||
|- | |- | ||
{{#var:Dark}}| '''1×''' | {{#var:Dark}}| '''1×''' | ||
{{#var:Dark}}| Big [[Electric Chuchu]] | {{#var:Dark}}| Big [[Electric Chuchu]] | ||
|- | |- | ||
!rowspan="2"| 7 | |||
{{#var:Light}}| '''2×''' | {{#var:Light}}| '''2×''' | ||
{{#var:Light}}| [[Fire-Breath Lizalfos]] | {{#var:Light}}| [[Fire-Breath Lizalfos]] | ||
|- | |- | ||
| '''2×''' | |||
| [[Blue Lizalfos]] | |||
|- | |- | ||
!rowspan="2"| 8 | |||
| '''1×''' | |||
| Meteo Wizzrobe | |||
|- | |- | ||
{{#var:Dark}}| '''3×''' | {{#var:Dark}}| '''3×''' | ||
{{#var:Dark}}| [[Black Bokoblin]] | {{#var:Dark}}| [[Black Bokoblin]] | ||
|- | |- | ||
! 9 | |||
{{#var:Light}}| '''1×''' | {{#var:Light}}| '''1×''' | ||
{{#var:Light}}| [[Decayed Guardian]] | {{#var:Light}}| [[Decayed Guardian]] | ||
|- | |- | ||
! 10 | |||
{{#var:Dark}}| '''1×''' | {{#var:Dark}}| '''1×''' | ||
{{#var:Dark}}| [[Black Hinox]] | {{#var:Dark}}| [[Black Hinox]] | ||
| Line 191: | Line 188: | ||
!colspan="2"| '''Resting Spot''' | !colspan="2"| '''Resting Spot''' | ||
|- | |- | ||
! 12 | |||
{{#var:Dark}}| '''6×''' | {{#var:Dark}}| '''6×''' | ||
{{#var:Dark}}| [[Guardian Scout]] | {{#var:Dark}}| [[Guardian Scout I]] | ||
|- | |- | ||
! 13 | |||
{{#var:Light}}| '''3×''' | {{#var:Light}}| '''3×''' | ||
{{#var:Light}}| Guardian Scout II | {{#var:Light}}| [[Guardian Scout II]] | ||
|- | |- | ||
!rowspan="2"| 14 | |||
{{#var:Dark}}| '''4×''' | {{#var:Dark}}| '''4×''' | ||
{{#var:Dark}}| Guardian Scout I | {{#var:Dark}}| Guardian Scout I | ||
|- | |- | ||
| '''2×''' | |||
| Guardian Scout II | |||
|- | |- | ||
! 15 | |||
| '''2×''' | |||
| [[Guardian Scout III]] | |||
|- | |- | ||
! 16 | |||
| '''1×''' | |||
| [[Guardian Scout IV]] | |||
|- | |- | ||
! 17 | ! 17 | ||
| Line 223: | Line 220: | ||
Unlike the other floors, three of the floors contain [[Animal]]s that need not be defeated before progressing to the next floor. Specifically, there are [[Stalhorse]]s on the fourth floor and regular [[Horse]]s on the twentieth, twenty-second, and twenty-third floors. | Unlike the other floors, three of the floors contain [[Animal]]s that need not be defeated before progressing to the next floor. Specifically, there are [[Stalhorse]]s on the fourth floor and regular [[Horse]]s on the twentieth, twenty-second, and twenty-third floors. | ||
{| class=" | {| class="altrow" style="text-align:center; width:100%; max-width:20em;" | ||
!style="width:18%"| Floor | |||
!colspan="2"| Enemies | |||
|- | |- | ||
! | ! 1 | ||
|style="width:18%"| '''4×''' | |||
|style="width:64%"| [[Stalkoblin]] | |||
|- | |- | ||
!rowspan="2"| 2 | |||
| '''2×''' | |||
| [[Electric Keese]] | |||
|- | |- | ||
{{#var:Dark}}| '''3×''' | {{#var:Dark}}| '''3×''' | ||
{{#var:Dark}}| [[Stalizalfos]] | {{#var:Dark}}| [[Stalizalfos]] | ||
|- | |- | ||
!rowspan="2"| 3 | |||
{{#var:Light}}| '''2×''' | {{#var:Light}}| '''2×''' | ||
{{#var:Light}}| Big [[Electric Chuchu]] | {{#var:Light}}| Big [[Electric Chuchu]] | ||
|- | |- | ||
| '''5×''' | |||
| [[Stalmoblin]] | |||
|- | |- | ||
! 4 | |||
| '''7×''' | |||
| Stalkoblin | |||
|- | |- | ||
! 5 | |||
| '''1×''' | |||
| [[Stalnox]] | |||
|- | |- | ||
! 6 | ! 6 | ||
!colspan="2"| '''Resting Spot''' | !colspan="2"| '''Resting Spot''' | ||
|- | |- | ||
!rowspan="3"| 7 | |||
| '''1×''' | |||
| Big [[Fire Chuchu]] | |||
|- | |- | ||
{{#var:Light}}| '''1×''' | {{#var:Light}}| '''1×''' | ||
{{#var: | {{#var:Light}}| [[Rock Octorok]] | ||
|- | |- | ||
| '''2×''' | |||
| [[Igneo Pebblit]] | |||
|- | |- | ||
! 8 | |||
| '''3×''' | |||
| [[Fire-Breath Lizalfos]] | |||
|- | |- | ||
!rowspan="3"| 9 | |||
| '''1×''' | |||
| [[Meteo Wizzrobe]] | |||
|- | |- | ||
{{#var:Light}}| '''1×''' | {{#var:Light}}| '''1×''' | ||
{{#var:Light}}| [[Black Moblin]] | {{#var:Light}}| [[Black Moblin]] | ||
|- | |- | ||
| '''2×''' | |||
| [[Fire-Breath Lizalfos]] | |||
|- | |- | ||
!rowspan="2"| 10 | |||
| '''3×''' | |||
| Black Moblin | |||
|- | |- | ||
{{#var:Dark}}| '''1×''' | {{#var:Dark}}| '''1×''' | ||
{{#var:Dark}}| Fire-Breath Lizalfos | {{#var:Dark}}| Fire-Breath Lizalfos | ||
|- | |- | ||
! 11 | |||
{{#var:Light}}| '''1×''' | {{#var:Light}}| '''1×''' | ||
{{#var:Light}}| [[Igneo Talus]] | {{#var:Light}}| [[Igneo Talus]] | ||
| Line 296: | Line 291: | ||
!colspan="2"| '''Resting Spot''' | !colspan="2"| '''Resting Spot''' | ||
|- | |- | ||
!rowspan="4"| 13 | |||
{{#var:Light}}| '''2×''' | {{#var:Light}}| '''2×''' | ||
{{#var:Light}}| [[Frost Pebblit]] | {{#var:Light}}| [[Frost Pebblit]] | ||
|- | |- | ||
| '''1×''' | |||
| Big [[Ice Chuchu]] | |||
|- | |- | ||
{{#var:Light}}| '''2×''' | {{#var:Light}}| '''2×''' | ||
{{#var:Light}}| [[Blue Bokoblin]] | {{#var:Light}}| [[Blue Bokoblin]] | ||
|- | |- | ||
| '''1×''' | |||
| [[Black Bokoblin]] | |||
|- | |- | ||
!rowspan="4"| 14 | |||
| '''2×''' | |||
| Big Ice Chuchu | |||
|- | |- | ||
{{#var:Dark}}| '''1×''' | {{#var:Dark}}| '''1×''' | ||
{{#var:Dark}}| [[Ice-Breath Lizalfos]] | {{#var:Dark}}| [[Ice-Breath Lizalfos]] | ||
|- | |- | ||
| '''4×''' | |||
| Blue Bokoblin | |||
|- | |- | ||
{{#var:Dark}}| '''1×''' | {{#var:Dark}}| '''1×''' | ||
{{#var:Dark}}| [[Silver Moblin]] | {{#var:Dark}}| [[Silver Moblin]] | ||
|- | |- | ||
!rowspan="4"| 15 | |||
{{#var:Light}}| '''1×''' | {{#var:Light}}| '''1×''' | ||
{{#var:Light}}| Black Moblin | {{#var:Light}}| Black Moblin | ||
|- | |- | ||
| '''1×''' | |||
| [[Blizzrobe]] | |||
|- | |- | ||
{{#var:Light}}| '''2×''' | {{#var:Light}}| '''2×''' | ||
{{#var:Light}}| Blue Bokoblin | {{#var:Light}}| Blue Bokoblin | ||
|- | |- | ||
| '''1×''' | |||
| [[Silver Bokoblin]] | |||
|- | |- | ||
! 16 | |||
| '''1×''' | |||
| [[Frost Talus]] | |||
|- | |- | ||
! 17 | |||
| '''1×''' | |||
| [[Blue-Maned Lynel]] | |||
|- | |- | ||
! 18 | ! 18 | ||
!colspan="2"| '''Resting Spot''' | !colspan="2"| '''Resting Spot''' | ||
|- | |- | ||
! 19 | |||
| '''6×''' | |||
| [[Decayed Guardian]] | |||
|- | |- | ||
! 20 | |||
| '''1×''' | |||
| [[Guardian Stalker]] | |||
|- | |- | ||
! 21 | |||
| '''1×''' | |||
| [[Guardian Skywatcher]] | |||
|- | |- | ||
!rowspan="3"| 22 | |||
| '''1×''' | |||
| Guardian Stalker | |||
|- | |- | ||
{{#var:Dark}}| '''1×''' | {{#var:Dark}}| '''1×''' | ||
{{#var:Dark}}| Guardian Skywatcher | {{#var:Dark}}| Guardian Skywatcher | ||
|- | |- | ||
| '''1×''' | |||
| [[Guardian Turret]] | |||
|- | |- | ||
!rowspan="3"| 23 | |||
| '''8×''' | |||
| [[Bokoblin]] | |||
|- | |- | ||
{{#var:Light}}| '''1×''' | {{#var:Light}}| '''1×''' | ||
{{#var:Light}}| [[White-Maned Lynel]] | {{#var:Light}}| [[White-Maned Lynel]] | ||
|- | |- | ||
| '''1×''' | |||
| Guardian Turret | |||
|- | |- | ||
! 24 | ! 24 | ||
| Line 397: | Line 392: | ||
|ja2= {{Romanize|剣の導師の祠|Tsurugi no Dōshi no Hokora|Sword Monk's Shrine|3}} | |ja2= {{Romanize|剣の導師の祠|Tsurugi no Dōshi no Hokora|Sword Monk's Shrine|3}} | ||
| | |zhS1= | ||
| | |zhS2= | ||
|zhT1= | |||
|zhT2= | |||
| | |nl1= {{Exp|Sword's Trial|Zwaardproef}} | ||
| | |nl2= {{Exp|Temple of the Sword|Tempel van het zwaard}} | ||
| | |fi1= | ||
| | |fi2= | ||
|frC1= {{Exp|The Trials of the Sword|Les épreuves de l'épée}} | |frC1= {{Exp|The Trials of the Sword|Les épreuves de l'épée}} | ||
|frC2= {{Exp|Sanctuary of the society|Sanctuaire de la confrérie}} | |frC2= {{Exp|Sanctuary of the society|Sanctuaire de la confrérie}} | ||
|frF1= {{Exp|The Trials of the Sword|Les épreuves de l'épée}} | |||
|frF2= {{Exp|Sanctuary of the conclave|Sanctuaire du conclave}} | |||
|de1= {{Exp|Trial of the Sword|Prüfung des Schwertes}} | |de1= {{Exp|Trial of the Sword|Prüfung des Schwertes}} | ||
|de2= {{Exp|Shrine of the Sword|Schrein des Schwertes}} | |de2= {{Exp|Shrine of the Sword|Schrein des Schwertes}} | ||
|hu1= | |||
|hu2= | |||
|it1= {{Exp|Trial of the Sword|La prova della espada}} | |it1= {{Exp|Trial of the Sword|La prova della espada}} | ||
|it2= {{Exp|Sanctuary of the Sword|Sacrario della espada}} | |it2= {{Exp|Sanctuary of the Sword|Sacrario della espada}} | ||
| | |ko1= | ||
| | |ko2= | ||
|no1= | |||
|no2= | |||
|pl1= | |||
|pl2= | |||
|ptB1= | |ptB1= | ||
|ptB2= | |ptB2= | ||
| | |ptP1= | ||
| | |ptP2= | ||
|ru1= {{Romanize|Испытание Меча|Ispytaniye Mecha|Trial of the Sword|3}} | |ru1= {{Romanize|Испытание Меча|Ispytaniye Mecha|Trial of the Sword|3}} | ||
|ru2= {{Romanize|Святилище Гуру Меча|Svyatilishche Guru Mecha|Shrine of the Sword Guru|3}} | |ru2= {{Romanize|Святилище Гуру Меча|Svyatilishche Guru Mecha|Shrine of the Sword Guru|3}} | ||
| | |esS1= {{Exp|The Trial of the Sword|El reto de la espada}} | ||
| | |esS2= {{Exp|Sanctuary of the Sword|Santuario de la espada}} | ||
| | |esL1= {{Exp|The Trial of the Sword|El reto de la espada}} | ||
| | |esL2= {{Exp|Sanctuary of the Sword|Santuario de la espada}}}} | ||
| | |||
| | |||
==Gallery== | ==Gallery== | ||
Revision as of 15:06, 29 December 2017

Template:Dungeon The Trial of the Sword, also known as the Sword Monk's Shrine, is a challenge and mini-dungeon in Breath of the Wild added in The Master Trials DLC Pack.
The Trial of the Sword can be accessed from the Korok Forest by placing the Master Sword back in its pedestal. If the Master Sword is out of energy, the Trial cannot be accessed.[1] During the challenge, Link will go through a series of floors and must defeat every enemy on a floor to proceed to the next one. At the start of the Trial, he is stripped of all of his weapons, Shields, Bows, Arrows, Armor, Materials and Food. Link is able to use any of the Runes during the Trial, but he is not able to use any Champion abilities. Link begins the Trial with the same amount of Hearts, Stamina and temporary boosts that he had when entering, even with Hearts lost from damage or temporary Hearts. The Trial of the Sword is divided into three sets of floors. Once a set is completed, it can be skipped during future attempts of the Trial; however, Link will begin empty handed when resumed and any item gathered during the challenge will be lost. After completing all 54 floors of the Trial, the Master Sword awakens its true power, allowing it to stay in its powered-up state at all times.[2]
Beginning Trials
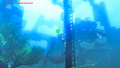
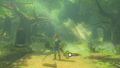
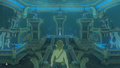
The Beginning Trials are the first 13 floors of the Trial of the Sword. The first 7 floors are forest themed, with each of them containing Trees, Rocks and grass. The sixth floor is the Trial of the Stone Talus. The seventh floor is a resting stop with a Cooking Pot, a Fairy and three Treasure Chests. Floors 8 through 12 all contain water. The twelfth floor is the Trial of the Hinox. On the thirteenth and final floor of the Beginning Trials, Link finds himself in an Ancient Shrine themed room known as the Sword Monk's Shrine, and a mysterious voice tells him that he is now strong enough to wield more of the Master Sword's power.[3] At the end of a long staircase rests the Master Sword in a pedestal, where Link pulls it and is transported back to the Korok Forest.
| Floor | Enemies | |
|---|---|---|
| 1 | 3× | Bokoblin |
| 2 | 1× | Big Fire Chuchu |
| style="background-color:"| 4× | style="background-color:"| Bokoblins | |
| 3 | style="background-color:"| 1× | style="background-color:"| Chuchu |
| 4× | Fire Chuchu | |
| style="background-color:"| 4× | style="background-color:"| Big Fire Chuchu | |
| 4 | style="background-color:"| 5× | style="background-color:"| Bokoblin |
| 3× | Blue Bokoblin | |
| 5 | 2× | Moblin |
| style="background-color:"| 3× | style="background-color:"| Blue Bokoblin | |
| 6 | style="background-color:"| 1× | style="background-color:"| Stone Talus |
| 7 | Resting Spot | |
| 8 | style="background-color:"| 1× | style="background-color:"| Big Electric Chuchu |
| 2× | Lizalfos | |
| style="background-color:"| 2× | style="background-color:"| Blue Lizalfos | |
| 9 | style="background-color:"| 2× | style="background-color:"| Water Octorok |
| 1× | Electric Wizzrobe | |
| 10 | 1× | Blue Lizalfos |
| style="background-color:"| 2× | style="background-color:"| Black Lizalfos | |
| 11 | style="background-color:"| 4× | style="background-color:"| Bokoblin |
| 3× | Blue Bokoblin | |
| style="background-color:"| 1× | style="background-color:"| Black Bokoblin | |
| 1× | Black Moblin | |
| 12 | 1× | Blue Hinox |
| 13 | Master Sword | |
Middle Trials
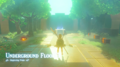
The Middle Trials are the middle 17 floors of the Trial of the Sword. The first 4 floors are shrine-themed and feature a constant upward draft over a bottomless pit and scattered platforms. The fifth floor is a resting stop with a Cooking Pot, a Fairy and three Treasure Chests, one of which contains Hylian Trousers. Floors 6 through 10 are in a dark forest setting, not unlike those of Thyphlo Ruins. The tenth floor is the Trial of the Hinox. Floor 11 is another resting stop with a Cooking Pot, two fairies, and three Treasure Chests, one of which contains a Hylian Tunic. Floors 12 through 16 are again shrine-themed, but exclusively feature Guardian Scouts. On the seventeenth floor, Link returns to the Sword Monk's Shrine, where the Master Sword rests on a different pedestal that is now connected to the previous pedestal by an added walkway.
| Floor | Enemies | |
|---|---|---|
| 1 | 5× | Bokoblin |
| 2 | 2× | Bokoblin |
| style="background-color:"| 1× | style="background-color:"| Blue Bokoblin | |
| 1× | Fire Wizzrobe | |
| style="background-color:"| 1× | style="background-color:"| Meteo Wizzrobe | |
| 3 | style="background-color:"| 4× | style="background-color:"| Bokoblin |
| 3× | Blue Bokoblin | |
| 4 | 1× | Decayed Guardian |
| 5 | Resting Spot | |
| 6 | 5× | Fire Keese |
| style="background-color:"| 1× | style="background-color:"| Big Electric Chuchu | |
| 7 | style="background-color:"| 2× | style="background-color:"| Fire-Breath Lizalfos |
| 2× | Blue Lizalfos | |
| 8 | 1× | Meteo Wizzrobe |
| style="background-color:"| 3× | style="background-color:"| Black Bokoblin | |
| 9 | style="background-color:"| 1× | style="background-color:"| Decayed Guardian |
| 10 | style="background-color:"| 1× | style="background-color:"| Black Hinox |
| 11 | Resting Spot | |
| 12 | style="background-color:"| 6× | style="background-color:"| Guardian Scout I |
| 13 | style="background-color:"| 3× | style="background-color:"| Guardian Scout II |
| 14 | style="background-color:"| 4× | style="background-color:"| Guardian Scout I |
| 2× | Guardian Scout II | |
| 15 | 2× | Guardian Scout III |
| 16 | 1× | Guardian Scout IV |
| 17 | Master Sword | |
Final Trials
The Final Trials are the final 24 floors of the Trial of the Sword. The first 5 floors are set in a jungle during a thunderstorm and feature Stal enemies. The fifth floor is the Trial of the Stalnox. The sixth floor is a resting floor with a Cooking Pot, a Fairy and three Treasure Chests, one of which contains Flamebreaker Boots. Floors 6 through 11 are volcano-themed, complete with burning temperatures. The eleventh floor is the Trial of the Igneo Talus. The twelfth floor is another resting floor, with a Cooking Pot, two Fairies, and three Treasure Chests, one of which contains a Hylian Tunic. Floors 13 through 17 are ice-themed, with appropriate temperatures. The sixteenth floor is the Trial of the Frost Talus. The eighteenth floor is another resting spot with a Cooking Pot, three Fairies and three Treasure Chests. Floors 19 through 23 are set in ruins and feature various Guardians. On the twenty-fourth floor, Link returns to the Sword Monk's Shrine. This time, the pathways lead a final pedestal with the Master Sword, surrounded by the seven unnamed Monks who prepared the Trial of the Sword and now deem Link worthy of the fully awakened Master Sword. They then disappear, having fulfilled their duty, leaving Link to pull out the now fully awakened Master Sword.[4]
Unlike the other floors, three of the floors contain Animals that need not be defeated before progressing to the next floor. Specifically, there are Stalhorses on the fourth floor and regular Horses on the twentieth, twenty-second, and twenty-third floors.
| Floor | Enemies | |
|---|---|---|
| 1 | 4× | Stalkoblin |
| 2 | 2× | Electric Keese |
| style="background-color:"| 3× | style="background-color:"| Stalizalfos | |
| 3 | style="background-color:"| 2× | style="background-color:"| Big Electric Chuchu |
| 5× | Stalmoblin | |
| 4 | 7× | Stalkoblin |
| 5 | 1× | Stalnox |
| 6 | Resting Spot | |
| 7 | 1× | Big Fire Chuchu |
| style="background-color:"| 1× | style="background-color:"| Rock Octorok | |
| 2× | Igneo Pebblit | |
| 8 | 3× | Fire-Breath Lizalfos |
| 9 | 1× | Meteo Wizzrobe |
| style="background-color:"| 1× | style="background-color:"| Black Moblin | |
| 2× | Fire-Breath Lizalfos | |
| 10 | 3× | Black Moblin |
| style="background-color:"| 1× | style="background-color:"| Fire-Breath Lizalfos | |
| 11 | style="background-color:"| 1× | style="background-color:"| Igneo Talus |
| 12 | Resting Spot | |
| 13 | style="background-color:"| 2× | style="background-color:"| Frost Pebblit |
| 1× | Big Ice Chuchu | |
| style="background-color:"| 2× | style="background-color:"| Blue Bokoblin | |
| 1× | Black Bokoblin | |
| 14 | 2× | Big Ice Chuchu |
| style="background-color:"| 1× | style="background-color:"| Ice-Breath Lizalfos | |
| 4× | Blue Bokoblin | |
| style="background-color:"| 1× | style="background-color:"| Silver Moblin | |
| 15 | style="background-color:"| 1× | style="background-color:"| Black Moblin |
| 1× | Blizzrobe | |
| style="background-color:"| 2× | style="background-color:"| Blue Bokoblin | |
| 1× | Silver Bokoblin | |
| 16 | 1× | Frost Talus |
| 17 | 1× | Blue-Maned Lynel |
| 18 | Resting Spot | |
| 19 | 6× | Decayed Guardian |
| 20 | 1× | Guardian Stalker |
| 21 | 1× | Guardian Skywatcher |
| 22 | 1× | Guardian Stalker |
| style="background-color:"| 1× | style="background-color:"| Guardian Skywatcher | |
| 1× | Guardian Turret | |
| 23 | 8× | Bokoblin |
| style="background-color:"| 1× | style="background-color:"| White-Maned Lynel | |
| 1× | Guardian Turret | |
| 24 | Master Sword | |
Trivia
- The Trial of the Sword was originally called the Cave of Trials during the Expansion Pass announcement.[5]
Nomenclature
| Language | Name | ||
|---|---|---|---|
| Trial of the Sword | Sword Monk's Shrine | ||
| Japanese | 剣の試練 | 剣の導師の祠 | |
| Dutch | Zwaardproef | Tempel van het zwaard | |
| FrenchCA | Les épreuves de l'épée | Sanctuaire de la confrérie | |
| FrenchEU | Les épreuves de l'épée | Sanctuaire du conclave | |
| German | Prüfung des Schwertes | Schrein des Schwertes | |
| Italian | La prova della espada | Sacrario della espada | |
| Russian | Испытание Меча | Святилище Гуру Меча | |
| SpanishEU | El reto de la espada | Santuario de la espada | |
| SpanishLA | El reto de la espada | Santuario de la espada | |
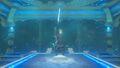
Gallery
-
Link on one of the floors of the Trial of the Sword
-
Link about to enter the Trial of the Sword
-

Link inside the final room of the Middle Trials
-
Link inside one of the trial's resting rooms
-
The seven Monks at the end of the Trial of the Sword
-
Link raising the Master Sword skyward after completing the Trial of the Sword and unlocking the Sword's true splendor


See Also
References
- ↑ "You cannot participate in the Trial when the Master Sword is out of energy." — N/A (Breath of the Wild)
- ↑ Template:Cite web
- ↑ "To the one chosen by the sacred blade...I commend your efforts in this trial. You are now strong enough to wield more of the Master Sword's power than ever before. Courageous hero...chosen by the blade... Take hold of the Master Sword." — N/A (Breath of the Wild)
- ↑ "You have done well...The depth of your heroism is beyond question. We are the ones who prepared this trial, following a revelation from the Goddess Hylia. To the one who has overcome the Trial of the Sword...you have proven your hand worthy of the legendary Master Sword. Now that the hero has gained the power necessary to combat the Calamity, our sacred duty has been fulfilled." — N/A (Breath of the Wild)
- ↑ Template:Cite web