Stone Tablet: Difference between revisions
TriforceTony (talk | contribs) No edit summary |
TriforceTony (talk | contribs) No edit summary |
||
| (47 intermediate revisions by 12 users not shown) | |||
| Line 1: | Line 1: | ||
{{Object | {{Infobox Object | ||
| | |image= | ||
| | {{Media | ||
|Model TWW= File:TWW Stone Tablet Earth Temple Model.png | |||
|Model PH= File:PH Stone Tablet Model.png | |||
|Model ST= File:ST Stone Tablet Model.png | |||
|Model SS= File:SS Stone Tablet Model.png | |||
|Model SSHD= File:SSHD Stone Tablet Model.png | |||
|Model ALBW= File:ALBW Lorule Sacred Realm Tablet Active.png | |||
|Model TFH= File:TFH Stone Tablet Model.png | |||
|Model BotW= File:BotW Stone Tablet Model.png | |||
|Model TotK= File:TotK Stone Tablet Mode.png | |||
|Sprite TMC= File:TMC Stone Tablet Sprite.png | |||
}} | |||
|caption= | |caption= | ||
|game= | |pronunciation= | ||
|other= | |plural= | ||
|game= TWW, TMC, PH, ST, SS, ALBW, TFH, BotW, TotK | |||
|other= AST | |||
|uses= | |uses= | ||
|comp= | |comp= {{Plural|Series|Pendant of Virtue|link}} | ||
|theme | |theme= | ||
}} | }} | ||
{{Term/Store|Stone Tablet|Stone Tablets|Series, BotW, TotK|plural}} are recurring {{Plural|Series|Object|link}} and {{Plural|Series|Item|link}} in {{TLoZ|Series}}.<ref>{{Cite|{{Color|BotW Gray|Stone Tablet}}|Adventure Log|BotW}}</ref><ref>{{Cite|{{Color|TotK Purah Pad|It's become clear that there are 13 stone tablets documenting the age of legends. By deciphering all of them, one could learn about the lives of the royal family of that era, which was not documented in any history book. Capture the stone tablets in {{Color|TotK Red|pictures}}, and show them to Wortsworth in Kakariko Village.}}|Adventure Log|TotK}}</ref>{{Name Ref|PH, ST, ALBW, TFH, AST}} {{Plural|Series|Stone Tablet}} go unnamed in {{TWW}}, {{TMC}}, {{ST}}, {{ALBW}}, and {{TFH}}. | |||
==Location and Uses== | ==Location and Uses== | ||
==='' | ==={{TWW|-}}=== | ||
The Stone Tablet is the | {{Plural|TWWHD|Stone Tablet}} appear in the {{Term|TWWHD|Earth Temple|link}} and the {{Term|TWWHD|Wind Temple|link}} in {{TWW}}. They are also found at the entrance to both {{Plural|TWWHD|Dungeon|link}} ({{Term|TWWHD|Headstone Island|link}} and {{Term|TWWHD|Gale Isle|link}}, respectively).<ref name="TWW Guide 96">{{Cite Guide|quote= |game= TWW|publisher= Prima|page= 96}}</ref><ref>{{Cite Guide|quote= |game= TWW|publisher= Prima|page= 84}}</ref> | ||
The {{Plural|TWWHD|Stone Tablet}} are large slabs of rock that block doorways, and can only be destroyed when {{Term|TWWHD|Link|link}} plays the {{Term|TWWHD|Wind Waker (Item)|link}} alongside the corresponding {{Term|TWWHD|Sage|link}}. The {{Plural|TWWHD|Stone Tablet}} have on them the requirements to destroy them: the melody that must be played and the instrument needed. Resting atop all is a symbol of the {{Term|TWWHD|Triforce|link}}. | |||
The {{Term|TWWHD|Stone Tablet}} at the {{Term|TWWHD|Earth Temple}} teaches {{Term|TWWHD|Link}} the "{{Term|TWWHD|Earth God's Lyric|link}}", the melody he must play in front of {{Term|TWWHD|Medli|link}} to awaken her as the Sage of Earth.<ref name="TWW Guide 85">{{Cite Guide|quote= |game= TWW|publisher= Prima|page= 85}}</ref> Once she has awakened, {{Term|TWWHD|Link}} must take her back to {{Term|TWWHD|Headstone Island}} to play the "{{Term|TWWHD|Earth God's Lyric}}" together and thus destroy the {{Term|TWWHD|Stone Tablet}}.<ref name="TWW Guide 85"/> As the pair ventures through the {{Term|TWWHD|Earth Temple}}, they encounter two more of these {{Plural|TWWHD|Stone Tablet|display=Tablets}}, which must be destroyed using the same process as done in the entrance of the {{Term|TWWHD|Dungeon}}. Likewise, at {{Term|TWWHD|Gale Isle}}, a {{Term|TWWHD|Stone Tablet}} teaches {{Term|TWWHD|Link}} the "{{Term|TWWHD|Wind God's Aria|link}}" that he must play to {{Term|TWWHD|Makar|link}} in order to awaken him as the Sage of Wind. Only with the sound of {{Term|TWWHD|Makar}}'s violin will the {{Plural|TWWHD|Stone Tablet}} shatter.<ref name="TWW Guide 96"/> | |||
==={{TMC|-}}=== | |||
Two {{Plural|TMC|Stone Tablet}} appear in {{TMC}}. The first appears in the {{Term|TMC|Elemental Sanctuary|link}} after {{Term|TMC|Link}} places the newly-reforged {{Term|TMC|White Sword|link}} into the pedestal; it gives instructions on how to use the {{Term|TMC|White Sword}}'s ability to split {{Term|TMC|Link}} into copies of himself.<ref>{{Cite|Hmm-hmm... Let’s see if I can’t read that tablet for you... {{Color|TMC Blue|Fill your sword with power and walk over the glowing tile...}} Hm... Perhaps it refers to those {{Color|TMC Blue|flashing spots on the floor}} around you.|Ezlo|TMC}}</ref> This {{Term|TMC|Stone Tablet|display=Tablet}} disappears after the fourth and final {{Term|TMC|Four Elements|link|display=Element}} is infused into the {{Term|TMC|White Sword}},<ref>{{Cite|Hmm-hmm... It seems that forging the {{Color|TMC Red|sacred blade}} somehow opened the doorway!|Ezlo|TMC}}</ref> revealing a new doorway that leads to a hidden chamber telling the location of the {{Term|TMC|Light Force|link}}. | |||
The second {{Term|TMC|Stone Tablet}} is located at the top of the {{Term|TMC|Fortress of Winds|link}}, accessible after {{Term|TMC|Link}} defeats {{Term|TMC|Mazaal|link}}. It was left by the {{Term|TMC|Wind Tribe|link}}, who took the {{Term|TMC|Wind Element|link}} and departed for the {{Term|TMC|Cloud Tops|link}}. The {{Term|TMC|Stone Tablet|display=Tablet}} explains the method of reaching them: by using the {{Term|TMC|Ocarina of Wind|link}} that {{Term|TMC|Zeffa|link}} drops at {{Term|TMC|Link}}'s feet shortly after he reads the {{Term|TMC|Stone Tablet|display=Tablet}}.<ref>{{Cite|We are the {{Color|TMC Green|Tribe of the Winds}}. Long have we lived with the winds. We have mastered them. Now, we join them. Together, with the great winds at our backs, we head for the skies. Those who come seeking our power must play the {{Color|TMC Blue|notes}} Zeffa teaches. May they lead you onward to the power that you seek.|Stone Tablet|TMC}}</ref> | |||
==={{PH|-}}=== | |||
{{Plural|PH|Stone Tablet}} double as {{Plural|PH|Sign|link}} on many [[Locations in Phantom Hourglass|Islands]] in {{PH}}, and as {{Plural|Series|Tombstone|link}} on the {{Term|PH|Isle of the Dead|link}}. On {{Term|PH|Molida Island|link}}, a series of {{Plural|PH|Stone Tablet}} contain the {{Term|PH|Wayfarer's Words|link}}; {{Term|PH|Link|link}} eventually discovers the {{Term|PH|Old Wayfarer|link}}'s hideout at the location where the {{Plural|PH|Stone Tablet|display=Tablets}} intersect.<ref>{{Cite|Oh, just look at this stone tablet! The guy who lives nearby, {{Color|PH Blue|Romanos}}, had a father who scattered these here. They're left as a testament to his trip to the {{Color|PH Blue|Isle of Gust}}, but they're a big nuisance!|Potato|PH}}</ref> | |||
==={{ST|-}}=== | |||
{{Plural|ST|Stone Tablet}} double as {{Plural|ST|Sign}} in some {{Plural|ST|Village|link}} in {{ST}}. They cannot be read in the dark.<ref>{{Cite|Something's written here, but it's too dark to read it.|N/A|ST}}</ref> | |||
A {{Term|ST|Stone Tablet}} near the {{Term|ST|Trading Post|link}} is used to mark the grave of {{Term|ST|Linebeck|link|display=Linebeck Senior}}.<ref>{{Cite|Here rests the legendary Captain Linebeck.|Stone Tablet|ST}}</ref> | |||
==={{SS|-}}=== | |||
{{Stub|SSHD}} | |||
==={{ALBW|-}}=== | |||
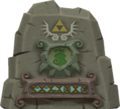
In {{ALBW}}, a large {{Term|ALBW|Stone Tablet}} etched with writing and an inverted {{Term|ALBW|Triforce|link}} symbol rests at the heart of {{Term|ALBW|Lorule|link}}'s {{Term|ALBW|Sacred Realm|link}}, presumably as a monument to the kingdom's lost {{Term|ALBW|Triforce}}. Prior to the game's events, {{Term|ALBW|Yuga|link}} discovered a crack in the {{Term|ALBW|Stone Tablet}} through which he could sense a parallel world ({{Term|ALBW|Hyrule|link}}) with its own {{Term|ALBW|Triforce}}.<ref>{{Cite|{{Color|ALBW Blue|Yuga}} discovered that there was a strange crack in this grim slate... Through it, we could sense that there was another world beyond ours... a place where the Triforce still existed.|Princess Hilda|ALBW}}</ref> The sorcerer and {{Term|ALBW|Princess Hilda|link}} plotted to use this crack to invade {{Term|ALBW|Hyrule}} and claim its {{Term|ALBW|Triforce}},<ref>{{Cite|He and I devised the scheme that imperiled your kingdom. But I alone will set this right.|Princess Hilda|ALBW}}</ref> after their own had been destroyed to quell the constant warring in {{Term|ALBW|Lorule}}.<ref>{{Cite|Many sought to control the Triforce, plunging Lorule into endless war. Our kingdom was on the verge of ruin. My ancestors got rid of the Triforce to stop the war—by destroying it. Utterly and absolutely.|Princess Hilda|ALBW}}</ref> | |||
After {{Term|ALBW|Yuga Ganon|link}} is defeated and {{Term|ALBW|Princess Hilda}} repents, she uses the last of the power in {{Term|ALBW|Ravio's Bracelet|link}} to transport {{Term|ALBW|Princess Zelda|link}} and {{Term|ALBW|Link|link}} back to their own world through the {{Term|ALBW|Stone Tablet}}'s crack. Moments later, {{Term|ALBW|Princess Hilda|display=Hilda}} and {{Term|ALBW|Ravio|link}} watch on as the {{Term|ALBW|Stone Tablet}} begins to rumble and then explodes, before a new {{Term|ALBW|Lorule|display=Lorulean}} {{Term|ALBW|Triforce}} forms in its place. | |||
==={{TFH|-}}=== | |||
In {{TFH}}, {{Plural|TFH|Stone Tablet}} appear next to each {{Term|TFH|Triforce Gateway|link}} in the hub area of the {{Term|TFH|Den of Trials|link}}. When read, they indicate which Zone the {{Term|TFH|Triforce Gateway}} will transport the {{Plural|TFH|Links|link}} to. The [[Hylian (Language)|Hylian text]] seen on the {{Plural|TFH|Stone Tablet|display=Tablets}} reads "Good Luck". | |||
==={{BotW|-}}=== | |||
Several {{Plural|BotW|Stone Tablet}} can be found throughout {{Term|BotW|Hyrule Kingdom|link}}. The one on {{Term|BotW|Rist Peninsula|link}} grants the "{{Term|BotW|Into the Vortex|link}}" {{Term|BotW|Shrine Quest|link}}, while the one on {{Term|BotW|Mount Taran|link}} grants "{{Term|BotW|The Three Giant Brothers|link}}". Another can be found along the {{Term|BotW|Karusa Valley|link}} path in the {{Term|BotW|Gerudo Highlands|link}}, where it provides a hint for unearthing {{Term|BotW|Sho Dantu Shrine|link}}. {{Term|BotW|Shee Vaneer Shrine|link}} and {{Term|BotW|Shee Venath Shrine|link}} both feature identical {{Plural|BotW|Stone Tablet}}. In the {{Term|BotW|Korok Forest|link}}, a {{Term|BotW|Stone Tablet}} near the {{Term|BotW|Ogre Tree|link}} that serves as its exit bears a note from {{Term|BotW|Maca}}. | |||
During the "{{Term|BotW|Trial of Second Sight|link}}", {{Term|BotW|Link}} will find a {{Term|BotW|Stone Tablet}} in front of one of the {{Plural|BotW|Ogre Tree}}. The {{Term|BotW|Ogre Tree}} asks him to feed it the {{Term|BotW|Rusty Shield|link}} nearby and promises a reward from its brother.<ref>{{Cite|Feed me the aged shield guarded by monsters eternal. My brother will repay you in kind.|Stone Tablet|BotW}}</ref> Placing the {{Term|BotW|Rusty Shield}} inside its mouth will cause a {{Term|BotW|Treasure Chest|link}} containing an {{Term|BotW|Amber|link}}. Past the {{Term|BotW|Water (Terrain)|link}} of {{Term|BotW|Lake Saria|link}}, another {{Term|BotW|Ogre Tree}} with a {{Term|BotW|Stone Tablet}} asks {{Term|BotW|Link}} to return its {{Term|BotW|Treasure Chest|display=Chest}}, as it was stolen by the brother.<ref>{{Cite|Please place my chest in my mouth.<br/>{{Small|The shield eater's brother stole it from me.}}|Stone Tablet|BotW}}</ref> Following these instructions causes {{Term|BotW|Kuhn Sidajj Shrine|link}} to rise from the ground. | |||
{| class="wikitable sortable" style="width:100%; max-width:60em;" | |||
|- | |||
!style="width:30%"| Location | |||
!style="width:70%"| Text | |||
|- | |||
| style="text-align:center" |'''{{Term|BotW|Karusa Valley|link}}''' | |||
| style="text-align:center" |''If you seek power untold, offer a shining blue stone.'' | |||
|- | |||
| style="text-align:center" |'''{{Term|BotW|Hyrule Castle|link}} [[Lockup]]''' | |||
| style="text-align:center" |''- Test of the Royal Guard -<br/>Strike down the giant foe to become recognized as a knight of the kingdom.'' | |||
|- | |||
| style="text-align:center" |'''{{Term|BotW|Keo Ruug Shrine|link}}''' | |||
| style="text-align:center" |''Look at the stars for guidance. The constellations are the key.'' | |||
|- | |||
| style="text-align:center" |'''{{Term|BotW|Korok Forest|link}}''' | |||
| style="text-align:center" |''A Note from Maca:<br/>Just climb into this tree's mouth to leave the forest. I promise it won't eat you.'' | |||
|- | |||
| style="text-align:center" |'''{{Term|BotW|Lost Woods|link}}''' | |||
| style="text-align:center" |''Feed me the aged shield guarded by monsters eternal. My brother will repay you in kind.'' | |||
|- | |||
| style="text-align:center" |'''{{Term|BotW|Lost Woods|link}}''' | |||
| style="text-align:center" |''Please place my chest in my mouth.<br/>{{Small|The shield eater's brother stole it from me.}}'' | |||
|- | |||
| style="text-align:center" |'''{{Term|BotW|Mount Taran|link}}''' | |||
| style="text-align:center" |''The {{Color|BotW Red|ancient orbs}} guarded by the giants of Mount Taran lead to the {{Color|BotW Red|shrine}}.'' | |||
|- | |||
| style="text-align:center" |'''{{Term|BotW|Rist Peninsula|link}}''' | |||
| style="text-align:center" |''Only a hero bearing this {{Color|BotW Red|ancient orb}} shall be granted the right of {{Color|BotW Red|trial}} on Rist Peninsula.'' | |||
|- | |||
| style="text-align:center" |'''{{Term|BotW|Shee Vaneer Shrine|link}}/{{Term|BotW|Shee Venath Shrine|link}}''' | |||
| style="text-align:center" |''The shrines atop these peaks share a connection—their memory the answer to the other's question. Commit to memory before you start, lest, a failure, you will depart.'' | |||
|} | |||
==={{TotK|-}}=== | |||
{{Stub|TotK}} | |||
==Other Appearances== | ==Other Appearances== | ||
{{ | ==={{AST|-}}=== | ||
=== | {{Noncanon|Start}} | ||
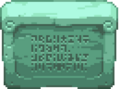
The eight {{ | [[File:AST Stone Tablet.png|left]] | ||
{{ | The eight {{Plural|AST|Stone Tablet}} can be found at the end of each {{Term|AST|Dungeon}} and are obtained after defeating a {{Term|AST|Dungeon}}'s respective {{Term|AST|Boss}} in {{AST}}. The {{Plural|AST|Stone Tablet|display=Tablets}} contain writings in a language used in ancient {{Term|AST|Hyrule|link}}, requiring {{Term|AST|Princess Zelda|link}} to use the {{Term|AST|Book of Mudora|link}} to decipher their message. The {{Plural|AST|Stone Tablet}} reveal that the {{Plural|AST|Silver Arrow|link}}, a sealed power needed to defeat {{Term|AST|Ganon|link}}, are found at {{Term|AST|Death Mountain|link}}. | ||
{{Noncanon|End}} | |||
==Nomenclature== | ==Nomenclature== | ||
{{ | {{Nomenclature}} | ||
==Gallery== | ==Gallery== | ||
<gallery> | <gallery> | ||
File:AST Stone Tablet Obtainment.png|The Hero of Light obtaining a Stone Tablet from | File:TWW Stone Tablet Wind Temple Model.png|A {{Term|TWWHD|Stone Tablet}} at the {{Term|TWWHD|Wind Temple}} from {{TWW|-}} | ||
File:TMC Stone Tablet Sprite 2.png|The {{Term|TMC|Stone Tablet}} at the {{Term|TMC|Fortress of Winds}} from {{TMC|-}} | |||
File:TMC Stone Tablet Sprite 3.png|The {{Term|TMC|Stone Tablet}} in the {{Term|TMC|Temple of Droplets}} from {{TMC|-}} | |||
File:ALBW Lorule Sacred Realm.png|The {{Term|ALBW|Stone Tablet}} in {{Term|ALBW|Lorule}}'s {{Term|ALBW|Sacred Realm}} from {{ALBW|-}} | |||
File:AST Stone Tablet Obtainment.png|The {{Term|AST|Hero of Light}} obtaining a {{Term|AST|Stone Tablet}} from {{AST|-}} | |||
</gallery> | </gallery> | ||
{{Ref}} | {{Ref}} | ||
{{Categories | |||
|Quest Items, Tablets | |||
|objects= TWW, TWWHD, TMC, PH, ST, SS, SSHD, ALBW, TFH, BotW, TotK | |||
|items= AST | |||
}} | |||
Latest revision as of 14:10, 18 July 2023
Stone Tablets are recurring Objects and Items in The Legend of Zelda series.[1][2][name references needed] Stone Tablets go unnamed in The Wind Waker, The Minish Cap, Spirit Tracks, A Link Between Worlds, and Tri Force Heroes.
Location and Uses
The Wind Waker
Stone Tablets appear in the Earth Temple and the Wind Temple in The Wind Waker. They are also found at the entrance to both Dungeons (Headstone Island and Gale Isle, respectively).[3][4]
The Stone Tablets are large slabs of rock that block doorways, and can only be destroyed when Link plays the Wind Waker alongside the corresponding Sage. The Stone Tablets have on them the requirements to destroy them: the melody that must be played and the instrument needed. Resting atop all is a symbol of the Triforce.
The Stone Tablet at the Earth Temple teaches Link the "Earth God's Lyric", the melody he must play in front of Medli to awaken her as the Sage of Earth.[5] Once she has awakened, Link must take her back to Headstone Island to play the "Earth God's Lyric" together and thus destroy the Stone Tablet.[5] As the pair ventures through the Earth Temple, they encounter two more of these Tablets, which must be destroyed using the same process as done in the entrance of the Dungeon. Likewise, at Gale Isle, a Stone Tablet teaches Link the "Wind God's Aria" that he must play to Makar in order to awaken him as the Sage of Wind. Only with the sound of Makar's violin will the Stone Tablets shatter.[3]
The Minish Cap
Two Stone Tablets appear in The Minish Cap. The first appears in the Elemental Sanctuary after Link places the newly-reforged White Sword into the pedestal; it gives instructions on how to use the White Sword's ability to split Link into copies of himself.[6] This Tablet disappears after the fourth and final Element is infused into the White Sword,[7] revealing a new doorway that leads to a hidden chamber telling the location of the Light Force.
The second Stone Tablet is located at the top of the Fortress of Winds, accessible after Link defeats Mazaal. It was left by the Wind Tribe, who took the Wind Element and departed for the Cloud Tops. The Tablet explains the method of reaching them: by using the Ocarina of Wind that Zeffa drops at Link's feet shortly after he reads the Tablet.[8]
Phantom Hourglass
Stone Tablets double as Signs on many Islands in Phantom Hourglass, and as Tombstones on the Isle of the Dead. On Molida Island, a series of Stone Tablets contain the Wayfarer's Words; Link eventually discovers the Old Wayfarer's hideout at the location where the Tablets intersect.[9]
Spirit Tracks
Stone Tablets double as Signs in some Villages in Spirit Tracks. They cannot be read in the dark.[10]
A Stone Tablet near the Trading Post is used to mark the grave of Linebeck Senior.[11]
Skyward Sword
A Link Between Worlds
In A Link Between Worlds, a large Stone Tablet etched with writing and an inverted Triforce symbol rests at the heart of Lorule's Sacred Realm, presumably as a monument to the kingdom's lost Triforce. Prior to the game's events, Yuga discovered a crack in the Stone Tablet through which he could sense a parallel world (Hyrule) with its own Triforce.[12] The sorcerer and Princess Hilda plotted to use this crack to invade Hyrule and claim its Triforce,[13] after their own had been destroyed to quell the constant warring in Lorule.[14]
After Yuga Ganon is defeated and Princess Hilda repents, she uses the last of the power in Ravio's Bracelet to transport Princess Zelda and Link back to their own world through the Stone Tablet's crack. Moments later, Hilda and Ravio watch on as the Stone Tablet begins to rumble and then explodes, before a new Lorulean Triforce forms in its place.
Tri Force Heroes
In Tri Force Heroes, Stone Tablets appear next to each Triforce Gateway in the hub area of the Den of Trials. When read, they indicate which Zone the Triforce Gateway will transport the Links to. The Hylian text seen on the Tablets reads "Good Luck".
Breath of the Wild
Several Stone Tablets can be found throughout Hyrule Kingdom. The one on Rist Peninsula grants the "Into the Vortex" Shrine Quest, while the one on Mount Taran grants "The Three Giant Brothers". Another can be found along the Karusa Valley path in the Gerudo Highlands, where it provides a hint for unearthing Sho Dantu Shrine. Shee Vaneer Shrine and Shee Venath Shrine both feature identical Stone Tablets. In the Korok Forest, a Stone Tablet near the Ogre Tree that serves as its exit bears a note from Maca.
During the "Trial of Second Sight", Link will find a Stone Tablet in front of one of the Ogre Trees. The Ogre Tree asks him to feed it the Rusty Shield nearby and promises a reward from its brother.[15] Placing the Rusty Shield inside its mouth will cause a Treasure Chest containing an Amber. Past the Water of Lake Saria, another Ogre Tree with a Stone Tablet asks Link to return its Chest, as it was stolen by the brother.[16] Following these instructions causes Kuhn Sidajj Shrine to rise from the ground.
| Location | Text |
|---|---|
| Karusa Valley | If you seek power untold, offer a shining blue stone. |
| Hyrule Castle Lockup | - Test of the Royal Guard - Strike down the giant foe to become recognized as a knight of the kingdom. |
| Keo Ruug Shrine | Look at the stars for guidance. The constellations are the key. |
| Korok Forest | A Note from Maca: Just climb into this tree's mouth to leave the forest. I promise it won't eat you. |
| Lost Woods | Feed me the aged shield guarded by monsters eternal. My brother will repay you in kind. |
| Lost Woods | Please place my chest in my mouth. The shield eater's brother stole it from me. |
| Mount Taran | The ancient orbs guarded by the giants of Mount Taran lead to the shrine. |
| Rist Peninsula | Only a hero bearing this ancient orb shall be granted the right of trial on Rist Peninsula. |
| Shee Vaneer Shrine/Shee Venath Shrine | The shrines atop these peaks share a connection—their memory the answer to the other's question. Commit to memory before you start, lest, a failure, you will depart. |
Tears of the Kingdom
Other Appearances
Ancient Stone Tablets

The eight Stone Tablets can be found at the end of each Dungeon and are obtained after defeating a Dungeon's respective Boss in Ancient Stone Tablets. The Tablets contain writings in a language used in ancient Hyrule, requiring Princess Zelda to use the Book of Mudora to decipher their message. The Stone Tablets reveal that the Silver Arrows, a sealed power needed to defeat Ganon, are found at Death Mountain.
Nomenclature
| Language | Names | |
|---|---|---|
| This table was generated using translation pages. To request an addition, please contact a staff member with a reference. | ||
Gallery
-
A Stone Tablet at the Wind Temple from The Wind Waker
-
The Stone Tablet at the Fortress of Winds from The Minish Cap
-

The Stone Tablet in the Temple of Droplets from The Minish Cap
-
The Stone Tablet in Lorule's Sacred Realm from A Link Between Worlds
-

The Hero of Light obtaining a Stone Tablet from Ancient Stone Tablets


References
- ↑ "Stone Tablet" — Adventure Log (Breath of the Wild)
- ↑ "It's become clear that there are 13 stone tablets documenting the age of legends. By deciphering all of them, one could learn about the lives of the royal family of that era, which was not documented in any history book. Capture the stone tablets in pictures, and show them to Wortsworth in Kakariko Village." — Adventure Log (Tears of the Kingdom)
- ↑ 3.0 3.1 The Legend of Zelda: The Wind Waker—Prima's Official Strategy Guide, Prima Games, pg. 96
- ↑ The Legend of Zelda: The Wind Waker—Prima's Official Strategy Guide, Prima Games, pg. 84
- ↑ 5.0 5.1 The Legend of Zelda: The Wind Waker—Prima's Official Strategy Guide, Prima Games, pg. 85
- ↑ "Hmm-hmm... Let’s see if I can’t read that tablet for you... Fill your sword with power and walk over the glowing tile... Hm... Perhaps it refers to those flashing spots on the floor around you." — Ezlo (The Minish Cap)
- ↑ "Hmm-hmm... It seems that forging the sacred blade somehow opened the doorway!" — Ezlo (The Minish Cap)
- ↑ "We are the Tribe of the Winds. Long have we lived with the winds. We have mastered them. Now, we join them. Together, with the great winds at our backs, we head for the skies. Those who come seeking our power must play the notes Zeffa teaches. May they lead you onward to the power that you seek." — Stone Tablet (The Minish Cap)
- ↑ "Oh, just look at this stone tablet! The guy who lives nearby, Romanos, had a father who scattered these here. They're left as a testament to his trip to the Isle of Gust, but they're a big nuisance!" — Potato (Phantom Hourglass)
- ↑ "Something's written here, but it's too dark to read it." — N/A (Spirit Tracks)
- ↑ "Here rests the legendary Captain Linebeck." — Stone Tablet (Spirit Tracks)
- ↑ "Yuga discovered that there was a strange crack in this grim slate... Through it, we could sense that there was another world beyond ours... a place where the Triforce still existed." — Princess Hilda (A Link Between Worlds)
- ↑ "He and I devised the scheme that imperiled your kingdom. But I alone will set this right." — Princess Hilda (A Link Between Worlds)
- ↑ "Many sought to control the Triforce, plunging Lorule into endless war. Our kingdom was on the verge of ruin. My ancestors got rid of the Triforce to stop the war—by destroying it. Utterly and absolutely." — Princess Hilda (A Link Between Worlds)
- ↑ "Feed me the aged shield guarded by monsters eternal. My brother will repay you in kind." — Stone Tablet (Breath of the Wild)
- ↑ "Please place my chest in my mouth.
The shield eater's brother stole it from me." — Stone Tablet (Breath of the Wild)
- Quest Items
- Tablets
- Items
- Objects
- Objects in The Wind Waker
- Objects in The Wind Waker HD
- Objects in The Minish Cap
- Objects in Phantom Hourglass
- Objects in Spirit Tracks
- Objects in Skyward Sword
- Objects in Skyward Sword HD
- Objects in A Link Between Worlds
- Objects in Tri Force Heroes
- Objects in Breath of the Wild
- Objects in Tears of the Kingdom
- Items in Ancient Stone Tablets