Moldorm: Difference between revisions
(LCT Name Ref) |
mNo edit summary |
||
| (31 intermediate revisions by 12 users not shown) | |||
| Line 1: | Line 1: | ||
{{ | {{Hatnote|This article is about the enemy. For the {{Term|Series|Boss|link}}, see {{Term|Series|Moldorm (Boss)|link}}.}} | ||
{{Infobox Enemy | |||
{{Enemy | |||
|image= | |image= | ||
{{Media | {{Media | ||
| Line 10: | Line 8: | ||
|Model PH= File:PH Moldorm Model.png | |Model PH= File:PH Moldorm Model.png | ||
|Model SS= File:SS Moldorm Model.png | |Model SS= File:SS Moldorm Model.png | ||
|Model SSHD= File:SSHD Moldorm Model.png | |||
|Sprite TLoZ= File:TLoZ Moldorm Sprite.png | |Sprite TLoZ= File:TLoZ Moldorm Sprite.png | ||
|Sprite FS= File:FS Moldorm Sprite.png | |Sprite FS= File:FS Moldorm Sprite.png | ||
|Sprite FSA= File:FSA Moldorm Sprite.png | |Sprite FSA= File:FSA Moldorm Sprite.png | ||
|Sprite TMC= File:TMC Moldorm Sprite.png | |||
}} | }} | ||
|caption= | |caption= | ||
| Line 18: | Line 18: | ||
|plural= Moldorms<ref>{{Cite Book|quote= Moldorms scurry around erratically, running into walls.|book= E |publisher= |page= 193}}</ref> | |plural= Moldorms<ref>{{Cite Book|quote= Moldorms scurry around erratically, running into walls.|book= E |publisher= |page= 193}}</ref> | ||
|race= | |race= | ||
|game= | |game= TLoZ, FS, FSA, TMC, TP, PH, SS | ||
|other= {{ | |other= LCT | ||
| | |habitat= | ||
{{Infobox Game Blocks | |||
|TP= {{Term|TPHD|Arbiter's Grounds (Dungeon)|link}}, {{Term|TPHD|Gerudo Desert|link}} | |||
|SS= {{Term|SS|Fire Sanctuary (Dungeon)|link}} | |||
}} | |||
|member= | |member= | ||
|attack= | |attack={{Infobox Game Blocks | ||
|weapon= {{Term| | |TLoZ=Contact {{small|(1/2 heart)}} | ||
| | }} | ||
|weapon= | |||
{{Infobox Game Blocks | |||
|TP= {{Term|TPHD|Clawshot|link}}, {{Term|TPHD|Sword|link}} | |||
|SS= {{Term|SS|Mogma Mitts|link}} | |||
}} | |||
|spoils= | |||
{{Infobox Game Blocks | |||
|TLoZ= {{Term|TLoZ|Heart|link}}, {{Term|TLoZ|Fairy|link}}, One {{Term|TLoZ|Rupee|link}} | |||
}} | |||
|exp= | |exp= | ||
|theme= | |theme= | ||
}} | |health={{Infobox Game Blocks | ||
{{Term/Store|Moldorm|Moldorms|Series, TLoZ, FS, FSA, TMC, TP, PH, SS, LCT|plural}} are recurring | |TLoZ={{HP|TLoZ|5}} | ||
}}}} | |||
{{Term/Store|Moldorm|Moldorms|Series, TLoZ, FS, FSA, TMC, TP, PH, SS, SSHD, LCT|plural}} are recurring {{Plural|Series|Enemy|link}} in {{TLoZ|Series}}.<ref>{{Cite Book|quote= |book= E |publisher= |page= 193 {{Exp Game|TLoZ, FS, FSA, TMC, TP, PH, SS}}}}</ref><ref>{{Cite|{{Big|Gerudo Moldorm: Defender}}<br/>Something's coming! Keep your eres on your radar--and on the ground!|Stage Select|LCT}}</ref> | |||
==Characteristics== | ==Characteristics== | ||
==={{TLoZ|-}}=== | ==={{TLoZ|-}}=== | ||
{{ | {{Manual|TLoZ|Moldorm|The huge worm living in the labyrinths. It grows smaller as Link attacks. Not so strong.}} | ||
{{Plural|TLoZ|Moldorm}} in {{TLoZ}} slowly slither around the ground in a random pattern. {{Term|TLoZ|Link|link}} can defeat them by hitting them with his {{Term|TLoZ|Sword|link}}. When defeated, they may drop either a {{Term|TLoZ|Heart|link}}, a {{Term|TLoZ|Fairy|link}} or one {{Term|TLoZ|Rupee|link}}.{{Note|If Link defeats 10 enemies without getting hit or teleporting with the Recorder, then the 10th enemy defeated will drop five | {{Plural|TLoZ|Moldorm}} in {{TLoZ}} slowly slither around the ground in a random pattern. {{Term|TLoZ|Link|link}} can defeat them by hitting them with his {{Term|TLoZ|Sword|link}}. When defeated, they may drop either a {{Term|TLoZ|Heart|link}}, a {{Term|TLoZ|Fairy|link}} or one {{Term|TLoZ|Rupee|link}}.{{Note|If {{Term|TLoZ|Link|link}} defeats 10 enemies without getting hit or teleporting with the {{Term|TLoZ|Recorder|link}}, then the 10th enemy defeated will drop five {{Plural|TLoZ|Rupee|link}}. However, if the 10th enemy is defeated with a {{Term|TLoZ|Bomb|link}}, then it will drop four {{Plural|TLoZ|Bomb}}. If {{Term|TLoZ|Link}} defeats 16 enemies without getting hit or teleporting, then the 16th enemy will drop a {{Term|TLoZ|Fairy|link}}. After the 16th enemy, {{Term|TLoZ|Link}} must get hit and reset the counter to zero in order to achieve this effect again. Defeating {{Plural|TLoZ|Armos|link}}, {{Plural|TLoZ|Like Like|link}}, {{Plural|TLoZ|Keese|link}}, or {{Plural|TLoZ|Gel|link}} will not be counted.<ref>{{Cite Web|quote= |author= n.a. |published= n.d. |retrieved= August 17, 2017 |url= http://redcandle.us/The_Legend_of_Zelda#Forced_drops |title= Forced Drops |site= redcandle.us}}</ref>}} | ||
==={{FS|-}}=== | ==={{FS|-}}=== | ||
{{ | {{Stub|FS}} | ||
==={{FSA|-}}=== | ==={{FSA|-}}=== | ||
{{ | Moldorms are very rare enemies, being only seen in the {{Term|FSA|Desert Temple|link}} and the [[Pyramid]]. They act the same as in ''Four Swords''. | ||
==={{TMC|-}}=== | ==={{TMC|-}}=== | ||
{{ | {{Figurines|TMC}} | ||
{{Plural|TMC|Moldorm}} in {{TMC}} appear in {{Plural|TMC|Dungeon|link}} and in {{Plural|TMC|Cave|link}} accessed with the {{Term|TMC|Mole Mitts|link}}. They move erratically and are more resilient than many other enemies, taking two hits from the {{Term|TMC|Four Sword|link}} to defeat, and three or more from other {{Plural|TMC|Sword|link}}. | {{Plural|TMC|Moldorm}} in {{TMC}} appear in {{Plural|TMC|Dungeon|link}} and in {{Plural|TMC|Cave|link}} accessed with the {{Term|TMC|Mole Mitts|link}}. They move erratically and are more resilient than many other enemies, taking two hits from the {{Term|TMC|Four Sword|link}} to defeat, and three or more from other {{Plural|TMC|Sword|link}}. | ||
==={{TP|-}}=== | ==={{TP|-}}=== | ||
{{Plural|TPHD|Moldorm}} in {{TP}} appear in the sands of {{Term|TPHD|Gerudo Desert|link}}, as well as in {{Term|TPHD|Quicksand|link}} found within the {{Term|TPHD|Arbiter's Grounds ( | {{Plural|TPHD|Moldorm}} in {{TP}} appear in the sands of {{Term|TPHD|Gerudo Desert|link}}, as well as in {{Term|TPHD|Quicksand|link}} found within the {{Term|TPHD|Arbiter's Grounds (Dungeon)|link}}. They will leap up from the sand to attack {{Term|TPHD|Link|link}}. He can use the {{Term|TPHD|Clawshot|link}} to pull them from the ground, leaving them vulnerable to other weapon attacks until they manage to burrow back into the sand. After defeating enough {{Plural|TPHD|Moldorm}},{{How Many|TP}} a larger {{Plural|TPHD|Moldorm}} will leap from the sand. This variation takes two hits to defeat instead of one. | ||
==={{PH|-}}=== | ==={{PH|-}}=== | ||
{{ | {{Stub|PH}} | ||
==={{SS|-}}=== | ==={{SS|-}}=== | ||
| Line 57: | Line 70: | ||
==Other Appearances== | ==Other Appearances== | ||
==={{LCT|-}}=== | |||
{{Noncanon|Start}} | {{Noncanon|Start}} | ||
{{Stub|LCT}} | |||
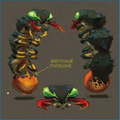
{{Plural|LCT|Moldorm}} appear in the "Gerudo Moldorm: Defender" | In {{LCT}}, {{Plural|LCT|Moldorm}} appear in the "{{Term|LCT|Gerudo Moldorm: Defender|link}}" {{Term|LCT|Stage|link}}. They dig under the sand and spiral towards {{Term|LCT|Link}}, occasionally jumping out of the sand allowing {{Term|LCT|Link}} to shoot them. If a {{Term|LCT|Moldorm}} gets close to {{Term|LCT|Link}}, it will jump out and damage him, causing him to lose points. | ||
{{Noncanon|End}} | {{Noncanon|End}} | ||
==Trivia== | ==Trivia== | ||
*{{Plural|Series|Moldorm}}' weak spot was inspired by the {{Wp| | *{{Plural|Series|Moldorm}}' weak spot was inspired by the {{Wp|Honey Ant}}, while the fluid that sprays from the spot when struck by a {{Term|Series|Sword|link}} was based on an obsession of the effects designer.<ref>{{Cite Book|quote= The weak spot on Moldorm's rear end is modeled after a honey ant. The juice that sprays out from the weak spot when struck by a sword was based on an obsession of the effects designer's.|book= HH |page= 63}}</ref> | ||
==Nomenclature== | ==Nomenclature== | ||
{{Plural|Series|Moldorm}} are known as {{Romanize|テール|Tail}} in Japanese. {{Plural|Series|Swamola|link}} are known as {{Romanize|モルドアーム|Morudoāmu}} in Japan, just like {{Plural|TLoZ|Moldorm}} from {{TLoZ|-}}. {{Plural|Series|Moldorm}} in {{TP}} and {{SS}} are known as {{Plural|Series|Moldworm|link}} in Japan. | {{Plural|Series|Moldorm}} are known as {{Romanize|テール|Tail}} in Japanese. {{Plural|Series|Swamola|link}} are known as {{Romanize|モルドアーム|Morudoāmu}} in Japan, just like {{Plural|TLoZ|Moldorm}} from {{TLoZ|-}}. {{Plural|Series|Moldorm}} in {{TP}} and {{SS}} are known as {{Plural|Series|Moldworm|link}} in Japan. | ||
{{Nomenclature}} | |||
{{ | ==Gallery== | ||
<gallery> | |||
File:SS Moldorm Concept Artwork.png|Concept artwork of {{Plural|SS|Moldorm}} from {{SS}} | |||
</gallery> | |||
==See Also== | ==See Also== | ||
*{{Term|Series|Lanmola|link}} | * {{Term|Series|Lanmola|link}} | ||
*{{Term|Series|Magtail|link}} | * {{Term|Series|Magtail|link}} | ||
*{{Term|Series|Mini-Moldorm|link}} | * {{Term|Series|Mini-Moldorm|link}} | ||
*{{Term|Series|Tailpasaran|link}} | * {{Term|Series|Moldworm|link}} | ||
*{{Term|Series|Winder|link}} | * {{Term|Series|Skytail|link}} | ||
* {{Term|Series|Tailpasaran|link}} | |||
* {{Term|Series|Winder|link}} | |||
{{Notes}} | {{Notes}} | ||
| Line 82: | Line 102: | ||
{{Bosses|SS}} | {{Bosses|SS}} | ||
{{Categories | {{Categories | ||
|Burrowing Enemies, Sand-Related Enemies, Worm-Like Enemies | |Burrowing Enemies, Moldorms, Sand-Related Enemies, Worm-Like Enemies | ||
|enemies= TLoZ, FS, TMC, TP, TPHD, PH, SS, LCT | |enemies= TLoZ, FS, FSA, TMC, TP, TPHD, PH, SS, SSHD, LCT | ||
|sub-bosses= SS | |sub-bosses= SS, SSHD | ||
}} | }} | ||
Revision as of 11:34, 26 April 2024
Moldorms are recurring Enemies in The Legend of Zelda series.[2][3]
Characteristics
The Legend of Zelda
Moldorms in The Legend of Zelda slowly slither around the ground in a random pattern. Link can defeat them by hitting them with his Sword. When defeated, they may drop either a Heart, a Fairy or one Rupee.[note 1]
Four Swords
Four Swords Adventures
Moldorms are very rare enemies, being only seen in the Desert Temple and the Pyramid. They act the same as in Four Swords.
The Minish Cap
Moldorms in The Minish Cap appear in Dungeons and in Caves accessed with the Mole Mitts. They move erratically and are more resilient than many other enemies, taking two hits from the Four Sword to defeat, and three or more from other Swords.
Twilight Princess
Moldorms in Twilight Princess appear in the sands of Gerudo Desert, as well as in Quicksand found within the Arbiter's Grounds. They will leap up from the sand to attack Link. He can use the Clawshot to pull them from the ground, leaving them vulnerable to other weapon attacks until they manage to burrow back into the sand. After defeating enough Moldorms,[how many?] a larger Moldorms will leap from the sand. This variation takes two hits to defeat instead of one.
Phantom Hourglass
Skyward Sword
Moldorms in Skyward Sword reside out of sight underground. They are encountered only when Link enters an underground tunnel with the Mogma Mitts. Striking their tail segment with the Mogma Mitts will destroy the rear segments and increase their movement speed, with three strikes required to defeat them. One appears as a Sub-Boss in the Fire Sanctuary.
Other Appearances
Link's Crossbow Training
In Link's Crossbow Training, Moldorms appear in the "Gerudo Moldorm: Defender" Stage. They dig under the sand and spiral towards Link, occasionally jumping out of the sand allowing Link to shoot them. If a Moldorm gets close to Link, it will jump out and damage him, causing him to lose points.
Trivia
- Moldorms' weak spot was inspired by the Honey Ant, while the fluid that sprays from the spot when struck by a Sword was based on an obsession of the effects designer.[5]
Nomenclature
Moldorms are known as テール (Tail) in Japanese. Swamolas are known as モルドアーム (Morudoāmu) in Japan, just like Moldorms from The Legend of Zelda. Moldorms in Twilight Princess and Skyward Sword are known as Moldworms in Japan.
| Language | Names | |
|---|---|---|
Japanese | モルドアーム (Morudoāmu) (TLoZ | SS)[7][8] | |
ChineseSI | 莫尔德虫 (Mòěrdéchóng) (TLoZ)[10] | |
Dutch | Vuur-Worm (TLoZ)[9] | |
FrenchEU | Moldorm (TLoZ)[9] | |
Italian | Moldorm (TLoZ | LADX | FS | FSA)[6] | |
| This table was generated using translation pages. To request an addition, please contact a staff member with a reference. | ||
Gallery
-
Concept artwork of Moldorms from Skyward Sword

See Also
Notes
- ↑ If Link defeats 10 enemies without getting hit or teleporting with the Flute, then the 10th enemy defeated will drop five Rupees. However, if the 10th enemy is defeated with a Bomb, then it will drop four Bombs. If Link defeats 16 enemies without getting hit or teleporting, then the 16th enemy will drop a Fairy. After the 16th enemy, Link must get hit and reset the counter to zero in order to achieve this effect again. Defeating Armos, Like Likes, Keese, or Gels will not be counted.[4]
References
- ↑ "Moldorms scurry around erratically, running into walls." (Encyclopedia, Dark Horse Books, pg. 193)
- ↑ Encyclopedia, Dark Horse Books, pg. 193 (TLoZ | FS | FSA | TMC | TP | PH | SS)
- ↑ "Gerudo Moldorm: Defender
Something's coming! Keep your eres on your radar--and on the ground!" — Stage Select (Link's Crossbow Training) - ↑ n.a., Forced Drops , redcandle.us, published n.d., retrieved August 17, 2017.
- ↑ "The weak spot on Moldorm's rear end is modeled after a honey ant. The juice that sprays out from the weak spot when struck by a sword was based on an obsession of the effects designer's." (Hyrule Historia, Dark Horse Books, pg. 63)
- ↑ Enciclopedia di Hyrule, Magazzini Salani, pg. 193
- ↑ Hyrule Encyclopedia, Tokuma Shoten Publishing Co., Ltd., pg. 209
- ↑ Hyrule Encyclopedia, Ambit Ltd., pg. 209
- ↑ 9.0 9.1 The Legend of Zelda manual, pg. 37
- ↑ 塞尔达传说:百科全书, New Star Press, pg. 197
Mazura • Jermafenser • Rebonack • Carock • Gooma • Barba • Thunderbird • Link's Shadow
Ball and Chain Trooper • Armos Knights • Lanmolas • Moldorm • Agahnim
Helmasaur King • Arrghus • Mothula • Blind the Thief • Kholdstare • Vitreous • Trinexx • Ganon
Moldorm • Genie • Slime Eye • Angler Fish • Slime Eel • Facade • Evil Eagle • Hot Head • Shadow Nightmares
Spike Roller • Moblin Chief • Hinox • Dodongo Snakes • Lanmola • Hydrosoar
Master Stalfos • Gohma • Armos Knight • Rover • Grim Creeper • Turtle Rock • Blaino
Gohma • King Dodongo • Barinade • Phantom Ganon • Volvagia • Morpha • Bongo Bongo • Twinrova • Ganon
Lizalfos • Big Octo • Stalfos • Meg • Flare Dancer • White Wolfos • Dark Link • Dead Hand • Gerudo Thief • Iron Knuckle
Odolwa • Goht • Gyorg • Twinmold • Majora's Mask
Dinolfos • Gekko • Wizzrobe • Gerudo Pirate • Wart • Gekko and Mad Jelly
Captain Keeta • Iron Knuckle • Sharp • Igos du Ikana • Garo Master • Gomess • Eyegore
Aquamentus • Dodongo • Mothula • Gohma • Digdogger • Manhandla • Gleeok • Medusa Head • General Onox
Twinrova • Ganon
Brother Goriyas • Facade • Omuai • Agunima • Great Moblin • Syger • Vire • Poe Sisters • Frypolar
Pumpkin Head • Head Thwomp • Shadow Hag • Eyesoar • Smog • Octogon • Possessed Nayru • Plasmarine • Ramrock • Veran
Twinrova • Ganon
Giant Ghini • Swoop • Subterror • Armos Warrior • Great Moblin • Smasher • Vire • Angler Fish • Blue Stalfos
Gohma • Kalle Demos • Gohdan • Helmaroc King • Jalhalla • Molgera • Puppet Ganon • Ganondorf
Mothula • Darknut • Phantom Ganon • Stalfos • Wizzrobe • Mighty Darknut • Big Octo![]()
Phantom Ganon • Stone Arrghus • Helmaroc King • Big Poe • Big Moldorm • Frostare • Vaati • Ganon
Chief Soldier • Shadow Link • Manhandla • Dodongos • Big Dark Stalfos • Gohma • Big Dodongo
Big Green Chuchu • Gleerok • Mazaal • Big Octorok • Gyorg Pair • Vaati
Madderpillar • Dark Nut • Big Blue Chuchu • Red Dark Nut • Black Knight
Diababa • Fyrus • Morpheel • Stallord • Blizzeta • Armogohma • Argorok • Zant • Puppet Zelda • Ganon
Ook • King Bulblin • Dangoro • Twilit Carrier Kargarok • Twilit Bloat
Deku Toad • Death Sword • Darkhammer • Darknut • Aeralfos • Phantom Zant
Stagnox • Fraaz • Phytops • Cragma • Byrne • Skeldritch • Demon Train • Chancellor Cole • Malladus
Mothula • Snapper • Heatoise • Big Blin • Rocktite • Geozard Chief • Dark Link![]()
Ghirahim • Scaldera • Moldarach • The Imprisoned • Koloktos • Tentalus • Levias • Bilocyte • Demise
Stalfos • Lizalfos • Stalmaster • Moldarach • LD-002G Scervo • Dark Lizalfos • Magmanos • Moldorm • LD-003D Dreadfuse
Yuga • Moldorm • Margomill • Gemesaur King • Arrghus • Knucklemaster • Stalblind • Zaganaga • Dharkstare • Grinexx • Yuga Ganon
Armos • Red Stalfos • Heedles • Green & Red Goriyas • Gigabari • Gibdos & Purple Mini-Moldorms • Red Eyegores • Flying Tiles & Devalants • Big Pengator & Pengators • Fire Gimos • Moldorm • Lorule Ball and Chain Soldier • Arrghus
Margoma • Arrghus • Moldorm • Blizzagia • The Lady's Pets • Stalchampion • Prismantus • The Lady • Shadow Links
Electric Blob King • Electric Blob Queen • Hinox Brothers • Freezlord • Vulture Vizier • Grim Repoe • Gigaleon
Windblight Ganon • Fireblight Ganon • Thunderblight Ganon • Waterblight Ganon • Monk Maz Koshia(TCB) • Calamity Ganon • Dark Beast Ganon
Stone Talus • Stone Talus (Luminous) • Stone Talus (Rare) • Igneo Talus • Frost Talus • Igneo Talus Titan(TCB) • Molduga • Molduking(TCB) • Hinox • Blue Hinox • Black Hinox • Master Kohga
Bosses in Tears of the Kingdom
Colgera • Yunobo • Moragia • Marbled Gohma • Sludge Like • Mucktorok • Queen Gibdo • Seized Construct • Phantom Ganon • Demon King's Army • Demon King Ganondorf • Demon Dragon
- Enemies
- Burrowing Enemies
- Moldorms
- Sand-Related Enemies
- Worm-Like Enemies
- Sub-Bosses
- Enemies in The Legend of Zelda
- Enemies in Four Swords
- Enemies in Four Swords Adventures
- Enemies in The Minish Cap
- Enemies in Twilight Princess
- Enemies in Twilight Princess HD
- Enemies in Phantom Hourglass
- Enemies in Skyward Sword
- Sub-Bosses in Skyward Sword
- Enemies in Skyward Sword HD
- Sub-Bosses in Skyward Sword HD
- Enemies in Link's Crossbow Training