Guidelines:Tears of the Kingdom

Overview
We are assuming that Tears of the Kingdom works like Breath of the Wild does when it comes to the World Level. To cover content as accurately as possible, it is highly recommended that participants use a "pacifist" file with minimal progression. Because killing enemies often adds a hidden value to the game's data which determines what type of enemy you see (such as when Blue Bokoblins start appearing where normal red ones have before), this impacts the accuracy of data collection. The contents of Treasure Chests are also known to scale to provide more formidable weaponry or equipment with added effects.
Playing without killing enemies is the best-recommended option for collecting data. As Nintendo accounts are free to create, we recommended that you create a separate account for pacifist accounts if you wish to help in this way.
If you are interested in contributing to the Tears of the Kingdom project as part of a team, you are welcome to join our #tears-of-the-kingom channel on the Zelda Wiki Discord.
Citing
It is best to cite the subtitled text instead of the spoken words when citing from Memories and cutscenes.
Coloration and Styling
| Color | Name | Notes |
|---|---|---|
TotK Channel Blue | The Legend of Zelda: Tears of the Kingdom Channel | |
TotK Gray | ||
TotK Map | Map | |
TotK Map Blue | Shrine of Light, Towns | |
TotK Mysterious Voice | Mysterious Voice | |
TotK Purah Pad | Purah Pad interface | |
TotK Red | ||
TotK Teal | This is an estimate. Should be replaced with the hexadecimal used in the game files. | |
TotK White | ||
TotK Yellow |
Images
Screenshots
Taking Screenshots
For guidelines on how to take screenshots, please refer to the File Guidelines.
Standards for Screenshots
To keep our content as accurate to official media as possible, we have provided a list of the ideal conditions to capture screenshots based on direct video from trailers and official artwork, including conditions that specifically involve Link or Link's Horse. As a general principle, screenshots of locations should not include Link in the shot. Other conditions are as follows:
- The HUD mode should be set to Pro. This removes all HUD elements from the game screen and allows for much clearer screenshots.
- This can be done by going to the System menu (press + then scroll to the far right), selecting Options, and switching HUD mode to "Pro" at the bottom of the menu.
- Unless it's necessary to have it otherwise, shots should be taken during the daytime (ideally between 8:00 AM to 3:00 PM).
- If a screenshot requires the Paraglider to be shown, use the default fabric. If you have a different fabric, you can change back to the default fabric at the Kochi Dye Shop in Hateno Village.
- The weather should be sunny, unless otherwise necessary. You can verify the weather by setting the HUD mode to Normal and looking at the gauge underneath the current time.
- The environment in view should not be tampered with (such as any Trees being cut down, Treasure Chests opened, or any items/objects in sight that do not naturally belong there).
If there is ever a case where the HUD cannot be set to Pro, these standards should be met for the HUD:
- Link should have a maximum of 3 Hearts, and they should be full. If you have more than three hearts, you can remove them by selling them to the Horned Statue in the Royal Hidden Passage beneath Lookout Landing. Temporary Hearts are also not acceptable.
- Link should not have any active effects on-screen from Elixirs. These appear underneath the Life Gauge if one is active.
- The Sheikah Sensor should be disabled on the map, which removes it from the HUD.
To see which combinations of equipment are acceptable for a screenshot under a specific situation, click on one of the tabs below.
-
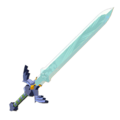
Weapon:
Master Sword -
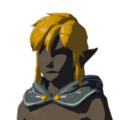
Armor:
Hylian Hood
No Dye, worn down -
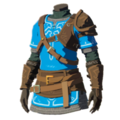
Armor:
Champion's Leathers -
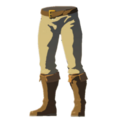
Armor:
Hylian Trousers
No Dye
-
Weapon:
Master Sword -
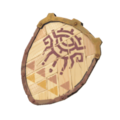
Shield:
Old Wooden Shield -
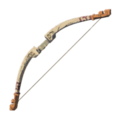
Bow:
Old Wooden Bow -
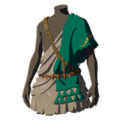
Armor:
Archaic Tunic
No Dye -
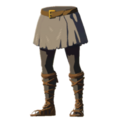
Armor:
Archaic Legwear
No Dye
-

One-Handed Weapon:
Rusty Broadsword -
Spear:
Soldier's Spear -
Two-Handed Weapon:
Cobble Crusher
Fused with Blue Moblin Horn -
Shield:
Reinforced Lizal Shield -
Armor:
Flamebreaker Helm
No Dye -
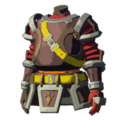
Armor:
Flamebreaker Armor
No Dye -
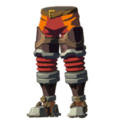
Armor:
Flamebreaker Boots
No Dye
-
One-Handed Weapon:
Rusty Broadsword -
Shield:
Old Wooden Shield -
Bow:
Old Wooden Bow -
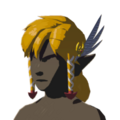
Armor:
Snowquill Headdress
No Dye -
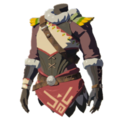
Armor:
Snowquill Tunic
No Dye -
Armor:
Snowquill Trousers
No Dye
As there are no specific standards for Desert Heat, you should take screenshots that involve Link while he is at full health and without any Foods that grant Heat Resistance, as they cause a timer to appear on the screen. For screenshots not involving Link, it is acceptable to wear any necessary attire to ensure that Link's Hearts don't decrease.
Tips for Screenshots
- Try to take shots that capture the front of a subject, head-on. You should try to keep as much of the subject in the frame as possible, but also try to be as close to the subject as possible when doing so.
- If Link is up next to an object and you place the camera between Link and the object, you can turn Link "invisible" in order to take screenshots without him in them. Walls, cliffs, and Trees are your allies. Just be sure not to get any foliage in the way of the shot.
- Slightly higher ground usually allows for better shots of the subject. You can climb nearby Trees, position the camera to face the sky to hide Link and then slightly readjust the camera until you get the angle you want. This is possible for all Trees, but it's more difficult for thinner Trees.
- Springs are particularly effective Items that you can use to create a barrier to position Link against, as they can be collected in large numbers and deployed from the Inventory at will. They can also be stacked to create taller structures. Zonai Capsules with Springs can be spawned at Device Dispensers such as those at the Digdogg Suspension Bridge and North Necluda Sky Archipelago.
Characters
When writing articles for characters, you should begin their biography section with information on a character's species and, if applicable, whatever equipment they are carrying. Then, you should document the character's role in Link's adventure from when Link can first and last meet them. It's usually easiest to carefully document lines of dialogue from them and assemble them in a logical, chronological order. From there, you can assemble a narrative and begin writing while citing passages accordingly. Due to the complexity of this game, there are often several branches of dialogue. It's recommended that you save before speaking to a character so that you can reload and explore various paths of dialogue. Remember to make use of the Big, Small, and Color templates where appropriate when citing text.
Some characters have unique lines of dialogue in certain situations, such as: when they are rescued from Monsters, when rain forces them to take shelter, when you approach them without any Armor that covers Link's chest, when you wake them up at night, when you surprise them by waiting inside their house close to the door as they return home, and when they are walking to and from home to their daytime/nighttime locations. Try these out when speaking to characters, as you may find something new.
If a character operates a shop that isn't tied to a given location, include a Wares and Prices section that lists what they sell.
Locations
It is recommended that you progress far enough to obtain the Camera as it will allow you to quickly identify Creatures, Monsters, Materials, and Equipment.
Sections
Features and Overview
For the Features and Overview section, articles should follow the following format:
- The first paragraph should contain general details, such as where the location is situated and what features are unique to the area. These include characters (travelers, while not unique, should be mentioned as passing through), searchable objects which grant Materials (such as the Zonai statues), and monster camps.
- The second paragraph should contain information on what events took place between Breath of the Wild and Tears of the Kingdom and then whatever happens in a location during the course of the game. If a Memory can be recovered here, mention the details of the Memory and then state that Link is able to recall these events. If none of these details are applicable, simply skip to the next paragraph.
Other Sections
The sub-sections following the Features and Overview section should be as follows (where applicable): Areas, Creatures, Enemies, Materials, Equipment, Zonai Devices, Treasure Chests, and Korok Seeds. Where relevant, each section should be a gallery that lists each applicable subject in alphabetical order. These galleries should be created using the Gallery List template.
Areas
This section should only be included if a location contains other locations in it. Named locations should go in a Gallery List template, while unnamed locations should go beneath this as a sub-header.
- If a location of a particular type (General Store, Inn, Armor Shop, Jewelry Shop) exists but has no name, it is acceptable to phrase the header as "
OWNER'sTYPE OF SHOP". For example, Ardin runs an unnamed General Store in Gerudo Town that specializes in Mushrooms. The section for her shop is consequently known asArdin's General Store. As this isn't truly a term, this section cannot be split into its own article. - Named locations that are listed must include the
{{Main}}template alongside a brief description of the store. Locations that go unnamed but would otherwise be listed on a town's page should contain any necessary details that a separate article might, including aWares and Pricessub-section.
- If a location of a particular type (General Store, Inn, Armor Shop, Jewelry Shop) exists but has no name, it is acceptable to phrase the header as "
Creatures
Though bugs and other critters also serve as items, they should only be placed in the Creatures section and not the Materials section. Because they cannot be found universally by cutting Grass or lifting Rocks, Creatures found this way may be placed in this section.
Enemies
If an enemy is equipped with a Weapon, Shield, or Bow, please use the Equipment template to clarify. Though enemies are listed alphabetically, please use the in-game ordering when arranging the same enemies by equipment (so that two Bokoblins are listed as one wielding a Traveler's Sword then one with a Traveler's Bow, respectively). If there are enemies of the same type that do not bear any equipment, please list them first. Additionally, if there are two enemies with the same Weapon and one has a Shield, list the one without the Shield first. When listing an enemy with a Bow, be sure to also include any Materials it attaches to the Arrows. If there are two enemies with the exact same Bow but different types of Arrows, list the Materials in the in-game order (so that an enemy with Chuchu Jellies is listed before an enemy with Red Chuchu Jellies). For more information, please consult the Equipment template page.
Materials
Materials obtained from cutting Trees do not qualify for the Materials section. This is because they are universal features of all Trees. However, Materials found growing on or atop of Trees (Acorns, Apples, Bird Eggs, Chickaloo Tree Nuts, Courser Bee Honey, Hearty Durians, Mighty Bananas, Palm Fruits) do qualify as long as they weren't obtained by destroying the Trees.
Equipment
Only equipment found in the open should be included in this section. Equipment found inside of Treasure Chests should not be placed in this section. Additionally, equipment held by enemies should not be counted, as most equipment held by these enemies tend to scale alongside them. Equipment obtained from cutting down Trees and bushes (Korok Leaves, Tree Branches) do not qualify for this section. This is because they are universal features of all Trees.
The files for each item on a list should come out as File:TotK NAME Model.png, even if that particular subject does not yet have an image. You should not substitute it for its icon just to ensure it has an image.
Zonai Devices
Only Zonai Devices found on the ground or open in the world should be included in this section. Zonai Devices in capsule form should not be included, nor should Zonai Devices that are held and used by enemies.
Treasure Chests
Korok Seeds
| Korok Seed Puzzle type | Notes | |
|---|---|---|
The coordinates should be as close to the Acorn Jar as possible. You can stand beneath the Jar and find the X and Y coordinates that way. By climbing beside the Acorn Jar, you can find the Z coordinate. | ||
The coordinates should be at the point the Korok appears. | ||
The coordinates should be at the point below the Puzzle. | ||
The coordinates should be at the point atop the Stump. | ||
The coordinates should be on the ground at the center of the structure. | ||
The coordinates should be on the ground where the Dandelion Bud is found. | ||
The coordinates should be atop the Cork that is stuck. | ||
The coordinates should be at the center of the Cube Pattern. If stuck on a wall, stand on top of the Pattern. | ||
The coordinates should be at the center of the Ring. | ||
The coordinates should be taken while Link is climbing on the center of the Puzzle. | ||
The coordinates should be taken as close to the Fairy Dust as possible. | ||
The coordinates should be taken where the Fairy Dust begins moving. You can save and reload the game to find this. | ||
The coordinates should be on the ground at the center of the structure. | ||
The coordinates should be taken at the spot where the first Flower appears. Ideally, you should provide additional information detailing the coordinates of where the Flower appears as you chase it (see here). | ||
The coordinates should be taken at the spot where Food is offered. If a Puzzle has more than one empty plate and requires multiple offerings, the position between them will work. | ||
The coordinates should be taken as close to the Balloon as possible. If possible, you can Ascend through a Balloon to stand on top of it. | ||
The coordinates should be taken at the site where the Pinwheel appears. | ||
The coordinates should be at the center of the stump where the Puzzle begins. Ideally, you should also provide the coordinates where the Race ends (see here). | ||
The coordinates should be taken as close to the Bell as possible. | ||
The coordinates should be taken where the Rock sits. | ||
The coordinates should be taken where the Rock sits. | ||
The coordinates should be taken at the center of the Pattern. | ||
The coordinates should be taken where the Rock sits. | ||
The coordinates should be taken where the Rock sits. | ||
The coordinates should be taken where the Rock sits. | ||
The coordinates should be at the center of the stump where the Puzzle begins. | ||
The coordinates should be at the center of the stump where the Puzzle begins. Ideally, you should also provide the coordinates where the Target sits (see here). | ||
The coordinates should be where the first Korok sits. Ideally, you should also provide the coordinates of the other Korok (see here). |


.png)
.png)


.png)


Specific Location Types
This is a breakdown of the main body portion of various types of location articles:
Bridges
When working on articles for bridges, you should form an imaginary cuboid that extends the full length of the bridge in question. Then, its sides should extend all the way up and down. Anything that appears within this imaginary cuboid should be counted for the article. If there are any pieces of a bridge that appear outside of this shape, you can consider the area leading up until that piece as part of the bridge as well.
Features and Overview (H2)
- List features and characters present along this bridge.
Creatures(H3)Minor Enemies(H3)Materials(H3)Equipment(H3)Zonai Devices(H3)
Skyview Towers
As a general principle, the area directly surrounding a Skyview Tower can be considered as part of that Tower's location if that location surrounding it does not have any other name.
Features and Overview (H2)
- Begin by mentioning where the Tower is located and what happens when the Tower is activated. List features and characters present on this Tower. If the characters present provide any Quests, briefly mention them.
Creatures(H3)Minor Enemies(H3)Materials(H3)Equipment(H3)Zonai Devices(H3)
Stables
Features and Overview (H2)
- List features and characters present in and around this Stable. If the characters present provide any Quests, briefly mention them.
Creatures(H3)Minor Enemies(H3)Materials(H3)Equipment(H3)Zonai Devices(H3)
Towns
Features and Overview (H2)
Areas(H3)Creatures(H3)Minor Enemies(H3)Materials(H3)Equipment(H3)Zonai Devices(H3)
Quests
Quest articles should follow a simple progression. The infobox should contain an image that pertains to the name or theme of the Quest, rather than one specific thing that happens in the Quest. The infobox also provides an option to list previous Quests and any Quests that follow. These should be any Quests that must be started or completed before the Quest in question can be started. An example of how to make a good Quest article can be seen here.
The Overview section should cover how to obtain the Quest, as well as how the Quest unfolds. Some Quests have multiple starting conditions and multiple ways to progress and resolve. Each one should be documented and cited thoroughly. If the Quest leads to another Quest, mention the following Quest(s) at the end of this section. Additionally, if a Quest has any consequences (such as Yiga Clan members showing up throughout Hyrule as a result of finishing the "Seek Out Impa" Main Quest), those should be mentioned at the end of whichever condition causes the consequence to occur.
The Objectives sub-section should list, in order, the various stages of a Quest.
Notes
