Gallery:Hyrule Warriors Legends: Difference between revisions
(Updating File names -Link Lab) |
TriforceTony (talk | contribs) m (Text replacement - "HWL Toon Zelda Render.png" to "HW Toon Zelda Render.png") |
||
| (41 intermediate revisions by 14 users not shown) | |||
| Line 2: | Line 2: | ||
This is a gallery page featuring promotional and pre-release media from and relating to {{HWL}}. | This is a gallery page featuring promotional and pre-release media from and relating to {{HWL}}. | ||
== | ==Box Art== | ||
{{#section:Gallery:Box Art|HWL}} | {{#section:Gallery:Box Art|HWL}} | ||
| Line 19: | Line 19: | ||
===Characters=== | ===Characters=== | ||
<gallery> | <gallery> | ||
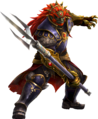
File:HWL Ganondorf Thief's Trident Artwork.png| | File:HWL Ganondorf Thief's Trident Artwork.png|{{Term|HWL|Ganondorf|link}} wielding the {{Term|HWL|Trident|link}} | ||
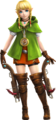
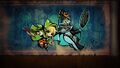
File: | File:HW Linkle Render.png|{{Term|HWL|Linkle|link}} | ||
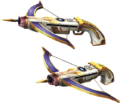
File:HWL Linkle Crossbow Artwork.png|Linkle wielding the | File:HWL Linkle Crossbow Artwork.png|Linkle wielding the {{Plural|HWL|Crossbow|link}} | ||
File:HWS Linkle Boots Artwork.png|Linkle wielding the | File:HWS Linkle Boots Artwork.png|Linkle wielding the {{Term|HWL|Boots|link}} | ||
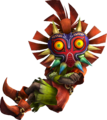
File: | File:HW Skull Kid Render.png|{{Term|HWL|Skull Kid|link}} | ||
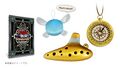
File:HWL Skull Kid Ocarina Artwork.png|Skull Kid wielding the | File:HWL Skull Kid Ocarina Artwork.png|Skull Kid wielding the {{Term|HWL|Ocarina|link}} | ||
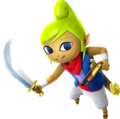
File: | File:HW Toon Link Render.png|{{Term|HWL|Toon Link|link}} | ||
File:HWL Toon Link Sword Artwork.png|Toon Link wielding the | File:HWL Toon Link Sword Artwork.png|Toon Link wielding the {{Term|HWL|Light Sword|link}} | ||
File: | File:HWS Toon Link Sand Wand and Spirit Train Artwork.png|Toon Link with the {{Term|HWL|Spirit Train|link}} wielding the {{Term|HWL|Sand Wand|link}} | ||
File: | File:HW Tetra Render.png|{{Term|HWL|Tetra|link}} | ||
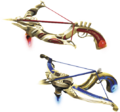
File:HWL Tetra Pistol Artwork.png|Tetra wielding the | File:HWL Tetra Pistol Artwork.png|Tetra wielding the {{Term|HWL|Cutlass|link}} | ||
File: | File:HW King Daphnes Render.png|{{Term|HWL|King Daphnes|link}} | ||
File:HWL King Daphnes Sail Artwork.png|King Daphnes wielding the | File:HWL King Daphnes Sail Artwork.png|King Daphnes wielding the {{Term|HWL|Sail|link}} | ||
File: | File:HW Medli Render.png|{{Term|HWL|Medli|link}} | ||
File:HWS Medli Rito Harp Artwork.png|Medli wielding the | File:HWS Medli Rito Harp Artwork.png|Medli wielding the {{Term|HWL|Rito Harp|link}} | ||
File: | File:HW Marin Render.png|{{Term|HWL|Marin|link}} | ||
File: | File:HW Marin Sea Lily's Bell Render.png|Marin wielding the {{Term|HWL|Bell|link}} | ||
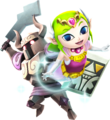
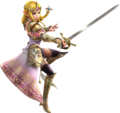
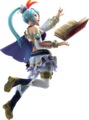
File: | File:HW Toon Zelda Render.png|{{Term|HWL|Toon Zelda|link}} | ||
File: | File:HW Phantom Arms Render.png|Toon Zelda and a Phantom wielding the {{Term|HWL|Phantom Arms|link}} | ||
File:HW Ravio Render.png|{{Term|HWL|Ravio|link}} | |||
File:HWS Ravio Rental Hammer Artwork.png|Ravio wielding the {{Term|HWL|Rental Hammer|link}} | |||
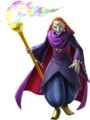
File:HW Yuga Render.png|{{Term|HWL|Yuga|link}} | |||
File:HWDE Yuga Picture Frame Artwork.png|Yuga wielding the {{Term|HWL|Picture Frame|link}} | |||
</gallery> | </gallery> | ||
===Bosses=== | ===Bosses=== | ||
<gallery> | <gallery> | ||
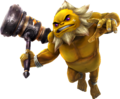
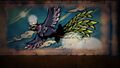
File:HWL Helmaroc King | File:HWL Helmaroc King Render.png|{{Term|HWL|Helmaroc King|link}} | ||
File:HWL Phantom Ganon | File:HWL Phantom Ganon Render.png|{{Term|HWL|Phantom Ganon|link}} | ||
</gallery> | </gallery> | ||
| Line 49: | Line 53: | ||
<gallery> | <gallery> | ||
File:Hyrule Warriors Legends Artwork.png|Promotional artwork | File:Hyrule Warriors Legends Artwork.png|Promotional artwork | ||
File:HWL Link Cover Artwork.png|Cover artwork of Link | |||
File:HWL Zelda Cover Artwork.png|Cover artwork of Zelda | |||
File:HWL Ganondorf Cover Artwork.png|Cover artwork of Ganondorf | |||
File:HWL Fi Cover Artwork.png|Cover artwork of Fi | |||
File:HWL Tingle Cover Artwork.png|Cover artwork of Tingle | |||
File:HWL Tetra Cover Artwork.png|Cover artwork of Tetra | |||
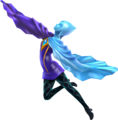
File:HWL Midna Cover Artwork.png|Cover artwork of Midna | |||
File:HWL Lana Cover Artwork.png|Cover artwork of Lana | |||
File:HWL Darunia Cover Artwork.png|Cover artwork of Darunia | |||
File:HWL Tetra and Link Cutscene.jpg|Tetra and Link | File:HWL Tetra and Link Cutscene.jpg|Tetra and Link | ||
File:HWL Helmaroc King Cutscene.jpg|The Helmaroc King with Tetra | File:HWL Helmaroc King Cutscene.jpg|The Helmaroc King with Tetra | ||
File:HWL Skull Kid Cutscene.jpg|Skull Kid with | File:HWL Skull Kid Cutscene.jpg|Skull Kid with {{Term|HWL|Tatl|link}} and {{Term|HWL|Tael|link}} | ||
File:HWL Linkle and Twili Midna Cutscene.jpg|Linkle and | File:HWL Linkle and Twili Midna Cutscene.jpg|Linkle and {{Term|HWL|Twili Midna|link}} | ||
File:HWL Darkmagic Sword Render.png|{{Term|HWL|Darkmagic Sword|link}} | |||
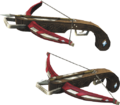
File:HWL Simple Crossbow Artwork.png|{{Term|HWL|Simple Crossbows|link}} | |||
File:HWL Hylian Crossbow Artwork.png|{{Term|HWL|Hylian Crossbows|link}} | |||
File:HWL Legend's Crossbow Artwork.png|{{Term|HWL|Legend's Crossbows|link}} | |||
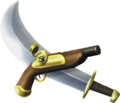
File:HWL Pirate Cutlass Artwork.png|{{Term|HWL|Pirate Cutlass|link}} | |||
File:HWL Jeweled Cutlass Artwork.png|{{Term|HWL|Jeweled Cutlass|link}} | |||
File:HWL Regal Cutlass Artwork.png|{{Term|HWL|Regal Cutlass|link}} | |||
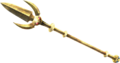
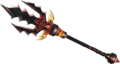
File:HWL Thief's Trident Artwork.png|{{Term|HWL|Thief's Trident|link}} | |||
File:HWL King of Evil Trident Artwork.png|{{Term|HWL|King of Evil Trident|link}} | |||
File:HWL Trident of Demise Artwork.png|{{Term|HWL|Trident of Demise|link}} | |||
</gallery> | </gallery> | ||
==Logos== | ==Logos== | ||
<gallery> | <gallery> | ||
File:HWL | File:HWL English Logo.png|North American English logo | ||
File:HWL | File:HWL English Logo 2.png|European English logo | ||
File:HWL | File:HWL Japanese Logo.png|Japanese logo | ||
</gallery> | </gallery> | ||
| Line 65: | Line 88: | ||
<gallery> | <gallery> | ||
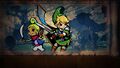
File:Linklegends.jpg|Link fighting a group of enemies | File:Linklegends.jpg|Link fighting a group of enemies | ||
File:HWL Versus Helmaroc King.jpg|Toon Link fighting | File:HWL Versus Helmaroc King.jpg|Toon Link fighting {{Plural|HWL|Miniblin|link}} and the Helmaroc King | ||
</gallery> | </gallery> | ||
==Video Gallery== | ==Video Gallery== | ||
{{Youtube|zGDEUPZNlh8|200|Reveal Trailer}} | {{Youtube|zGDEUPZNlh8|200|Reveal Trailer}} | ||
{{Youtube|BgSex5oCGmc|200|'' | {{Youtube|BgSex5oCGmc|200|''Wind Waker'' Campaign Trailer}} | ||
{{Youtube|pzQ0Xl91cHU|200|European Limited Edition Trailer}} | {{Youtube|pzQ0Xl91cHU|200|European Limited Edition Trailer}} | ||
{{Youtube|pPYjT5mfSVM|200|Japanese Promotional Trailer}} | {{Youtube|pPYjT5mfSVM|200|Japanese Promotional Trailer}} | ||
| Line 79: | Line 101: | ||
{{Youtube|M4EkT5eqnDI|200|Launch Trailer}} | {{Youtube|M4EkT5eqnDI|200|Launch Trailer}} | ||
{{Youtube|ET1fXnu_J2w|200|My Fairy Trailer}} | {{Youtube|ET1fXnu_J2w|200|My Fairy Trailer}} | ||
{{Youtube|yLO2NLGj2Q4|200| | {{Youtube|yLO2NLGj2Q4|200|{{MWWP|-}} Trailer}} | ||
{{Youtube|96Vf08ImYJk|200|WonderCon Developer Panel}} | {{Youtube|96Vf08ImYJk|200|WonderCon Developer Panel}} | ||
{{Youtube|nO_LqrwtTmg|200| | {{Youtube|nO_LqrwtTmg|200|{{LAP|-}} Trailer}} | ||
{{Youtube|jH-gM40Ddkg|200| | {{Youtube|jH-gM40Ddkg|200|{{PH&STP|-}} Trailer}} | ||
{{Youtube|o9QQyDveZxE|200|{{ALBWP|-}} Trailer}} | |||
{{clear}} | {{clear}} | ||
| Line 95: | Line 117: | ||
{{Youtube|aC6oVcxuP78|200|Medli – Rito Harp}} | {{Youtube|aC6oVcxuP78|200|Medli – Rito Harp}} | ||
{{Categories | |||
|Galleries | |||
}} | |||
Latest revision as of 15:00, 27 December 2023
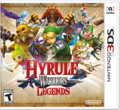
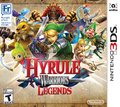
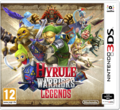
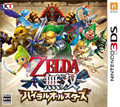
This is a gallery page featuring promotional and pre-release media from and relating to Hyrule Warriors Legends.
Box Art
-
American box art
-
Canadian box art
-
United Kingdom box art
-
Japanese box art
-
Korean box art
-
Chinese box art


Limited Editions
-

European Limited Edition box art
-

Japanese Premium Box art
-
Japanese Treasure Box art


Pre-Release
-
North American box art

Special Editions Contents and Pre-order Bonuses
-
Japanese Treasure Box edition contents
-

Character Book


Artwork
Characters
-
-
-
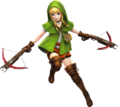
Linkle wielding the Crossbows
-
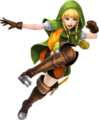
Linkle wielding the Boots
-
-

Skull Kid wielding the Ocarina
-

-
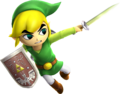
Toon Link wielding the Light Sword
-
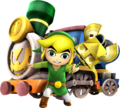
Toon Link with the Spirit Train wielding the Sand Wand
-

-
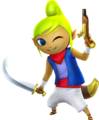
Tetra wielding the Cutlass
-

-
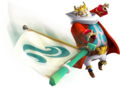
King Daphnes wielding the Sail
-

-
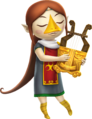
Medli wielding the Rito Harp
-

-
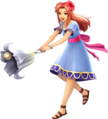
Marin wielding the Bell
-

-
Toon Zelda and a Phantom wielding the Phantom Arms
-

-

Ravio wielding the Rental Hammer
-
-
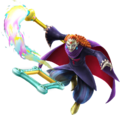
Yuga wielding the Picture Frame


Bosses


Other
-
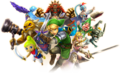
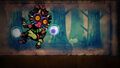
Promotional artwork
-

Cover artwork of Link
-
Cover artwork of Zelda
-

Cover artwork of Ganondorf
-
Cover artwork of Fi
-

Cover artwork of Tingle
-
Cover artwork of Tetra
-
Cover artwork of Midna
-
Cover artwork of Lana
-
Cover artwork of Darunia
-
Tetra and Link
-
The Helmaroc King with Tetra
-
-
Linkle and Twili Midna
-
-
-
-
-
-

-

-

-
-


Logos
-

North American English logo
-

European English logo
-
Japanese logo
Screenshots
-

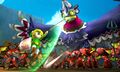
Link fighting a group of enemies
-
Toon Link fighting Miniblins and the Helmaroc King

