Bosses in Twilight Princess: Difference between revisions
Jump to navigation
Jump to search

TriforceTony (talk | contribs) m (Text replacement - "Forest Temple" to "{{Term|TPHD|Forest Temple|link}}") |
m (Text replacement - "Arbiter's Grounds (Twilight Princess)" to "Arbiter's Grounds (Dungeon)") |
||
| Line 11: | Line 11: | ||
File:TP Skull Kid Render.png|[[Skull Kid]]<br><small>''([[Sacred Grove]])''</small> | File:TP Skull Kid Render.png|[[Skull Kid]]<br><small>''([[Sacred Grove]])''</small> | ||
File:Kingbhc.jpg|[[King Bulblin]]<br><small>''([[Gerudo Desert]])''<br>''([[Hyrule Castle]])''</small> | File:Kingbhc.jpg|[[King Bulblin]]<br><small>''([[Gerudo Desert]])''<br>''([[Hyrule Castle]])''</small> | ||
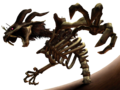
File:TP Death Sword Render.png|[[Death Sword]]<br><small>''([[Arbiter's Grounds ( | File:TP Death Sword Render.png|[[Death Sword]]<br><small>''([[Arbiter's Grounds (Dungeon)|Arbiter's Grounds]])''</small> | ||
File:TP Darkhammer Render.png|[[Darkhammer]]<br><small>''([[Snowpeak Ruins]])''</small> | File:TP Darkhammer Render.png|[[Darkhammer]]<br><small>''([[Snowpeak Ruins]])''</small> | ||
TP Darknut Render.png|[[Darknut]]<br><small>''([[Temple of Time (Twilight Princess)|Temple of Time]])''</small> | TP Darknut Render.png|[[Darknut]]<br><small>''([[Temple of Time (Twilight Princess)|Temple of Time]])''</small> | ||
| Line 23: | Line 23: | ||
File:TP Fyrus Render.png|''Twilit Igniter'': [[Fyrus]]<br><small>''([[Goron Mines]])''</small> | File:TP Fyrus Render.png|''Twilit Igniter'': [[Fyrus]]<br><small>''([[Goron Mines]])''</small> | ||
File:TP Morpheel Render.png|''Twilit Aquatic'': [[Morpheel]]<br><small>''([[Lakebed Temple]])''</small> | File:TP Morpheel Render.png|''Twilit Aquatic'': [[Morpheel]]<br><small>''([[Lakebed Temple]])''</small> | ||
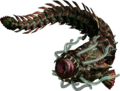
File:TP Stallord Render.png|''Twilit Fossil'': [[Stallord]]<br><small>''([[Arbiter's Grounds ( | File:TP Stallord Render.png|''Twilit Fossil'': [[Stallord]]<br><small>''([[Arbiter's Grounds (Dungeon)|Arbiter's Grounds]])''</small> | ||
File:TP Blizzeta Render.png|''Twilit Ice Mass'': [[Blizzeta]]<br><small>''([[Snowpeak Ruins]])''</small> | File:TP Blizzeta Render.png|''Twilit Ice Mass'': [[Blizzeta]]<br><small>''([[Snowpeak Ruins]])''</small> | ||
File:TP Armogohma Render.png|''Twilit Arachnid'': [[Armogohma]]<br><small>''([[Temple of Time (Twilight Princess)|Temple of Time]])''</small> | File:TP Armogohma Render.png|''Twilit Arachnid'': [[Armogohma]]<br><small>''([[Temple of Time (Twilight Princess)|Temple of Time]])''</small> | ||
Revision as of 04:08, 29 February 2020
Gallery of Bosses from The Legend of Zelda: Twilight Princess
Middle Bosses


Bosses
-

Twilit Parasite: Diababa
(Forest Temple) -

Twilit Igniter: Fyrus
(Goron Mines) -
Twilit Aquatic: Morpheel
(Lakebed Temple) -
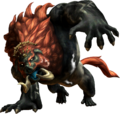
Twilit Fossil: Stallord
(Arbiter's Grounds) -
Twilit Ice Mass: Blizzeta
(Snowpeak Ruins) -

Twilit Arachnid: Armogohma
(Temple of Time) -
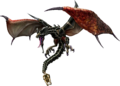
Twilit Dragon: Argorok
(City in the Sky) -
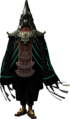
Usurper King: Zant
(Palace of Twilight)


-

Ganon's Puppet: Zelda
(Hyrule Castle) -
Dark Beast: Ganon
(Hyrule Castle) -
Dark Rider: Ganondorf
(Hyrule Field) -
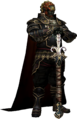
Dark Lord: Ganondorf
(Hyrule Field)


