Bosses in A Link Between Worlds: Difference between revisions
Jump to navigation
Jump to search
No edit summary |
(→Bosses: Putting in placeholders for most the bosses) |
||
| Line 4: | Line 4: | ||
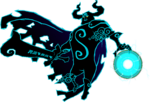
File:YugaALBW.png|[[Yuga]]<br><small>''([[Eastern Palace]])''</small> | File:YugaALBW.png|[[Yuga]]<br><small>''([[Eastern Palace]])''</small> | ||
File:Moldorm.png|[[Moldorm]]<br><small>''([[Tower of Hera]])''</small> | File:Moldorm.png|[[Moldorm]]<br><small>''([[Tower of Hera]])''</small> | ||
File:Moldorm.png|[[Helmasaur King]]<br><small>''([[Dark Palace]])''</small> | |||
File:Moldorm.png|[[Blind]]<br><small>''([[Thieves' Hideout]])''</small> | |||
File:Moldorm.png|[[Arrghus]]<br><small>''([[Swamp Palace]])''</small> | |||
File:Moldorm.png|[[Trinexx]]<br><small>''([[Turtle Rock]])''</small> | |||
File:Moldorm.png|[[Kholdstare]]<br><small>''([[Ice Palace]])''</small> | |||
File:YuGanon.PNG|[[Yuga]] (joined with [[Ganon]])<br><small>''(Lorule Castle)''</small> | File:YuGanon.PNG|[[Yuga]] (joined with [[Ganon]])<br><small>''(Lorule Castle)''</small> | ||
</gallery></center> | </gallery></center> | ||
Revision as of 15:26, 23 November 2013
This article or section is out of date.
It needs to be updated to be accurate with information available at the present time.

