Gallery:Princess Zelda: Difference between revisions
TriforceTony (talk | contribs) |
|||
| (314 intermediate revisions by 42 users not shown) | |||
| Line 1: | Line 1: | ||
This is a gallery page, featuring character art and screen-captures of [[Princess Zelda]]. | This is a gallery page, featuring character art and screen-captures of [[Princess Zelda]]. | ||
== | {{OTOC}} | ||
==Main Appearances== | |||
==={{TLoZ}}=== | ==={{TLoZ}}=== | ||
<gallery> | <gallery> | ||
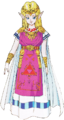
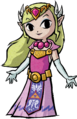
File: | File:TLoZ Princess Zelda Artwork 2.png|Princess Zelda artwork | ||
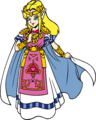
File:Princess | File:TLoZ Princess Zelda Artwork.png|Princess Zelda's artwork from the 1994 Re-Release | ||
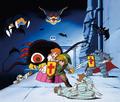
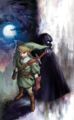
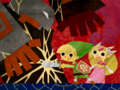
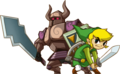
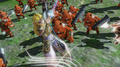
File: | File:TLoZ Link and Zelda Surrounded Artwork.png|Princess Zelda and Link surrounded by enemies | ||
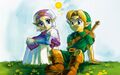
File: | File:TLoZ Link and Zelda NP Art.png|Artwork of Link and Zelda from ''Nintendo Power'' | ||
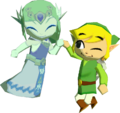
File: | File:TLoZ Zelda Holding onto Link Newtype Artwork.png|Artwork of Link and Zelda from ''Newtype'' | ||
File: | File:TLoZ Link Princess Zelda Artwork.png|{{Term|TLoZ|Link|link}} and {{Term|TLoZ|Princess Zelda|link}} | ||
File: | File:TLoZ Princess Zelda Sprite.png|{{Term|TLoZ|Princess Zelda}}, as seen in-game | ||
File: | File:TLoZ Princess Zelda Blue Sprite.png|{{Term|TLoZ|Princess Zelda}}, as seen in-game while {{Term|TLoZ|Link}} wears the {{Term|TLoZ|Blue Ring|link}} | ||
File:TLoZ Princess Zelda Red Sprite.png|{{Term|TLoZ|Princess Zelda}}, as seen in-game while {{Term|TLoZ|Link}} wears the {{Term|TLoZ|Red Ring|link}} | |||
</gallery> | </gallery> | ||
==={{TAoL}}=== | ==={{TAoL}}=== | ||
<gallery> | <gallery> | ||
File: | File:TAoL Princess Zelda and Prince of Hyrule Artwork.png|Princess Zelda I and the {{Term|TAoL|Prince of Hyrule|link}} | ||
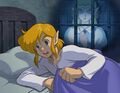
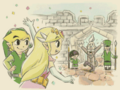
File:TAoL Link and Impa Artwork 2.png|Princess Zelda I is attacked by the {{Term|TAoL|Magician|link}} | |||
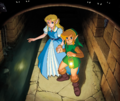
File: | File:TAoL Princess Zelda I Artwork.png|Artwork of Link and {{Term|TAoL|Impa|link}} observing Princess Zelda I | ||
File:TAoL Link Zelda and Fairy Concept Artwork.png|Princess Zelda’s concept art | |||
File: | File:TAoL Princess Zelda Sleeping Sprite.png|{{Term|TAoL|Princess Zelda}} sleeping, as seen in-game | ||
File: | File:TAoL Princess Zelda Awoken Sprite.png|{{Term|TAoL|Princess Zelda}} awake, as seen in-game | ||
File:Zelda | |||
File: | |||
</gallery> | </gallery> | ||
| Line 29: | Line 30: | ||
====Original SNES Version==== | ====Original SNES Version==== | ||
<gallery> | <gallery> | ||
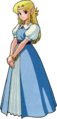
File: | File:ALttP Princess Zelda Casual Artwork 2.png|Zelda in casual clothes from {{ALttP|-}} | ||
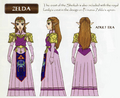
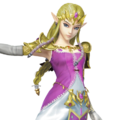
File:Princess Zelda | File:ALttP Princess Zelda Artwork 2.png|Zelda in royal clothes from A Link to the Past | ||
File:ALttP Artwork. | File:ALttP Princess Zelda Artwork 3.png|Zelda in royal clothes from A Link to the Past | ||
File: | File:ALttP Zelda Telepathy Artwork 2.png|Princess Zelda speaking to Link telepathically | ||
File: | File:ALttP Sewer Passageway Artwork 2.png|Link leading Princess Zelda through the [[Sewer Passageway]] | ||
File:ALttP Princess Zelda Sprite.png|Princess Zelda's appearance during the game | |||
File:ZeldaALttP.png|Princess Zelda as seen during the ending sequence | File:ZeldaALttP.png|Princess Zelda as seen during the ending sequence | ||
</gallery> | </gallery> | ||
| Line 39: | Line 41: | ||
====Game Boy Advance Remake==== | ====Game Boy Advance Remake==== | ||
<gallery> | <gallery> | ||
File:Princess Zelda | File:ALttP Princess Zelda Casual Artwork.png|Zelda artwork from the remake of {{ALttP|-}} | ||
File: | File:ALttP Princess Zelda Artwork.png|Princess Zelda's royal clothes from the remake of {{ALttP|-}} | ||
File: | File:ALttP Zelda Telepathy Artwork.jpg|Princess Zelda speaking to Link telepathically in the remake of {{ALttP|-}} | ||
File:Sewer | File:ALttP Sewer Passageway Artwork.png|Link leading Princess Zelda through the Sewer Passageway in the remake of {{ALttP|-}} | ||
</gallery> | </gallery> | ||
==={{OoT}}=== | ==={{OoT}}=== | ||
<gallery> | <gallery> | ||
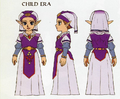
File:Zelda | File:OoT Princess Zelda Child Artwork.png|Artwork of Princess Zelda as a child from {{OoT|-}} | ||
File: | File:OoT Princess Zelda Child Model.png|Princess Zelda as a child as she appears in-game | ||
File:Escapezelda.jpg|Zelda escaping from [[Hyrule Castle]] with [[Impa]] | File:Escapezelda.jpg|Zelda escaping from [[Hyrule Castle]] with [[Impa]] | ||
File:Adult | File:OoT Adult Zelda Artwork.png|Artwork of Zelda as an Adult | ||
File:Zelda | File:OoT Princess Zelda Model.png|Adult Zelda as she appears in-game | ||
File:ZeldaOoTHQ.jpg|Adult Zelda reveals herself to [[Link]] | File:ZeldaOoTHQ.jpg|Adult Zelda reveals herself to [[Link]] | ||
File:Zelda OoT.jpg|Zelda calling the powers of the [[ | File:Zelda OoT.jpg|Zelda calling the powers of the [[Six Sages]] | ||
File:OoT Zelda Link Artwork.jpg|Artwork of | File:OoT Zelda Link Artwork.jpg|Artwork of Princess Zelda and Link as children | ||
File: | File:OoT Princess Zelda Concept Artwork.png|Concept artwork | ||
File:Zeldadulyera.png|Concept artwork | File:Zeldadulyera.png|Concept artwork | ||
</gallery> | </gallery> | ||
| Line 61: | Line 63: | ||
===={{OoT3D}}==== | ===={{OoT3D}}==== | ||
<gallery> | <gallery> | ||
File: | File:OoT3D Princess Zelda Child Artwork.png|Artwork of Princess Zelda as a child | ||
File:Princess Zelda | File:OoT3D Princess Zelda Child Render.png|Render of Princess Zelda as a child | ||
File: | File:OoT3D Princess Zelda Child.png|Princess Zelda as a child | ||
File: | File:OoT3D Zelda Escaping Promotional Screenshot.png|Zelda escaping | ||
File: | File:OoT3D Princess Zelda Model 2.png|Adult Zelda as she appears in-game | ||
File:OoT3D Adult Princess Zelda.png|Adult Zelda reveals herself to [[Link]] | |||
File:OoT3D Ganon Battle Zelda and Master Sword.jpg|Adult Zelda seen during the final battle | |||
File:OoT3D Zelda Final Battle.png|Zelda uses her powers to hold down [[Ganondorf]] in the final battle | |||
File:OoT3D Zelda Calling The Sages.png|Zelda calls on the powers of the [[Six Sages]] | |||
</gallery> | </gallery> | ||
| Line 75: | Line 81: | ||
</gallery> | </gallery> | ||
=== | ==={{OoS}} and {{OoA}}=== | ||
<gallery> | <gallery> | ||
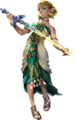
File:Zelda | File:OoS Zelda Artwork.png|Zelda from {{OoS|-}} and {{OoA|-}} | ||
File:Zelda | File:OoS Zelda Sprite.png|Princess Zelda's sprite | ||
File:OOA Credits Linked.png| Zelda and some friends rejoicing | File:Zlkiss.png|{{Term|OoS|Princess Zelda}} kissing {{Term|OoS|Link}} on the cheek | ||
File:OOS Credits Linked.png| | File:ZeldaKiss2.png|{{Term|OoS|Princess Zelda}} laughing at {{Term|OoS|Link}} after she kissed him on the cheek | ||
File:OOX Credits 5.png| Zelda gazing up at the sky | File:OOA Credits Linked.png|Zelda and some friends rejoicing | ||
File:Ooserieszelda.jpg| Concept art of Zelda | File:OOS Credits Linked.png|Zelda and some friends rejoicing | ||
File:OOX Credits 5.png|Zelda gazing up at the sky | |||
File:Ooserieszelda.jpg|Concept art of Zelda | |||
</gallery> | </gallery> | ||
==={{FS}}=== | ==={{FS}}=== | ||
<gallery> | <gallery> | ||
File:FS Zelda.png|Zelda from | File:FS Princess Zelda Artwork.png|Zelda from {{FS|-}} | ||
File: | File:FS Princess Zelda Sprite.png|Zelda's sprite front | ||
File:Zeldafs2.png|Zelda's sprite side-view | File:Zeldafs2.png|Zelda's sprite side-view | ||
File:Zeldafs3.png|Zelda's sprite back | File:Zeldafs3.png|Zelda's sprite back | ||
| Line 95: | Line 103: | ||
==={{TWW}}=== | ==={{TWW}}=== | ||
<gallery> | <gallery> | ||
File:TWW Princess Zelda.png|Zelda from ' | File:TWW Princess Zelda Artwork.png|Zelda from {{TWW|-}} | ||
File:TWW Princess Zelda Model.png|Zelda's in-game model | |||
File:Zelda Master Sword.jpg|The Master Sword falls inches near Zelda's head after Ganondorf attacks Link | File:Zelda Master Sword.jpg|The Master Sword falls inches near Zelda's head after Ganondorf attacks Link | ||
File:ZeldaWW.png|Zelda looking at [[Link]] after regaining consciousness | File:ZeldaWW.png|Zelda looking at [[Link]] after regaining consciousness | ||
File:LinkandZeldaWW.png|Zelda and Link during the final battle of | File:LinkandZeldaWW.png|Zelda and Link during the final battle of {{TWW|-}} | ||
File: | File:TWW Princess Zelda Figurine Model.png|Front view of Zelda's figurine | ||
File: | File:TWW Princess Zelda Figurine Model 2.png|Side view of Zelda's figurine | ||
File:Final Battle in Hyrule.jpg|Link along with Princess Zelda fighting Ganondorf | File:TWW Final Battle in Hyrule Artwork.jpg|Link along with Princess Zelda fighting Ganondorf | ||
</gallery> | </gallery> | ||
===={{TWWHD}}==== | ===={{TWWHD}}==== | ||
<gallery> | <gallery> | ||
File:Princess Zelda | File:TWWHD Princess Zelda Artwork.png|Zelda from {{TWWHD|-}} | ||
File:TWWHD LINE Wallpaper.jpg|Wallpaper from Nintendo of Japan's LINE account featuring Zelda | |||
</gallery> | </gallery> | ||
==={{FSA}}=== | ==={{FSA}}=== | ||
<gallery> | <gallery> | ||
File:Zelda | File:FSA Princess Zelda Sprite.png|Princess Zelda's sprite front | ||
File:Zeldafsa2.png|Princess Zelda's sprite side-view | File:Zeldafsa2.png|Princess Zelda's sprite side-view | ||
File:Zeldafsa3.png|Princess Zelda's sprite back | File:Zeldafsa3.png|Princess Zelda's sprite back | ||
| Line 118: | Line 128: | ||
==={{TMC}}=== | ==={{TMC}}=== | ||
<gallery> | <gallery> | ||
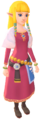
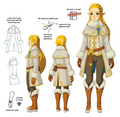
File: | File:TMC Princess Zelda Artwork.png|Artwork of Princess Zelda | ||
File: | File:TMC Princess Zelda Sprite.png|Princess Zelda's walking sprite | ||
File: | File:TMC Princess Zelda Cheer Sprite.png|Princess Zelda's cheering sprite | ||
File:Princess Zelda Figurine. | File:TMC Princess Zelda Sprite 2.png|Princess Zelda turned to stone | ||
File:TMC Princess Zelda Figurine Sprite.png|Princess Zelda's figurine | |||
</gallery> | </gallery> | ||
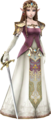
==={{TP}}=== | ==={{TP}}=== | ||
<gallery> | <gallery> | ||
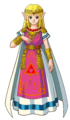
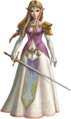
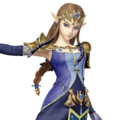
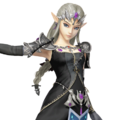
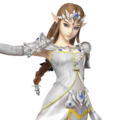
File: | File:TP Princess Zelda Render.png|Zelda render | ||
File:Robezelda.png|Zelda in her robes | File:Robezelda.png|Zelda in her robes | ||
File:Zelda | File:TP Princess Zelda Robed Model.png|Zelda in her robes, revealing her head | ||
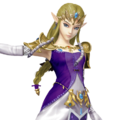
File: | File:TP Princess Zelda Model.png|Zelda as she appears in-game | ||
File: | File:TP Possessed Zelda Render.png|Zelda being possessed by [[Ganondorf]] | ||
File:Royal Sword.png|Zelda's sword | |||
File:Robbed Figure.jpg|Robed Zelda | File:Robbed Figure.jpg|Robed Zelda | ||
File:Zelda Imprisoned.jpg|Zelda imprisoned atop [[Hyrule Castle]] | File:Zelda Imprisoned.jpg|Zelda imprisoned atop [[Hyrule Castle]] | ||
File:Zelda Imprisoned 2.jpg|Zelda imprisoned atop Hyrule Castle | File:Zelda Imprisoned 2.jpg|Zelda imprisoned atop Hyrule Castle | ||
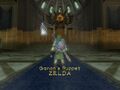
File: | File:PuppetZelda TP.jpg|[[Possessed Zelda|Ganon's Puppet: Zelda]] | ||
File:Zelda TP 3.jpg|Zelda on the throne at the end of | File:Zelda TP 3.jpg|Zelda on the throne at the end of {{TP|-}} | ||
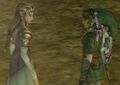
File: | File:Link and Zelda TP.jpg|Link and Zelda look at each other | ||
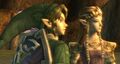
File: | File:Link and Zelda TP2.jpg|Link and Zelda look at [[Hyrule Castle]] | ||
File:Ganon's Attack.jpg|Zelda calls upon the power of the [[Spirits of Light]] | File:Ganon's Attack.jpg|Zelda calls upon the power of the [[Spirits of Light]] | ||
File: | File:Tp lightarrow1.jpg|Zelda receiving the [[Light Arrow]]s from the Light Spirits | ||
File: | File:Tp lightarrow2.jpg|Zelda receives the Light Arrows | ||
File: | File:Princess Zelda Asking TP.jpg|Zelda asks for [[Link]]'s help for the final battle | ||
File:Zeldaandlink.jpg|Link accepts Zelda's call for help | File:Zeldaandlink.jpg|Link accepts Zelda's call for help | ||
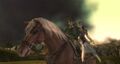
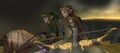
File:Link Zelda TP.jpg|Link and Zelda sitting on [[Epona]] | File:Link Zelda TP.jpg|Link and Zelda sitting on [[Epona]] | ||
File: | File:Zelda LightArrow.jpg|Zelda getting ready to fire a [[Light Arrow]] at [[Ganondorf]] | ||
File:Link Zelda | File:TP Link and Zelda.jpg|Link and Zelda watch Ganondorf fall off his horse | ||
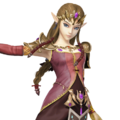
File:Zelda TP.jpg|Zelda as seen in | File:Zelda TP.jpg|Zelda as seen in {{TP|-}} | ||
File:Zelda TP 2.jpg|Zelda bids [[Midna]] farewell | File:Zelda TP 2.jpg|Zelda bids [[Midna]] farewell | ||
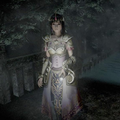
File: | File:TP Artwork.png|Princess Zelda on the key artwork of {{TP|-}} | ||
File: | File:TP Princess Zelda Concept Art 1.jpg|Zelda concept art from {{TP|-}} | ||
File:Cloaked Zelda.png|Concept art of Zelda in her robes. | File:TP Cloaked Zelda Concept Art.png|Concept art of Zelda in her robes. | ||
File:TP | File:TP Link Princess Zelda Artwork.png|Cloaked Zelda along with Link from {{TP|-}} | ||
</gallery> | </gallery> | ||
===={{TPHD}}==== | ===={{TPHD}}==== | ||
<gallery> | <gallery> | ||
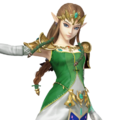
File:TPHD Zelda Artwork.png|Artwork of Zelda for | File:TPHD Zelda Artwork.png|Artwork of Zelda for {{TPHD|-}} | ||
File:TPHD Princess Zelda Model.png|Zelda as she appears in-game | |||
</gallery> | </gallery> | ||
==={{PH}}=== | ==={{PH}}=== | ||
<gallery> | <gallery> | ||
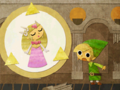
File:PhantomHourglassintro04.png|Princess Zelda during the opening scene of | File:PhantomHourglassintro04.png|Princess Zelda during the opening scene of {{PH|-}} | ||
File:PhantomHourglassintro06.png|Princess Zelda during the opening scene of | File:PhantomHourglassintro06.png|Princess Zelda during the opening scene of {{PH|-}} | ||
</gallery> | </gallery> | ||
==={{ST}}=== | ==={{ST}}=== | ||
<gallery> | <gallery> | ||
File:ST Zelda.png|Zelda from | File:ST Princess Zelda Artwork.png|{{Term|ST|Princess Zelda|display=Zelda}} from {{ST|-}} | ||
File: | File:ST Princess Zelda Artwork 2.png|{{Term|ST|Princess Zelda|display=Zelda}} as a ghost | ||
File:ST | File:ST Princess Zelda Spirit Flute Model.png|{{Term|ST|Princess Zelda|display=Zelda}} holding the {{Term|ST|Spirit Flute}}, as seen in-game | ||
File:ST | File:ST Zelda Ghost Model.png|{{Term|ST|Princess Zelda|display=Zelda}} as a ghost, as seen in-game | ||
File:ST | File:ST Zelda & Link High Five Model.png|{{Term|ST|Princess Zelda|display=Zelda}}'s ghost and {{Term|ST|Link}} sharing a high-five, as seen in-game | ||
File:ST Phantom.png|Zelda as a | File:ST Possessed Zelda Model.png|Zelda possessed by Malladus | ||
File: | File:ST Princess Zelda Model.png|{{Term|ST|Princess Zelda|display=Zelda}} before singing the Sacred Duet | ||
File:ST Link Phantom.png|Zelda as a Phantom alongside Link | File:ST Phantom Zelda Artwork.png|{{Term|ST|Princess Zelda|display=Zelda}} as a {{Term|ST|Phantom|link}} | ||
File:ST Artwork.jpg|Link and Princess Zelda riding the Spirit Train | File:ST Link and Phantom Zelda Artwork.png|{{Term|ST|Princess Zelda|display=Zelda}} as a {{Term|ST|Phantom}} alongside {{Term|ST|Link}} | ||
File:ST Credits 1.png|Princess Zelda returning to Hyrule Castle at the end of the game | File:ST Link Phantom Zelda Artwork 2.png|{{Term|ST|Princess Zelda|display=Zelda}} as a {{Term|ST|Phantom}} alongside {{Term|ST|Link}} | ||
File:LinkZelda ST.png|Zelda accompanying Link while he rides the | File:ST Key Artwork.jpg|{{Term|ST|Link}} and {{Term|ST|Princess Zelda}} riding the {{Term|ST|Spirit Train|link}} | ||
File:ST Credits 1.png|{{Term|ST|Princess Zelda}} returning to {{Term|ST|Hyrule Castle}} at the end of the game | |||
File:LinkZelda ST.png|{{Term|ST|Princess Zelda|display=Zelda}} accompanying {{Term|ST|Link}} while he rides the {{Term|ST|Spirit Train}} | |||
File:Toon-zelda-head.png|{{A&A}} book character sketch | File:Toon-zelda-head.png|{{A&A}} book character sketch | ||
File:Toon-Zelda-logo2.png| | File:Toon-Zelda-logo2.png|{{A&A|-}} second book character sketch | ||
</gallery> | </gallery> | ||
==={{SS}}=== | ==={{SS}}=== | ||
<gallery> | <gallery> | ||
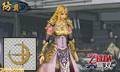
File:Zelda | File:SS Zelda Icon.png|Icon of {{Term|SS|Zelda}} | ||
File: | File:SS Zelda Icon 2.png|{{Term|SS|Map}} icon of {{Term|SS|Zelda}} | ||
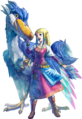
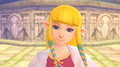
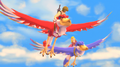
File:Zelda | File:SS Zelda Loftwing Artwork.png|Artwork of Zelda with her [[Loftwing]] | ||
File:Zelda | File:SS Zelda Artwork.png|Artwork of Zelda holding the [[Goddess's Harp]] | ||
File:Zelda | File:SS Zelda Model.png|Zelda's in-game model | ||
File:Zelda | File:SS Zelda Model 2.png|Zelda's in-game model | ||
File:Zelda | File:SS Zelda Model 3.png|Zelda's in-game model | ||
File:Link | File:SS Zelda Model 4.png|Zelda's in-game model | ||
File:SS Zelda Promotional Screenshot.png|Screenshot of Zelda from E3 2011 | |||
File:SS Link Zelda Flying Promotional Screenshot.png|Screenshot of Link and Zelda flying from E3 2011 | |||
File:SS Zelda Wing Ceremony.png|Zelda at the [[Wing Ceremony]] | File:SS Zelda Wing Ceremony.png|Zelda at the [[Wing Ceremony]] | ||
File:SSZeldaConcept3.jpg|Concept art of Zelda from {{HH}} | File:SSZeldaConcept3.jpg|Concept art of Zelda from {{HH}} | ||
File: | File:SS Zelda White Dress Concept Art.png|Concept art of Zelda | ||
File:Zelda falling.png|Zelda falling toward [[The Imprisoned]] | File:Zelda falling.png|Zelda falling toward [[The Imprisoned]] | ||
File:SSZeldaConcept1.jpg|Concept art of Zelda from | File:SSZeldaConcept1.jpg|Concept art of Zelda from {{HH|-}} | ||
File:SSZeldaConcept2.jpg|Concept art of Zelda from ' | File:SSZeldaConcept2.jpg|Concept art of Zelda from {{HH|-}} | ||
</gallery> | |||
===={{SSHD}}==== | |||
<gallery> | |||
File:SSHD Zelda Model.png|Zelda's in-game model | |||
File:SSHD Zelda Icon.png|Icon of {{Term|SSHD|Zelda}} | |||
</gallery> | </gallery> | ||
==={{ALBW}}=== | ==={{ALBW}}=== | ||
<gallery> | <gallery> | ||
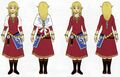
File:ALBW Zelda.png|Artwork of Princess Zelda | File:ALBW Princess Zelda Artwork.png|Artwork of {{Term|ALBW|Princess Zelda}} | ||
File:ALBW Zelda Portrait.png|Portrait of Princess Zelda | File:ALBW Princess Zelda Model.png|{{Term|ALBW|Princess Zelda}} as seen in-game | ||
File:ALBW | File:ALBW Zelda Portrait.png|{{Term|ALBW|Yuga}}'s {{Term|ALBW|Portrait|link}} of {{Term|ALBW|Princess Zelda}} | ||
File:ALBW | File:ALBW The Demon King.jpg|{{Term|ALBW|Princess Zelda}} being abducted by {{Term|ALBW|Ganon}} as seen in the painting ''"The Demon King"'' | ||
File:ALBW The Triforce, Split Apart.jpg|{{Term|ALBW|Princess Zelda}} with {{Term|ALBW|Link}} in the painting ''"The Triforce, Split Apart"'' | |||
</gallery> | </gallery> | ||
==={{BotW}}=== | ==={{BotW|-}}=== | ||
<gallery> | <gallery> | ||
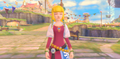
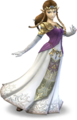
File:BotW Zelda Artwork.png|Artwork of Zelda | File:BotW Zelda Artwork.png|Artwork of Princess Zelda | ||
File:BotW | File:BotW Zelda The Champions' Ballad Artwork.png|Artwork of Zelda | ||
File:BotW Zelda Model.png|Zelda, as seen in-game | File:BotW Zelda Concept Artwork.png|Zelda in her Ceremonial Robe | ||
File:BotW Zelda Model 2.png|Zelda wearing a white dress | File:BotW Expansion Pass Artwork.png|Artwork of Zelda and Link from the Expansion Pass | ||
File:BotW Zelda Bathing.png|Zelda | File:BotW Game Informer Cover Official Illustration.png|Zelda and Link holding the [[Master Sword]] | ||
File:BotW The Champions' Ballad Artwork.png|Zelda alongside the [[Champions]] from [[The Champions' Ballad]] | |||
File:BotW Picture of the Champions.png|The photo taken of the Champions | |||
File:BotW Champion Revali's Song.png|Zelda meeting with Revali | |||
File:BotW Twitter Official One-Year Anniversary Illustration Artwork.jpg|Zelda spending time with Link in Hyrule Field | |||
File:BotW Princess Zelda Model.png|Zelda, as seen in-game | |||
File:BotW Princess Zelda Model 2.png|Zelda wearing a white dress | |||
File:BotW Princess Zelda Model 3.png|Zelda in her blue royal gown | |||
File:BotW Zelda Bathing.png|Zelda praying at a spring | |||
File:BotW Grieving Zelda.png|Link consoling a grieving Zelda | File:BotW Grieving Zelda.png|Link consoling a grieving Zelda | ||
File:BotW Link Speaking to Zelda.png|Zelda speaking with Link | File:BotW Link Speaking to Zelda.png|Zelda speaking with Link | ||
File:BotW Zelda Defending Link.png|Zelda defending Link from a [[Guardian | File:BotW Zelda Defending Link.png|Zelda defending Link from a [[Guardian Stalker]] | ||
File:BotW Zelda Viewing Hyrule Castle.png|Zelda viewing Hyrule Castle from a distance | File:BotW Zelda Viewing Hyrule Castle.png|Zelda viewing Hyrule Castle from a distance | ||
File:BotW | File:BotW Zelda Freed.png|{{Term|BotW|Princess Zelda}} appearing to seal {{Term|BotW|Dark Beast Ganon}} away | ||
File:BotW Link Princess Zelda Reunion.png|{{Term|BotW|Princess Zelda}} and {{Term|BotW|Link}} reuniting | |||
File:BotW Link and Zelda.png|{{Term|BotW|Link}} and {{Term|BotW|Princess Zelda}} speaking after defeating {{Term|BotW|Dark Beast Ganon}} | |||
File:BotW Link Princess Zelda Departing Hyrule Castle.png|{{Term|BotW|Link}} and {{Term|BotW|Princess Zelda}} leaving {{Term|BotW|Hyrule Castle (Breath of the Wild)}} | |||
File:BotW Link Princess Zelda Viewing Hyrule Castle.png|{{Term|BotW|Link}} and {{Term|BotW|Princess Zelda}} looking back at {{Term|BotW|Hyrule Castle (Breath of the Wild)}} | |||
File:Zelda's Formal Wear.webp|Concept art of Zelda in her dress | |||
File:BotW Zelda Concept Artwork.jpg|Concept art of Zelda in casual clothes | |||
File:Zelda's Ceremonial Robe Artwork.webp|Concept art of Zelda in her ceremonial robe | |||
File:BotW WinterWear Zelda.webp|Concept art of Zelda's winter wear | |||
File:BotW LINE Holiday 2017 Wallpaper.jpg|Wallpaper celebrating Holiday 2017 from Nintendo of Japan's LINE account featuring Zelda | |||
</gallery> | </gallery> | ||
==={{TotK|-}}=== | |||
==={{ | |||
<gallery> | <gallery> | ||
File:Zelda Game & Watch.png|Zelda in {{ | File:TotK Zelda Artwork.png|Artwork of Princess Zelda | ||
File:TotK Zelda Artwork 2.png|Artwork of Princess Zelda | |||
File:TotK Zelda Artwork 3.png|Artwork of Princess Zelda with the {{Term|TotK|Decayed Master Sword|link}} | |||
File:TotK Zelda Artwork 4.png|Artwork of Princess Zelda | |||
File:TotK Zelda Model.png|Zelda as seen in-game | |||
File:TotK Zelda Introduction.png|{{Term|TotK|Princess Zelda}}'s introduction | |||
File:TotK Zelda Time Power.png|{{Term|TotK|Zelda}} channeling her {{Term|TotK|Time}} powers | |||
File:TotK Sage of Time.png|{{Term|TotK|Princess Zelda}} during the {{Term|TotK|Imprisoning War|link}} | |||
File:TotK Draconification.png|{{Term|TotK|Princess Zelda}} transforming into the {{Term|TotK|Light Dragon|link}} | |||
</gallery> | |||
==Other Appearances== | |||
==={{ZG&W}}=== | |||
<gallery> | |||
File:Zelda Game & Watch.png|Zelda in {{ZG&W}} | |||
</gallery> | </gallery> | ||
===TV Series=== | ===TV Series=== | ||
<gallery> | <gallery> | ||
File:Zelda (animated series).png|Princess Zelda | File:Zelda (animated series).png|Princess Zelda from {{TLoZ|TV Series}} | ||
File:Zelda 2 (Underworld Connections).png|Princess Zelda | File:Zelda 2 (Underworld Connections).png|Princess Zelda from {{TLoZ|TV Series|-}} | ||
File:Bow (Cold Spells).png|Princess Zelda | File:Bow (Cold Spells).png|Princess Zelda from {{TLoZ|TV Series|-}} | ||
File:Princess Zelda (Captain N).png|Princess Zelda | File:Princess Zelda (Captain N).png|Princess Zelda from {{CN|-}} | ||
File:Zelda's Bow (Captain N).png|Princess Zelda | File:Zelda's Bow (Captain N).png|Princess Zelda from {{CN|-}} | ||
</gallery> | |||
===Game Book=== | |||
<gallery> | |||
File:Zelda from Mirage Castle's Battle.jpg|Princess Zelda from Mirage Castle's Battle | |||
</gallery> | </gallery> | ||
===Comics and Manga=== | ===Comics and Manga=== | ||
<gallery> | <gallery> | ||
File:Zelda | File:ALttPC Zelda 1.jpg|Zelda as seen in the {{ALttP|Ishinomori}} | ||
File:Zelda Nintendo Adventure Books.png|Princess Zelda, as seen in the [[Nintendo Adventure Books]] | File:Zelda Nintendo Adventure Books.png|Princess Zelda, as seen in the [[Nintendo Adventure Books]] | ||
File:Zelda's Dagger.png|Princess Zelda, as seen in the Nintendo Adventure Books | File:Zelda's Dagger.png|Princess Zelda, as seen in the Nintendo Adventure Books | ||
File: | File:LA (Cagiva) Princess Zelda.jpg|{{Term|LA (Cagiva)|Princess Zelda}} from the {{LA|Cagiva}} | ||
File:Zelda Riruto.jpg|Zelda as she appears in {{OoR}} | |||
File:PrincessZeldaTMCManga.png|Princess Zelda from The Minish Cap {{TMC|Himekawa}} manga | |||
File:Princess Zelda in Phantom Hourglass manga.png|Princess Zelda from Phantom Hourglass {{TMC|Himekawa}} manga | |||
File:OoT3D Himekawa Promotional Manga 6.png|Zelda as she appears in the {{OoT3D}} promotional manga by Akira Himekawa | |||
File:OoT3D Himekawa Promotional Manga 7.png|Zelda as she appears in the ''Ocarina of Time 3D'' promotional manga by Akira Himekawa | |||
File:OoT3D Himekawa Promotional Manga 11.png|Zelda as she appears in the ''Ocarina of Time 3D'' promotional manga by Akira Himekawa | |||
File:OoT3D Himekawa Promotional Manga 12.png|Zelda as she appears in the ''Ocarina of Time 3D'' promotional manga by Akira Himekawa | |||
File:OoT3D Himekawa Promotional Manga 14.png|Zelda as she appears in the ''Ocarina of Time 3D'' promotional manga by Akira Himekawa | |||
File:FS (Himekawa) Zelda Artwork.png|Zelda in the Four Swords manga by Akira Himekawa | |||
File:FS (Himekawa) Zelda Artwork 2.png|Zelda in the Four Swords manga by Akira Himekawa without flowers | |||
</gallery> | </gallery> | ||
=== | ===Strategy Guides=== | ||
<gallery> | <gallery> | ||
File: | File:TLoZ Princess Zelda Million Publishing Artwork.png|Princess Zelda Million Publishing guide artwork | ||
File: | File:TLoZ Link and Zelda Million Publishing Artwork.png|Princess Zelda with Link | ||
File: | File:TLoZ Link and Zelda Million Publishing Artwork 2.png|Zelda and Link holding up Triforces | ||
</gallery> | </gallery> | ||
==={{TFoE|-}}=== | |||
<gallery> | <gallery> | ||
File: | File:TFoE Zelda Cutscene Sprite.png|Zelda from {{TFoE|-}} | ||
</gallery> | |||
==={{TWoG|-}}=== | |||
<gallery> | |||
File:TWoG Zelda Cutscene Sprite.png|Zelda from {{TWoG|-}} | |||
File:TWoG Zelda Sprite.png|Zelda's sprite from {{TWoG|-}} | |||
</gallery> | |||
==={{ZA|-}}=== | |||
<gallery> | |||
File:ZA Zelda Sprite.png|Zelda's sprite from {{ZA|-}} | |||
</gallery> | |||
==={{BSTLoZ|-}}=== | |||
<gallery> | |||
File:BSTLoZ Zelda Sprite.png|Zelda from {{BSTLoZ|-}} | |||
</gallery> | |||
==={{SSBM|-}}=== | |||
<gallery> | |||
File:SSBM Zelda Render.png|Zelda | |||
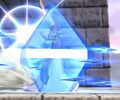
File:SSBM Zelda Trophy Model.png|The Zelda Trophy | |||
File:SSBM Zelda (Smash) Trophy Model.png|The Zelda [Smash] Trophy | |||
File:SSBM Zelda (Smash) Trophy Blue Model.png|The second Zelda [Smash] Trophy | |||
File:SSBM Zelda Alternative Costume 1.png|Alternate costume | File:SSBM Zelda Alternative Costume 1.png|Alternate costume | ||
File:SSBM Zelda Alternative Costume 2.png|Alternate costume | File:SSBM Zelda Alternative Costume 2.png|Alternate costume | ||
File:SSBM Zelda Alternative Costume 3.png|Alternate costume | File:SSBM Zelda Alternative Costume 3.png|Alternate costume | ||
File:SSBM Zelda Alternative Costume 4.png|Alternate costume | File:SSBM Zelda Alternative Costume 4.png|Alternate costume | ||
File: | File:SSBM Zelda Icon.png|Zelda Stock Icon | ||
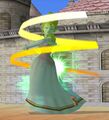
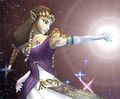
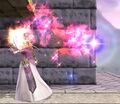
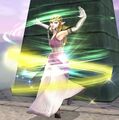
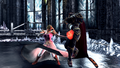
File:Din's Fire (SSBM).jpg|Zelda using a ranged version of Din's Fire | File:Din's Fire (SSBM).jpg|Zelda using a ranged version of Din's Fire | ||
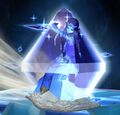
File:Farore's Wind (SSBM).jpg|Zelda using Farore's Wind | File:Farore's Wind (SSBM).jpg|Zelda using Farore's Wind | ||
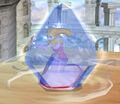
File:Nayru's Love (SSBM).jpg|Zelda using Nayru's Love | File:Nayru's Love (SSBM).jpg|Zelda using Nayru's Love | ||
</gallery> | </gallery> | ||
==={{SSBB|-}}=== | |||
<gallery> | <gallery> | ||
File:SSBB Zelda Model.png|Zelda as she appears in | File:SSBB Zelda Model.png|Zelda as she appears in {{SSBB|-}} | ||
File:SSBB Zelda Trophy Model.png|The Zelda Trophy | |||
File:SSBB Light Arrow (Zelda) Trophy Model.png|The Light Arrow Trophy, featuring Zelda | |||
File:SSBB Zelda Sheik Alternative Costume 1.png|Zelda/Sheik Alternate costume | File:SSBB Zelda Sheik Alternative Costume 1.png|Zelda/Sheik Alternate costume | ||
File:SSBB Zelda Sheik Alternative Costume 2.png|Zelda/Sheik Alternate costume | File:SSBB Zelda Sheik Alternative Costume 2.png|Zelda/Sheik Alternate costume | ||
| Line 280: | Line 368: | ||
File:SSBB Zelda Sheik Alternative Costume 4.png|Zelda/Sheik Alternate costume | File:SSBB Zelda Sheik Alternative Costume 4.png|Zelda/Sheik Alternate costume | ||
File:SSBB Zelda Sheik Alternative Costume 5.png|Zelda/Sheik Alternate costume | File:SSBB Zelda Sheik Alternative Costume 5.png|Zelda/Sheik Alternate costume | ||
File: | File:SSBB Zelda Icon.png|Zelda Stock Icon | ||
File:Din's Fire (SSBB).jpg|Zelda using Din's Fire | |||
File:Din's Fire (SSBB).jpg|Zelda using Din's Fire | File:Farore's Wind.jpg|Zelda using Farore's Wind | ||
File:Farore's Wind.jpg|Zelda using Farore's Wind | File:Nayru's Love (SSBB).jpg|Zelda using Nayru's Love | ||
File:Nayru's Love (SSBB).jpg|Zelda using Nayru's Love | File:Zelda 070625b-l.jpg|Zelda attacking | ||
File:Zelda 070625b-l.jpg|Zelda attacking | File:Zeldaalt.jpg|Two of Zelda's alternate costumes | ||
File:Zeldaalt.jpg|Zelda's alternate | |||
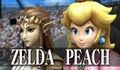
File:Zelda and Peach.jpg|Zelda standing next to Peach in the [[The Subspace Emissary]] | File:Zelda and Peach.jpg|Zelda standing next to Peach in the [[The Subspace Emissary]] | ||
</gallery> | </gallery> | ||
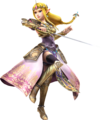
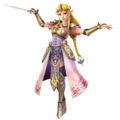
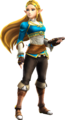
===={{SSB4}} | ==={{HW|-}}=== | ||
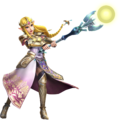
<gallery> | |||
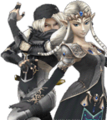
File:HW Story Frame 1.png|Link and Zelda artwork | |||
File:HW Zelda Render.png|Render of Zelda | |||
File:HW Zelda Polished Rapier.png|Zelda wielding the Polished Rapier | |||
File:HW Zelda Baton Render.png|Zelda wielding the Wind Waker | |||
File:HW Zelda Old Dominion Rod Artwork.png|Zelda wielding the Old Dominion Rod | |||
File:HW Zelda Era of Twilight Robes Render.png|Zelda's Era of Twilight Robes | |||
File:HW Zelda Era of the Hero of Time Robes Render.png|Zelda's Era of the Hero of Time Robes | |||
File:HW Zelda Skyloft Robes Render.png|Zelda's Skyloft Robes | |||
File:HW Zelda Ilia's Clothes Render.png|Zelda's [[Ilia]]'s Clothes | |||
File:HW Zelda Standard Robes (Master Quest) Model.png|Zelda's Standard Robes (Master Quest) | |||
File:HW Zelda Standard Robes (Twilight) Model.png|Zelda's Standard Robes (Twilight) | |||
File:HW Zelda Bunny Hood Model.png|Zelda's [[Bunny Hood]] Costume from the Termina Map | |||
File:HW Zelda Standard Robes (Boss) Model.png|Standard Robes (Boss) | |||
File:HWDE Zelda Icon.png|Zelda portrait | |||
File:HWDE Zelda Portrait 2.png|Zelda portrait | |||
File:HWDE Zelda Portrait 3.png|Zelda portrait | |||
File:HWDE Zelda Portrait 4.png|Zelda portrait | |||
File:HWDE Zelda Portrait 5.png|Zelda portrait | |||
File:HWDE Dark Zelda Portrait.png|Dark Zelda portrait | |||
File:HWDE Wizzro Zelda Icon.png|Portrait of Wizzro disguised as Zelda | |||
File:HWDE Wizzro Zelda Icon 2.png|Portrait of Wizzro disguised as Zelda | |||
File:HWDE Zelda Mini Map Icon.png|Zelda Mini Map icon | |||
File:HWDE Dark Zelda Mini Map Icon.png|Dark Zelda Mini Map icon | |||
File:HWDE Wizzro Zelda Mini Map Icon.png|Wizzro disguised as Zelda Mini Map icon | |||
File:HW Zelda Adventure Mode Icon.png|Zelda Adventure Mode icon | |||
File:HW Zelda Head Adventure Mode Icon.png|Zelda head Adventure Mode icon | |||
File:HW Zelda Concept Artwork.png|Concept artwork of Zelda | |||
File:HW Zelda Concept Artwork 2.png|Concept artwork of Zelda | |||
File:HW Zelda Concept Artwork 3.png|Concept artwork of Zelda | |||
File:HW Zelda Concept Artwork 4.png|Concept artwork of Zelda | |||
File:HW Zelda Nightgown Concept Artwork.png|Concept artwork of Zelda in her nightgown | |||
</gallery> | |||
===={{HW|L|-}}==== | |||
<gallery> | |||
File:HWL Zelda Cover Artwork.png|Cover artwork | |||
File:HWL Zelda Koholint Map Standard Robes Model.png|Zelda's Standard Robes (Koholint) | |||
File:HWL Zelda Grand Travels Standard Robes Model.png|Zelda's Standard Robes (Grand Travels) | |||
</gallery> | |||
===={{HW|DE|-}}==== | |||
<gallery> | |||
File:HWDE Zelda BotW Costume Render.png|Zelda's Era of the Wilds Robes | |||
File:HWDE Zelda BotW Costume Model.png|Zelda's Era of the Wilds Model | |||
File:HWDE Zelda Standard Robes (Great Sea) Model.png|Zelda's Standard Robes (Great Sea) | |||
File:HWDE Zelda Standard Robes (Wind Waker) Model.png|Zelda's Standard Robes (Wind Waker) | |||
File:HWDE Zelda BotW Costume.jpg|Zelda using the Bow of Light in her Era of the Wilds Robes | |||
File:HWDE Zelda BotW Costume 2.jpg|Zelda using the Bow of Light in her Era of the Wilds Robes | |||
File:HWDE Zelda 8-Bit White Sword?.png|Zelda wielding the 8-Bit White Sword? | |||
File:HWDE Zelda Gloomy Rapier.png|Zelda wielding the Gloomy Rapier | |||
File:HWDE Zelda 8-Bit Recorder.png|Zelda wielding the 8-Bit Recorder | |||
File:HWDE Zelda Liquid Glorious Baton.png|Zelda wielding the Liquid Glorious Baton | |||
File:HWDE Zelda Volcanic Dominion Rod.png|Zelda wielding the Volcanic Dominion Rod | |||
</gallery> | |||
====Video Gallery==== | |||
{{Youtube|h-cOQcIJGp4|200|Zelda - Rapier gameplay}} | |||
{{Youtube|n5FqyNh9Ua8|200|Zelda - Baton gameplay}} | |||
{{clear}} | |||
==={{SSB4}}=== | |||
<gallery> | <gallery> | ||
File:SSB4 - Zelda Artwork.png|Zelda | File:SSB4 - Zelda Artwork.png|Render of Zelda | ||
File:SSBfN3DS Zelda Trophy Model.png|Zelda Trophy {{SSB4|3DS|-}} | |||
File:SSBfWU Zelda Trophy Model.png|Zelda Trophy from {{SSB4|Wii U|-}} | |||
File:SSBfN3DS Zelda (Alt.) Trophy Model.png|Zelda (Alt.) Trophy from {{SSB4|3DS|-}} | |||
File:SSBfWU Zelda (Alt.) Trophy Model.png|Zelda (Alt.) Trophy from {{SSB4|Wii U|-}} | |||
File:SSBfWU Light Arrow (Zelda) Trophy Model.png|Light Arrow Trophy featuring Zelda from {{SSB4|Wii U|-}} | |||
File:SSB4 Zelda Alternative Costume 1.png|Alternate costume | File:SSB4 Zelda Alternative Costume 1.png|Alternate costume | ||
File:SSB4 Zelda Alternative Costume 2.png|Alternate costume | File:SSB4 Zelda Alternative Costume 2.png|Alternate costume | ||
| Line 301: | Line 454: | ||
File:SSB4 Zelda Alternative Costume 6.png|Alternate costume | File:SSB4 Zelda Alternative Costume 6.png|Alternate costume | ||
File:SSB4 Zelda Alternative Costume 7.png|Alternate costume | File:SSB4 Zelda Alternative Costume 7.png|Alternate costume | ||
File: | File:SSB4 Zelda Icon.png|Zelda stock icon | ||
File: | File:SSB4 Din's Fire.jpg|Zelda using Din's Fire from {{SSB4|Wii U|-}} | ||
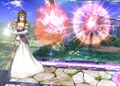
File: | File:SSB4 Farore's Wind.jpg|Zelda using Farore's Wind from {{SSB4|Wii U|-}} | ||
File: | File:SSB4 Nayru's Love.jpg|Zelda using Nayru's Love from {{SSB4|Wii U|-}} | ||
File: | </gallery> | ||
File: | |||
File: | ==={{SSBU|-}}=== | ||
File: | <gallery> | ||
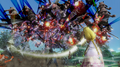
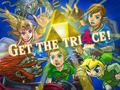
File: | File:SSBU Get the Tri4ce! Artwork.png|Artwork of Zelda and other [[Fighter]]s reaching for the [[Triforce]] | ||
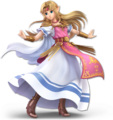
File:SSBU Zelda Stock Artwork.png|Stock artwork of Zelda | |||
File:SSBU Zelda Render.png|Render of Zelda | |||
File:SSBU Zelda Render 2.png|Alternate render | |||
File:SSBU Zelda Render 3.png|Alternate render | |||
File:SSBU Zelda Render 4.png|Alternate render | |||
File:SSBU Zelda Render 5.png|Alternate render | |||
File:SSBU Zelda Render 6.png|Alternate render | |||
File:SSBU Zelda Render 7.png|Alternate render | |||
File:SSBU Zelda Render 8.png|Alternate render | |||
File:SSBU Zelda Stock Icon.png|Stock icon of Zelda | |||
File:SSBU Zelda Stock Icon 2.png|Alternate Stock icon of Zelda | |||
File:SSBU Zelda Stock Icon 3.png|Alternate Stock icon of Zelda | |||
File:SSBU Zelda Stock Icon 4.png|Alternate Stock icon of Zelda | |||
File:SSBU Zelda Stock Icon 5.png|Alternate Stock icon of Zelda | |||
File:SSBU Zelda Stock Icon 6.png|Alternate Stock icon of Zelda | |||
File:SSBU Zelda Stock Icon 7.png|Alternate Stock icon of Zelda | |||
File:SSBU Zelda Stock Icon 8.png|Alternate Stock icon of Zelda | |||
File:SSBU Zelda.png|Closeup of Zelda | |||
File:SSBU Zelda 2.png|Zelda in an alternate costume | |||
File:SSBU Zelda 3.png|Zelda attacking King Dedede | |||
File:SSBU Zelda 4.png|Zelda beside Pichu | |||
File:SSBU Zelda 5.png|Zelda using [[Farore's Wind]] | |||
File:SSBU Zelda 6.png|Zelda in an alternate costume | |||
File:SSBU Zelda 7.png|Zelda using the Super Scope against Yoshi | |||
File:SSBU Zelda 8.png|Zelda high-fiving Rosalina | |||
File:SSBU Zelda 9.png|Zelda waving as Kapp'n transports Donkey Kong | |||
File:SSBU Zelda 10.png | |||
File:SSBU Zelda Triforce Of Wisdom.png|Zelda performing her Final Smash | |||
File:SSBU Zelda Phantom Slash.png|Zelda using the Phantom Slash | |||
</gallery> | </gallery> | ||
==={{ | ====Video Gallery==== | ||
{{Youtube|fMDgFn3qQ_c|200|Zelda gameplay trailer}} | |||
{{Clear}} | |||
==={{CoH|-}}=== | |||
<gallery> | <gallery> | ||
File: | File:CoH Zelda Artwork.png|Artwork of {{Term|CoH|Princess Zelda}} | ||
File:CoH Zelda Sprite.png|{{Term|CoH|Princess Zelda}} as seen in-game | |||
File: | |||
</gallery> | </gallery> | ||
==={{HWAoC|-}}=== | |||
<gallery> | <gallery> | ||
File: | File:HWAoC Zelda Model.png|{{Term|HWAoC|Zelda}}, as seen in-game | ||
File: | File:Zelda in the Ceremonial Robe.jpg|{{Term|HWAoC|Zelda's Ceremonial Robes}}, as seen in-game | ||
File: | File:HWAoC Zelda's Winter Clothes Model.png|{{Term|HWAoC|Zelda's Winter Clothes}}, as seen in-game | ||
File: | File:HWAoC Zelda Artwork.png|Artwork of Zelda | ||
File: | File:HWAoC Zelda Portrait Icon.png|{{Term|HWAoC|Princess Zelda}}'s portrait | ||
File:HWAoC Zelda Portrait Icon 2.png|{{Term|HWAoC|Princess Zelda}}'s portrait | |||
File:HWAoC Zelda Portrait Icon 3.png|{{Term|HWAoC|Princess Zelda}}'s portrait | |||
File:HWAoC Zelda Portrait Icon 4.png|{{Term|HWAoC|Princess Zelda}}'s portrait | |||
File:HWAoC Zelda Portrait Icon 5.png|{{Term|HWAoC|Princess Zelda}}'s portrait | |||
File:HWAoC Zelda Introduction.png|{{Term|HWAoC|Princess Zelda}}'s introduction | |||
File:HWAoC Zelda Sealing Power Artwork.png|Artwork of {{Term|HWAoC|Princess Zelda}} after unlocking her Sealing Power | |||
File:HWAoC Zelda Ceremonial Portrait Icon.png|{{Term|HWAoC|Princess Zelda}}'s pre-awakening portrait | |||
File:HWAoC Zelda Ceremonial Portrait Icon 2.png|{{Term|HWAoC|Princess Zelda}}'s pre-awakening portrait | |||
File:HWAoC Zelda Ceremonial Portrait Icon 3.png|{{Term|HWAoC|Princess Zelda}}'s pre-awakening portrait | |||
File:HWAoC Zelda Ceremonial Portrait Icon 4.png|{{Term|HWAoC|Princess Zelda}}'s pre-awakening portrait | |||
File:HWAoC Zelda Ceremonial Portrait Icon 5.png|{{Term|HWAoC|Princess Zelda}}'s pre-awakening portrait | |||
File:HWAoC Zelda Awakened Portrait Icon.png|{{Term|HWAoC|Princess Zelda}}'s awakened portrait | |||
File:HWAoC Zelda Awakened Portrait Icon 2.png|{{Term|HWAoC|Princess Zelda}}'s awakened portrait | |||
File:HWAoC Zelda Awakened Portrait Icon 3.png|{{Term|HWAoC|Princess Zelda}}'s awakened portrait | |||
File:HWAoC Zelda Awakened Portrait Icon 4.png|{{Term|HWAoC|Princess Zelda}}'s awakened portrait | |||
File:HWAoC Zelda Awakened Portrait Icon 5.png|{{Term|HWAoC|Princess Zelda}}'s awakened portrait | |||
File:HWAoC Key Artwork 2.jpg|{{Term|HWAoC|Princess Zelda}} alongside {{Term|HWAoC|Link}} and the {{Term|HWAoC|Champions|display=Champions}} | |||
File:HWAoC Zelda Icon.png|Icon of {{Term|HWAoC|Princess Zelda}} | |||
File:HWAoC Zelda Icon 2.png|Icon of {{Term|HWAoC|Princess Zelda}} after visiting the {{Term|HWAoC|Spring of Courage}} | |||
File:HWAoC Zelda Promotional Screenshot.png|A promotional screenshot of Zelda | |||
File:HWAoC Zelda Promotional Screenshot 2.png|A promotional screenshot of Zelda | |||
File:HWAoC Zelda Promotional Screenshot 3.png|A promotional screenshot of Zelda | |||
</gallery> | </gallery> | ||
| Line 359: | Line 539: | ||
File:New Nintendo 3DS Zelda.png|Zelda from the New Nintendo 3DS commercial | File:New Nintendo 3DS Zelda.png|Zelda from the New Nintendo 3DS commercial | ||
File:New Nintendo 3DS Zelda 2.png|Alternate shot of Zelda from the New Nintendo 3DS commercial | File:New Nintendo 3DS Zelda 2.png|Alternate shot of Zelda from the New Nintendo 3DS commercial | ||
File:Nintendo TOKYO Zelda Render.png|{{BotW|-}} Zelda from the Nintendo TOKYO store | |||
Nintendo TOKYO TLoZ Promotional Artwork.png|Promotional artwork for ''The Legend of Zelda'' merchandise series from Nintendo TOKYO store featuring Zelda | |||
File:TekkenTagTournament2zelda 005.png|Nina Williams dressed as Zelda fighting King dressed as Ganondorf in ''Tekken Tag Tournament 2: Wii U Edition'' | File:TekkenTagTournament2zelda 005.png|Nina Williams dressed as Zelda fighting King dressed as Ganondorf in ''Tekken Tag Tournament 2: Wii U Edition'' | ||
File:FFMoBW - Miu (Zelda Costume).png|Miu Hinasaki dressed as Zelda in ''Fatal Frame: Maiden of Black Water'' | File:FFMoBW - Miu (Zelda Costume).png|Miu Hinasaki dressed as Zelda in ''Fatal Frame: Maiden of Black Water'' | ||
File:SWC3 Zelda Costume.png|The female protagonist dressed as Zelda in ''Samurai Warriors Chronicles 3'' | File:SWC3 Zelda Costume.png|The female protagonist dressed as Zelda in ''Samurai Warriors Chronicles 3'' | ||
File:ALBW Developers ND 2015 New Year Greeting Card.jpg|2015 New Year greeting card for ''Nintendo Dream'' made by developers of {{ALBW|-}} | |||
File:SMM Zelda Costume Sprite.png|Zelda costume from ''Super Mario Maker'' | File:SMM Zelda Costume Sprite.png|Zelda costume from ''Super Mario Maker'' | ||
File:SMM Zelda and Shield Sprite.png|Zelda and Shield costume from ''Super Mario Maker'' | File:SMM Zelda and Shield Sprite.png|Zelda and Shield costume from ''Super Mario Maker'' | ||
File:SSB Zelda amiibo.png|Zelda amiibo from the {{SSB|-}} series | |||
File:TLoZ Zelda (The Wind Waker) amiibo.png|Zelda amiibo from {{TLoZ|-}} series | |||
File:TLoZ Zelda (Breath of the Wild) amiibo.png|Zelda [[amiibo]] from {{BotW|-}} series | |||
File:BotW Japan Expo Artwork.png|Japan Expo 2017 artwork featuring Zelda from {{BotW|-}} | |||
File:NI Calendar 4 2020.jpg|The monthly calendar of April 2020 featuring Zelda from Nintendo Co., Ltd.'s Instagram account | |||
</gallery> | </gallery> | ||
{{Categories | |||
|Galleries | |||
}} | |||
[[Category:Princess Zelda]] | [[Category:Princess Zelda]] | ||
Latest revision as of 02:10, 24 May 2024
This is a gallery page, featuring character art and screen-captures of Princess Zelda.
Main Appearances
The Legend of Zelda
-

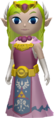
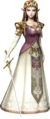
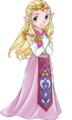
Princess Zelda artwork
-

Princess Zelda's artwork from the 1994 Re-Release
-
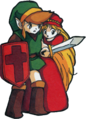
Princess Zelda and Link surrounded by enemies
-
Artwork of Link and Zelda from Nintendo Power
-
Artwork of Link and Zelda from Newtype
-
Link and Princess Zelda
-

Princess Zelda, as seen in-game
-

Princess Zelda, as seen in-game while Link wears the Blue Ring
-

Princess Zelda, as seen in-game while Link wears the Red Ring


The Adventure of Link
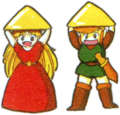
-

Princess Zelda I and the Prince of Hyrule
-
Princess Zelda I is attacked by the Magician
-
Artwork of Link and Impa observing Princess Zelda I
-
Princess Zelda’s concept art
-

Princess Zelda sleeping, as seen in-game
-

Princess Zelda awake, as seen in-game


A Link to the Past
Original SNES Version
-
Zelda in casual clothes from A Link to the Past
-
Zelda in royal clothes from A Link to the Past
-
Zelda in royal clothes from A Link to the Past
-
Princess Zelda speaking to Link telepathically
-
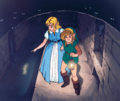
Link leading Princess Zelda through the Sewer Passageway
-

Princess Zelda's appearance during the game
-

Princess Zelda as seen during the ending sequence


Game Boy Advance Remake
-
Zelda artwork from the remake of A Link to the Past
-
Princess Zelda's royal clothes from the remake of A Link to the Past
-
Princess Zelda speaking to Link telepathically in the remake of A Link to the Past
-
Link leading Princess Zelda through the Sewer Passageway in the remake of A Link to the Past


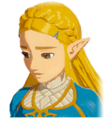
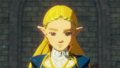
Ocarina of Time
-

Artwork of Princess Zelda as a child from Ocarina of Time
-
Princess Zelda as a child as she appears in-game
-

Zelda escaping from Hyrule Castle with Impa
-
Artwork of Zelda as an Adult
-

Adult Zelda as she appears in-game
-
Adult Zelda reveals herself to Link
-
Zelda calling the powers of the Six Sages
-
Artwork of Princess Zelda and Link as children
-
Concept artwork
-
Concept artwork


Ocarina of Time 3D
-

Artwork of Princess Zelda as a child
-

Render of Princess Zelda as a child
-
Princess Zelda as a child
-
Zelda escaping
-
Adult Zelda as she appears in-game
-
Adult Zelda reveals herself to Link
-
Adult Zelda seen during the final battle
-
Zelda uses her powers to hold down Ganondorf in the final battle
-
Zelda calls on the powers of the Six Sages


Majora's Mask
-
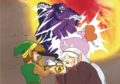
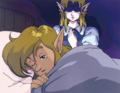
Memories of Princess Zelda
-

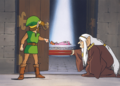
Zelda teaching Link the Song of Time
-
Zelda appears in Clock Town through the use of cheat codes


Oracle of Seasons and Oracle of Ages
-
Zelda from Oracle of Seasons and Oracle of Ages
-

Princess Zelda's sprite
-

Princess Zelda kissing Link on the cheek
-

Princess Zelda laughing at Link after she kissed him on the cheek
-

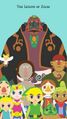
Zelda and some friends rejoicing
-
Zelda and some friends rejoicing
-

Zelda gazing up at the sky
-
Concept art of Zelda


Four Swords
-
Zelda from Four Swords
-

Zelda's sprite front
-

Zelda's sprite side-view
-

Zelda's sprite back


The Wind Waker
-
Zelda from The Wind Waker
-

Zelda's in-game model
-
The Master Sword falls inches near Zelda's head after Ganondorf attacks Link
-
Zelda looking at Link after regaining consciousness
-
Zelda and Link during the final battle of The Wind Waker
-
Front view of Zelda's figurine
-
Side view of Zelda's figurine
-
Link along with Princess Zelda fighting Ganondorf


The Wind Waker HD
-

Zelda from The Wind Waker HD
-
Wallpaper from Nintendo of Japan's LINE account featuring Zelda


Four Swords Adventures
-

Princess Zelda's sprite front
-

Princess Zelda's sprite side-view
-

Princess Zelda's sprite back


The Minish Cap
-

Artwork of Princess Zelda
-

Princess Zelda's walking sprite
-

Princess Zelda's cheering sprite
-

Princess Zelda turned to stone
-

Princess Zelda's figurine

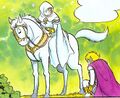
Twilight Princess
-
Zelda render
-
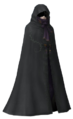
Zelda in her robes
-
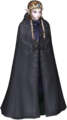
Zelda in her robes, revealing her head
-

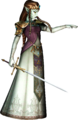
Zelda as she appears in-game
-
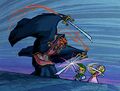
Zelda being possessed by Ganondorf
-
Zelda's sword
-
Robed Zelda
-
Zelda imprisoned atop Hyrule Castle
-
Zelda imprisoned atop Hyrule Castle
-
-
Zelda on the throne at the end of Twilight Princess
-
Link and Zelda look at each other
-
Link and Zelda look at Hyrule Castle
-
Zelda calls upon the power of the Spirits of Light
-

Zelda receiving the Light Arrows from the Light Spirits
-
Zelda receives the Light Arrows
-
Zelda asks for Link's help for the final battle
-
Link accepts Zelda's call for help
-
Link and Zelda sitting on Epona
-
Zelda getting ready to fire a Light Arrow at Ganondorf
-
Link and Zelda watch Ganondorf fall off his horse
-
Zelda as seen in Twilight Princess
-
Zelda bids Midna farewell
-
Princess Zelda on the key artwork of Twilight Princess
-
Zelda concept art from Twilight Princess
-
Concept art of Zelda in her robes.
-
Cloaked Zelda along with Link from Twilight Princess


Twilight Princess HD
-
Artwork of Zelda for Twilight Princess HD
-
Zelda as she appears in-game


Phantom Hourglass
-
Princess Zelda during the opening scene of Phantom Hourglass
-
Princess Zelda during the opening scene of Phantom Hourglass


Spirit Tracks
-

Zelda from Spirit Tracks
-

Zelda as a ghost
-

Zelda holding the Spirit Flute, as seen in-game
-

Zelda as a ghost, as seen in-game
-
Zelda's ghost and Link sharing a high-five, as seen in-game
-

Zelda possessed by Malladus
-
Zelda before singing the Sacred Duet
-
Zelda as a Phantom
-
Zelda as a Phantom alongside Link
-

Zelda as a Phantom alongside Link
-

Link and Princess Zelda riding the Spirit Train
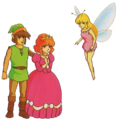
-
Princess Zelda returning to Hyrule Castle at the end of the game
-
Zelda accompanying Link while he rides the Spirit Train
-

Art & Artifacts book character sketch
-

Art & Artifacts second book character sketch


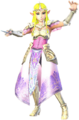
Skyward Sword
-

Icon of Zelda
-

Map icon of Zelda
-
Artwork of Zelda with her Loftwing
-

Artwork of Zelda holding the Goddess's Harp
-
Zelda's in-game model
-
Zelda's in-game model
-

Zelda's in-game model
-

Zelda's in-game model
-
Screenshot of Zelda from E3 2011
-
Screenshot of Link and Zelda flying from E3 2011
-
Zelda at the Wing Ceremony
-
Concept art of Zelda from Hyrule Historia
-
Concept art of Zelda
-
Zelda falling toward The Imprisoned
-
Concept art of Zelda from Hyrule Historia
-
Concept art of Zelda from Hyrule Historia


Skyward Sword HD
-
Zelda's in-game model
-

Icon of Zelda
A Link Between Worlds
-
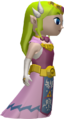
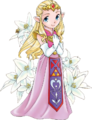
Artwork of Princess Zelda
-

Princess Zelda as seen in-game
-
Yuga's Painting of Princess Zelda
-
Princess Zelda being abducted by Ganon as seen in the painting "The Demon King"
-
Princess Zelda with Link in the painting "The Triforce, Split Apart"


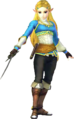
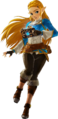
Breath of the Wild
-
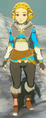
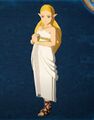
Artwork of Princess Zelda
-

Artwork of Zelda
-
Zelda in her Ceremonial Robe
-
Artwork of Zelda and Link from the Expansion Pass
-

Zelda and Link holding the Master Sword
-
Zelda alongside the Champions from The Champions' Ballad
-
The photo taken of the Champions
-
Zelda meeting with Revali
-
Zelda spending time with Link in Hyrule Field
-
Zelda, as seen in-game
-

Zelda wearing a white dress
-

Zelda in her blue royal gown
-
Zelda praying at a spring
-
Link consoling a grieving Zelda
-
Zelda speaking with Link
-
Zelda defending Link from a Guardian Stalker
-
Zelda viewing Hyrule Castle from a distance
-
Zelda appearing to seal Dark Beast Ganon away
-
Zelda and Link reuniting
-
Link and Zelda speaking after defeating Dark Beast Ganon
-
Link and Zelda leaving Hyrule Castle
-
Link and Zelda looking back at Hyrule Castle
-
Concept art of Zelda in her dress
-
Concept art of Zelda in casual clothes
-
Concept art of Zelda in her ceremonial robe
-
Concept art of Zelda's winter wear
-

Wallpaper celebrating Holiday 2017 from Nintendo of Japan's LINE account featuring Zelda


Tears of the Kingdom
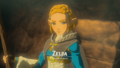
-
Artwork of Princess Zelda
-

Artwork of Princess Zelda
-
Artwork of Princess Zelda with the Decayed Master Sword
-
Artwork of Princess Zelda
-
Zelda as seen in-game
-
Zelda's introduction
-
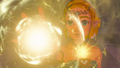
Zelda channeling her Time powers
-
Zelda during the Imprisoning War
-
Zelda transforming into the Light Dragon


Other Appearances
Zelda (Game & Watch)
-

Zelda in Zelda (Game & Watch)

TV Series
-

Princess Zelda from The Legend of Zelda TV series
-
Princess Zelda from The Legend of Zelda
-
Princess Zelda from The Legend of Zelda
-
Princess Zelda from Captain N: The Game Master
-
Princess Zelda from Captain N: The Game Master
.png)
.png)
.png)
.png)
.png)
Game Book
-
Princess Zelda from Mirage Castle's Battle

Comics and Manga
-
Zelda as seen in the A Link to the Past comic by Shotaro Ishinomori
-

Princess Zelda, as seen in the Nintendo Adventure Books
-
Princess Zelda, as seen in the Nintendo Adventure Books
-
Princess Zelda from the Link's Awakening manga by Ataru Cagiva
-
Zelda as she appears in Oath of Riruto
-

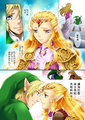
Princess Zelda from The Minish Cap The Minish Cap manga by Akira Himekawa manga
-

Princess Zelda from Phantom Hourglass The Minish Cap manga by Akira Himekawa manga
-
Zelda as she appears in the Ocarina of Time 3D promotional manga by Akira Himekawa
-
Zelda as she appears in the Ocarina of Time 3D promotional manga by Akira Himekawa
-
Zelda as she appears in the Ocarina of Time 3D promotional manga by Akira Himekawa
-
Zelda as she appears in the Ocarina of Time 3D promotional manga by Akira Himekawa
-
Zelda as she appears in the Ocarina of Time 3D promotional manga by Akira Himekawa
-
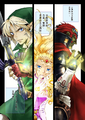
Zelda in the Four Swords manga by Akira Himekawa
-
Zelda in the Four Swords manga by Akira Himekawa without flowers


_Princess_Zelda.jpg)


_Zelda_Artwork.png)
_Zelda_Artwork_2.png)
Strategy Guides
-

Princess Zelda Million Publishing guide artwork
-
Princess Zelda with Link
-
Zelda and Link holding up Triforces


The Faces of Evil
-
Zelda from The Faces of Evil
The Wand of Gamelon
-
Zelda from The Wand of Gamelon
-
Zelda's sprite from The Wand of Gamelon
Zelda's Adventure
-

Zelda's sprite from Zelda's Adventure
BS The Legend of Zelda
-

Zelda from BS The Legend of Zelda
Super Smash Bros. Melee
-

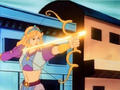
Zelda
-
The Zelda Trophy
-
![The Zelda [Smash] Trophy](//cdn.wikimg.net/en/zeldawiki/images/thumb/6/6e/SSBM_Zelda_%28Smash%29_Trophy_Model.png/84px-SSBM_Zelda_%28Smash%29_Trophy_Model.png)
The Zelda [Smash] Trophy
-
![The second Zelda [Smash] Trophy](//cdn.wikimg.net/en/zeldawiki/images/thumb/1/16/SSBM_Zelda_%28Smash%29_Trophy_Blue_Model.png/120px-SSBM_Zelda_%28Smash%29_Trophy_Blue_Model.png)
The second Zelda [Smash] Trophy
-
Alternate costume
-
Alternate costume
-
Alternate costume
-
Alternate costume
-

Zelda Stock Icon
-
Zelda using a ranged version of Din's Fire
-
Zelda using Farore's Wind
-
Zelda using Nayru's Love


![The Zelda [Smash] Trophy](/wiki/File:SSBM_Zelda_(Smash)_Trophy_Model.png)
![The second Zelda [Smash] Trophy](/wiki/File:SSBM_Zelda_(Smash)_Trophy_Blue_Model.png)


.jpg)
.jpg)
.jpg)
Super Smash Bros. Brawl
-
Zelda as she appears in Super Smash Bros. Brawl
-
The Zelda Trophy
-
The Light Arrow Trophy, featuring Zelda
-
Zelda/Sheik Alternate costume
-
Zelda/Sheik Alternate costume
-
Zelda/Sheik Alternate costume
-

Zelda/Sheik Alternate costume
-
Zelda/Sheik Alternate costume
-

Zelda Stock Icon
-
Zelda using Din's Fire
-

Zelda using Farore's Wind
-
Zelda using Nayru's Love
-
Zelda attacking
-
Two of Zelda's alternate costumes
-
Zelda standing next to Peach in the The Subspace Emissary


.jpg)

.jpg)


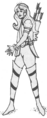
Hyrule Warriors
-
Link and Zelda artwork
-
Render of Zelda
-
Zelda wielding the Polished Rapier
-
Zelda wielding the Wind Waker
-
Zelda wielding the Old Dominion Rod
-
Zelda's Era of Twilight Robes
-

Zelda's Era of the Hero of Time Robes
-

Zelda's Skyloft Robes
-

Zelda's Ilia's Clothes
-
Zelda's Standard Robes (Master Quest)
-
Zelda's Standard Robes (Twilight)
-
Zelda's Bunny Hood Costume from the Termina Map
-
Standard Robes (Boss)
-
Zelda portrait
-
Zelda portrait
-
Zelda portrait
-

Zelda portrait
-
Zelda portrait
-

Dark Zelda portrait
-

Portrait of Wizzro disguised as Zelda
-
Portrait of Wizzro disguised as Zelda
-

Zelda Mini Map icon
-

Dark Zelda Mini Map icon
-

Wizzro disguised as Zelda Mini Map icon
-

Zelda Adventure Mode icon
-

Zelda head Adventure Mode icon
-
Concept artwork of Zelda
-
Concept artwork of Zelda
-
Concept artwork of Zelda
-
Concept artwork of Zelda
-
Concept artwork of Zelda in her nightgown


_Model.png)
_Model.png)

_Model.png)


Hyrule Warriors Legends
-
Cover artwork
-
Zelda's Standard Robes (Koholint)
-

Zelda's Standard Robes (Grand Travels)


Hyrule Warriors: Definitive Edition
-
Zelda's Era of the Wilds Robes
-
Zelda's Era of the Wilds Model
-
Zelda's Standard Robes (Great Sea)
-

Zelda's Standard Robes (Wind Waker)
-
Zelda using the Bow of Light in her Era of the Wilds Robes
-
Zelda using the Bow of Light in her Era of the Wilds Robes
-
Zelda wielding the 8-Bit White Sword?
-
Zelda wielding the Gloomy Rapier
-
Zelda wielding the 8-Bit Recorder
-
Zelda wielding the Liquid Glorious Baton
-
Zelda wielding the Volcanic Dominion Rod


_Model.png)
_Model.png)


Video Gallery
Super Smash Bros. for Nintendo 3DS / Wii U
-
Render of Zelda
-
Zelda Trophy Super Smash Bros. for Nintendo 3DS
-
Zelda Trophy from Super Smash Bros. for Wii U
-
Zelda (Alt.) Trophy from Super Smash Bros. for Nintendo 3DS
-
Zelda (Alt.) Trophy from Super Smash Bros. for Wii U
-
Light Arrow Trophy featuring Zelda from Super Smash Bros. for Wii U
-
Alternate costume
-
Alternate costume
-
Alternate costume
-
Alternate costume
-
Alternate costume
-
Alternate costume
-
Alternate costume
-

Zelda stock icon
-
Zelda using Din's Fire from Super Smash Bros. for Wii U
-
Zelda using Farore's Wind from Super Smash Bros. for Wii U
-
Zelda using Nayru's Love from Super Smash Bros. for Wii U


_Trophy_Model.png)
_Trophy_Model.png)


Super Smash Bros. Ultimate
-
-

Stock artwork of Zelda
-
Render of Zelda
-
Alternate render
-
Alternate render
-
Alternate render
-
Alternate render
-
Alternate render
-
Alternate render
-
Alternate render
-

Stock icon of Zelda
-

Alternate Stock icon of Zelda
-

Alternate Stock icon of Zelda
-

Alternate Stock icon of Zelda
-

Alternate Stock icon of Zelda
-

Alternate Stock icon of Zelda
-

Alternate Stock icon of Zelda
-

Alternate Stock icon of Zelda
-

Closeup of Zelda
-
Zelda in an alternate costume
-
Zelda attacking King Dedede
-
Zelda beside Pichu
-
Zelda using Farore's Wind
-
Zelda in an alternate costume
-
Zelda using the Super Scope against Yoshi
-
Zelda high-fiving Rosalina
-
Zelda waving as Kapp'n transports Donkey Kong
-
-
Zelda performing her Final Smash
-
Zelda using the Phantom Slash


Video Gallery
Cadence of Hyrule
-
Artwork of Zelda
-

Zelda as seen in-game

Hyrule Warriors: Age of Calamity
-
Zelda, as seen in-game
-
Zelda's Ceremonial Robes, as seen in-game
-

Zelda's Winter Clothes, as seen in-game
-
Artwork of Zelda
-

Zelda's portrait
-

Zelda's portrait
-

Zelda's portrait
-
Zelda's portrait
-

Zelda's portrait
-
Zelda's introduction
-

Artwork of Zelda after unlocking her Sealing Power
-
Zelda's pre-awakening portrait
-
Zelda's pre-awakening portrait
-
Zelda's pre-awakening portrait
-
Zelda's pre-awakening portrait
-
Zelda's pre-awakening portrait
-
Zelda's awakened portrait
-

Zelda's awakened portrait
-
Zelda's awakened portrait
-
Zelda's awakened portrait
-
Zelda's awakened portrait
-
Zelda alongside Link and the Champions
-

Icon of Zelda
-

Icon of Zelda after visiting the Spring of Courage
-
A promotional screenshot of Zelda
-
A promotional screenshot of Zelda
-
A promotional screenshot of Zelda


Other Appearances
-

Zelda from the New Nintendo 3DS commercial
-
Alternate shot of Zelda from the New Nintendo 3DS commercial
-
Breath of the Wild Zelda from the Nintendo TOKYO store
-
Promotional artwork for The Legend of Zelda merchandise series from Nintendo TOKYO store featuring Zelda
-
Nina Williams dressed as Zelda fighting King dressed as Ganondorf in Tekken Tag Tournament 2: Wii U Edition
-
Miu Hinasaki dressed as Zelda in Fatal Frame: Maiden of Black Water
-
The female protagonist dressed as Zelda in Samurai Warriors Chronicles 3
-
2015 New Year greeting card for Nintendo Dream made by developers of A Link Between Worlds
-

Zelda costume from Super Mario Maker
-

Zelda and Shield costume from Super Mario Maker
-
Zelda amiibo from the Super Smash Bros. series
-
Zelda amiibo from The Legend of Zelda series
-

Zelda amiibo from Breath of the Wild series
-

Japan Expo 2017 artwork featuring Zelda from Breath of the Wild
-
The monthly calendar of April 2020 featuring Zelda from Nintendo Co., Ltd.'s Instagram account


.png)


_amiibo.png)
_amiibo.png)

