|
|
| (281 intermediate revisions by 50 users not shown) |
| Line 1: |
Line 1: |
| {{Future game}} | | {{Infobox Item |
| {{Item
| | |type= |
| |name = Material
| | |image= |
| |type = | | {{Media |
| |image = [[File:TFH Friendly Token.png]] | | |Sprite BotW= File:BotW Material Icon.png |
| |caption = A Friendly Token from ''Tri Force Heroes''
| | |Sprite TotK= File:TotK Material Icon.png |
| |game = {{TFH}}<br>{{BotW}}
| |
| |other = {{HW}}<br>{{HWL}} | |
| |cost = | |
| |uses =
| |
| |comp = [[Spoils]]<br>[[Treasure]]<br>[[Ingredient]]
| |
| |sample =
| |
| |theme music =
| |
| }} | | }} |
| '''Materials''' are a recurring type of item in {{LZS|Series}} used in creating new items.
| | |caption= |
| | |game= TFH, BotW, TotK |
| | |other= HW, HWL, HWAoC |
| | |cost= |
| | |uses= |
| | |comp= {{List|{{Plural|Series|Spoil|link}}, {{Term|Series|Treasure|link}}, {{Term|Series|Ingredient|link}}}} |
| | |sample= |
| | |theme= |
| | }} |
| | {{Term/Store|Material|Materials|Series, TFH, BotW, HW, HWL, HWDE|plural}} are a recurring type of item in {{TLoZ|Series}} used in creating new items.<ref>{{Cite|Materials|Tutorial|HWDE}}</ref><ref>{{Cite|Materials|Inventory|BotW}}</ref>{{Name Ref|TFH}} |
|
| |
|
| ==Location and Uses== | | ==Location and Uses== |
| ===''Tri Force Heroes''=== | | ==={{TFH|-}}=== |
| Materials in {{TFH}} are primarily found throughout the [[Drablands]], although they can also be received as prizes for completing certain tasks or mini-games. Typically, at the end of a Level each Link is allowed to open one chest from a set of three, which contain two common Materials and one rare Material specific to that Level. Once the region's boss has been defeated, the Links can undertake [[Drablands Challenge]]s that reward a different set of Materials. Materials are necessary for crafting [[Outfit]]s to wear in the Drablands, which can be tailored at [[Madame Couture's]] by providing a recipe of Materials and a certain amount of [[Rupee]]s.
| | {{Main|Magical Material}} |
| | {{Plural|TFH|Magical Material|link}} are used to craft various {{Plural|TFH|Outfit|link}} at {{Term|TFH|Madame Couture's|link}}. |
| | |
| | ====List of {{Plural|TFH|Magical Material}}==== |
| | {{Gallery List|Items |
| | |TFH= Antique Coin, Fabled Butterfly, Friendly Token, Gold Dust, Mystery Jade, Royal Ring |
| | }} |
| | :[[File:TFH Hytopian Silk Icon.png|x26px|link=Magical Material]] [[Magical Material|See more Magical Materials in ''Tri Force Heroes'']] |
|
| |
|
| Rarer Materials, used to make more powerful Outfits,<ref>{{Cite web|quote= So, as you clear courses in this game, you're going to receive materials. And you use those materials to go and then make these costumes. [...] And of course to create the really powerful costumes, you need special materials. And you're only going to get those special materials on the really difficult courses. [...] So what I'd like to do today is introduce one of those more difficult courses, which again, once you clear you'll get this special material, that allows you to create one of the more powerful suits in the game.|author= Hiromasa Shikata|published= June 18, 2015|retrieved=August 22, 2015|url= https://www.youtube.com/watch?v=FnQl8A2vx4k|title= Nintendo Treehouse Live @ E3 2015 Day 3 The Legend of Zelda: Tri Force Heroes|site= YouTube|type= Video}}</ref> can also be acquired as rewards and prizes through other means. Materials can be won as prizes from the [[Daily Riches]] mini-game, and purchased as goods from the [[Street Merchant]] in town.<!--should we mention the Hytopian Silk the captain gives you?--> The [[Freebie]] and [[Frilly Fabric]] Materials are exclusive to these places, respectively. Materials can also be won by winning matches in the [[Coliseum]]; however, the rarity of the Material received is random. There is also a 20% chance (40% in the 2.0.0 update) that the winner may win an exclusive, gold-ranked Material specific to the Coliseum's arena, such as the [[Supple Leaf]] from the [[Coliseum#Woodlands|Woodlands]] arena. Link can also receive these rare Materials from [[King Tuft]] whenever he completes all of the Drablands Challenges in a given Area,<ref>{{Cite|Oh! Ah yes, I hear you have conquered a Drablands challenge... Why didn't you say something sooner! So modest! The mark of a true hero, I say. As promised, your reward for besting the Drablands challenge of the Woodlands. Use it well!|King Tuft|TFH}}</ref> however he can only receive one Material per Area in this way.
| | ==={{BotW|-}}=== |
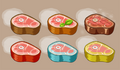
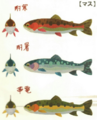
| | Materials in {{BotW}} can be found all throughout Hyrule, after defeating enemies, in Treasure Chests, or hunting for food. They cover a wide variety of items, and as such have a wide variety of uses. Materials can sometimes be eaten raw, but are best cooked together to create much more nourishing [[Food#Breath of the Wild|Food]], that restore more hearts and have other positive effects. Each type of Material occupies its own slot. There is a maximum capacity of 999 Materials per slot.<ref>{{Cite Web|url= https://youtu.be/sGUSY0IoSHs?t=268|title= BotW Glitches & Tricks: Hold Smuggling, and Dead Link Inventory.|author= Kleric|site= YouTube}}</ref> Materials are also used to have the [[Great Fairy#Breath of the Wild|Great Fairies]] upgrade [[armor]]. |
|
| |
|
| In the 2.1.0 update, Hero Points can be earned through completing Levels that the player did not initially vote for. These points can then be presented to the Street Merchant for free Materials; the kind he will give will be the Materials that Link still needs to craft unfinished Outfits. Through this, it is also possible to receive the rare, gold-ranked Materials normally only given by King Tuft or through the Coliseum. [[Friendly Token]]s are not given through this way. Once Link has obtained all the necessary Materials to make the remaining Outfits (excluding those requiring Friendly Tokens), the Street Merchant will no longer give free Materials.
| | Materials can be sold for Rupees as well. The listed value is the price a merchant will pay Link for the item. Buying these items from most merchants will cost Link four times this value; [[Beedle]] will charge five times this value. Select materials may also be exchanged for [[Mon]] by [[Kilton]]. |
|
| |
|
| Friendly Tokens are Materials normally exclusive to the [[Faux Hero]], as rewards for completing Levels alongside other players over local [[multiplayer]] or Download Play. The Faux Hero will only give one Friendly Token per friend. In the 2.0.0 update however, it is possible to purchase Friendly Tokens from the Street Merchant after lifting the curse off of [[Princess Styla]].<ref>{{Cite|Whoa! You did it!! So you finally broke the princess's awful curse, did ya? Good one. This town's finally lively again, and I'm turning a fine profit. It's all thanks to you, pal. Oh, that reminds me. I've decided to finally put "those" up for sale, starting today. What are "those"? They're called... Friendly Tokens!! They're special treasures, ya know. Rare. Valuable. Ya can't find these things, even in the Drablands.|Street Merchant|TFH}}</ref> Following the update, Friendly Tokens can also be obtained as one of the possible prizes from Daily Riches.
| | ====List of Materials==== |
| | {{Gallery List|Items |
| | |BotW= Ancient Core, Diamond, Giant Ancient Core, Naydra's Scale, Silent Princess, Star Fragment |
| | }} |
| | :[[File:BotW Material Icon.png|x26px|link=Materials in Breath of the Wild]] [[Materials in Breath of the Wild|See more Materials in ''Breath of the Wild'']] |
|
| |
|
| The Lady's Materials—the [[Lady's Glasses]], [[Lady's Collar]], and the [[Lady's Parasol]]—are [[quest item]]s used to craft [[The Lady's Ensemble]], and can only be obtained as part of normal story progression. They are obtained at the end of the [[Forest Temple (Tri Force Heroes)|Forest Temple]], [[The Lady's Lair]], and the [[Sky Temple]], respectively, in addition to the normal Materials awarded for completing those Levels. They cannot be sold to the Street Merchant, as he finds witch Materials to be creepy.<ref>{{Cite|Bah! The Lady's Glasses! Witch materials gives me the creeps! You're on your own there.|Street Merchant|TFH}}</ref> Once they are all collected, the Outfit crafted from these special Materials grants Link the magical power necessary to lift Princess Styla's curse.<ref>{{Cite|Now that you have some of The Lady's materials, it's time I showed you this little piece of work. I call it... The Lady's Ensemble! If you wear this and visit the princess, you should be able to lift her curse! All without defeating The Lady.|Madame Couture|TFH}}</ref>
| | ==={{TotK|-}}=== |
| | {{Main|Materials in Tears of the Kingdom}} |
| | {{Plural|TotK|Material}} are used in a variety of ways. They are commonly dropped by {{Plural|TotK|Enemy|link}} but may also be found along the ground. |
| | |
| | ====List of {{Plural|TotK|Material}}==== |
| | {{Gallery List|Items |
| | |TotK= Ancient Blade, King's Scale, Large Zonai Charge, Large Zonaite, Light Dragon's Horn, Muddle Bud |
| | }} |
| | :[[File:ZW TotK Material.png|x26px|link=Materials in Tears of the Kingdom]] [[Materials in Tears of the Kingdom|See more Materials in ''Tears of the Kingdom'']] |
| | |
| | ==Other Appearances== |
| | ==={{HW|-}}=== |
| | {{Noncanon|Start}} |
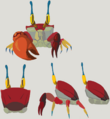
| | In {{HW}}, {{Plural|HWDE|Material}} are similar to {{Plural|HWDE|Spoil|link}} and {{Plural|HWDE|Treasure|link}} in that each {{Term|HWDE|Material}} is a unique {{Term|HWDE|Item|link}} possessed by the {{Term|HWDE|Enemy|link}} that dropped it. {{Plural|HWDE|Material}} are dropped by nearly every {{Term|HWDE|Enemy}} type except {{Plural|HWDE|Cucco|link}} and infantry soldiers, and only when the {{Term|HWDE|Enemy}} does not drop a {{Term|HWDE|Weapon Bag|link}}. They come in three rarities, with at most two rarities of item for each enemy type. The most common are {{Plural|HWDE|Bronze Material|link}}, which are the only item drops for the basic infantry {{Plural|HWDE|Captain (Hyrule Warriors)|link}}. {{Plural|HWDE|Silver Material|link}} are dropped by unique {{Plural|HWDE|Captain (Hyrule Warriors)}}, {{Plural|HWDE|Warrior|link}}, and {{Plural|HWDE|Giant Boss|link}}. Rare {{Plural|HWDE|Gold Material|;oml}} are dropped only by {{Plural|HWDE|Warrior}} and {{Plural|HWDE|Giant Boss}}. {{Plural|HWDE|Enemy}} can be influenced to drop their rarer {{Plural|HWDE|Material}} by using {{Plural|HWDE|Weapon|link}} with the "Material+" {{Term|HWDE|Skill|link}}, by creating a special {{Term|HWDE|Mixture|link}} in the {{Term|HWDE|Apothecary|link}}, or by activating the reward while using {{Term|HWDE|Focus Spirit|link}}. |
| | |
| | {{Plural|HWDE|Material}} are primarily used to craft {{Plural|HWDE|Badge|link}} for the playable {{Plural|HWDE|Warrior}}, with each {{Term|HWDE|Badge}} having its own recipe of specific {{Plural|HWDE|Material}}. {{Plural|HWDE|Material}} can also be used to brew one-use elixirs by consuming a set amount of any {{Term|HWDE|Material}} of a given rarity. |
|
| |
|
| ====List of Materials==== | | ====List of Materials==== |
| <div style="display:none"> | | <div style="display:none"> |
| {{#vardefine:Bronze|[[File:TFH Bronze Diamond Icon.png|link=]]<br>'''<span style="color:#cc9f68">Bronze</span>'''}}
| |
| {{#vardefine:Silver|[[File:TFH Silver Diamond Icon.png|link=]]<br>'''<span style="color:#9dcde0">Silver</span>'''}}
| |
| {{#vardefine:Gold|[[File:TFH Gold Diamond Icon.png|link=]]<br>'''<span style="color:#e8da72">Gold</span>'''}}
| |
| {{#vardefine:Col|colspan="2"{{!}}}} | | {{#vardefine:Col|colspan="2"{{!}}}} |
| </div> | | </div> |
|
| |
|
| {| class="altrow sortable" cellpadding="4" style="text-align:center; width: 100%;" | | {| class="wikitable sortable" style="text-align:center; width: 100%; max-width:50em;" |
| | |+ Enemy Materials |
| |- | | |- |
| !width="20%"| Material | | !style="width: 34%"| Enemy |
| !width="10%" class="unsortable"| Quality | | !style="width: 33%" class="unsortable"| Bronze |
| !width="50%" class="unsortable"| Description | | !style="width: 33%" class="unsortable"| Silver |
| !width="20%" class="unsortable"| Location
| |
| |- | | |- |
| | {{Section|Lady's Glasses|[[File:TFH Lady's Glasses.png]]<br>'''Lady's Glasses'''}} | | | {{Section|Bulblin|[[File:HWDE Bulblin Captain Mini Map Icon.png|link=]]<br/>'''[[Bulblin]]'''}} |
| | | [[File:HW Metal Plate Icon.png|x50px]]<br/>'''[[Metal Plate]]''' |
| | — | | | — |
| | Sleek glasses to grace the nose of a sophisticated lady.
| |
| | [[Forest Temple (Tri Force Heroes)|Forest Temple]] {{Exp|Acquired alongside normal Material on first visit}}
| |
| |- | | |- |
| | {{Section|Lady's Collar|[[File:TFH Lady's Collar.png]]<br>'''Lady's Collar'''}} | | | {{Section|Stalchild|[[File:HWDE Stalchild Captain Mini Map Icon.png|link=]]<br/>'''[[Stalchild]]'''}} |
| | | [[File:HW Monster Tooth Icon.png|x50px]]<br/>'''[[Monster Tooth]]''' |
| | — | | | — |
| | A high-quality collar to adorn the neck of a stylish lady.
| |
| | [[The Lady's Lair]] {{Exp|Acquired alongside normal Material on first visit}}
| |
| |- | | |- |
| | {{Section|Lady's Parasol|[[File:TFH Lady's Parasol.png]]<br>'''Lady's Parasol'''}} | | | {{Section|Bokoblin|[[File:HWDE Bokoblin Captain Mini Map Icon.png|link=]]<br/>'''[[Bokoblin]]'''}} |
| | | [[File:HW Old Rag Icon.png|x50px]]<br/>'''[[Old Rag]]''' |
| | — | | | — |
| | A fabled item, untouched by grubby hands of drab mortals.
| |
| | [[Sky Temple]] {{Exp|Acquired alongside normal Material on first visit}}
| |
| |- | | |- |
| | {{Section|Frilly Fabric|[[File:TFH Frilly Fabric.png]]<br>'''Frilly Fabric'''}} | | | {{Section|Hylian Soldier|[[File:HWDE Hylian Soldier Mini Map Icon.png|link=]]<br/>'''[[Hylian Soldier]]'''}} |
| | | [[File:HW Soldier's Uniform Icon.png|x50px]]<br/>'''[[Soldier's Uniform]]''' |
| | — | | | — |
| | A Street Merchant exclusive. It's supposedly handmade.
| |
| | Purchased from the [[Street Merchant]]
| |
| |- | | |- |
| | {{Section|Friendly Token|[[File:TFH Friendly Token.png]]<br>'''Friendly Token'''}} | | | {{Section|Goron|[[File:HWDE Goron Captain Mini Map Icon 2.png|link=]]<br/>'''[[Goron]]'''}} |
| | | [[File:HW Rock Icon.png|x50px]]<br/>'''[[Rock]]''' |
| | — | | | — |
| | More friends is better than none. So go get some, son!
| |
| | Gift from [[Faux Hero]] after connecting with someone new on local wireless or Download Play<br>Purchased from the [[Street Merchant]] after beating game {{Exp|2.0.0 update}}<br>[[Daily Riches]] {{Exp|2.0.0 update}}
| |
| |- | | |- |
| | {{Section|Freebie|[[File:TFH Freebie.png]]<br>'''Freebie'''}} | | | {{Section|Aeralfos|[[File:HWDE Aeralfos Mini Map Icon.png|link=]]<br/>'''[[Aeralfos]]'''}} |
| | — | | | [[File:HW Aeralfos Leather Icon.png|x50px]]<br/>'''[[Aeralfos Leather]]''' |
| | This will undoubtedly come in handy one day. Don't lose it! | | | [[File:HW Round Aeralfos Shield Icon.png|x50px]]<br/>'''[[Round Aeralfos Shield]]''' |
| | [[Daily Riches]] {{Exp|Open a losing chest}}
| |
| |- | | |- |
| | {{Section|Blob Jelly|[[File:TFH Blob Jelly.png]]<br>'''Blob Jelly'''}} | | | {{Section|Fiery Aeralfos|[[File:HWDE Fiery Aeralfos Mini Map Icon.png|link=]]<br/>'''[[Fiery Aeralfos]]'''}} |
| | {{#var:Bronze}} | | | [[File:HW Fiery Aeralfos Leather Icon.png|x50px]]<br/>'''[[Fiery Aeralfos Leather]]''' |
| | Blobs drop this. It's best not to question what it is... | | | [[File:HW Fiery Aeralfos Wing Icon.png|x50px]]<br/>'''[[Fiery Aeralfos Wing]]''' |
| | [[Deku Forest (Tri Force Heroes)|Deku Forest]]<br>[[Buzz Blob Cave]] | |
| |- | | |- |
| | {{Section|Armos Spirit|[[File:TFH Armos Spirit.png]]<br>'''Armos Spirit'''}} | | | {{Section|Gibdo|[[File:HWDE Gibdo Mini Map Icon.png|link=]]<br/>'''[[Gibdo]]'''}} |
| | {{#var:Bronze}} | | | [[File:HW Gibdo Bandage Icon.png|x50px]]<br/>'''[[Gibdo Bandage]]''' |
| | When an Armos falls, its spirit remains for three days. | | | [[File:HW Heavy Gibdo Sword Icon.png|x50px]]<br/>'''[[Heavy Gibdo Sword]]''' |
| | [[Deku Forest (Tri Force Heroes)|Deku Forest]]<br>[[Moblin Base]] | |
| |- | | |- |
| | {{Section|Tektite Shell|[[File:TFH Tektite Shell.png]]<br>'''Tektite Shell'''}} | | | {{Section|ReDead Knight|[[File:HWDE ReDead Knight Mini Map Icon.png|link=]]<br/>'''[[ReDead Knight]]'''}} |
| | {{#var:Bronze}} | | | [[File:HW ReDead Bandage Icon.png|x50px]]<br/>'''[[ReDead Bandage]]''' |
| | This is a good-luck charm! I mean...probably. Maybe?
| | | [[File:HW ReDead Knight Ashes Icon.png|x50px]]<br/>'''[[ReDead Knight Ashes]]''' |
| | [[Deku Forest (Tri Force Heroes)|Deku Forest]]<br>[[Buzz Blob Cave]]<br>[[Moblin Base]]<br>[[Forest Temple (Tri Force Heroes)|Forest Temple]] | |
| |- | | |- |
| | {{Section|Sweet Shroom|[[File:TFH Sweet Shroom.png]]<br>'''Sweet Shroom'''}} | | | {{Section|Lizalfos|[[File:HWDE Lizalfos Mini Map Icon.png|link=]]<br/>'''[[Lizalfos]]'''}} |
| | {{#var:Silver}} | | | [[File:HW Lizalfos Scale Icon.png|x50px]]<br/>'''[[Lizalfos Scale]]''' |
| | Somewhat poisonous, but it smells like a sweet dream.
| | | [[File:HW Lizalfos Gauntlet Icon.png|x50px]]<br/>'''[[Lizalfos Gauntlet]]''' |
| | [[Deku Forest (Tri Force Heroes)|Deku Forest]]<br>[[Buzz Blob Cave]]<br>[[Moblin Base]]<br>[[Forest Temple (Tri Force Heroes)|Forest Temple]]
| |
| |- | | |- |
| | {{Section|Blin Bling|[[File:TFH Blin Bling.png]]<br>'''Blin Bling'''}} | | | {{Section|Dinolfos|[[File:HWDE Dinolfos Mini Map Icon.png|link=]]<br/>'''[[Dinolfos]]'''}} |
| | {{#var:Silver}} | | | [[File:HW Dinolfos Fang Icon.png|x50px]]<br/>'''[[Dinolfos Fang]]''' |
| | Only Big Blins manage to amass this kind of glitz.
| | | [[File:HW Dinolfos Arm Guard Icon.png|x50px]]<br/>'''[[Dinolfos Arm Guard]]''' |
| | [[Deku Forest (Tri Force Heroes)|Deku Forest]]<br>[[Buzz Blob Cave]]<br>[[Moblin Base]]<br>[[Forest Temple (Tri Force Heroes)|Forest Temple]]
| |
| |- | | |- |
| | {{Section|Gohma's Eye|[[File:TFH Gohma's Eye.png]]<br>'''Gohma's Eye'''}} | | | {{Section|Moblin|[[File:HWDE Moblin Mini Map Icon.png|link=]]<br/>'''[[Moblin]]'''}} |
| | {{#var:Silver}} | | | [[File:HW Moblin Flank Icon.png|x50px]]<br/>'''[[Moblin Flank]]''' |
| | Pure gold/emerald. Beauty is in the eye of the Gohma.
| | | [[File:HW Moblin Spear Icon.png|x50px]]<br/>'''[[Moblin Spear]]''' |
| | [[Buzz Blob Cave]]<br>[[Moblin Base]]<br>[[Forest Temple (Tri Force Heroes)|Forest Temple]] | |
| |- | | |- |
| | {{Section|Mystery Jade|[[File:TFH Mystery Jade.png]]<br>'''Mystery Jade'''}} | | | {{Section|Shield Moblin|[[File:HWDE Shield Moblin Mini Map Icon.png|link=]]<br/>'''[[Shield Moblin]]'''}} |
| | {{#var:Gold}} | | | [[File:HW Shield-Moblin Helmet Icon.png|x50px]]<br/>'''[[Shield-Moblin Helmet]]''' |
| | Nobody knows where this comes from. Mysterious! | | | [[File:HW Metal Moblin Shield Icon.png|x50px]]<br/>'''[[Metal Moblin Shield]]''' |
| | [[Moblin Base]]<br>[[Forest Temple (Tri Force Heroes)|Forest Temple]] | |
| |- | | |- |
| | {{Section|Supple Leaf|[[File:TFH Supple Leaf.png]]<br>'''Supple Leaf'''}} | | | {{Section|Darknut|[[File:HWDE Darknut Mini Map Icon.png|link=]]<br/>'''[[Darknut]]'''}} |
| | {{#var:Gold}} | | | [[File:HW Piece of Darknut Armor Icon.png|x50px]]<br/>'''[[Piece of Darknut Armor]]''' |
| | A jiggly leaf brimming with collagen. So soft and elastic! | | | [[File:HW Large Darknut Sword Icon.png|x50px]]<br/>'''[[Large Darknut Sword]]''' |
| | Received from [[King Tuft]] once all [[Woodlands]] Drablands Challenges are completed | |
| |- | | |- |
| | {{Section|Fresh Kelp|[[File:TFH Fresh Kelp.png]]<br>'''Fresh Kelp'''}} | | | {{Section|Stalmaster|[[File:HWDE Stalmaster Mini Map Icon.png|link=]]<br/>'''[[Stalmaster]]'''}} |
| | {{#var:Bronze}} | | | [[File:HW Stalmaster Wrist Bone Icon.png|x50px]]<br/>'''[[Stalmaster Wrist Bone]]''' |
| | Grown far from the sea, so it's low on minerals. | | | [[File:HW Stalmaster's Skull Icon.png|x50px]]<br/>'''[[Stalmaster's Skull]]''' |
| | [[Secret Fortress]]<br>[[Abyss of Agony]] | |
| |- | | |- |
| | {{Section|Zora Scale|[[File:TFH Zora Scale.png]]<br>'''Zora Scale'''}} | | | {{Section|Big Poe|[[File:HWDE Big Poe Mini Map Icon.png|link=]]<br/>'''[[Big Poe]]'''}} |
| | {{#var:Bronze}} | | | [[File:HW Big Poe Necklace Icon.png|x50px]]<br/>'''[[Big Poe Necklace]]''' |
| | Scales that grow as a Zora grows. This one's enormous!
| | | [[File:HW Big Poe's Lantern Icon.png|x50px]]<br/>'''[[Big Poe's Lantern]]''' |
| | [[Secret Fortress]]<br>[[Abyss of Agony]]<br>[[Cove of Transition]] | |
| |- | | |- |
| | {{Section|Hytopian Silk|[[File:TFH Hytopian Silk.png]]<br>'''Hytopian Silk'''}} | | | {{Section|Icy Big Poe|[[File:HWDE Icy Big Poe Mini Map Icon.png|link=]]<br/>'''[[Icy Big Poe]]'''}} |
| | {{#var:Bronze}} | | | [[File:HW Essence of Icy Big Poe Icon.png|x50px]]<br/>'''[[Essence of Icy Big Poe]]''' |
| | Spun from the cocoons of rather dapper silkworms.
| | | [[File:HW Icy Big Poe's Talisman Icon.png|x50px]]<br/>'''[[Icy Big Poe's Talisman]]''' |
| | [[Secret Fortress]]<br>[[Abyss of Agony]]<br>[[Cove of Transition]]<br>[[Water Temple (Tri Force Heroes)|Water Temple]] | |
| |- | | |- |
| | {{Section|Aqua Crown|[[File:TFH Aqua Crown.png]]<br>'''Aqua Crown'''}} | | | {{Section|Hylian Captain|[[File:HWDE Hylian Captain Mini Map Icon.png|link=]]<br/>'''[[Captain (Hyrule Warriors)|Hylian Captain]]'''}} |
| | {{#var:Silver}} | | | [[File:HW Hylian Captain Gauntlet Icon.png|x50px]]<br/>'''[[Hylian Captain Gauntlet]]''' |
| | When an impure soul dons this, it evaporates. Harsh!
| | | [[File:HW Holy Hylian Shield Icon.png|x50px]]<br/>'''[[Holy Hylian Shield]]''' |
| | [[Secret Fortress]]<br>[[Abyss of Agony]]<br>[[Cove of Transition]]<br>[[Water Temple (Tri Force Heroes)|Water Temple]] | |
| |- | | |- |
| | {{Section|Octorok Sucker|[[File:TFH Octorok Sucker.png]]<br>'''Octorok Sucker'''}} | | | {{Section|Goron Captain|[[File:HWDE Goron Captain Mini Map Icon.png|link=]]<br/>'''[[Goron Captain]]'''}} |
| | {{#var:Silver}} | | | [[File:HW Goron Armor Breastplate Icon.png|x50px]]<br/>'''[[Goron Armor Breastplate]]''' |
| | A Drablands delicacy! Eat it raw or cook it to perfection.
| | | [[File:HW Thick Goron Helmet Icon.png|x50px]]<br/>'''[[Thick Goron Helmet]]''' |
| | [[Secret Fortress]]<br>[[Abyss of Agony]]<br>[[Cove of Transition]]<br>[[Water Temple (Tri Force Heroes)|Water Temple]] | | |} |
| | {| class="wikitable sortable" style="text-align:center; width: 100%; max-width:50em;" |
| | |+ Boss Materials |
| |- | | |- |
| | {{Section|Fairy Dust|[[File:TFH Fairy Dust.png]]<br>'''Fairy Dust'''}}
| | !{{#var:Col}} Boss |
| | {{#var:Silver}}
| | !width="33%" class="unsortable"| Silver |
| | Cute dust that fairies sneeze. It has a million uses.
| | !width="33%" class="unsortable"| Gold |
| | [[Abyss of Agony]]<br>[[Cove of Transition]]<br>[[Water Temple (Tri Force Heroes)|Water Temple]]
| |
| |-
| |
| | {{Section|Rainbow Coral|[[File:TFH Rainbow Coral.png]]<br>'''Rainbow Coral'''}}
| |
| | {{#var:Gold}}
| |
| | So beautiful, folks travel from faraway lands to nab one.
| |
| | [[Cove of Transition]]<br>[[Water Temple (Tri Force Heroes)|Water Temple]]
| |
| |-
| |
| | {{Section|Thornberry|[[File:TFH Thornberry.png]]<br>'''Thornberry'''}}
| |
| | {{#var:Gold}}
| |
| | Too spiky to eat, but it makes a fine fabric.
| |
| | Received from [[King Tuft]] once all [[Riverside]] Drablands Challenges are completed
| |
| |-
| |
| | {{Section|Goron Ore|[[File:TFH Goron Ore.png]]<br>'''Goron Ore'''}}
| |
| | {{#var:Bronze}}
| |
| | Named for its Goron-like sturdiness. And musk.
| |
| | [[Blazing Trail]]<br>[[Hinox Mine]]
| |
| |-
| |
| | {{Section|Monster Guts|[[File:TFH Monster Guts.png]]<br>'''Monster Guts'''}}
| |
| | {{#var:Bronze}}
| |
| | Madame Couture's favorite! It's loaded with iron.
| |
| | [[Blazing Trail]]<br>[[Hinox Mine]]<br>[[Den of Flames]]
| |
| |-
| |
| | {{Section|Demon Fossil|[[File:TFH Demon Fossil.png]]<br>'''Demon Fossil'''}}
| |
| | {{#var:Bronze}}
| |
| | Cheap knockoffs abound, but this one's the real deal.
| |
| | [[Blazing Trail]]<br>[[Hinox Mine]]<br>[[Den of Flames]]<br>[[Fire Temple (Tri Force Heroes)|Fire Temple]]
| |
| |-
| |
| | {{Section|Rugged Horn|[[File:TFH Rugged Horn.png]]<br>'''Rugged Horn'''}}
| |
| | {{#var:Silver}}
| |
| | Would look cool in a piercing or hanging above a doorway.
| |
| | [[Blazing Trail]]<br>[[Hinox Mine]]<br>[[Den of Flames]]<br>[[Fire Temple (Tri Force Heroes)|Fire Temple]]
| |
| |-
| |
| | {{Section|Kodongo Tail|[[File:TFH Kodongo Tail.png]]<br>'''Kodongo Tail'''}}
| |
| | {{#var:Silver}}
| |
| | Don't worry–Kodongos can regrow their tails over time.
| |
| | [[Blazing Trail]]<br>[[Hinox Mine]]<br>[[Den of Flames]]<br>[[Fire Temple (Tri Force Heroes)|Fire Temple]]
| |
| |-
| |
| | {{Section|Keese Wing|[[File:TFH Keese Wing.png]]<br>'''Keese Wing'''}}
| |
| | {{#var:Silver}}
| |
| | Use it to brew an invigorating tea, or grind for a purple dye.
| |
| | [[Hinox Mine]]<br>[[Den of Flames]]<br>[[Fire Temple (Tri Force Heroes)|Fire Temple]]
| |
| |-
| |
| | {{Section|Star Fragment|[[File:TFH Star Fragment.png]]<br>'''Star Fragment'''}}
| |
| | {{#var:Gold}}
| |
| | Prized as a gift from the sky, this rock is out of this world!
| |
| | [[Den of Flames]]<br>[[Fire Temple (Tri Force Heroes)|Fire Temple]] | |
| |-
| |
| | {{Section|Divine Whiskers|[[File:TFH Divine Whiskers.png]]<br>'''Divine Whiskers'''}}
| |
| | {{#var:Gold}}
| |
| | From the maw of a sacred beast, grown over millennia.
| |
| | Received from [[King Tuft]] once all [[Volcano]] Drablands Challenges are completed
| |
| |-
| |
| | {{Section|Fluffy Fuzz|[[File:TFH Fluffy Fuzz.png]]<br>'''Fluffy Fuzz'''}}
| |
| | {{#var:Bronze}}
| |
| | So soft, you'll want to rub your face all over it.
| |
| | [[Frozen Plateau]]<br>[[Snowball Ravine]]
| |
| |-
| |
| | {{Section|Tiny Snowflake|[[File:TFH Tiny Snowflake.png]]<br>'''Tiny Snowflake'''}}
| |
| | {{#var:Bronze}}
| |
| | Fragile and delicate. These only form at -25 degrees.
| |
| | [[Frozen Plateau]]<br>[[Snowball Ravine]]<br>[[Silver Shrine]]
| |
| |-
| |
| | {{Section|Serpent Fangs|[[File:TFH Serpent Fangs.png]]<br>'''Serpent Fangs'''}}
| |
| | {{#var:Bronze}}
| |
| | Razor-sharp fangs that can pierce through anything.
| |
| | [[Frozen Plateau]]<br>[[Snowball Ravine]]<br>[[Silver Shrine]]<br>[[Ice Temple]]
| |
| |-
| |
| | {{Section|Crimson Shell|[[File:TFH Crimson Shell.png]]<br>'''Crimson Shell'''}}
| |
| | {{#var:Silver}}
| |
| | A mysterious shell that never misses a foe when thrown.
| |
| | [[Frozen Plateau]]<br>[[Snowball Ravine]]<br>[[Silver Shrine]]<br>[[Ice Temple]]
| |
| |-
| |
| | {{Section|Freezard Water|[[File:TFH Freezard Water.png]]<br>'''Freezard Water'''}}
| |
| | {{#var:Silver}}
| |
| | Formerly a Freezard. Now the purest of pure water.
| |
| | [[Frozen Plateau]]<br>[[Snowball Ravine]]<br>[[Silver Shrine]]<br>[[Ice Temple]]
| |
| |-
| |
| | {{Section|Chill Stone|[[File:TFH Chill Stone.png]]<br>'''Chill Stone'''}}
| |
| | {{#var:Silver}}
| |
| | Guaranteed to keep its cool at all times. Can you dig it?
| |
| | [[Snowball Ravine]]<br>[[Silver Shrine]]<br>[[Ice Temple]]
| |
| |-
| |
| | {{Section|Ice Rose|[[File:TFH Ice Rose.png]]<br>'''Ice Rose'''}}
| |
| | {{#var:Gold}}
| |
| | This rare flower only blooms in the coldest conditions.
| |
| | [[Silver Shrine]]<br>[[Ice Temple]]
| |
| |-
| |
| | {{Section|Beastie Patch|[[File:TFH Beastie Patch.png]]<br>'''Beastie Patch'''}}
| |
| | {{#var:Gold}}
| |
| | A bandage for beasts. Helps wounds heal faster.
| |
| | Received from [[King Tuft]] once all [[Ice Cavern]] Drablands Challenges are completed
| |
| |-
| |
| | {{Section|Stiff Puff|[[File:TFH Stiff Puff.png]]<br>'''Stiff Puff'''}}
| |
| | {{#var:Bronze}}
| |
| | It looks puffy, but it's actually rock solid. Go figure!
| |
| | [[Sealed Gateway]]<br>[[Bomb Storage]]
| |
| |-
| |
| | {{Section|Silver Thread|[[File:TFH Silver Thread.png]]<br>'''Silver Thread'''}}
| |
| | {{#var:Bronze}}
| |
| | Spun from glinting gossamer. Antibacterial and deodorizing.
| |
| | [[Sealed Gateway]]<br>[[Bomb Storage]]<br>[[Training Ground]]
| |
| |-
| |
| | {{Section|Royal Ring|[[File:TFH Royal Ring.png]]<br>'''Royal Ring'''}}
| |
| | {{#var:Bronze}}
| |
| | A ring with a royal legacy. Unfit for "commoner" fingers.
| |
| | [[Sealed Gateway]]<br>[[Bomb Storage]]<br>[[Training Ground]]<br>[[The Lady's Lair]]
| |
| |-
| |
| | {{Section|Antique Coin|[[File:TFH Antique Coin.png]]<br>'''Antique Coin'''}}
| |
| | {{#var:Silver}}
| |
| | Everyone loves gold! Keep this somewhere safe.
| |
| | [[Sealed Gateway]]<br>[[Bomb Storage]]<br>[[Training Ground]]<br>[[The Lady's Lair]]
| |
| |-
| |
| | {{Section|Fancy Fabric|[[File:TFH Fancy Fabric.png]]<br>'''Fancy Fabric'''}}
| |
| | {{#var:Silver}}
| |
| | A master artisan slaved over this for decades. Pretty, yes?
| |
| | [[Sealed Gateway]]<br>[[Bomb Storage]]<br>[[Training Ground]]<br>[[The Lady's Lair]]
| |
| |-
| |
| | {{Section|Exquisite Lace|[[File:TFH Exquisite Lace.png]]<br>'''Exquisite Lace'''}}
| |
| | {{#var:Silver}}
| |
| | Such detail! Sadly, they don't make 'em like this anymore.
| |
| | [[Bomb Storage]]<br>[[Training Ground]]<br>[[The Lady's Lair]]
| |
| |-
| |
| | {{Section|Vibrant Brooch|[[File:TFH Vibrant Brooch.png]]<br>'''Vibrant Brooch'''}}
| |
| | {{#var:Gold}} | |
| | Such vibrant colors! Sure to make strangers jealous.
| |
| | [[Training Ground]]<br>[[The Lady's Lair]]
| |
| |-
| |
| | {{Section|Brittle Papyrus|[[File:TFH Brittle Papyrus.png]]<br>'''Brittle Papyrus'''}}
| |
| | {{#var:Gold}}
| |
| | Love letters written on this supposedly always work.
| |
| | Received from [[King Tuft]] once all [[Fortress]] Drablands Challenges are completed
| |
| |-
| |
| | {{Section|Palm Cone|[[File:TFH Palm Cone.png]]<br>'''Palm Cone'''}}
| |
| | {{#var:Bronze}}
| |
| | Taken from trees that can go for centuries without water.
| |
| | [[Infinity Dunes]]<br>[[Stone Corridors]]
| |
| |-
| |
| | {{Section|Ancient Fin|[[File:TFH Ancient Fin.png]]<br>'''Ancient Fin'''}}
| |
| | {{#var:Bronze}}
| |
| | Smells heavenly when baked. Cook too long and it hardens.
| |
| | [[Infinity Dunes]]<br>[[Stone Corridors]]<br>[[Gibdo Mausoleum]]
| |
| |- | | |- |
| | {{Section|Vintage Linen|[[File:TFH Vintage Linen.png]]<br>'''Vintage Linen'''}} | | |{{#var:Col}} {{Section|Ganon|[[File:HWDE Ganon Mini Map Icon.png|link=]]<br/>'''[[Ganon]]'''}} |
| | {{#var:Bronze}} | | | [[File:HW Ganon's Mane Icon.png|x50px]]<br/>'''[[Ganon's Mane]]''' |
| | How to make this is a family secret. Enough said!
| | | [[File:HW Ganon's Fang Icon.png|x50px]]<br/>'''[[Ganon's Fang]]''' |
| | [[Infinity Dunes]]<br>[[Stone Corridors]]<br>[[Gibdo Mausoleum]]<br>[[Desert Temple (Tri Force Heroes)|Desert Temple]] | |
| |- | | |- |
| | {{Section|Gibdo Bandage|[[File:TFH Gibdo Bandage.png]]<br>'''Gibdo Bandage'''}} | | |{{#var:Col}} {{Section|King Dodongo|[[File:HWDE King Dodongo Mini Map Icon.png|link=]]<br/>'''[[King Dodongo]]'''}} |
| | {{#var:Silver}} | | | [[File:HW King Dodongo's Claws Icon.png|x50px]]<br/>'''[[King Dodongo's Claws]]''' |
| | Gibdos like to clean, like cats. They aren't as cute, though.
| | | [[File:HW King Dodongo's Crystal Icon.png|x50px]]<br/>'''[[King Dodongo's Crystal]]''' |
| | [[Infinity Dunes]]<br>[[Stone Corridors]]<br>[[Gibdo Mausoleum]]<br>[[Desert Temple (Tri Force Heroes)|Desert Temple]] | |
| |- | | |- |
| | {{Section|Stal Skull|[[File:TFH Stal Skull.png]]<br>'''Stal Skull'''}} | | |{{#var:Col}} {{Section|Gohma|[[File:HWDE Gohma Mini Map Icon.png|link=]]<br/>'''[[Gohma]]'''}} |
| | {{#var:Silver}} | | | [[File:HW Gohma's Acid Icon.png|x50px]]<br/>'''[[Gohma's Acid]]''' |
| | Did you know Stalbone can be used as a white dye? | | | [[File:HW Gohma's Lens Icon.png|x50px]]<br/>'''[[Gohma's Lens]]''' |
| | [[Infinity Dunes]]<br>[[Stone Corridors]]<br>[[Gibdo Mausoleum]]<br>[[Desert Temple (Tri Force Heroes)|Desert Temple]]
| |
| |- | | |- |
| | {{Section|Sandy Ribbon|[[File:TFH Sandy Ribbon.png]]<br>'''Sandy Ribbon'''}} | | |{{#var:Col}} {{Section|Manhandla|[[File:HWDE Manhandla Mini Map Icon.png|link=]]<br/>'''[[Manhandla]]'''}} |
| | {{#var:Silver}} | | | [[File:HW Manhandla's Toxic Dust Icon.png|x50px]]<br/>'''[[Manhandla's Toxic Dust]]''' |
| | A magic ribbon that can rouse a sandstorn when shaken.
| | | [[File:HW Manhandla's Sapling Icon.png|x50px]]<br/>'''[[Manhandla's Sapling]]''' |
| | [[Stone Corridors]]<br>[[Gibdo Mausoleum]]<br>[[Desert Temple (Tri Force Heroes)|Desert Temple]] | |
| |- | | |- |
| | {{Section|Crystal Skull|[[File:TFH Crystal Skull.png]]<br>'''Crystal Skull'''}} | | |{{#var:Col}} {{Section|Argorok|[[File:HWDE Argorok Mini Map Icon.png|link=]]<br/>'''[[Argorok]]'''}} |
| | {{#var:Gold}} | | | [[File:HW Argorok's Embers Icon.png|x50px]]<br/>'''[[Argorok's Embers]]''' |
| | The secrets this thing must hold! Probably diseases too. | | | [[File:HW Argorok's Stone Icon.png|x50px]]<br/>'''[[Argorok's Stone]]''' |
| | [[Gibdo Mausoleum]]<br>[[Desert Temple (Tri Force Heroes)|Desert Temple]] | |
| |- | | |- |
| | {{Section|Golden Insect|[[File:TFH Golden Insect.png]]<br>'''Golden Insect'''}} | | |{{#var:Col}} {{Section|The Imprisoned|[[File:HWDE The Imprisoned Mini Map Icon.png|link=]]<br/>'''[[The Imprisoned]]'''}} |
| | {{#var:Gold}} | | | [[File:HW The Imprisoned's Scales Icon.png|x50px]]<br/>'''[[The Imprisoned's Scales]]''' |
| | Some of these things are worth more than actual gold. | | | [[File:HW The Imprisoned's Pillar Icon.png|x50px]]<br/>'''[[The Imprisoned's Pillar]]''' |
| | Received from [[King Tuft]] once all [[The Dunes]] Drablands Challenges are completed | |
| |- | | |- |
| | {{Section|Carrumpkin|[[File:TFH Carrumpkin.png]]<br>'''Carrumpkin'''}} | | |{{#var:Col}} {{Section|Cia|[[File:HWDE Cia Mini Map Icon.png|link=]]<br/>'''[[Cia]]'''}} |
| | {{#var:Bronze}} | | | [[File:HW Cia's Bracelet Icon.png|x50px]]<br/>'''[[Cia's Bracelet]]''' |
| | This carrot loved autumn so much, it became a pumpkin. | | | [[File:HW Cia's Staff Icon.png|x50px]]<br/>'''[[Cia's Staff]]''' |
| | [[Illusory Mansion]]<br>[[Palace Noir]] | |
| |- | | |- |
| | {{Section|Mystery Extract|[[File:TFH Mystery Extract.png]]<br>'''Mystery Extract'''}} | | |{{#var:Col}} {{Section|Volga|[[File:HWDE Volga Mini Map Icon.png|link=]]<br/>'''[[Volga]]'''}} |
| | {{#var:Bronze}} | | | [[File:HW Volga's Helmet Icon.png|x50px]]<br/>'''[[Volga's Helmet]]''' |
| | Nobody knows what this is...That's probably for the best.
| | | [[File:HW Volga's Dragon Spear Icon.png|x50px]]<br/>'''[[Volga's Dragon Spear]]''' |
| | [[Illusory Mansion]]<br>[[Palace Noir]]<br>[[Lone Labyrinth]] | |
| |- | | |- |
| | {{Section|Spider Silk Lace|[[File:TFH Spider Silk Lace.png]]<br>'''Spider Silk Lace'''}} | | |{{#var:Col}} {{Section|Wizzro|[[File:HWDE Wizzro Mini Map Icon.png|link=]]<br/>'''[[Wizzro]]'''}} |
| | {{#var:Bronze}} | | | [[File:HW Wizzro's Robe Icon.png|x50px]]<br/>'''[[Wizzro's Robe]]''' |
| | Made from unbreakable and totally creepy spider thread.
| | | [[File:HW Wizzro's Ring Icon.png|x50px]]<br/>'''[[Wizzro's Ring]]''' |
| | [[Illusory Mansion]]<br>[[Palace Noir]]<br>[[Lone Labyrinth]]<br>[[Grim Temple]] | |
| |- | | |- |
| | {{Section|Poe Soul|[[File:TFH Poe Soul.png]]<br>'''Poe Soul'''}} | | |width="17%"| {{Section|Link|[[File:HWDE Link Mini Map Icon.png|link=]]<br/>'''[[Link]]'''}} |
| | {{#var:Silver}} | | |width="17%"| [[File:HWDE Young Link Mini Map Icon.png|link=]]<br/>'''[[Young Link]]''' |
| | A Poe hides its soul not in its body, but elsewhere. | | | [[File:HW Link's Boots Icon.png|x50px]]<br/>'''[[Link's Boots]]''' |
| | [[Illusory Mansion]]<br>[[Palace Noir]]<br>[[Lone Labyrinth]]<br>[[Grim Temple]] | | | [[File:HW Link's Scarf Icon.png|x50px]]<br/>'''[[Link's Scarf]]''' |
| |- | | |- |
| | {{Section|Twisted Twig|[[File:TFH Twisted Twig.png]]<br>'''Twisted Twig'''}} | | |{{#var:Col}} {{Section|Lana|[[File:HWDE Lana Mini Map Icon.png|link=]]<br/>'''[[Lana]]'''}} |
| | {{#var:Silver}} | | | [[File:HW Lana's Hair Clip Icon.png|x50px]]<br/>'''[[Lana's Hair Clip]]''' |
| | A highly prized talisman said to ensure marital bliss.
| | | [[File:HW Lana's Cloak Icon.png|x50px]]<br/>'''[[Lana's Cloak]]''' |
| | [[Illusory Mansion]]<br>[[Palace Noir]]<br>[[Lone Labyrinth]]<br>[[Grim Temple]] | |
| |- | | |- |
| | {{Section|Lava Drop|[[File:TFH Lava Drop.png]]<br>'''Lava Drop'''}} | | |{{#var:Col}} {{Section|Zelda|[[File:HWDE Zelda Mini Map Icon.png|link=]]<br/>'''[[Princess Zelda|Zelda]]'''}} |
| | {{#var:Silver}} | | | [[File:HW Zelda's Brooch Icon.png|x50px]]<br/>'''[[Zelda's Brooch]]''' |
| | A fire spirit's tear, perhaps? Carrying one is good luck.
| | | [[File:HW Zelda's Tiara Icon.png|x50px]]<br/>'''[[Zelda's Tiara]]''' |
| | [[Palace Noir]]<br>[[Lone Labyrinth]]<br>[[Grim Temple]] | |
| |- | | |- |
| | {{Section|Sanctuary Mask|[[File:TFH Sanctuary Mask.png]]<br>'''Sanctuary Mask'''}} | | |{{#var:Col}} {{Section|Impa|[[File:HWDE Impa Mini Map Icon.png|link=]]<br/>'''[[Impa]]'''}} |
| | {{#var:Gold}} | | | [[File:HW Impa's Hair Band Icon.png|x50px]]<br/>'''[[Impa's Hair Band]]''' |
| | A mask used to ward off evil. It's seemingly ineffective... | | | [[File:HW Impa's Breastplate Icon.png|x50px]]<br/>'''[[Impa's Breastplate]]''' |
| | [[Lone Labyrinth]]<br>[[Grim Temple]] | |
| |- | | |- |
| | {{Section|Gold Dust|[[File:TFH Gold Dust.png]]<br>'''Gold Dust'''}} | | |{{#var:Col}} {{Section|Ganondorf|[[File:HWDE Ganondorf Mini Map Icon.png|link=]]<br/>'''[[Ganondorf]]'''}} |
| | {{#var:Gold}} | | | [[File:HW Ganondorf's Gauntlet Icon.png|x50px]]<br/>'''[[Ganondorf's Gauntlet]]''' |
| | Looks like sand, but it's sooo much more. CHA-CHING! | | | [[File:HW Ganondorf's Jewel Icon.png|x50px]]<br/>'''[[Ganondorf's Jewel]]''' |
| | Received from [[King Tuft]] once all [[The Ruins]] Drablands Challenges are completed | |
| |- | | |- |
| | {{Section|Cucco Feathers|[[File:TFH Cucco Feathers.png]]<br>'''Cucco Feathers'''}} | | |{{#var:Col}} {{Section|Sheik|[[File:HWDE Sheik Mini Map Icon.png|link=]]<br/>'''[[Sheik]]'''}} |
| | {{#var:Bronze}} | | | [[File:HW Sheik's Kunai Icon.png|x50px]]<br/>'''[[Sheik's Kunai]]''' |
| | Cuccos are always losing and regrowing feathers. Weirdos. | | | [[File:HW Sheik's Turban Icon.png|x50px]]<br/>'''[[Sheik's Turban]]''' |
| | [[Floating Garden]]<br>[[Deception Castle]] | |
| |- | | |- |
| | {{Section|Carmine Pearl|[[File:TFH Carmine Pearl.png]]<br>'''Carmine Pearl'''}} | | |{{#var:Col}} {{Section|Darunia|[[File:HWDE Darunia Mini Map Icon.png|link=]]<br/>'''[[Darunia]]'''}} |
| | {{#var:Bronze}} | | | [[File:HW Darunia's Spikes Icon.png|x50px]]<br/>'''[[Darunia's Spikes]]''' |
| | A red jewel from the sky. Often called a "sun seed".
| | | [[File:HW Darunia's Bracelet Icon.png|x50px]]<br/>'''[[Darunia's Bracelet]]''' |
| | [[Floating Garden]]<br>[[Deception Castle]]<br>[[Dragon Citadel]] | |
| |- | | |- |
| | {{Section|Sky Dragon Tail|[[File:TFH Sky Dragon Tail.png]]<br>'''Sky Dragon Tail'''}} | | |{{#var:Col}} {{Section|Ruto|[[File:HWDE Ruto Mini Map Icon.png|link=]]<br/>'''[[Princess Ruto|Ruto]]'''}} |
| | {{#var:Bronze}} | | | [[File:HW Ruto's Earrings Icon.png|x50px]]<br/>'''[[Ruto's Earrings]]''' |
| | An [[Aeralfos]] tail. It's pliable, strong, and oh-so rare.
| | | [[File:HW Ruto's Scale Icon.png|x50px]]<br/>'''[[Ruto's Scale]]''' |
| | [[Floating Garden]]<br>[[Deception Castle]]<br>[[Dragon Citadel]]<br>[[Sky Temple]] | |
| |- | | |- |
| | {{Section|Pretty Plume|[[File:TFH Pretty Plume.png]]<br>'''Pretty Plume'''}} | | |{{#var:Col}} {{Section|Agitha|[[File:HWDE Agitha Mini Map Icon.png|link=]]<br/>'''[[Agitha]]'''}} |
| | {{#var:Silver}} | | | [[File:HW Agitha's Basket Icon.png|x50px]]<br/>'''[[Agitha's Basket]]''' |
| | A feather that charms man and beast alike. Women too.
| | | [[File:HW Agitha's Pendant Icon.png|x50px]]<br/>'''[[Agitha's Pendant]]''' |
| | [[Floating Garden]]<br>[[Deception Castle]]<br>[[Dragon Citadel]]<br>[[Sky Temple]] | |
| |- | | |- |
| | {{Section|Mock Fairy|[[File:TFH Mock Fairy.png]]<br>'''Mock Fairy'''}} | | | {{Section|Midna|[[File:HWDE Midna Mini Map Icon.png|link=]]<br/>'''[[Midna]]'''}} |
| | {{#var:Silver}} | | | [[File:HWDE Twili Midna Mini Map Icon.png|link=]]<br/>'''[[Twili Midna]]''' |
| | Threatened fairies conjure these up as decoys. | | | [[File:HW Midna's Hair Icon.png|x50px]]<br/>'''[[Midna's Hair]]''' |
| | [[Floating Garden]]<br>[[Deception Castle]]<br>[[Dragon Citadel]]<br>[[Sky Temple]] | | | [[File:HW Midna's Fused Shadow Icon.png|x50px]]<br/>'''[[Midna's Fused Shadow]]''' |
| |- | | |- |
| | {{Section|Aurora Stone|[[File:TFH Aurora Stone.png]]<br>'''Aurora Stone'''}} | | |{{#var:Col}} {{Section|Fi|[[File:HWDE Fi Mini Map Icon.png|link=]]<br/>'''[[Fi]]'''}} |
| | {{#var:Silver}} | | | [[File:HW Fi's Heels Icon.png|x50px]]<br/>'''[[Fi's Heels]]''' |
| | A large stone with a hefty helping of aurora aura.
| | | [[File:HW Fi's Crystal Icon.png|x50px]]<br/>'''[[Fi's Crystal]]''' |
| | [[Deception Castle]]<br>[[Dragon Citadel]]<br>[[Sky Temple]] | |
| |- | | |- |
| | {{Section|Steel Mask|[[File:TFH Steel Mask.png]]<br>'''Steel Mask'''}} | | |{{#var:Col}} {{Section|Ghirahim|[[File:HWDE Ghirahim Mini Map Icon.png|link=]]<br/>'''[[Ghirahim]]'''}} |
| | {{#var:Gold}} | | | [[File:HW Ghirahim's Sash Icon.png|x50px]]<br/>'''[[Ghirahim's Sash]]''' |
| | A speck of this steel makes swords way stronger. | | | [[File:HW Ghirahim's Cape Icon.png|x50px]]<br/>'''[[Ghirahim's Cape]]''' |
| | [[Dragon Citadel]]<br>[[Sky Temple]] | |
| |- | | |- |
| | {{Section|Fabled Butterfly|[[File:TFH Fabled Butterfly.png]]<br>'''Fabled Butterfly'''}} | | |{{#var:Col}} {{Section|Zant|[[File:HWDE Zant Mini Map Icon.png|link=]]<br/>'''[[Zant]]'''}} |
| | {{#var:Gold}} | | | [[File:HW Zant's Magic Gem Icon.png|x50px]]<br/>'''[[Zant's Magic Gem]]''' |
| | An ethereal butterfly, only visible to the very valorous. | | | [[File:HW Zant's Helmet Icon.png|x50px]]<br/>'''[[Zant's Helmet]]''' |
| | Received from [[King Tuft]] once all [[Sky Realm]] Drablands Challenges are completed | |
| |} | | |} |
| {{Clear}} | | {{Clear}} |
|
| |
|
| ===''Breath of the Wild''=== | | ==={{HW|L|-}}=== |
| Materials in {{BotW}} can be found all throughout Hyrule, after defeating enemies, in treasure chests, or hunting for food. They cover a wide variety of items, and as such have a wide variety of uses. Food materials can sometimes be eaten raw, but are best cooked together to create much more nourishing recipes, that restore more hearts and have other positive effects. Materials can be sold for Rupees as well. | | Materials in {{HW|L}} are primarily the same as those in {{HW|-}}, with the addition of new Materials for Warriors who did not yield any in {{HW|-}}, as well as for monsters and Warriors who exist exclusively in {{HW|L|-}}. Certain Warriors, such as Young Link and Twili Midna, also received their own set of Materials apart from their counterparts. |
|
| |
|
| ====List of Materials==== | | ====List of Materials==== |
| <!--
| | {| class="wikitable sortable" style="text-align:center; width: 100%; max-width:50em;" |
| | | |+ Enemy Materials |
| NOTE: When adding Materials to this list, please provide a link to a video so that it can be verified. Otherwise, your contribution may be reverted.
| |
| | |
| -->
| |
| {| class="altrow" cellpadding="4" style="width: 100%;" | |
| |-
| |
| !width="20%"| Material
| |
| !width="60%"| Description
| |
| !width="20%"| Additional uses
| |
| |-
| |
| |style="text-align:center"| {{Section|Amber|[[File:BotW Amber Icon.png|x50px|link=]]<br>'''Amber'''}}
| |
| | A fossilized resin with a caramelesque sheen to it. It's usually traded for Rupees but can also be used in accessories. | |
| | —
| |
| |-
| |
| |style="text-align:center"| {{Section|Ancient Screw|[[File:BotW Ancient Screw Icon.png|x50px|link=]]<br>'''Ancient Screw'''}}
| |
| | A screw used in ancient machinery. It's made of an unknown material, and no matter how many times it's turned, its threads never seem to show sign of wear.
| |
| | —
| |
| |-
| |
| |style="text-align:center"| {{Section|Ancient Spring|'''Ancient Spring'''}}
| |
| | A spring used in ancient machinery. It is light and buoyant enough to float on water, and no matter how many times it's compressed, it never loses tension.
| |
| | —
| |
| |-
| |
| |style="text-align:center"| {{Section|Apple|[[File:BotW Apple Icon.png|x50px|link=]]<br>'''Apple'''}}
| |
| | A common fruit found on trees all around Hyrule. Eat it fresh, or cook it to increase its effect.
| |
| | Restores half a Heart
| |
| |-
| |
| |style="text-align:center"| {{Section|Bird Meat|[[File:BotW Bird Meat Icon.png|x50px|link=]]<br>'''Bird Meat'''}}
| |
| | This meat is tougher and chewier than a standard Steak. Tastes better cooked.
| |
| | Restores two Hearts
| |
| |-
| |
| |style="text-align:center"| {{Section|Bokoblin Fang|'''Bokoblin Fang'''}}
| |
| | A sharp tooth obtained from a Bokoblin. You can sell it, but it also has other uses.
| |
| | —
| |
| |-
| |
| |style="text-align:center"| {{Section|Blue Nightshade|[[File:BotW Blue Nightshade Icon.png|x50px|link=]]<br>'''Blue Nightshade'''}}
| |
| | A plant that grows in quieter areas of Hyrule. At night, it gives off a soft glow. Cook with it to increase your stealth.
| |
| | —
| |
| |-
| |
| |style="text-align:center"| {{Section|Bokoblin Horn|[[File:BotW Bokoblin Horn Icon.png|x50px|link=]]<br>'''Bokoblin Horn'''}}
| |
| | The severed horn of a Bokoblin, a creature often encountered in the plains of Hyrule. The horn isn't edible, but you can cook it with an insect to make something useful.
| |
| | —
| |
| |-
| |
| |style="text-align:center"| {{Section|Chuchu Jelly|'''Chuchu Jelly'''}}
| |
| | A gelatinous substance that came from a Chuchu. It's unusable in this state, but applying a bit of electric current may change its form.
| |
| | —
| |
| |-
| |
| |style="text-align:center"| {{Section|Courser Bee Honey|[[File:BotW Courser Bee Honey Icon.png|x50px|link=]]<br>'''Courser Bee Honey'''}}
| |
| | Sweet honey chock-full of nutrients! Rather than eating it raw, try cooking with it to unlock its stamina-restoring effects.
| |
| | Restores two Hearts
| |
| |-
| |
| |style="text-align:center"| {{Section|Endura Shroom|'''Endura Shroom'''}}
| |
| | A rare yellowish-orange mushroom. Cook it before eating to temporarily increase your stamina limit.
| |
| | Restores one Heart
| |
| |- | | |- |
| |style="text-align:center"| {{Section|Firewood|[[File:BotW Firewood Icon.png|x50px|link=]]<br>'''Firewood'''}}
| | !style="width: 34%"| Enemy |
| | A portable bundle of firewood. You can use this to make a fire...as long as you have something to light it. | | !style="width: 33%" class="unsortable"| Bronze |
| | — | | !style="width: 33%" class="unsortable"| Silver |
| |- | | |- |
| |style="text-align:center"| {{Section|Flint|'''Flint'''}}
| | | {{Section|Miniblin|[[File:HWDE Minblin Captain Mini Map Icon.png|link=]]<br/>'''[[Miniblin|Miniblin Captain]]'''}} |
| | Strike it with a metallic weapon to generate a spark. The portable fire starter breaks after one use, but it can create a long-lasting flame if you use it near firewood. | | | [[File:HWL Monster Horn Icon.png|x50px]]<br/>'''[[Monster Horn]]''' |
| | — | | | — |
| |- | | |- |
| |style="text-align:center"| {{Section|Hearty Truffle|[[File:BotW Hearty Truffle Icon.png|x50px|link=]]<br>'''Hearty Truffle'''}}
| | | {{Section|Big Blin|[[File:HWDE Big Blin Mini Map Icon.png|link=]]<br/>'''[[Big Blin]]'''}} |
| | This rare mushroom has a rich scent. Cook it before eating to temporarily increase your maximum hearts. | | | [[File:HWL Big Blin Hide Icon.png|x50px]]<br/>'''[[Big Blin Hide]]''' |
| | Restores two Hearts | | | [[File:HWL Big Blin Club Icon.png|x50px]]<br/>'''[[Big Blin Club]]''' |
| |- | | |- |
| |style="text-align:center"| {{Section|Hylian Shroom|[[File:BotW Hylian Shroom Icon.png|x50px|link=]]<br>'''Hylian Shroom'''}}
| | | {{Section|Stone Blin|[[File:HWDE Stone Blin Mini Map Icon.png|link=]]<br/>'''[[Stone Blin]]'''}} |
| | A common mushroom found near trees around Hyrule. Eat it to restore half a heart.
| | | [[File:HWL Stone Blin Buckler Icon.png|x50px]]<br/>'''[[Stone Blin Buckler]]''' |
| | —
| | | [[File:HWL Stone Blin Helmet Icon.png|x50px]]<br/>'''[[Stone Blin Helmet]]''' |
| |-
| |
| |style="text-align:center"| {{Section|Hyrule Bass|'''Hyrule Bass'''}}
| |
| | An ordinary fish that can be found all over Hyrule. Can be eaten raw, but its healing effects are amplified when cooked.
| |
| | Restores one Heart
| |
| |-
| |
| |style="text-align:center"| {{Section|Hyrule Herb|'''Hyrule Herb'''}}
| |
| | This healthy herb grows abundantly in the plains of Hyrule. Cook it before eating to increase the number of hearts it restores.
| |
| | Restores one Heart
| |
| |-
| |
| |style="text-align:center"| {{Section|Ice Keese Wing|'''Ice Keese Wing'''}}
| |
| | A rare Ice Keese wing. Its frozen surface gleams attractively, but its usefulness isn't readily apparent.
| |
| | —
| |
| |-
| |
| |style="text-align:center"| {{Section|Keese Eyeball|'''Keese Eyeball'''}}
| |
| | A rare material dropped by a defeated Keese. It's fun to look at, but it doesn't seem to have much use. Maybe a collector would be interested in it...
| |
| | —
| |
| |-
| |
| |style="text-align:center"| {{Section|Keese Wing|'''Keese Wing'''}}
| |
| | The wing of a Keese. It's covered with very short, sharp fur. It's not much use by itself, but you can mix it with insects to make something useful.
| |
| | —
| |
| |-
| |
| |style="text-align:center"| {{Section|Opal|[[File:BotW Opal Icon.png|x50px|link=]]<br>'''Opal'''}}
| |
| | A valuable ore that's often inlaid with an intricate spiral pattern. Opal is usually traded for Rupees but can also be used in accessories.
| |
| | —
| |
| |-
| |
| |style="text-align:center"| {{Section|Prime Steak|'''Prime Steak'''}}
| |
| | A fresh, high-quality piece of animal meat. This stuff isn't easy to come by, so savor it. Cook it to recover more hearts.
| |
| | Restores one and a half Hearts
| |
| |-
| |
| |style="text-align:center"| {{Section|Restless Cricket|[[File:BotW Restless Cricket Icon.png|x50px|link=]]<br>'''Restless Cricket'''}}
| |
| | A very energetic cricket. Cook it with monster parts to create a stamina-boosting elixir.
| |
| | —
| |
| |-
| |
| |style="text-align:center"| {{Section|Rock Salt|'''Rock Salt'''}}
| |
| | Crystallized salt from the ancient sea commonly used to season meals. Cannot be eaten in this form.
| |
| | —
| |
| |-
| |
| |style="text-align:center"| {{Section|Ruby|[[File:BotW Ruby Icon.png|x50px|link=]]<br>'''Ruby'''}}
| |
| | A valuable material mined from large stones in Hyrule. Rubies hold the power of fire within them. Can be sold for a very high price.
| |
| |
| |
| |-
| |
| |style="text-align:center"| {{Section|Rushroom|[[File:BotW Rushroom Icon.png|x50px|link=]]<br>'''Rushroom'''}}
| |
| | A mushroom that can grow almost anywhere but prefers cielings and sheer cliffs. Cook it before eating to temporarily increase your movement speed.
| |
| | Restores half a Heart
| |
| |-
| |
| |style="text-align:center"| {{Section|Sapphire|'''Sapphire'''}}
| |
| | A valuable blue gem mined from natural rock formations. Sapphires are said to contain the essence of ice within them. Sells for a very high price.
| |
| | —
| |
| |-
| |
| |style="text-align:center"| {{Section|Sizzlewing Butterfly|'''Sizzlewing Butterfly'''}}
| |
| | A butterfly found in the woods and plains of warm regions. Its wings absorb teh warmth of the sun. Cook it with monster parts to create an elixir that makes you feel warm and fuzzy.
| |
| | —
| |
| |-
| |
| |style="text-align:center"| {{Section|Spicy Pepper|[[File:BotW Spicy Pepper Icon.png|x50px|link=]]<br>'''Spicy Pepper'''}}
| |
| | This pepper is exploding with spice. Cook with it to create dishes that will raise your body temperature and help you withstand the cold.
| |
| | Restores half a Heart
| |
| |-
| |
| |style="text-align:center"| {{Section|Stamella Shroom|[[File:BotW Stamella Shroom Icon.png|x50px|link=]]<br>'''Stamella Shroom'''}}
| |
| | A green mushroom that grows near trees in the forest. It's chock-full of natural energy. Cook it to realease its stamina-restoration properties.
| |
| | Restores one Heart
| |
| |-
| |
| |style="text-align:center"| {{Section|Steak|'''Steak'''}}
| |
| | Meat obtained from animals in plains and forests. You can eat it raw, but cooking it will make it more delicious and nutricious.
| |
| | Restores one Heart
| |
| |-
| |
| |style="text-align:center"| {{Section|Sunset Firefly|'''Sunset Firefly'''}}
| |
| | During the day, these fireflies stay unlit and hidden in the shade. Cook them with monster parts for an increased-stealth effect.
| |
| | —
| |
| |-
| |
| |style="text-align:center"| {{Section|Topaz|[[File:BotW Topaz Icon.png|x50px|link=]]<br>'''Topaz'''}}
| |
| | This rare yellow gem is said to contain electrical powers and can be sold for a high price.
| |
| | —
| |
| |-
| |
| |style="text-align:center"| {{Section|White Chuchu Jelly|'''White Chuchu Jelly'''}}
| |
| | A jiggly substance that came from a White Chuchu. It's cool to the touch and squeezing it seems to relieve stress. If struck, it will explode in a cold mist.
| |
| | —
| |
| |} | | |} |
|
| |
|
| ==Non-Canon Appearances==
| | {| class="wikitable" style="text-align:center; width: 100%; max-width:50em;" |
| {{Noncanon|Start}}
| |
| ===''Hyrule Warriors''===
| |
| In {{HW}}, Materials are similar to [[Spoils Bag|Spoils]] and [[Treasure]]s in that each Material is a unique object possessed by the enemy that dropped it, such as their hair or weapons. Materials are dropped by nearly every enemy type except [[Cucco]]s and infantry soldiers, and only when the enemy does not drop a Weapon Bag. They come in three rarities, with at most two rarities of item for each enemy type. The most common are Bronze Materials, which are the only item drops for the basic infantry [[Captain (Hyrule Warriors)|Captains]]. Silver Materials are dropped by unique Captains, Warriors, and giant bosses. Rare Gold Materials are dropped only by Warriors and giant bosses. Enemies can be influenced to drop their rarer Materials by using weapons with the "Material+" [[Skill]], or by activating the identical boon while using [[Focus Spirit]].
| |
| | |
| Materials are primarily used to craft [[Badge]]s for the playable Warriors, with each Badge having its own recipe of specific Materials. Materials can also be used to brew one-use elixirs by consuming a set amount of any Material of a given rarity.
| |
| | |
| ====List of Materials====
| |
| {| class="altrow sortable" cellpadding="4" style="text-align:center; width: 100%; max-width:50em;" | |
| |+ Enemy Materials | | |+ Enemy Materials |
| |- | | |- |
| !width="34%"| Enemy | | !style="width: 34%"| Enemy |
| !width="33%" class="unsortable"| Bronze | | !style="width: 33%"| Silver |
| !width="33%" class="unsortable"| Silver | | !style="width: 33%"| Gold |
| |-
| |
| | [[File:HWL VS Bulblin Captain Icon.png|link=]]<br>'''[[Bulblin]]'''
| |
| | [[File:HW Metal Plate.png|x50px]]<br>'''Metal Plate'''
| |
| | —
| |
| |-
| |
| | [[File:HWL VS Stalchild Captain Icon.png|link=]]<br>'''[[Stalchild]]'''
| |
| | [[File:HW Monster Tooth.png|x50px]]<br>'''Monster Tooth'''
| |
| | —
| |
| |-
| |
| | [[File:HWL VS Bokoblin Captain Icon.png|link=]]<br>'''[[Bokoblin]]'''
| |
| | [[File:HW Old Rag.png|x50px]]<br>'''Old Rag'''
| |
| | — | |
| |- | | |- |
| | [[File:HWL VS Hylian Soldier Icon.png|link=]]<br>'''[[Hylian Soldier]]''' | | | [[File:HWDE The Imprisoned Mini Map Icon.png|link=]]<br/>'''[[The Imprisoned]]''' <sup>(Miniature Version)</sup> |
| | [[File:HW Soldier's Uniform.png|x50px]]<br>'''Soldier's Uniform''' | | | [[File:HW The Imprisoned's Scales Icon.png|x50px]]<br/>'''The Imprisoned's Scales''' |
| | — | | | [[File:HW The Imprisoned's Pillar Icon.png|x50px]]<br/>'''The Imprisoned's Pillar''' |
| |- | | |- |
| | [[File:HWL VS Goron Captain 2 Icon.png|link=]]<br>'''[[Goron]]'''
| |
| | [[File:HW Rock.png|x50px]]<br>'''Rock'''
| |
| | —
| |
| |-
| |
| | [[File:HWL VS Aeralfos Icon.png|link=]]<br>'''[[Aeralfos]]'''
| |
| | [[File:HW Aeralfos Leather.png|x50px]]<br>'''Aeralfos Leather'''
| |
| | [[File:HW Round Aeralfos Shield.png|x50px]]<br>'''Round Aeralfos Shield'''
| |
| |-
| |
| | [[File:HWL VS Fiery Aeralfos Icon.png|link=]]<br>'''[[Fiery Aeralfos]]'''
| |
| | [[File:HW Fiery Aeralfos Leather.png|x50px]]<br>'''Fiery Aeralfos Leather'''
| |
| | [[File:HW Fiery Aeralfos Wing.png|x50px]]<br>'''Fiery Aeralfos Wing'''
| |
| |-
| |
| | [[File:HWL VS Gibdo Icon.png|link=]]<br>'''[[Gibdo]]'''
| |
| | [[File:HW Gibdo Bandage.png|x50px]]<br>'''Gibdo Bandage'''
| |
| | [[File:HW Heavy Gibdo Sword.png|x50px]]<br>'''Heavy Gibdo Sword'''
| |
| |-
| |
| | [[File:HWL VS ReDead Knight Icon.png|link=]]<br>'''[[ReDead Knight]]'''
| |
| | [[File:HW ReDead Bandage.png|x50px]]<br>'''ReDead Bandage'''
| |
| | [[File:HW ReDead Knight Ashes.png|x50px]]<br>'''ReDead Knight Ashes'''
| |
| |-
| |
| | [[File:HWL VS Lizalfos Icon.png|link=]]<br>'''[[Lizalfos]]'''
| |
| | [[File:HW Lizalfos Scale.png|x50px]]<br>'''Lizalfos Scale'''
| |
| | [[File:HW Lizalfos Gauntlet.png|x50px]]<br>'''Lizalfos Gauntlet'''
| |
| |-
| |
| | [[File:HWL VS Dinolfos Icon.png|link=]]<br>'''[[Dinolfos]]'''
| |
| | [[File:HW Dinolfos Fang.png|x50px]]<br>'''Dinolfos Fang'''
| |
| | [[File:HW Dinolfos Arm Guard.png|x50px]]<br>'''Dinolfos Arm Guard'''
| |
| |-
| |
| | [[File:HWL VS Moblin Icon.png|link=]]<br>'''[[Moblin]]'''
| |
| | [[File:HW Moblin Flank.png|x50px]]<br>'''Moblin Flank'''
| |
| | [[File:HW Moblin Spear.png|x50px]]<br>'''Moblin Spear'''
| |
| |-
| |
| | [[File:HWL VS Moblin Shield Icon.png|link=]]<br>'''[[Shield Moblin]]'''
| |
| | [[File:HW Shield Moblin Helmet.png|x50px]]<br>'''Shield Moblin Helmet'''
| |
| | [[File:HW Metal Moblin Shield.png|x50px]]<br>'''Metal Moblin Shield'''
| |
| |-
| |
| | [[File:HWL VS Darknut Icon.png|link=]]<br>'''[[Darknut]]'''
| |
| | [[File:HW Piece of Darknut Armor.png|x50px]]<br>'''Piece of Darknut Armor'''
| |
| | [[File:HW Large Darknut Sword.png|x50px]]<br>'''Large Darknut Sword'''
| |
| |-
| |
| | [[File:HWL VS Stalmaster Icon.png|link=]]<br>'''[[Stalmaster]]'''
| |
| | [[File:HW Stalmaster Wrist Bone.png|x50px]]<br>'''Stalmaster Wrist Bone'''
| |
| | [[File:HW Stalmaster's Skull.png|x50px]]<br>'''Stalmaster's Skull'''
| |
| |-
| |
| | [[File:HWL VS Big Poe Icon.png|link=]]<br>'''[[Big Poe]]'''
| |
| | [[File:HW Big Poe Necklace.png|x50px]]<br>'''Big Poe Necklace'''
| |
| | [[File:HW Big Poe's Lantern.png|x50px]]<br>'''Big Poe's Lantern'''
| |
| |-
| |
| | [[File:HWL VS Icy Big Poe Icon.png|link=]]<br>'''[[Icy Big Poe]]'''
| |
| | [[File:HW Essence of Icy Big Poe.png|x50px]]<br>'''Essence of Icy Big Poe'''
| |
| | [[File:HW Icy Big Poe's Talisman.png|x50px]]<br>'''Icy Big Poe's Talisman'''
| |
| |-
| |
| | [[File:HWL VS Hylian Captain 1 Icon.png|link=]]<br>'''[[Captain (Hyrule Warriors)|Hylian Captain]]'''
| |
| | [[File:HW Hylian Captain Gauntlet.png|x50px]]<br>'''Hylian Captain Gauntlet'''
| |
| | [[File:HW Holy Hylian Shield.png|x50px]]<br>'''Holy Hylian Shield'''
| |
| |-
| |
| | [[File:HWL VS Goron Captain 1 Icon.png|link=]]<br>'''[[Goron Captain]]'''
| |
| | [[File:HW Goron Armor Breastplate.png|x50px]]<br>'''Goron Armor Breastplate'''
| |
| | [[File:HW Thick Goron Helmet.png|x50px]]<br>'''Thick Goron Helmet'''
| |
| |} | | |} |
| {| class="altrow sortable" cellpadding="4" style="text-align:center; width: 100%; max-width:50em;" | | {| class="wikitable sortable" style="text-align:center; width: 100%; max-width:50em;" |
| |+ Boss Materials | | |+ Boss Materials |
| |- | | |- |
| !{{#var:Col}} Boss | | !{{#var:Col}} Boss |
| !width="33%" class="unsortable"| Silver | | !style="width: 33%" class="unsortable"| Silver |
| !width="33%" class="unsortable"| Gold | | !style="width: 33%" class="unsortable"| Gold |
| |-
| |
| |{{#var:Col}} [[File:HWL VS Ganon Icon.png|link=]]<br>'''[[Ganon]]'''
| |
| | [[File:HW Ganon's Mane.png|x50px]]<br>'''Ganon's Mane'''
| |
| | [[File:HW Ganon's Fang Material.png|x50px]]<br>'''Ganon's Fang'''
| |
| |-
| |
| |{{#var:Col}} [[File:HWL VS King Dodongo Icon.png|link=]]<br>'''[[King Dodongo]]'''
| |
| | [[File:HW King Dodongo's Claws.png|x50px]]<br>'''King Dodongo's Claws'''
| |
| | [[File:HW King Dodongo's Crystal Material.png|x50px]]<br>'''King Dodongo's Crystal'''
| |
| |- | | |- |
| |{{#var:Col}} [[File:HWL VS Gohma Icon.png|link=]]<br>'''[[Gohma]]''' | | |{{#var:Col}} {{Section|Helmaroc King|[[File:HWDE Helmaroc King Mini Map Icon.png|link=]]<br/>'''[[Helmaroc King]]'''}} |
| | [[File:HW Gohma's Acid.png|x50px]]<br>'''Gohma's Acid''' | | | [[File:HWL Helmaroc Plume Icon.png|x50px]]<br/>'''[[Helmaroc Plume]]''' |
| | [[File:HW Gohma's Lens.png|x50px]]<br>'''Gohma's Lens''' | | | [[File:HWL Helmaroc King's Mask Icon.png|x50px]]<br/>'''[[Helmaroc King's Mask]]''' |
| |- | | |- |
| |{{#var:Col}} [[File:HWL VS Manhandla Icon.png|link=]]<br>'''[[Manhandla]]''' | | |{{#var:Col}} {{Section|Phantom Ganon|[[File:HWDE Phantom Ganon Mini Map Icon.png|link=]]<br/>'''[[Phantom Ganon]]'''}} |
| | [[File:HW Manhandla's Toxic Dust.png|x50px]]<br>'''Manhandla's Toxic Dust''' | | | [[File:HWL Phantom Ganon's Cape Icon.png|x50px]]<br/>'''[[Phantom Ganon's Cape]]''' |
| | [[File:HW Manhandla's Sapling.png|x50px]]<br>'''Manhandla's Sapling''' | | | [[File:HWL Phantom Ganon's Sword Icon.png|x50px]]<br/>'''[[Phantom Ganon's Sword]]''' |
| |- | | |- |
| |{{#var:Col}} [[File:HWL VS Argorok Icon.png|link=]]<br>'''[[Argorok]]''' | | |{{#var:Col}} {{Section|King Daphnes|[[File:HWDE King Daphnes Mini Map Icon.png|link=]]<br/>'''[[Daphnes Nohansen Hyrule|King Daphnes]]'''}} |
| | [[File:HW Argorok's Embers.png|x50px]]<br>'''Argorok's Embers''' | | | [[File:HWL King Daphnes's Robe Icon.png|x50px]]<br/>'''[[King Daphnes's Robe]]''' |
| | [[File:HW Argorok's Stone.png|x50px]]<br>'''Argorok's Stone''' | | | [[File:HWL King Daphnes's Crown Icon.png|x50px]]<br/>'''[[King Daphnes's Crown]]''' |
| |- | | |- |
| |{{#var:Col}} [[File:HWL VS The Imprisoned Icon.png|link=]]<br>'''[[The Imprisoned]]''' | | |{{#var:Col}} {{Section|Linkle|[[File:HWDE Linkle Mini Map Icon.png|link=]]<br/>'''[[Linkle]]'''}} |
| | [[File:HW The Imprisoned's Scales.png|x50px]]<br>'''The Imprisoned's Scales''' | | | [[File:HWL Linkle's Boots Icon.png|x50px]]<br/>'''[[Linkle's Boots]]''' |
| | [[File:HW The Imprisoned's Pillar.png|x50px]]<br>'''The Imprisoned's Pillar''' | | | [[File:HWL Linkle's Compass Icon.png|x50px]]<br/>'''[[Linkle's Compass]]''' |
| |- | | |- |
| |{{#var:Col}} [[File:HWL VS Cia Icon.png|link=]]<br>'''[[Cia]]''' | | |{{#var:Col}} [[File:HWDE Marin Mini Map Icon.png|link=]]<br/>'''[[Marin]]''' |
| | [[File:HW Cia's Bracelet.png|x50px]]<br>'''Cia's Bracelet''' | | | [[File:HW Zelda's Brooch Icon.png|x50px]]<br/>'''Zelda's Brooch''' |
| | [[File:HW Cia's Staff Material.png|x50px]]<br>'''Cia's Staff''' | | | [[File:HW Zelda's Tiara Icon.png|x50px]]<br/>'''Zelda's Tiara''' |
| |- | | |- |
| |{{#var:Col}} [[File:HWL VS Volga Icon.png|link=]]<br>'''[[Volga]]''' | | |{{#var:Col}} [[File:HWDE Medli Mini Map Icon.png|link=]]<br/>'''[[Medli]]''' |
| | [[File:HW Volga's Helmet.png|x50px]]<br>'''Volga's Helmet''' | | | [[File:HW Ruto's Earrings Icon.png|x50px]]<br/>'''Ruto's Earrings''' |
| | [[File:HW Volga's Dragon Spear.png|x50px]]<br>'''Volga's Dragon Spear''' | | | [[File:HW Ruto's Scale Icon.png|x50px]]<br/>'''Ruto's Scale''' |
| |- | | |- |
| |{{#var:Col}} [[File:HWL VS Wizzro Icon.png|link=]]<br>'''[[Wizzro]]''' | | |{{#var:Col}} {{Section|Skull Kid|[[File:HWDE Skull Kid Mini Map Icon.png|link=]]<br/>'''[[Skull Kid]]'''}} |
| | [[File:HW Wizzro's Robe.png|x50px]]<br>'''Wizzro's Robe''' | | | [[File:HWL Skull Kid's Hat Icon.png|x50px]]<br/>'''[[Skull Kid's Hat]]''' |
| | [[File:HW Wizzro's Ring Material.png|x50px]]<br>'''Wizzro's Ring''' | | | [[File:HWL Majora's Mask Icon.png|x50px]]<br/>'''[[Majora's Mask (Item)|Majora's Mask]]''' |
| |- | | |- |
| |width="17%"| [[File:HWL VS Link Icon.png|link=]]<br>'''[[Link]]''' | | |style="width: 17%"| {{Section|Tetra|[[File:HWDE Tetra Mini Map Icon.png|link=]]<br/>'''[[Tetra]]'''}} |
| |width="17%"| [[File:HWL VS Young Link Icon.png|link=]]<br>'''[[Young Link]]''' | | |style="width: 17%"| [[File:HWDE Toon Zelda Mini Map Icon.png|link=]]<br/>'''[[Toon Zelda]]''' |
| | [[File:HW Link's Boots.png|x50px]]<br>'''Link's Boots''' | | | [[File:HWL Tetra's Sandals Icon.png|x50px]]<br/>'''[[Tetra's Sandals]]''' |
| | [[File:HW Link's Scarf.png|x50px]]<br>'''Link's Scarf''' | | | [[File:HWL Tetra's Bandana Icon.png|x50px]]<br/>'''[[Tetra's Bandana]]''' |
| |- | | |- |
| |{{#var:Col}} [[File:HWL VS Lana Icon.png|link=]]<br>'''[[Lana]]''' | | |{{#var:Col}} {{Section|Tingle|[[File:HWDE Tingle Mini Map Icon.png|link=]]<br/>'''[[Tingle]]'''}} |
| | [[File:HW Lana's Hair Clip.png|x50px]]<br>'''Lana's Hair Clip''' | | | [[File:HWL Tingle's Map Icon.png|x50px]]<br/>'''[[Tingle's Map]]''' |
| | [[File:HW Lana's Cloak.png|x50px]]<br>'''Lana's Cloak''' | | | [[File:HWL Tingle's Watch Icon.png|x50px]]<br/>'''[[Tingle's Watch]]''' |
| |- | | |- |
| |{{#var:Col}} [[File:HWL VS Zelda Icon.png|link=]]<br>'''[[Princess Zelda|Zelda]]''' | | |{{#var:Col}} {{Section|Toon Link|[[File:HWDE Toon Link Mini Map Icon.png|link=]]<br/>'''[[Toon Link]]'''}} |
| | [[File:HW Zelda's Brooch.png|x50px]]<br>'''Zelda's Brooch''' | | | [[File:HWL Pirate's Charm Icon.png|x50px]]<br/>'''[[Pirate's Charm]]''' |
| | [[File:HW Zelda's Tiara.png|x50px]]<br>'''Zelda's Tiara''' | | | [[File:HWL Island Outfit Icon.png|x50px]]<br/>'''[[Island Outfit]]''' |
| |- | | |- |
| |{{#var:Col}} [[File:HWL VS Impa Icon.png|link=]]<br>'''[[Impa]]''' | | |{{#var:Col}} {{Section|Twili Midna|[[File:HWDE Twili Midna Mini Map Icon.png|link=]]<br/>'''[[Twili Midna]]'''}} |
| | [[File:HW Impa's Hair Band.png|x50px]]<br>'''Impa's Hair Band''' | | | [[File:HWL Twili Midna's Hairpin Icon.png|x50px]]<br/>'''[[Twili Midna's Hairpin]]''' |
| | [[File:HW Impa's Breastplate.png|x50px]]<br>'''Impa's Breastplate''' | | | [[File:HWL Twili Midna's Robe Icon.png|x50px]]<br/>'''[[Twili Midna's Robe]]''' |
| |- | | |- |
| |{{#var:Col}} [[File:HWL VS Ganondorf Icon.png|link=]]<br>'''[[Ganondorf]]''' | | | {{Section|Young Link|[[File:HWDE Young Link Mini Map Icon.png|link=]]<br/>'''[[Young Link]]'''}} |
| | [[File:HW Ganondorf's Gauntlet.png|x50px]]<br>'''Ganondorf's Gauntlet''' | | | [[File:HWDE Ravio Mini Map Icon.png|link=]]<br/>'''[[Ravio]]''' |
| | [[File:HW Ganondorf's Jewel.png|x50px]]<br>'''Ganondorf's Jewel''' | | | [[File:HWL Young Link's Belt Icon.png|x50px]]<br/>'''[[Young Link's Belt]]''' |
| | | [[File:HWL Keaton Mask Icon.png|x50px]]<br/>'''[[Keaton Mask]]''' |
| |- | | |- |
| |{{#var:Col}} [[File:HWL VS Sheik Icon.png|link=]]<br>'''[[Sheik]]''' | | |{{#var:Col}} [[File:HWDE Yuga Mini Map Icon.png|link=]]<br/>'''[[Yuga]]''' |
| | [[File:HW Sheik's Kunai.png|x50px]]<br>'''Sheik's Kunai''' | | | [[File:HW Ganondorf's Gauntlet Icon.png|x50px]]<br/>'''Ganondorf's Gauntlet''' |
| | [[File:HW Sheik's Turban.png|x50px]]<br>'''Sheik's Turban'''
| | | [[File:HW Ganondorf's Jewel Icon.png|x50px]]<br/>'''Ganondorf's Jewel''' |
| |-
| |
| |{{#var:Col}} [[File:HWL VS Darunia Icon.png|link=]]<br>'''[[Darunia]]'''
| |
| | [[File:HW Darunia's Spikes.png|x50px]]<br>'''Darunia's Spikes'''
| |
| | [[File:HW Darunia's Bracelet Material.png|x50px]]<br>'''Darunia's Bracelet'''
| |
| |-
| |
| |{{#var:Col}} [[File:HWL VS Ruto Icon.png|link=]]<br>'''[[Ruto]]'''
| |
| | [[File:HW Ruto's Earrings Material.png|x50px]]<br>'''Ruto's Earrings'''
| |
| | [[File:HW Ruto's Scale.png|x50px]]<br>'''Ruto's Scale'''
| |
| |-
| |
| |{{#var:Col}} [[File:HWL VS Agitha Icon.png|link=]]<br>'''[[Agitha]]'''
| |
| | [[File:HW Agitha's Basket.png|x50px]]<br>'''Agitha's Basket'''
| |
| | [[File:HW Agitha's Pendant.png|x50px]]<br>'''Agitha's Pendant''' | |
| |-
| |
| | [[File:HWL VS Midna Icon.png|link=]]<br>'''[[Midna]]'''
| |
| | [[File:HWL VS Twili Midna Icon.png|link=]]<br>'''[[Twili Midna]]'''
| |
| | [[File:HW Midna's Hair.png|x50px]]<br>'''Midna's Hair
| |
| | [[File:HW Midna's Fused Shadow.png|x50px]]<br>'''Midna's Fused Shadow'''
| |
| |-
| |
| |{{#var:Col}} [[File:HWL VS Fi Icon.png|link=]]<br>'''[[Fi]]'''
| |
| | [[File:HW Fi's Heels.png|x50px]]<br>'''Fi's Heels'''
| |
| | [[File:HW Fi's Crystal.png|x50px]]<br>'''Fi's Crystal'''
| |
| |-
| |
| |{{#var:Col}} [[File:HWL VS Ghirahim Icon.png|link=]]<br>'''[[Ghirahim]]'''
| |
| | [[File:HW Ghirahim's Sash.png|x50px]]<br>'''Ghirahim's Sash'''
| |
| | [[File:HW Ghirahim's Cape.png|x50px]]<br>'''Ghirahim's Cape'''
| |
| |-
| |
| |{{#var:Col}} [[File:HWL VS Zant Icon.png|link=]]<br>'''[[Zant]]'''
| |
| | [[File:HW Zant's Magic Gem.png|x50px]]<br>'''Zant's Magic Gem'''
| |
| | [[File:HW Zant's Helmet.png|x50px]]<br>'''Zant's Helmet'''
| |
| |} | | |} |
| {{Clear}} | | {{Noncanon|End}} |
|
| |
|
| ===''Hyrule Warriors Legends''=== | | ==={{HWAoC|-}}=== |
| Materials in {{HWL}} are primarily the same as those in ''Hyrule Warriors'', though new Materials exist for Warriors who didn't yield any in ''Hyrule Warriors'' as well as for monsters and Warriors who exist exclusively in ''Hyrule Warriors Legends''. Certain Warriors, such as Young Link and Twili Midna, also received their own set of Materials apart from their counterparts. | | <section begin="HWAoC Materials"/> |
| | {{Main|Materials in Hyrule Warriors: Age of Calamity}} |
| | <section end="HWAoC Materials"/> |
|
| |
|
| ====List of Materials==== | | ====List of {{Plural|HWAoC|Material}}==== |
| {| class="altrow sortable" cellpadding="4" style="text-align:center; width: 100%; max-width:50em;" | | {{Gallery List|Items |
| |+ Enemy Materials
| | |HWAoC= Ethereal Stone, Guardian Claw, High-Yield Ancient Furnace, Robbie's Maintenance Oil, Robbie's Machine Lubricant, Robbie's Curing Agent |
| |-
| | }} |
| !width="34%"| Enemy
| | :[[File:HWAoC Fruit Menu Icon.png|x26px|link=Materials in Hyrule Warriors: Age of Calamity]] [[Materials in Hyrule Warriors: Age of Calamity|See more Materials in ''Hyrule Warriors: Age of Calamity'']] |
| !width="33%" class="unsortable"| Bronze
| |
| !width="33%" class="unsortable"| Silver
| |
| |-
| |
| | '''[[Big Blin]]'''
| |
| | {{Section|Big Blin Hide|[[File:HWL Big Blin Hide.png|x50px]]<br>'''Big Blin Hide'''}}
| |
| | {{Section|Big Blin Club|[[File:HWL Big Blin Club.png|x50px]]<br>'''Big Blin Club'''}}
| |
| |-
| |
| | '''[[Miniblin]]'''
| |
| | {{Section|Monster Horn|'''Monster Horn'''}}
| |
| | —
| |
| |-
| |
| | '''[[Stone Blin]]'''
| |
| | {{Section|Stone Blin Buckler|[[File:HWL Stone Blin Buckler.png|x50px]]<br>'''Stone Blin Buckler'''}}
| |
| | {{Section|Stone Blin Helmet|[[File:HWL Stone Blin Helmet.png|x50px]]<br>'''Stone Blin Helmet'''}}
| |
| |}
| |
| {| class="altrow sortable" cellpadding="4" style="text-align:center; width: 100%; max-width:50em;"
| |
| |+ Boss Materials
| |
| |-
| |
| !width="34%"| Boss
| |
| !width="33%" class="unsortable"| Silver
| |
| !width="33%" class="unsortable"| Gold
| |
| |-
| |
| | '''[[Helmaroc King]]'''
| |
| | {{Section|Helmaroc Plume|'''Helmaroc Plume'''}}
| |
| | {{Section|Helmaroc King's Mask|[[File:HWL Helmaroc King's Mask.png|x50px]]<br>'''Helmaroc King's Mask'''}} | |
| |-
| |
| | [[File:HWL VS Daphnes Icon.png|link=]]<br>'''[[King Daphnes]]'''
| |
| | {{Section|King Daphnes's Robe|'''King Daphnes's Robe'''}}
| |
| | {{Section|King Daphnes's Crown|'''King Daphnes's Crown'''}}
| |
| |-
| |
| | [[File:HWL VS Linkle Icon.png|link=]]<br>'''[[Linkle]]'''
| |
| | {{Section|Linkle's Boots|'''Linkle's Boots'''}}
| |
| | {{Section|Linkle's Compass|'''Linkle's Compass'''}}
| |
| |-
| |
| | [[File:HWL VS Medli Icon.png|link=]]<br>'''[[Medli]]'''
| |
| | {{Section|Ruto's Earrings|[[File:HW Ruto's Earrings Material.png|x50px]]<br>'''Ruto's Earrings'''}}
| |
| | {{Section|Ruto's Scale|[[File:HW Ruto's Scale.png|x50px]]<br>'''Ruto's Scale'''}}
| |
| |-
| |
| | '''[[Phantom Ganon]]'''
| |
| | {{Section|Phantom Ganon's Cape|'''Phantom Ganon's Cape'''}}
| |
| | {{Section|Phantom Ganon's Sword|'''Phantom Ganon's Sword'''}}
| |
| |-
| |
| | [[File:HWL VS Skull Kid Icon.png|link=]]<br>'''[[Skull Kid]]'''
| |
| | {{Section|Skull Kid's Hat|'''Skull Kid's Hat'''}}
| |
| | {{Section|Majora's Mask|'''Majora's Mask'''}}
| |
| |-
| |
| | [[File:HWL VS Tetra Icon.png|link=]]<br>'''[[Tetra]]'''
| |
| | {{Section|Tetra's Sandals|'''Tetra's Sandals'''}}
| |
| | {{Section|Tetra's Bandana|'''Tetra's Bandana'''}}
| |
| |-
| |
| | [[File:HWL VS Tingle Icon.png|link=]]<br>'''[[Tingle]]'''
| |
| | {{Section|Tingle's Map|'''Tingle's Map'''}}
| |
| | {{Section|Tingle's Watch|'''Tingle's Watch'''}}
| |
| |-
| |
| | [[File:HWL VS Toon Link Icon.png|link=]]<br>'''[[Toon Link]]'''
| |
| | {{Section|Pirate's Charm|'''Pirate's Charm'''}}
| |
| | {{Section|Island Outfit|'''Island Outfit'''}}
| |
| |-
| |
| | [[File:HWL VS Twili Midna Icon.png|link=]]<br>'''[[Twili Midna]]'''
| |
| | {{Section|Twili Midna's Hairpin|'''Twili Midna's Hairpin'''}}
| |
| | {{Section|Twili Midna's Robe|'''Twili Midna's Robe'''}}
| |
| |-
| |
| | [[File:HWL VS Young Link Icon.png|link=]]<br>'''[[Young Link]]'''
| |
| | {{Section|Young Link's Belt|'''Young Link's Belt'''}}
| |
| | {{Section|Keaton Mask|'''Keaton Mask'''}}
| |
| |}
| |
| {{Noncanon|End}}
| |
|
| |
|
| ==Trivia== | | ==Trivia== |
| *The Crimson Shell's description is likely a reference to the {{Smw|Red Shell}} item in the ''{{Smw|Mario Kart (series)|Mario Kart}}'' series, which homes in at opponent racers. | | *During development of {{BotW|-}}, crabs were used to create elixirs; however, Nate Bihldorff, senior director of localization at Nintendo of America, convinced [[Hidemaro Fujibayashi]], the game's director, to use them for cooking recipes instead.<ref>{{Cite Web|quote= Nate had made it out to the beach, where he found some crab and a campfire with a pot at sunset. Feeling very pleased with himself, he threw some crab in the pot with some spicy peppers, only to find out crab wasn’t used for food recipes—it was for elixirs! This happened to fit perfectly with my own personal description of crustaceans as being “the insects of the sea,” but as an east coaster who grew up on crab, Nate wasn’t having it. He contacted Fujibayashi-san that night and began passionately explaining to the development team how much people like to eat crab, begging him to add crab dishes to the menu.|author= Bill Trinen|published= May 3, 2017|retrieved= May 3, 2017|url= https://nintendotreehouse.tumblr.com/post/160273426037/now-youre-cooking-with-power|title= Now You’re Cooking with Power|site= Tumblr|type=}}</ref> |
|
| |
|
| ==Etymology== | | ==Nomenclature== |
| {{Names | | {{Nomenclature}} |
| |align= left
| |
| |ja= {{Romanize|素材|Sozai}} {{ExpGame|HW}}
| |
| |jaM= Same as English
| |
| |esS=
| |
| |esSM=
| |
| |esL=
| |
| |esLM=
| |
| |frF=
| |
| |frFM=
| |
| |frC=
| |
| |frCM=
| |
| |de=
| |
| |deM=
| |
| |it=
| |
| |itM=
| |
| |ptP=
| |
| |ptPM=
| |
| |ptB=
| |
| |ptBM=
| |
| |nl=
| |
| |nlM=
| |
| |ru=
| |
| |ruM=
| |
| |ko=
| |
| |koM=
| |
| |chT=
| |
| |chTM=
| |
| |chS=
| |
| |chSM= }}
| |
|
| |
|
| ==Gallery== | | ==Gallery== |
| <gallery> | | <gallery> |
| File:HW Bronze Material Model.png|Bronze Material from ''Hyrule Warriors'' | | File:BotW Hearty Salmon Concept Artwork.png|Hearty Salmon concept art from {{BotW|-}} |
| File:HW Silver Material Model.png|Silver Material from ''Hyrule Warriors'' | | File:BotW Ironshell Crab Concept Artwork.png|Ironshell Crab concept art from {{BotW|-}} |
| File:HW Gold Material Model.png|Gold Material from ''Hyrule Warriors'' | | File:BotW Steaks Concept Artwork.png|Steaks concept art from {{BotW|-}} |
| File:HW Bronze Material Icon.png|Bronze Material icon from ''Hyrule Warriors'' | | File:BotW Trout Concept Artwork.png|Sizzlefin, Chillfin and Voltfin Trout concept art from {{BotW|-}} |
| File:HW Silver Material Icon.png|Silver Material icon from ''Hyrule Warriors'' | | File:TotK Material HUD Icon.png|The {{Term|TotK|Material}} icon in the Heads-Up Display from {{TotK|-}} |
| File:HW Gold Material Icon.png|Gold Material icon from ''Hyrule Warriors'' | | File:HW Bronze Material Model.png|Bronze Material from {{HW|-}} |
| | File:HW Silver Material Model.png|Silver Material from {{HW|-}} |
| | File:HW Gold Material Model.png|Gold Material from {{HW|-}} |
| | File:HW Bronze Material Icon.png|Bronze Material icon from {{HW|-}} |
| | File:HW Silver Material Icon.png|Silver Material icon from {{HW|-}} |
| | File:HW Gold Material Icon.png|Gold Material icon from {{HW|-}} |
| | File:HW Bronze Material Adventure Mode Icon.png|Adventure Mode Bronze Material icon from {{HW|-}} |
| | File:HW Silver Material Adventure Mode Icon.png|Adventure Mode Silver Material icon from {{HW|-}} |
| | File:HW Gold Material Adventure Mode Icon.png|Adventure Mode Gold Material icon from {{HW|-}} |
| </gallery> | | </gallery> |
|
| |
|
| {{Ref}} | | {{Ref}} |
|
| |
|
| [[Category:Items in Tri Force Heroes]]
| | {{Categories |
| [[Category:Items in Hyrule Warriors]]
| | |items= BotW, HW, HWL, HWDE, HWAoC |
| | }} |